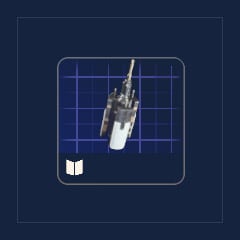
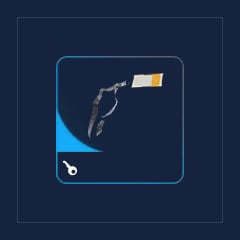
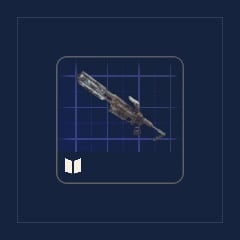
The Emperor Gateway Conduit blueprint has no guaranteed drop location established by the available evidence; player accounts report ordinary topside containers and redirected payloads. To prepare for entry, we farm the three coupler types during Redirection, bank complete sets, and check the reward pass for an alternative Conduit.
Find the Blueprint and Collect Couplers
The blueprint is the recipe; the couplers are its ingredients. Collecting duplicate materials does not solve a missing blueprint or missing coupler type.
Separate confirmed systems from reported drops
Embark's Frozen Trail patch notes confirm Pendola Pass, Redirection, and the 60-level Frozen Trail Pass. They do not specify the Conduit blueprint's loot pool or reward placement.
The available access options differ:
| Option | Evidence available | Decision |
|---|
| Search ordinary containers | Reported blueprint source | Search along your farming route; no guaranteed container |
| Search redirected payloads | Reported coupler source; blueprint eligibility unresolved | Prioritize for crafting materials |
| Check the reward pass | A supplied walkthrough reports a ready-made Conduit | Inspect the actual reward before grinding toward it |
If your pass shows a Conduit within reach, compare that progress against another uncertain blueprint search.
Use the relay to call the payload
The detailed player walkthroughs describe this sequence:
1. Enter Pendola Pass during Redirection.
2. Search a Damaged Emperor Relay for an Emperor Beacon.
3. Throw the beacon into an open area with nearby cover.
4. Move away from the landing zone while debris falls.
5. Wait for the impact sequence to finish.
6. Breach the upright central capsule for couplers.
The relay starts the process—it is not the final payload container. Choose a throw location you can leave safely, rather than standing beside the beacon to watch the landing.
Save a complete crafting set
The supplied walkthroughs report this recipe:
| Requirement | Reported amount |
|---|
| Plated ARC Coupler | 1 |
| Conductive ARC Coupler | 1 |
| Insulated ARC Coupler | 1 |
| Gateway Conduit blueprint | Learn once |
Check the current crafting screen before spending materials; this recipe is player-reported, not published in the official notes.
Espresso reported finding plated couplers less frequently during his session and said couplers did not stack. Neither observation establishes a universal drop ratio.
We extract a completed set rather than carrying it through an indefinite blueprint hunt. When the blueprint drops, learn it from your inventory and inspect the recipe.
Prepare for Emperor Entry
One supplied creator's run stopped at an upper ledge without a mobility tool. Bring a Snap Hook or Grappling Hook, a weapon you trust against ARC, and recovery supplies.
The equipment priorities are straightforward:
| Equipment | Job |
|---|
| Snap Hook / Grappling Hook | Upper ledges and difficult crossings |
| Familiar lighter weapon | Yellow targets and smaller enemies |
| Hullcracker | Player-recommended Hydra option |
| Healing and shield chargers | Interior recovery and the return trip |
| Stamina consumables | Supplemental movement support in gas |
Do not trade the traversal tool for optional firepower on the demonstrated routes.
Recognize the Interior's Failure Points
Espresso reports varying intermediate room order. We follow visible mechanisms rather than treating one walkthrough as a universal itinerary.
These are the documented hazards:
| Area | Action | Avoid |
|---|
| Entrance | Defeat the Hydra; shoot yellow targets to activate the lift | Central electrical field |
| Pillar room | Activate targets and board the moving pillar | Solving while ARC overwhelm you |
| Gas compactor | Continue through the exit corridor | Stopping immediately beyond the doorway |
| Upper platforms | Identify the destination before hooking | Climbing toward a blocked opening |
| Descent | Drop one level at a time | Unmeasured long falls |
| Final hangar | Activate the reported six targets | Leaving before collecting rewards |
Locate the onward opening before committing to a jump or triggering a moving mechanism.
Later player accounts identify orange canisters as explosive traps; an earlier account could not reliably distinguish them. Leave orange or uncertain containers alone, especially after securing your target item.
FAQ (Frequently Asked Questions)
Where does the Emperor Gateway Conduit blueprint drop?
Player accounts name ordinary topside containers and redirected payloads, but the exact loot pool remains unconfirmed. No guaranteed container or supported drop percentage is available from the checked official sources.
Can you get a Conduit without the blueprint?
A supplied walkthrough reports a ready-made Conduit on the reward pass. Check its current position and track in-game; obtaining that item is not the same as learning the crafting recipe.
Do you need Redirection active to enter?
Espresso reports that an existing Conduit permits entry under other map conditions. Redirection is the reported coupler-farming requirement, not the entry requirement.
Where can you find an Emperor Modulator?
Player accounts report Modulators in normal interior canisters and the final loot area. No guaranteed drop is established, so check your upgrade requirements before making one your sole raid objective.
Does leaving the Emperor extract your loot?
No—the described route requires a separate map extraction. Keep time and supplies for the Ballistic Gondola journey; Embark's launch announcement confirms Gondolas operate on Pendola Pass.


 0