0
0 Created: Aug 10,2026 | Forza Horizon 6
Forza Horizon 6 Extreme R-Class Drift Builds: 5 Share Codes That Actually Score

Forget clean, cinematic drifting. R-Class point drift builds exist for one job: maximum drift zone score. That means huge power, AWD, and drag tires — a combo that grips like glue in a straight line and turns to ice the moment you go sideways.
We tested five community-shared builds on the same drift zone to find out which ones actually hold angle, recover cleanly, and rack up points without launching you into a tree. Here's what we found — codes, numbers, and the exact habits that make these cars usable.
- The 5 Builds at a Glance
- Why AWD + Drag Tires = Point Drift Meta
- Drag Tire Behavior — The Core Mechanic
- Build 1: Sierra Lightweight — Code 470 536 915
- Build 2: Micro Drift Build — Code 295 663 094
- Build 3: Jesko-Style AWD — Code 112 986 861
- Build 4: Sesto-Style — Code 044 229 989
- Build 5: CCGT-Style — Code 302 492 720
- Final Ranking
- Core Habits That Actually Fix Your Score
- Recommended Settings
- Common Mistakes and Fast Fixes
- FAQ
- What's the best build to start with?
- Why do these builds use drag tires instead of drift tires?
- Are R-Class builds better than S2 for point drifting?
- Why does the car suddenly launch forward mid-run?
- How do I actually raise my drift zone score?
- Bottom Line
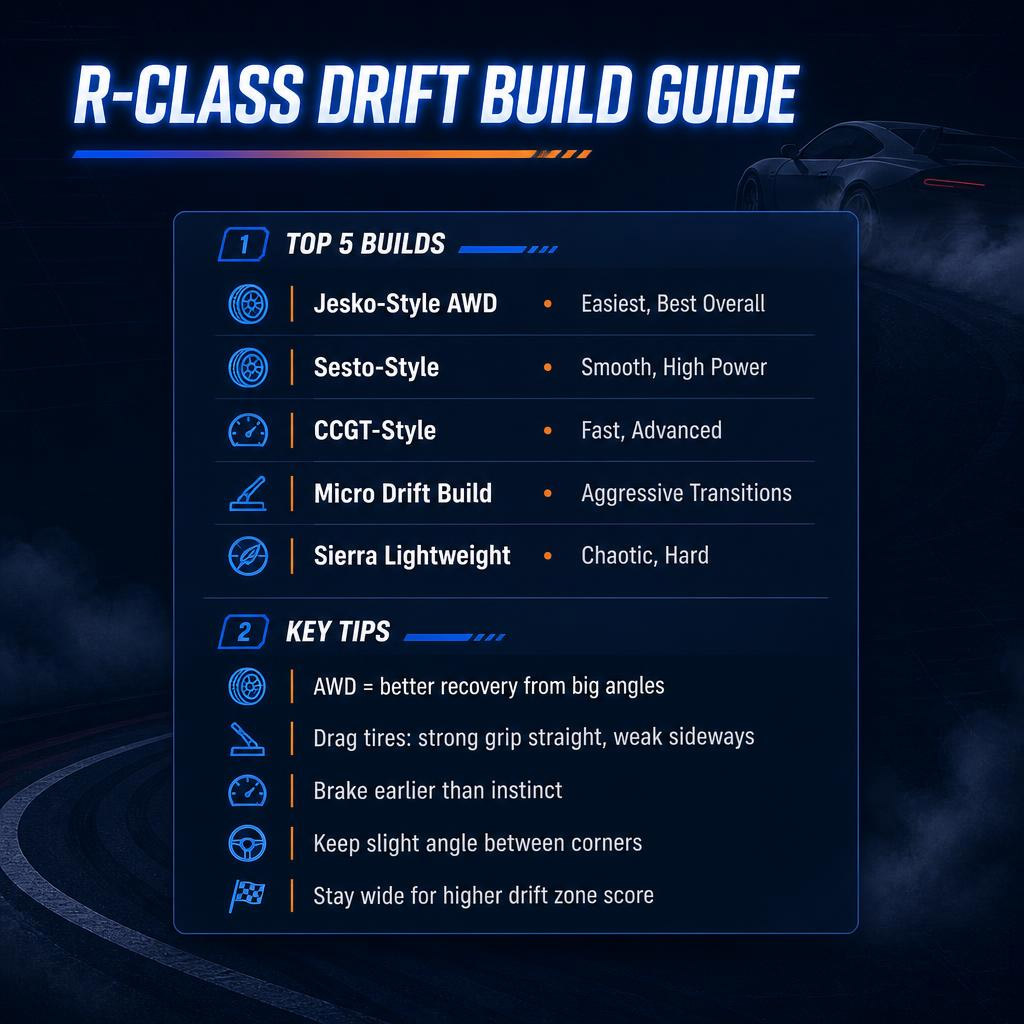
The 5 Builds at a Glance
| # | Share Code | Car | Power / Weight | Personality |
|---|---|---|---|---|
| 1 | 470 536 915 | Sierra-style lightweight | ~1,000 hp / ~558 kg | Twitchy, unstable, brutal |
| 2 | 295 663 094 | Micro drift build | High power, tiny chassis | Wild but manageable |
| 3 | 112 986 861 | Jesko-style AWD | High-speed hypercar | Easiest, most stable |
| 4 | 044 229 989 | Sesto-style | ~1,452 hp / ~1 ton | Smooth, speed-sensitive |
| 5 | 302 492 720 | CCGT-style | High grip, fast accel | Fast but hard to tame |
None of these are beginner cars. If you're used to a normal RWD drift build, these will feel wrong at first. That's the tune working as intended — these are built for score, not style.
Why AWD + Drag Tires = Point Drift Meta
AWD gives you recovery. In a RWD drift car, going too sideways means a delicate catch with throttle and counter-steer. In these builds, the front wheels drag you forward even while the rear is loose — so you hold longer slides and recover from bigger angles.
The trade-off: AWD drift cars snap straight fast, then launch. On drag tires, that launch is violent.
Drag Tire Behavior — The Core Mechanic
| Car Position | Grip Behavior | What Happens |
|---|---|---|
| Straight line | Massive grip | Car rockets forward |
| Slight angle | Grip fluctuates | Snaps between slide/grip |
| Full sideways | Very low lateral grip | Long, floaty slides |
| Transition | Unstable | Easy to over-rotate or fly off |
If the car suddenly gains speed after a corner, it just straightened out. That's where most runs die. Keep a sliver of angle between corners at all times — never let the wheels point fully forward.
Build 1: Sierra Lightweight — Code 470 536 915
~1,000 hp, ~558 kg. This thing rotates instantly and punishes every mistake just as fast.
Strengths: insane transitions, huge angle, brutal acceleration.
Weaknesses: short wheelbase = unstable, snap-happy on drag tires, unforgiving on narrow roads.
How to drive it: small inputs only. Reduce steering angle before adding throttle — this car doesn't need convincing to rotate. Treat it as a challenge run, not your go-to scorer.
Build 2: Micro Drift Build — Code 295 663 094
Same recipe as the Sierra — tiny, powerful, AWD — but noticeably grippier and more predictable.
Strengths: faster transitions than the Sierra, strong post-slide acceleration.
Weaknesses: still gains speed fast, needs precise throttle.
Best fix for forward surge: don't panic-brake. Use a light handbrake tap + partial throttle + early setup for the next corner. This build rewards rhythm over force.
Build 3: Jesko-Style AWD — Code 112 986 861
The easiest car in the test, full stop. More weight means more time to react — the front end doesn't dart around like the lightweight builds.
Strengths: most stable, best for learning R-Class point drift, strong score ceiling.
Weaknesses: still slides forever once sideways; brake early, or downhill sections will overshoot you.
Use the handbrake before the car gets away from you, not after. This is the build we'd recommend for chasing personal bests.
Build 4: Sesto-Style — Code 044 229 989
~1,452 hp, roughly 1 ton. Smoother than the lightweight cars, but sensitive to speed — go from clean drift to why are we in a field in one bad throttle input.
Fix: smaller throttle taps than feels necessary. Full throttle = the car keeps gaining speed until the next corner becomes impossible.
| Situation | Fix |
|---|---|
| Gaining speed too fast | Lift early, tap handbrake |
| Losing angle | Small throttle pulse |
| Straightening out | Counter-steer less, rotate earlier |
| Sliding too wide | Cut throttle before braking |
Build 5: CCGT-Style — Code 302 492 720
More grip than the others — which sounds good until you realize it gains speed extremely quickly. Exit one corner slightly too straight and you'll rocket into the next before you're ready.
Fix understeer under hard steering by starting the slide earlier and cutting throttle sooner. This car has the highest ceiling of the five, but it's not forgiving.
Final Ranking
| Rank | Build | Code | Best For | Difficulty |
|---|---|---|---|---|
| 1 | Jesko-style | 112 986 861 | Consistent high scores | Medium |
| 2 | Sesto-style | 044 229 989 | Smooth long slides | Medium-Hard |
| 3 | CCGT-style | 302 492 720 | Advanced high-speed runs | Hard |
| 4 | Micro build | 295 663 094 | Aggressive transitions | Hard |
| 5 | Sierra | 470 536 915 | Pure chaos | Very Hard |
Core Habits That Actually Fix Your Score
Use throttle like a switch, gently. Full throttle almost never helps — quick pulses maintain wheelspin without triggering a grip spike.
Never let the car fully straighten. Even a whisper of angle between corners kills the forward-launch problem.
Brake earlier than feels natural. These builds carry so much slide that late braking just doesn't work. Brake before the corner, then handbrake to adjust angle mid-slide.
Stay wide. Drift zones reward committed lines. Enter wide, rotate early, hold angle through the middle, exit with control.
Recommended Settings
| Setting | Choice | Why |
|---|---|---|
| Traction Control | Off | Allows sustained wheelspin |
| Stability Control | Off | Stops the game correcting your slide |
| ABS | Personal preference | Off gives more brake control |
| Transmission | Manual (w/ Clutch) | Limits sudden acceleration |
Gear tip: if first gear is too aggressive, use second. If the car bogs in second, drop to first for tight corners only.
Common Mistakes and Fast Fixes
| Problem | Cause | Fix |
|---|---|---|
| Car shoots off-road | Too straight before throttle | Keep slight angle between corners |
| Car spins out | Too much steering/throttle | Smaller inputs |
| Car won't slow down | Braking too late | Brake earlier, handbrake sooner |
| Score feels low | Line too narrow | Drive wider through the zone |
| Violent transitions | Over-correcting | Counter-steer less |
FAQ
What's the best build to start with?
The Jesko-style build (112 986 861). Best mix of stability, angle, and score potential — the only one on this list that forgives mistakes.
Why do these builds use drag tires instead of drift tires?
Drag tires give massive straight-line grip and almost no sideways grip once you're sliding. That's exactly what point drifting wants — long, fast slides that snap back hard when you straighten out.
Are R-Class builds better than S2 for point drifting?
Not automatically. R-Class hits harder angles and speed, but it's much less forgiving. If your R-Class car keeps overshooting corners, drop to an S2 build — it'll likely score better in your hands.
Why does the car suddenly launch forward mid-run?
Because the wheels briefly went straight. Drag tires grip violently in that state. Keep a sliver of angle between corners to avoid it entirely.
How do I actually raise my drift zone score?
Wide lines, sustained angle, smooth transitions. Don't just throw the car sideways — enter wide, rotate early, and never let the car go fully straight until the zone ends.
Bottom Line
Chase control before power. The Jesko-style build wins because it gives you time to react — that beats raw horsepower every time in a scoring run. Learn how drag tires behave, brake earlier than instinct tells you, keep a whisper of angle between every corner, and pulse the throttle instead of flooring it.
Once that clicks, these cars stop feeling broken — and your personal bests start falling fast.

Most Popular Posts
- Forza Horizon 6 Credits and Wheelspins Farm: Fastest Post-Update Methods
- Forza Horizon 6 Series 3 Best Cars, Events, Italian Exotics Rewards & S2 Meta Tunes
- Forza Horizon 6 A-Class Meta: 5 Best Cars + Tune Codes New Patch
- Forza Horizon 6 Gamescom 2026 Update, Season Roadmap, PS5 Release, and Best Prep Builds
- Forza Horizon 6 Top Rarest Cars: Best Collector Targets Ranked
- Forza Horizon 6 Series 3: Italian Exotics Cars, Aftermarket Takeover & Economy Fixes Explained
Popular Category Lists
- ARC Raiders / (345)
- Grow a Garden / (292)
- CoD: Black Ops 7 / (167)
- Star Citizen / (161)
- MLB 26 / (159)
- Monopoly Go / (152)
- ARK Survival Ascended / (126)
- Steal a Brainrot / (98)
- Blox Fruits / (74)
- Adopt Me / (73)
- Forza Horizon 6 / (72)
- Sailor Piece / (68)
- Grow a Garden 2 / (68)
- Diablo IV / (62)
- CoD: BLACK OPS 6 / (55)
- Path of Exile 2 / (48)
- Monster Hunter Wilds / (46)
- Aion 2 / (46)
- Windrose / (44)
- Donut SMP / (41)