0
0 Created: Jul 8,2026 | VV: Ultimatum
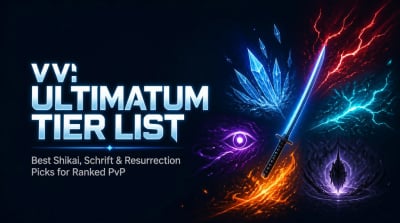
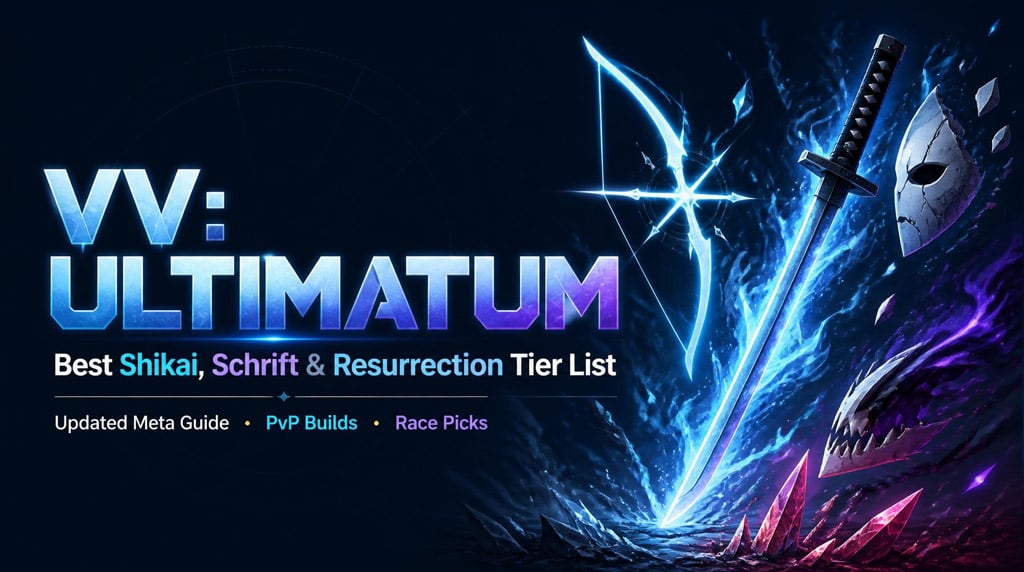
VV: Ultimatum Best Shikai, Schrift & Resurrection Tier List: Updated Meta Guide

VV: Ultimatum is not a roll rare and win game. A strong ability only works when your build can confirm hits, force movement, and cash out damage.
This tier list is based on real PvP value: damage, combo reliability, defensive tools, variant strength, and matchup pressure.
- VV: Ultimatum Tier List Overview
- S+ Tier: Best Abilities in VV: Ultimatum
- Superstar
- Blooming Madness
- S Tier: Meta Picks Worth Building Around
- Thunderbolt
- Red Ice
- Praying Mantis
- Demon Light
- Luminosity
- Fury
- High A Tier: Strong but More Conditional
- Shark
- Los Lobos
- Waypoint
- Heat
- Frozen Haze
- A Tier: Good Picks With Conditions
- Necromancy
- Blade Master
- Electro
- Senbonzakura
- B Tier: Playable but Limited
- Dimension
- Ink
- Flame
- Reversal
- Iron
- Best Ability by Race
- Best Build Pairings
- FAQ
- What is the best ability in VV: Ultimatum?
- What is the best Shikai in VV: Ultimatum?
- What is the best Resurrection in VV: Ultimatum?
- Is Senbonzakura worth using?
- Is Flame good in VV: Ultimatum?
- Summary
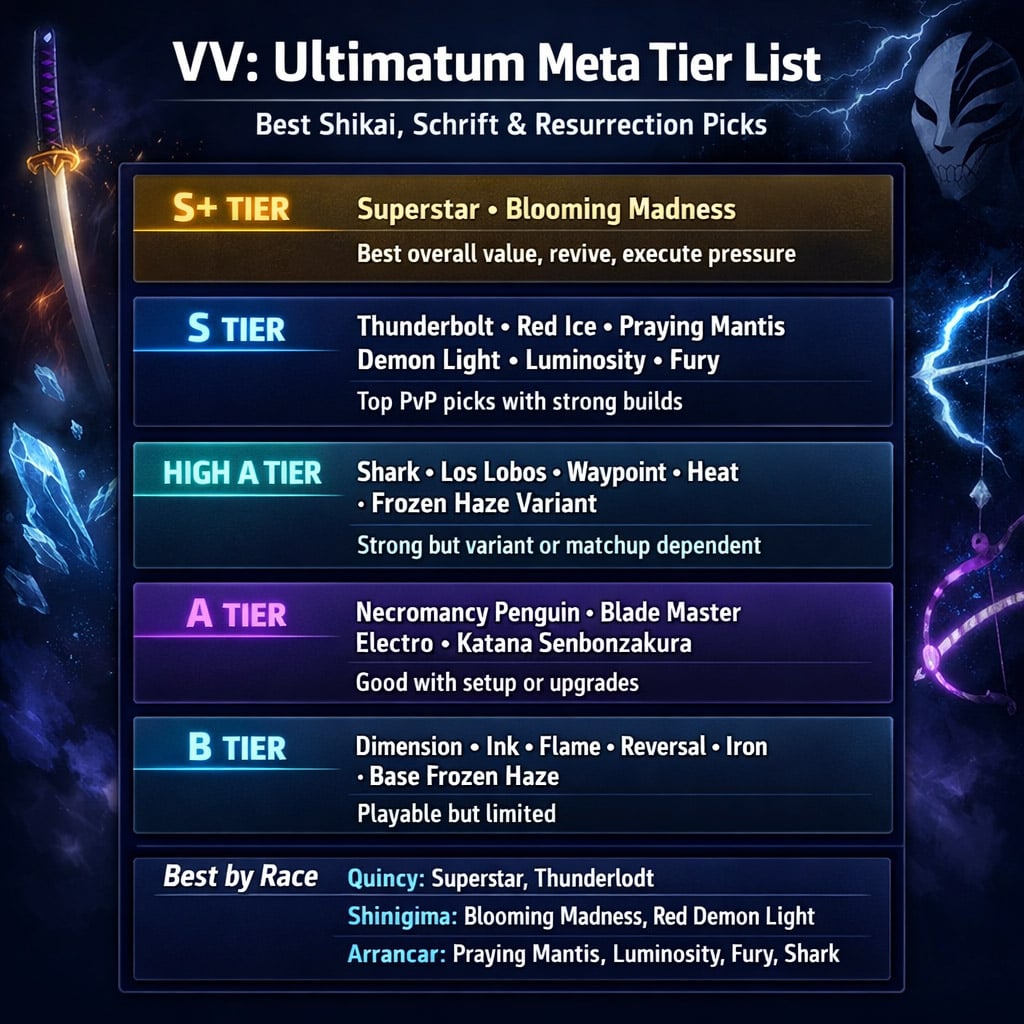
VV: Ultimatum Tier List Overview
| Tier | Best Abilities | Why They Rank Here |
|---|---|---|
| S+ | Superstar, Blooming Madness | Best overall value. Strong tools, high pressure, low downside |
| S | Thunderbolt, Red Ice, Praying Mantis, Demon Light, Luminosity, Fury | Top meta picks with strong builds or upgrades |
| High A | Shark, Los Lobos, Waypoint, Heat, Frozen Haze Variant | Strong but more matchup or variant dependent |
| A | Necromancy Penguin, Blade Master, Electro, Katana Senbonzakura | Good picks that need setup, upgrades, or clean execution |
| B | Dimension, Ink, Flame, Reversal, Iron, Base Frozen Haze, Longsword Senbonzakura | Playable, but easier to counter or too build-locked |
S+ Tier: Best Abilities in VV: Ultimatum
Superstar
Tier: S+
Race: Quincy
Best Build:Hakuda, Boxing, Muay Thai
Main Value:Free revive + output buff
Superstar is the safest top-tier ability in the game right now.
The reason is simple: James gives a free revive. That changes every fight. You can trade harder, commit more often, and still get a second chance.
The output buff also improves both offense and survivability. In real PvP, that means you win more trades without needing perfect play.
| Strength | PvP Impact |
|---|---|
| Free revive | Huge comeback value |
| Output buff | More damage and better trades |
| Great with Hakuda | Smooth pressure and clean confirms |
| Low setup requirement | Strong without needing a rare variant |
Use Superstar if you want the best Quincy Schrift for ranked PvP.
Blooming Madness
Tier: S+
Race: Shinigami
Best Build: Combo-heavy pressure builds
Main Value:Huge kit depth + execute pressure
Blooming Madness is the most complete Shinigami ability.
It has strong damage, multiple move variants, aerial options, and an ultimate that can auto-execute low-health targets. That forces enemies to respect your damage once they drop low.
The ability wins because it does not rely on one gimmick. It has tools for pressure, burst, movement, and finishers.
| Tool | Why It Matters |
|---|---|
| Ultimate execute | Ends fights fast |
| Multiple variants | Harder to predict |
| High damage output | Strong punish game |
| Aerial movement | Better chase and escape angles |
Pick Blooming Madness if you want the strongest Shinigami option overall.
S Tier: Meta Picks Worth Building Around
Thunderbolt
Tier: S
Race: Quincy
Best Variant:Red Variant
Best Build: Aggressive confirm builds
Thunderbolt hits hard, especially with Red Variant.
The first skill becomes slower, but it gains better range and damage. Do not throw it raw. Use it after a stun, punish, or forced dodge.
The second skill is a rushdown move that can combo extend if timed correctly.
| Pros | Cons |
|---|---|
| High burst damage | Red Variant is slower |
| Good range | Needs setup |
| Combo extension | Punishable if spammed |
If you can confirm hits, Thunderbolt is one of the best Quincy damage picks.
Red Ice
Tier: S
Race: Shinigami
Best Build: Combo setup builds
Main Value:Control + evasive tool
Red Ice is underrated by players who try to throw skills raw.
The first skill needs setup. If you keep missing it, your build is the problem. Use stuns, melee pressure, or forced movement before casting.
The second skill is rare value: it works like an evasive and still deals damage.
| Strength | Result |
|---|---|
| Strong control | Forces bad movement |
| Evasive skill | Saves you from pressure |
| Good damage | Rewards clean confirms |
| High skill ceiling | Gets better with better routing |
Red Ice is one of the best Shikai picks when your build can actually confirm it.
Praying Mantis
Tier: S
Race: Arrancar
Best Upgrade:360 barrier
Main Value: Pressure with defensive coverage
Praying Mantis is miserable to fight when upgraded correctly.
The 360 barrier makes trades awkward for your opponent. You pressure them, and they struggle to punish back cleanly.
| Strength | PvP Impact |
|---|---|
| 360 barrier | Safer aggression |
| High damage | Strong punish windows |
| Annoying defense | Forces slower enemy play |
Praying Mantis is one of the best Resurrection picks for controlled aggression.
Demon Light
Tier: S
Race: Shinigami
Best Build: Melee or hybrid pressure builds
Main Value: High damage weapon pressure
Demon Light plays like a full combat package.
Spear Beam gives ranged pressure. The split weapon crit can pull enemies in for combos. The multi-cut attack punishes close-range mistakes.
| Tool | Use |
|---|---|
| Spear Beam | Range check and poke |
| Pull-in crit | Combo starter or extender |
| Multi-cut attack | Close-range punish |
| High damage | Strong burst threat |
Demon Light is reliable because it threatens from multiple ranges.
Luminosity
Tier: S
Race: Arrancar
Best Build:Hakuda + Kido
Main Value: High damage with strong hybrid pressure
Luminosity becomes elite with the right build.
Hakuda gives melee pressure. Kido gives utility and extra range. Luminosity adds heavy ability damage on top.
| Build Piece | Purpose |
|---|---|
| Hakuda | Close-range combos |
| Kido | Utility and ranged pressure |
| Luminosity | Burst and ability damage |
Run Luminosity with Hakuda and Kido if you want one of the strongest Arrancar setups.
Fury
Tier: S
Race: Arrancar
Main Weakness:High Reiatsu cost
Fury still hits hard and keeps strong pressure.
The downside is resource drain. If you waste Reiatsu early, your threat drops fast. Play around cooldowns and commit only when you have a real opening.
| Pros | Cons |
|---|---|
| Strong pressure | Eats Reiatsu fast |
| Great offense | Needs resource control |
| Hard to fight | Punished if spammed |
Fury rewards disciplined players, not button mashers.
High A Tier: Strong but More Conditional
Shark
Tier: High A
Race: Arrancar
Best Variant:Blood Variant
Shark is simple and effective.
The combos are easy. The damage is good. The Blood Variant makes it even stronger.
| Strength | Why It Works |
|---|---|
| Easy combos | Low execution barrier |
| Good damage | Reliable reward |
| Blood Variant | Better pressure |
Shark is one of the best Resurrection choices for consistent results.
Los Lobos
Tier: High A
Race: Arrancar
Main Value:Cero Metralleta damage
Los Lobos can melt HP, but only when the user builds meter and lands the right window.
Gun M1s are strong until opponents learn the timing. The tracking shots can be avoided, and Cero can be dashed or parried.
| Strength | Counterplay |
|---|---|
| Huge Cero Metralleta damage | Needs meter |
| Gun pressure | Predictable if spammed |
| Range control | Can be dashed or parried |
Los Lobos is strong, but not autopilot. Mix your timing.
Waypoint
Tier: High A
Best Variant:Cosmic / auto-style variant
Waypoint is strong when the first skill tracks well and the second skill lands fully.
The second skill can shred HP, but you need to trap movement or punish a bad dodge.
| Tool | Value |
|---|---|
| Auto first skill | Easier pressure |
| High-damage second skill | Big HP punish |
| Good utility | Flexible playstyle |
Waypoint rewards patient players who wait for confirmed openings.
Heat
Tier: High A
Best Build:Hakuda or Strength
Heat is damage-heavy once the meter is built.
It works best with close-range builds because you need to stay active and keep pressure going. Hakuda gives better flow. Strength gives heavier hits.
| Build | Why Use It |
|---|---|
| Hakuda | Better pressure and confirms |
| Strength | Higher damage |
| Speed | Usable, but weaker after nerfs |
Heat is strong if your build lets you stay close and keep momentum.
Frozen Haze
Tier: High A with strong variant / B without it
Main Value:Skill and flash-step disable
Frozen Haze is variant-gated.
With the right variant, it can disable flash step and skills. That creates free punish windows. Without it, the ability drops hard.
| Version | Tier | Reason |
|---|---|---|
| Strong Variant | High A | Disables key tools |
| Base Version | B | Less threat, easier to play around |
Frozen Haze is only scary when it shuts down movement and skills.
A Tier: Good Picks With Conditions
Necromancy
Tier: A with Penguin / B without Penguin
Best Choice:Penguin
Necromancy depends on the summon.
Penguin freezes the target and gives a free combo starter. That single interaction carries the ability into A tier.
| Summon | Tier Impact |
|---|---|
| Penguin | A tier, freeze setup |
| Other summons | Usually B tier |
If you use Necromancy, use Penguin. No debate.
Blade Master
Tier: A
Best Upgrades:Air Variant, Heavenly lifesteal
Blade Master becomes good with upgrades.
The air variant lets you dodge pressure and punish from above. Heavenly lifesteal makes trades much safer.
| Upgrade | Value |
|---|---|
| Air Variant | Better mobility |
| Heavenly Variant | Lifesteal sustain |
| Second Skill | Combo ender or extender |
Blade Master is solid when upgraded, average without investment.
Electro
Tier: A
Main Value: Two-sided pressure
Electro is annoying in a good way.
The electro ball keeps hitting from behind while you attack from the front. That breaks defensive timing and creates messy trades.
| Strength | Result |
|---|---|
| Electro ball | Back pressure |
| Strong M2 | Reliable punish |
| Layered damage | Forces mistakes |
Electro wins scrambles by making defense uncomfortable.
Senbonzakura
Tier: A with Katana / B with Longsword
Best Variant:Katana Variant
Senbonzakura needs setup.
The skills are not easy to land raw. With Katana Variant, it feels much smoother. With Longsword, it is one of the weaker legendary picks.
| Version | Tier | Reason |
|---|---|---|
| Katana Variant | A | Better flow and confirms |
| Longsword Variant | B | Slower, less reliable |
| Mode Active | Higher A | Stronger pressure window |
Use combo routes first. Then cast Senbonzakura skills.
B Tier: Playable but Limited
Dimension
Tier: B
Dimension has mobility and decent damage, but most skills are easy to dodge.
| Pros | Cons |
|---|---|
| Good traversal | Low pressure |
| Decent burst | Predictable |
| Simple kit | Easy to avoid |
Use it only if you are confident with movement baiting.
Ink
Tier: B
Ink has debuffs, but weak pressure in most real fights.
| Pros | Cons |
|---|---|
| Useful debuffs | Needs strong fundamentals |
| Can disrupt | Not scary by itself |
| Good concept | Low average threat |
Ink needs a good pilot. The ability will not carry you.
Flame
Tier: B
Flame is carried by the first skill.
The second skill is blockable, low posture, and easy to escape with flash step. Use Flame only with an M1-focused build.
| Skill | Rating |
|---|---|
| First Skill | Good with combo confirm |
| Second Skill | Weak |
| Trail Damage | Easy to escape |
If you cannot land M1s, Flame is a bad pick.
Reversal
Tier: B
Reversal has clone pressure and screen inversion, but the counterplay is simple: back off until clones disappear.
| Strength | Weakness |
|---|---|
| Clone pressure | Can be waited out |
| Screen inversion | Annoying, not lethal |
| Disruption | Low kill pressure |
Reversal punishes impatient players. Good players stall it out.
Iron
Tier: B
Best Build:Hakuda only
Iron is too narrow.
It works with Hakuda. Outside Hakuda, it loses most of its value.
| Build | Value |
|---|---|
| Hakuda | Good synergy |
| Non-Hakuda | Poor value |
Do not use Iron unless your build is built around Hakuda.
Best Ability by Race
| Race | Best Picks | Best Use Case |
|---|---|---|
| Quincy | Superstar, Thunderbolt | Revive, burst, pressure |
| Shinigami | Blooming Madness, Red Ice, Demon Light | Control, damage, execute |
| Arrancar | Praying Mantis, Luminosity, Fury, Shark | Pressure, hybrid damage, easy combos |
| Variant-Dependent | Frozen Haze, Senbonzakura, Necromancy | Strong only with correct variant or summon |
Best Build Pairings
| Ability | Best Build | Reason |
|---|---|---|
| Superstar | Hakuda | Best pressure with revive safety |
| Heat | Hakuda / Strength | Better close-range damage |
| Red Ice | Combo setup | Confirms first skill |
| Luminosity | Hakuda + Kido | Hybrid pressure |
| Flame | M1 build | First skill needs melee confirms |
| Iron | Hakuda | Only real synergy |
| Senbonzakura | Combo build | Needs setup |
| Thunderbolt | Aggressive confirm build | Maximizes Red Variant burst |
FAQ
What is the best ability in VV: Ultimatum?
Superstar is the best overall ability. The free revive and output buff give it unmatched PvP value, especially with Hakuda.
What is the best Shikai in VV: Ultimatum?
Blooming Madness is the best overall Shikai. Red Ice and Demon Light are also top-tier if your build supports them.
What is the best Resurrection in VV: Ultimatum?
Praying Mantis, Luminosity, Fury, and Shark are the best Resurrection picks. Praying Mantis is strongest with 360 barrier, while Luminosity shines with Hakuda + Kido.
Is Senbonzakura worth using?
Yes, but only with Katana Variant or a strong combo build. Longsword Senbonzakura is much weaker and easier to counter.
Is Flame good in VV: Ultimatum?
Flame is usable, but not great. The first skill is strong, but the second skill is weak. Use Flame only if your build can consistently land M1 confirms.
Summary
The current VV: Ultimatum meta favors abilities that give confirmed damage, defensive value, and strong build synergy.
Best overall: Superstar
Best Shikai: Blooming Madness
Best Quincy picks: Superstar, Thunderbolt
Best Shinigami picks: Blooming Madness, Red Ice, Demon Light
Best Arrancar picks: Praying Mantis, Luminosity, Fury, Shark
Do not chase rarity alone. Pick the ability your build can actually use. A clean confirm beats a flashy move every time.
Most Popular Posts
- VV: Ultimatum Best Shikai, Schrift & Resurrection Tier List: Updated Meta Guide
- Best Hakuda Build in VV: Ultimatum: Top Shinigami Ranked Setup
- VV Ultimatum Blooming Madness Shikai Guide: Best Build, Skills, Dual Swords, Combos, and Update 2 Code
- VV: Ultimatum Reroll Farming Guide: Best Ability Reroll, Weapon Reroll, Hogyoku, and Gauntlet Methods
- VV Ultimatum Fast Unlock Every Title Guides: Boss, Gauntlet, PvP and Playtime Titles
- VV: Ultimatum Best Shikai, Schrift, and Resurrection Tier List Guide
Popular Category Lists
- ARC Raiders / (353)
- Grow a Garden / (294)
- CoD: Black Ops 7 / (167)
- Star Citizen / (162)
- MLB 26 / (159)
- Monopoly Go / (152)
- ARK Survival Ascended / (128)
- Steal a Brainrot / (99)
- Blox Fruits / (74)
- Adopt Me / (74)
- Forza Horizon 6 / (72)
- Sailor Piece / (68)
- Grow a Garden 2 / (68)
- Diablo IV / (62)
- CoD: BLACK OPS 6 / (55)
- Aion 2 / (51)
- Path of Exile 2 / (48)
- Monster Hunter Wilds / (46)
- Windrose / (44)
- Maplestory Classic / (42)