0
0 Created: Sep 20,2026 | Adopt Me
Adopt Me Building Guide: Pro Controls, Glitch Builds & Anchor Hacks

Misaligned counters, ghost furniture left behind during multi-select moves, and clipping errors waste hours in Adopt Me! Build Mode. Fixing them does not require endless trial and error—it requires understanding how the placement engine registers bounding boxes and selection targets.
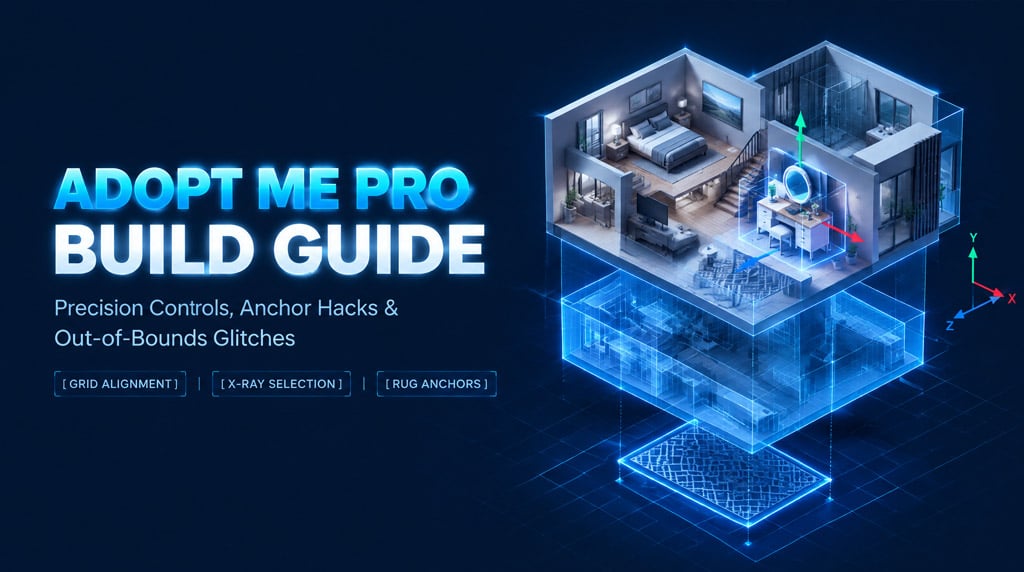
Below is the definitive workflow to master precision alignment, secure complex assemblies, and bypass placement limits.
- Calibrate Core Build Settings
- 1. Enable Furniture Multicoloring
- 2. Match Grid Steps to the Construction Phase
- 3. Recover Broken Angles with Instant Rotation Reset
- Master Selection, Cloning, and Advanced Move
- Fix Dropped Assets with the X-Ray Pipeline
- Clone Off-Grid as a Safety Staging Area
- Use the Move First, Scale Second Protocol
- Stabilize Multi-Object Moves Using Rug Anchors
- Step-by-Step Anchor Execution
- Furniture Scaling Limits & Scale Libraries
- Selecting the Right Base Object
- Build an On-Site Scale Library
- Out-of-Bounds and Roof Building Mechanics
- Safe Roof Access Setup (Tiny Home Method)
- Clean Showcase Recording Controls (PC)
- Camera Shortcuts & Smooth Passes
- FAQ (Frequently Asked Questions)
- Why does my selection box fail to capture all parts of my custom build?
- How do I stop furniture groups from breaking when rotating them?
- What grid setting should I use for custom multi-layered furniture?
- Why won't an object shrink small enough to make knobs or small details?
- What should I do if my furniture gets permanently crooked?
Calibrate Core Build Settings
Default settings favor fast, casual room decoration over architectural precision. Before placing structural components, configure your interface to avoid compounding alignment errors later.
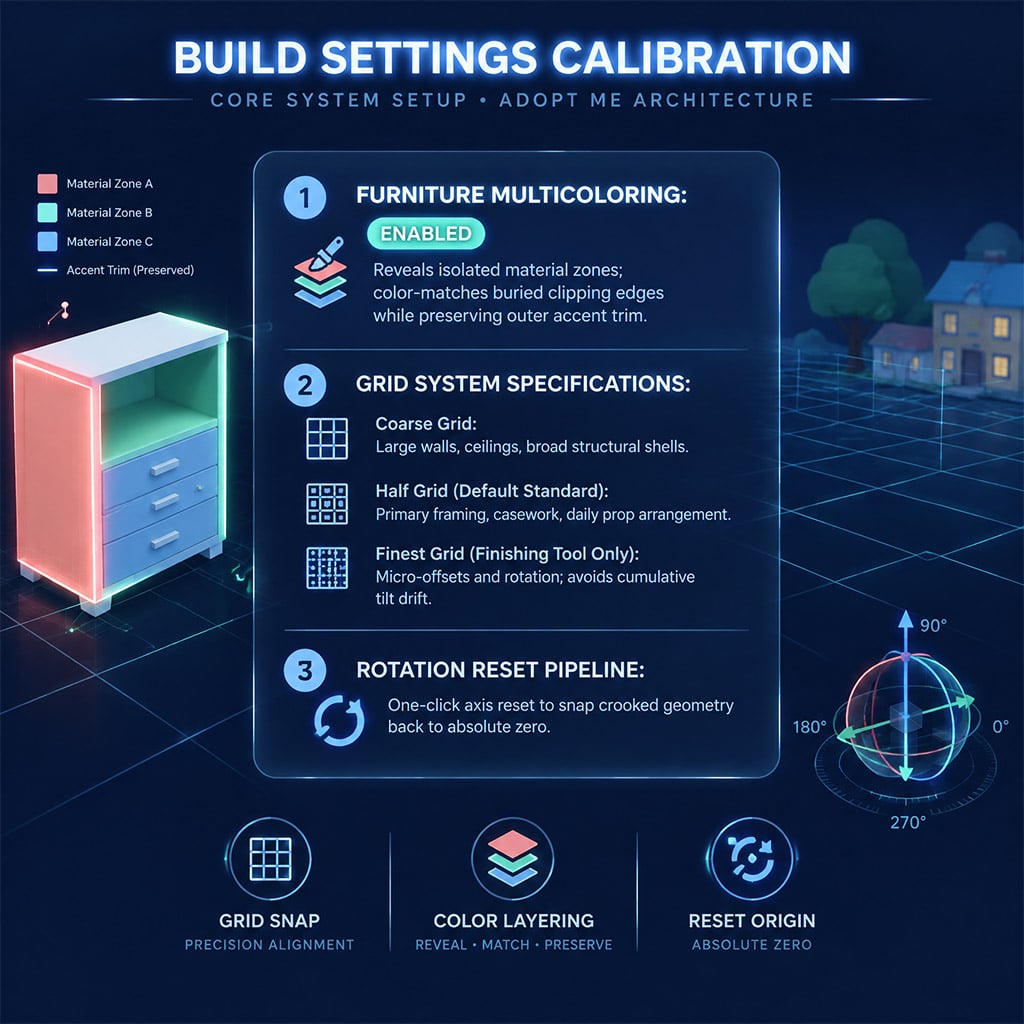
1. Enable Furniture Multicoloring
Head to Settings > Gameplay and toggle Furniture Multicoloring to On. When building custom architectural details—such as layered molding, coffered ceilings, or integrated sinks—builders routinely bury large segments of an object inside adjacent walls or floors.
Multicoloring isolates specific material zones on supported pieces. This allows you to color-match the buried collision edge to the wall surface while applying contrasting accents to the exposed trim.
2. Match Grid Steps to the Construction Phase
The three snapping tiers dictate movement distance and rotational increments. Relying on the finest grid for structural rough-ins is the fastest way to introduce invisible fractional drift that misaligns an entire room.
| Grid Tier | Movement Increment | Primary Use Case | Critical Failure Mode |
|---|---|---|---|
| Coarse | Maximum snap | Primary floors, exterior walls, large dividers | Zero nuance; causes clipping on customized assets |
| Half | Medium snap | Default setting: framing, major furniture, core props | Minor gaps if mixed with unsnapped parts |
| Finest | Micro snap | Final detailing, micro-rotations, custom mosaics | Cumulative angular drift; unrecoverable group tilt |
Pro Rule: Build the shell and primary fixtures on the Half grid. Restrict the Finest grid exclusively to final placement passes and rotation tweaks.
3. Recover Broken Angles with Instant Rotation Reset
If a cloned panel or shelf develops a fractional tilt that resists manual correction, stop nudging it. Incremental rotation edits on the fine grid stack errors on multiple axes.
Select the problem asset, click Reset Furniture Rotation, and re-apply the intended angle from a clean base.
Master Selection, Cloning, and Advanced Move
The default selection box only captures objects whose model origins fall inside your drag boundary. If an asset is clipped deep inside a counter or structural column, standard box-selection drops it.
Fix Dropped Assets with the X-Ray Pipeline
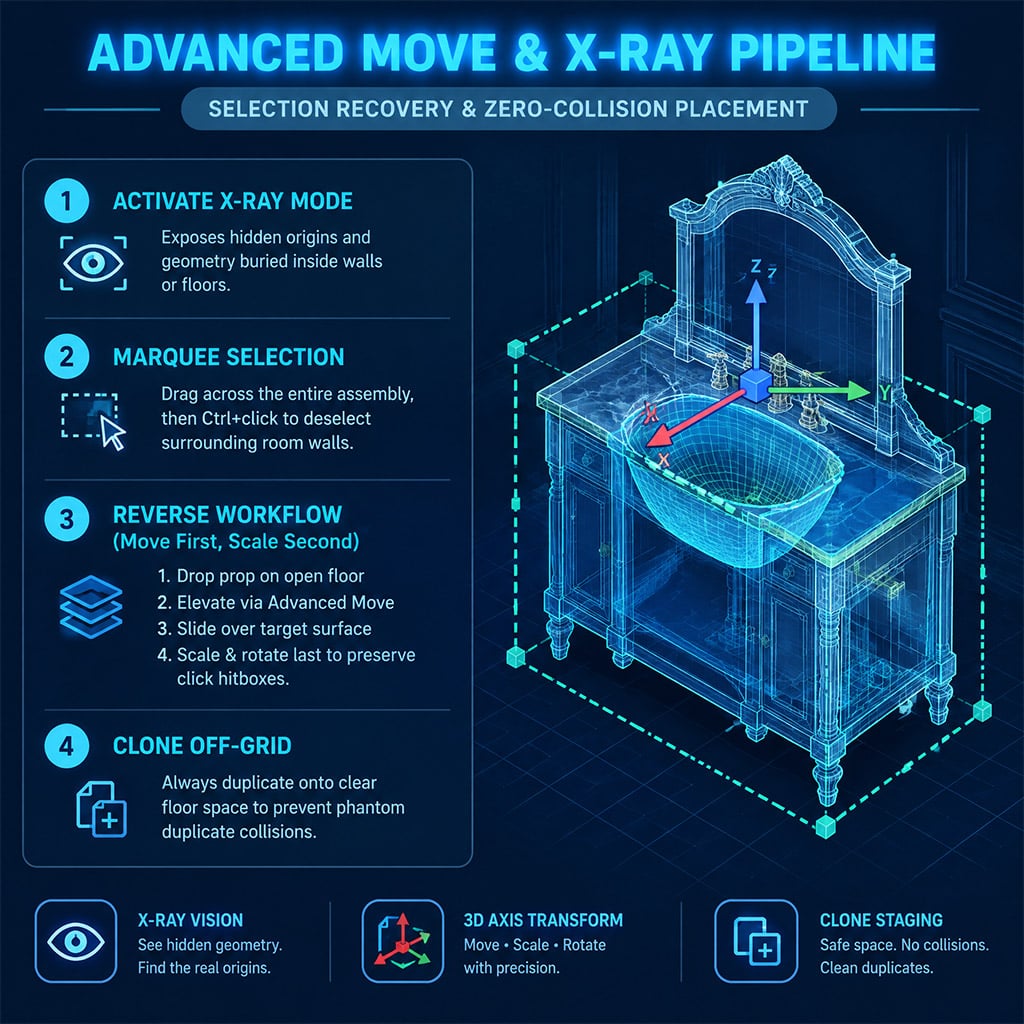
When moving layered items, simple box dragging leaves hidden bracing, lighting, and interior accents behind. Treat X-Ray mode as an essential precision selection tool:
1. Enable X-Ray in your Build Mode settings panel.
2. Drag your selection marquee across the entire assembly, including surrounding structural walls.
3. Hold the multi-select key (Ctrl on PC) and click exterior walls or unwanted surroundings to deselect them, isolating only the embedded components.
4. Verify that every interior node displays an active selection border before engaging movement controls.
Clone Off-Grid as a Safety Staging Area
Cloning directly on top of an active assembly introduces invisible duplicate geometry. Overlapping hitboxes make subsequent item selection unpredictable and inflate your house item limit.
Whenever you clone a complex asset:
- Generate the clone and immediately pull it away onto clear floor space using the translation gizmo.
- Keep an unedited master copy parked in an unused utility room before executing complex scaling or compound rotations.
Use the Move First, Scale Second Protocol
Standard placement frequently rejects custom surfaces like layered vanity tops, angled wall slabs, or stepped stairs because their collision profiles remain irregular.
Bypass surface collision using Advanced Move:
1. Drop the target decoration onto an open, unobstructed floor.
2. Open Advanced Move to reveal the vertical and lateral translation handles.
3. Elevate the item to your target height, slide it laterally over the target surface, and lower it into position.
4. Scale, rotate, and recolor the prop only after it sits in its final location. Scaling down an item before moving it shrinks its selection hitbox, making the gizmo handles significantly harder to grab.
Stabilize Multi-Object Moves Using Rug Anchors
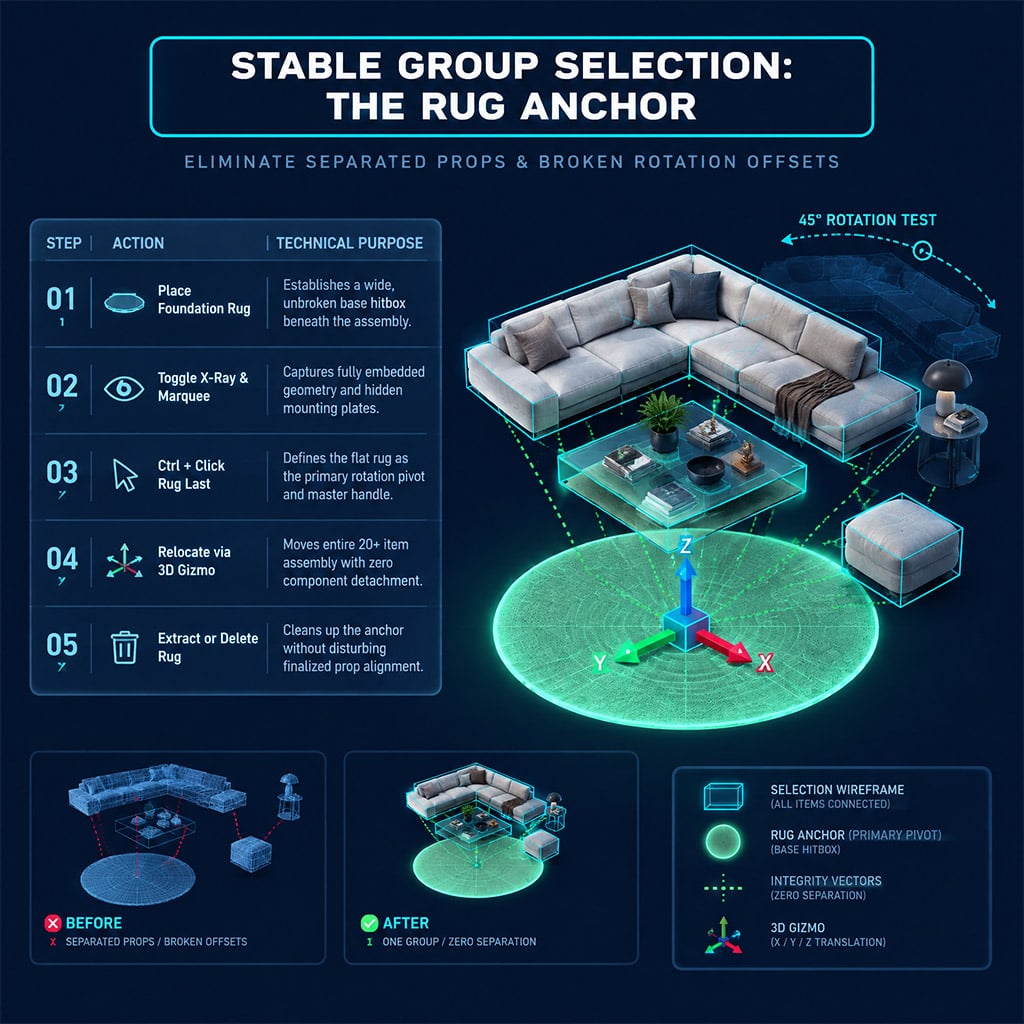
Moving a 20-piece custom chandelier, fireplace, or art installation piece by piece inevitably misaligns elements. Standard group-selection easily drops small micro-props when translation handles recalculate from an arbitrary center point.
Use a Rug Anchor to maintain group integrity.
Step-by-Step Anchor Execution
1. Lay down an inexpensive, flat rug directly underneath or adjacent to your custom build.
2. Toggle X-Ray on to reveal all embedded parts.
3. Drag-select the entire construction.
4. Hold Ctrl (PC) and click the rug to add it to the active group.
5. Make the rug the primary active target (its handle drives the group).
6. Drag the assembly using the rug's expansive bounding box.
7. Once positioned, select the rug individually and delete or slide it out.
| Anchor Type | Best Application | Operational Trade-Off |
|---|---|---|
| Flat Rug | Wall galleries, custom counters, room groups | Cannot easily be embedded permanently inside thin walls |
| Basic Cube | Sculptures, vertical pillars, structural beams | May clip through exterior surfaces if scaled too wide |
| Glass/Clear Panel | Permanent fixtures, multi-tier lighting | Costs Bucks to place; remains part of the furniture limit |
If a group still breaks during relocation, the culprit is almost always depth disparity, not item volume. An object buried too deep behind an exterior wall will break its selection link during movement. Pull the assembly away from existing walls before initiating large multi-object rotations.
Furniture Scaling Limits & Scale Libraries
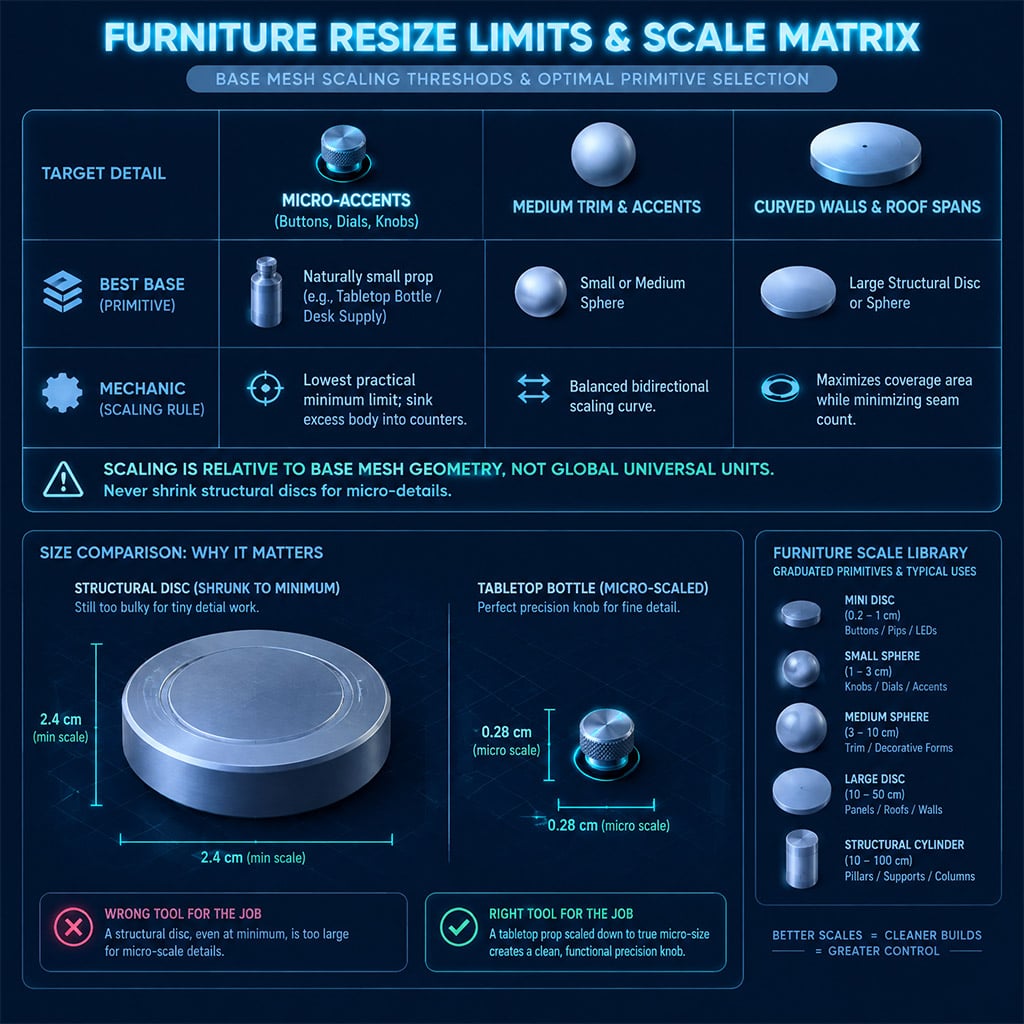
Two objects that share similar basic shapes do not share identical scaling thresholds. In Adopt Me!, scaling factors apply relative to an object's base mesh dimensions rather than absolute global units.
Selecting the Right Base Object
- For micro-details (dials, buttons, tiny food items, handles): Never attempt to scale down a standard structural disc or block. Its minimum limit will bottom out far too large. Instead, take a naturally small prop (like small tabletop bottles or desk supplies) and bury the unneeded portions inside your counter.
- For sweeping curves and large structural partitions: Use large spheres or large structural discs. Expanding a smaller cylinder to maximum dimensions burns through your budget and increases visual seams across multiple parts.
Build an On-Site Scale Library
Before committing funds to a massive build, dedicate an empty room in your house as a Scale Testing Lab:
- Line up your primary primitives: small/medium/large discs, cubes, cylinders, and spheres.
- Shrink one set to minimum size; expand the other set to maximum size.
- Use this permanent visual reference to select the correct base primitive instantly, eliminating trial-and-error spending.
Out-of-Bounds and Roof Building Mechanics
Building on top of roofs or beyond primary interior boundaries allows for custom sky gardens, patios, and scenic lookouts.
Safe Roof Access Setup (Tiny Home Method)
The Tiny Home remains the most cost-effective and structurally consistent framework for roof building:
1. Place a basic structural cube inside the top floor of the home.
2. Scale the cube's footprint wide enough to exceed the roof boundary.
3. Open Advanced Move and drive the cube vertically upward until its top surface cleanly clears the roof collision plane.
4. Drop a comfortable chair or pet bed onto the top surface of the protruding cube, ensuring the sitting prompt registers outside the ceiling barrier.
5. Exit build mode, sit in the seat to transition your avatar through the collision boundary, then enter Build Mode to lay down permanent structural flooring across the exterior.
Failure Point: If your avatar slides or clips back inside, the platform is either slightly tilted or colliding with the apex of the roof mesh. Reset rotation, confirm the cube is level, and elevate it an additional half-grid step above the collision ceiling.
Clean Showcase Recording Controls (PC)
Presenting a finished custom build requires controlled, cinematic camera navigation. Quick mouse pans make custom rooms feel cramped and cause visual clipping through interior partitions.
Camera Shortcuts & Smooth Passes
| Control Input | Function | Optimal Showcase Usage |
|---|---|---|
| Shift + P | Freecam Toggle | Unlocks free-floating camera (active in supported private/VIP setups) |
| W / A / S / D | Dolly / Strafe | Maintain steady directional speed; avoid sudden direction shifts |
| Up / Down Arrows | Speed Adjustment | Lower speed to minimum before capturing custom prop details |
| Z / C | Camera Roll | Use sparingly (under 5 degrees) for stylistic corner reveals |
Capture your finished space using three deliberate sweeps:
- The Structural Sweep: Set your camera to a wide, level perspective. Glide steadily across the room perimeter to establish structural layout and floor plan flow.
- The Micro-Detail Pass: Drop camera speed to its lowest setting. Pan across custom countertops, intricate headboards, and recessed lighting to showcase precision alignments.
- The Scale Anchor Pass: Walk your avatar through the environment to give viewers immediate, natural perspective on ceiling heights and room proportions.
FAQ (Frequently Asked Questions)
Why does my selection box fail to capture all parts of my custom build?
The item's origin point is buried beyond the bounding area of your drag selection. Turn on X-Ray mode in Build Mode settings, expand the selection marquee well beyond the outer edges of the build, and hold Ctrl to deselect unwanted exterior rooms.
How do I stop furniture groups from breaking when rotating them?
Add a flat rug underneath the assembly to act as an anchor point. Multi-select the furniture assembly, add the rug to the selection last so it serves as the primary handle, and rotate the group via the rug's central gizmo.
What grid setting should I use for custom multi-layered furniture?
Use the Half grid to align and frame the core components. Switch to the Finest grid only for final micro-adjustments or bespoke rotation angles, as full-time use of the finest grid introduces cumulative alignment errors.
Why won't an object shrink small enough to make knobs or small details?
Scaling ranges are proportional to the item's original base mesh. Structural shapes hit hard minimum limits; use naturally small clutter objects (such as small bottles, cans, or desk accessories) and sink the excess body into the wall or counter instead.
What should I do if my furniture gets permanently crooked?
Do not try to counter-rotate the item manually on the fine grid. Select the crooked asset and click Reset Furniture Rotation to snap it back to absolute zero, then re-apply your intended rotation from a clean baseline.

I’m Chloe Whitaker, a British Fact Checker at GGWTB focused on Currency farming, pet collecting, and management games, alongside Minecraft sandbox content. I check the details that shape your next move: growth timers, unlock requirements, and whether a reward is still obtainable. An old event tip shouldn’t cost you an evening chasing a pet you can no longer get.
Most Popular Posts
- Adopt Me Strawberry Tortle: Odds, Best Eggs, and Trading Moves Before Values Spike
- Adopt Me Chestnut Glyptodon & General Sheepdog Guide: Vote, Get Rewards, and Prepare
- Adopt Me Update: Tuxedo Cat, New Crystal Egg Pet & Silverback Gorilla Guide
- Adopt Me General Sheepdog Guide: How to Get It, Gippadon Costs, Acorns, Admin Trade-In, and Neon Details
- Adopt Me 9th Birthday Update: Birthday Butterfly, Pet Wear, Cake Cannon & Prep Strategy
- Adopt Me 2D Doggy Guide: Box Odds, Value & How to Get It (2D Tuesday)
Popular Category Lists
- ARC Raiders / (345)
- Grow a Garden / (292)
- CoD: Black Ops 7 / (167)
- Star Citizen / (161)
- MLB 26 / (159)
- Monopoly Go / (152)
- ARK Survival Ascended / (126)
- Steal a Brainrot / (98)
- Blox Fruits / (74)
- Adopt Me / (73)
- Forza Horizon 6 / (72)
- Sailor Piece / (68)
- Grow a Garden 2 / (68)
- Diablo IV / (62)
- CoD: BLACK OPS 6 / (55)
- Path of Exile 2 / (48)
- Monster Hunter Wilds / (46)
- Aion 2 / (46)
- Windrose / (44)
- Donut SMP / (41)