0
Created: Oct 30,2026 | Aion 2
Aion 2 Zikel Apparition Guide: Beat Stripes, Bleed, and Stamina Drain

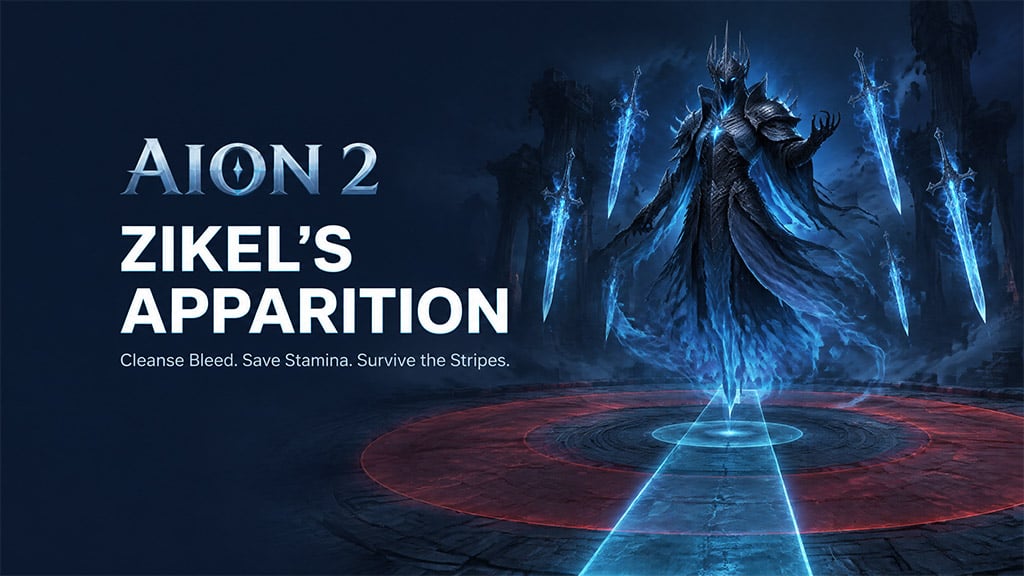
To beat Zikel's Apparition, cleanse bleed immediately, save stamina for committed attacks, and leave each safe stripe only after its surrounding explosion finishes. We build around stagger pressure and recovery first; extra damage comes after you can survive the complete mechanic cycle.
- Fix the Failure Before Raising the Difficulty
- Treat Gear Score as Context, Not a Strategy
- Prepare Stagger, Cleansing, and Recovery
- Separate Stagger Builders From Follow-Ups
- Equip Recovery Items Before the Pull
- Handle Attacks Without Spending Every Dodge
- Position Against the Attack, Not Just Behind the Boss
- Finish Each Stripe Before Moving to the Next
- Distinguish the Two Center Mechanics
- Treat Sorcerer Hibernation as an Optional Shortcut
- FAQ (Frequently Asked Questions)
- Can You Beat Zikel's Apparition Below 3,000 Gear Score?
- Does Difficulty 1 Give Access to the Colossus Exchange?
- Why Does Your Health Keep Falling After Using a Potion?
- How Do You Avoid Running Out of Stamina During the Stripes?
- Can Sorcerer Hibernation Skip Zikel's Stripe Mechanic?
Fix the Failure Before Raising the Difficulty
If you repeatedly die during the same mechanic, practice at a lower difficulty before spending more resources on harder attempts. We separate execution failures from build limitations so you change the thing actually ending the run.
Use your next attempt to identify the first failure.
| Failure Point | Likely Problem | Next Change |
|---|---|---|
| Health keeps dropping after healing | Bleed remains active | Add a reliable bleed cleanse |
| Stamina empties during stripes | Excessive sprinting or dodging | Walk between safe lanes when timing allows |
| Airborne bind ends the attempt | CC escape unavailable | Reserve Defiance or your equivalent |
| You die after avoiding a sword impact | Delayed explosion catches you | Keep clear until both hits resolve |
| You survive mechanics but cannot finish | Damage or uptime is insufficient | Improve stagger timing, then reassess gear |
Fix the earliest repeatable failure before buying upgrades for a later problem.
Treat Gear Score as Context, Not a Strategy
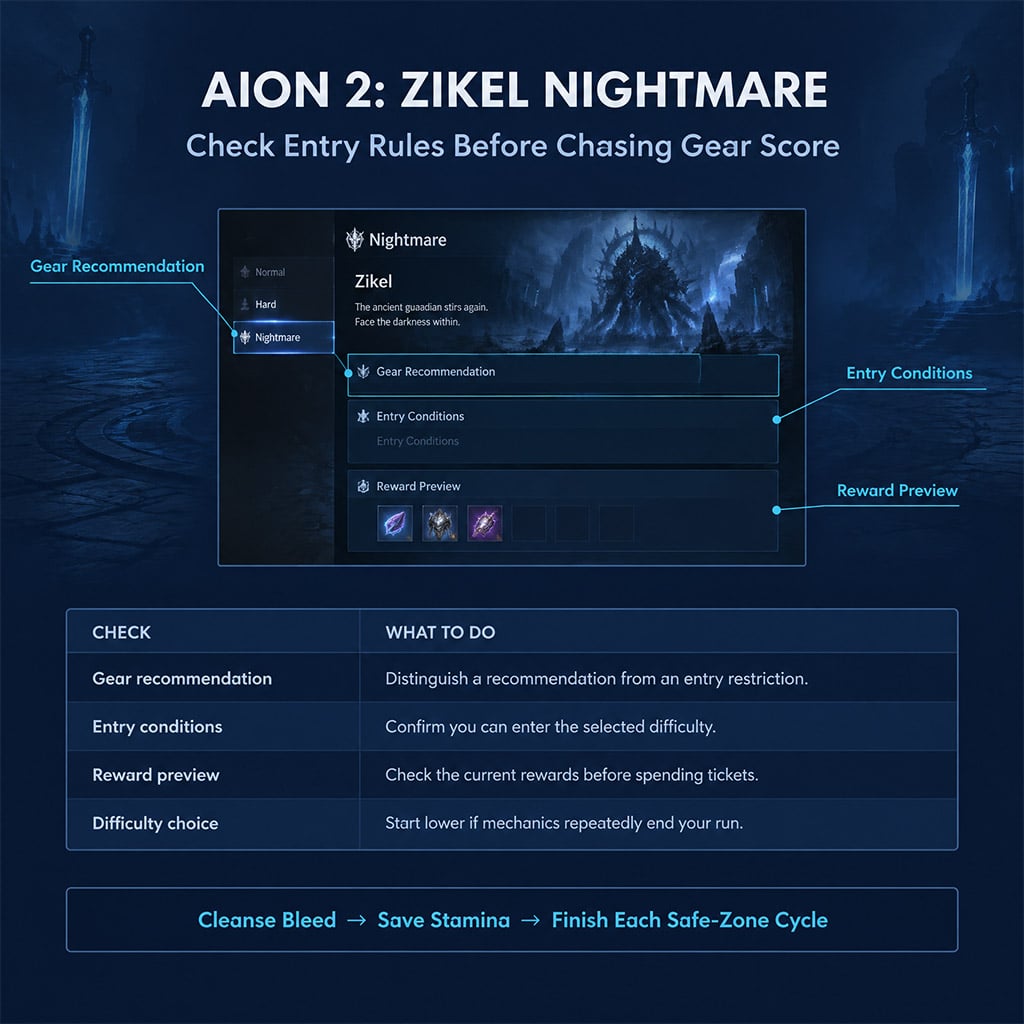
If the difficulty screen labels 3,000 GS as recommended, distinguish that from a hard entry requirement. A lower-score attempt demands cleaner execution, but the displayed recommendation does not explain whether your specific build has enough damage or recovery.
We judge readiness by whether you can complete the major mechanics consistently—not by one unusually successful run.
Prepare Stagger, Cleansing, and Recovery
If every skill slot is devoted to damage, one bind or bleed can erase the attempt. We keep tools that solve those threats, then use stagger windows to recover lost damage.
Separate Stagger Builders From Follow-Ups
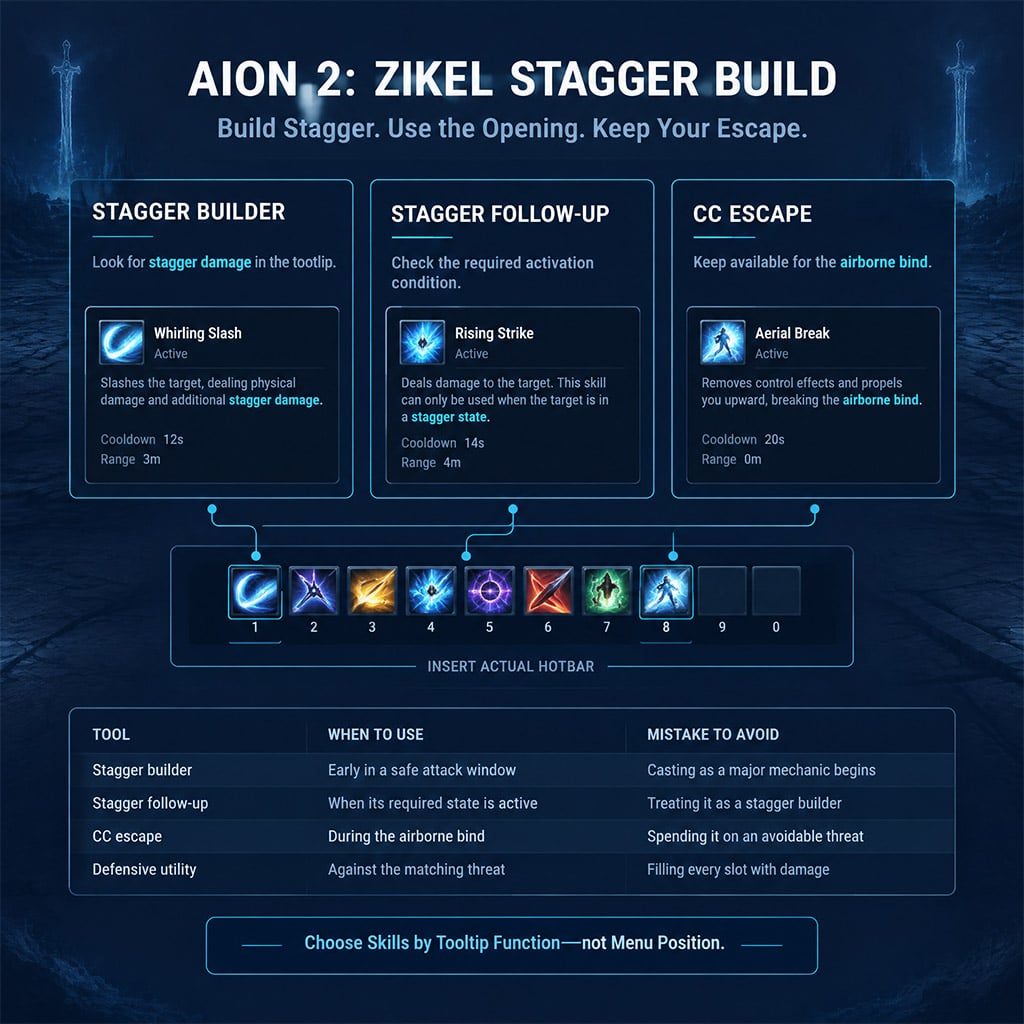
A stagger builder depletes the boss's stagger bar; a stagger follow-up requires the resulting vulnerable state. Read the activation conditions rather than copying another class's skill-menu positions.
Build around these functions.
| Tool | Execution | Why We Keep It |
|---|---|---|
| Defiance or equivalent CC escape | Use during the airborne bind | Restores control when ordinary movement is unavailable |
| Strong stagger builder | Cast early in a safe damage window | Starts cooldown recovery sooner |
| Stagger follow-up | Use when its activation condition appears | Converts the opening into damage or recovery |
| Defensive utility | Match shield, mitigation, or healing to the threat | Keeps a survivable mistake from ending the run |
| Bleed cleanse | Use promptly after bleed is applied | Stops ongoing damage instead of merely replacing lost health |
Replace your least productive damage skill before sacrificing your escape or cleanse.
We start stagger cooldowns early only when the cast is safe. Committing a long animation as a major mechanic begins trades useful cooldown timing for a preventable death.
Equip Recovery Items Before the Pull
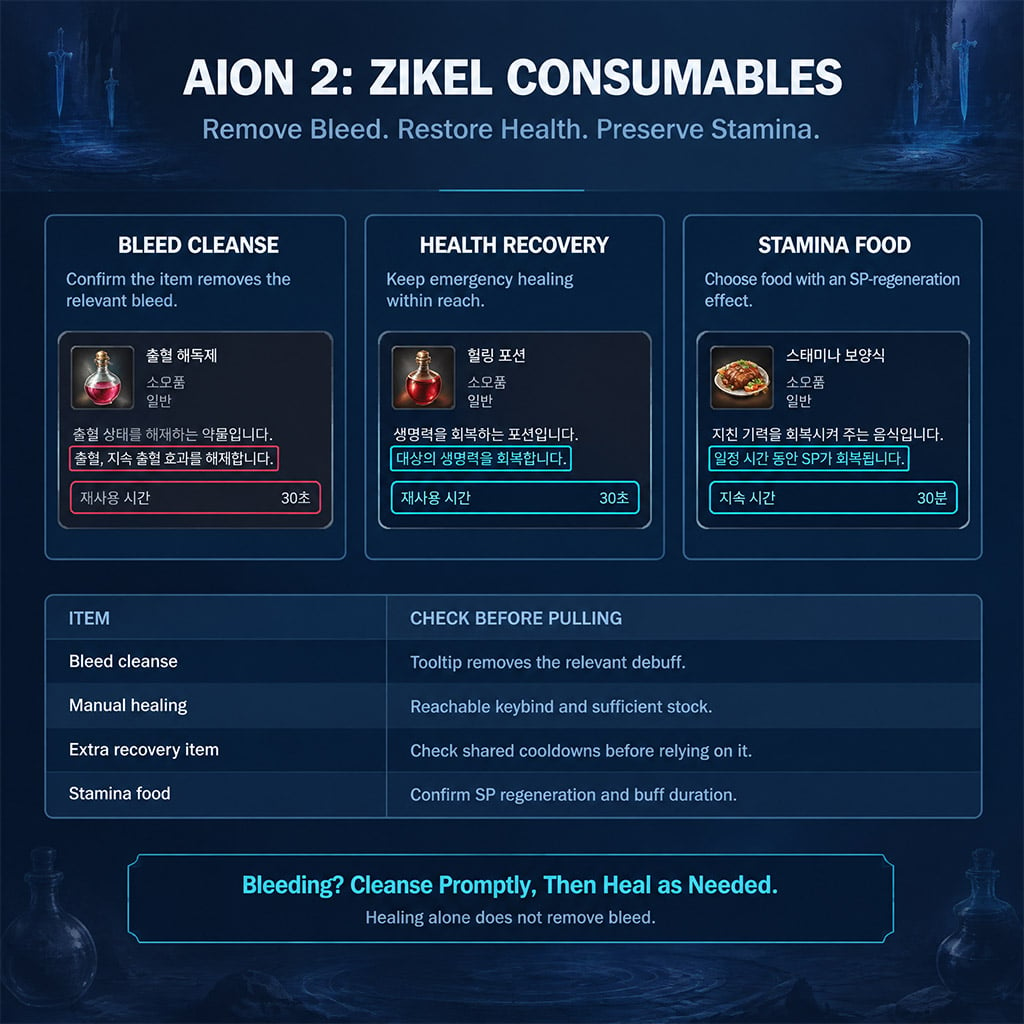
Healing does not remove bleed unless the item explicitly includes that effect. If health continues falling after a potion, cleanse first, then restore health.
We prioritize function over item rarity.
| Consumable | Purpose | Pre-Pull Check |
|---|---|---|
| Automatic healing potion | Routine recovery | Equipped with sufficient stock |
| Manual healing potion | Emergency healing | Assigned to a reachable input |
| Bleed-removal potion | Debuff removal | Tooltip covers the relevant bleed |
| Life Crystal | Additional recovery option | Check shared cooldowns before relying on it |
| Stamina-regeneration food | Supports repeated movement demands | Read the current SP-regeneration effect |
| Standard scrolls and seal stones | Baseline combat buffs | Apply before entering |
Prioritize a working cleanse and stamina food over scarce premium buffs while learning.
Fruit Salad is a practical option if your current recipe grants SP regeneration. Do not build your preparation around seasonal food that is no longer obtainable.
Handle Attacks Without Spending Every Dodge
If you dodge whenever the fight looks busy, you enter the stripe sequence without enough stamina. We spend movement resources on actual threats and use ordinary repositioning when it is sufficient.
Position Against the Attack, Not Just Behind the Boss
For melee, move toward Zikel's rear when a forward attack commits. Rear positioning is not universal safety: spins and arena-wide mechanics still require separate responses.
Ranged players should preserve space without backing into the arena edge. Keep both the boss and nearby ground markers visible so retreat does not become a blind dodge into another hazard.
Use this threat reference during practice.
| Threat | Response | Failure to Avoid |
|---|---|---|
| Forward attack | Reposition behind the committed attack | Remaining in front through follow-ups |
| Airborne bind | Use your CC escape | Spending it earlier on an avoidable threat |
| Expanding center shockwave | Jump over the approaching wave | Assuming the center is automatically safe |
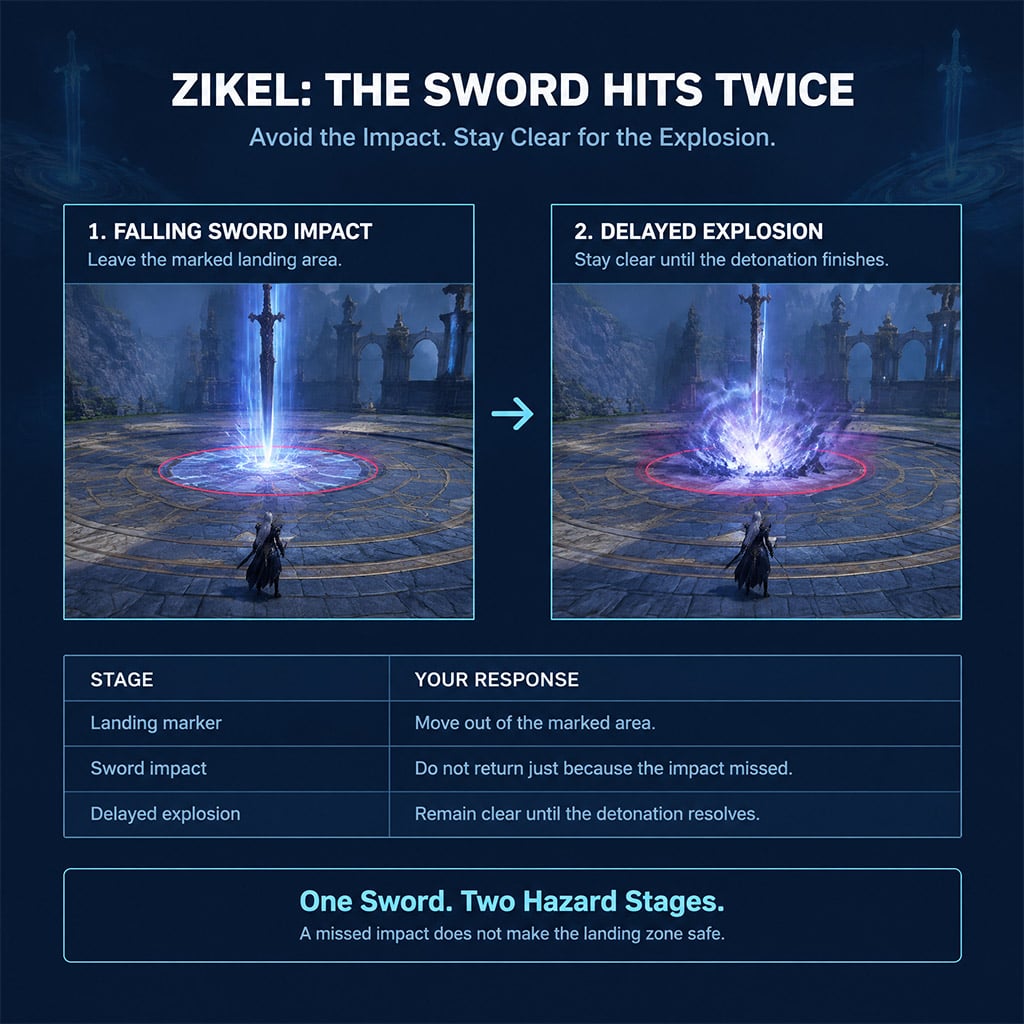
| Falling sword | Leave the marked landing area | Returning immediately after impact |
| Delayed sword explosion | Remain clear until detonation finishes | Treating the sword as a single-hit hazard |
| Bleeding projectile | Dodge when practical; cleanse if hit | Healing while bleed remains active |
A missed sword impact does not make its landing zone safe—the delayed explosion still matters.
Finish Each Stripe Before Moving to the Next
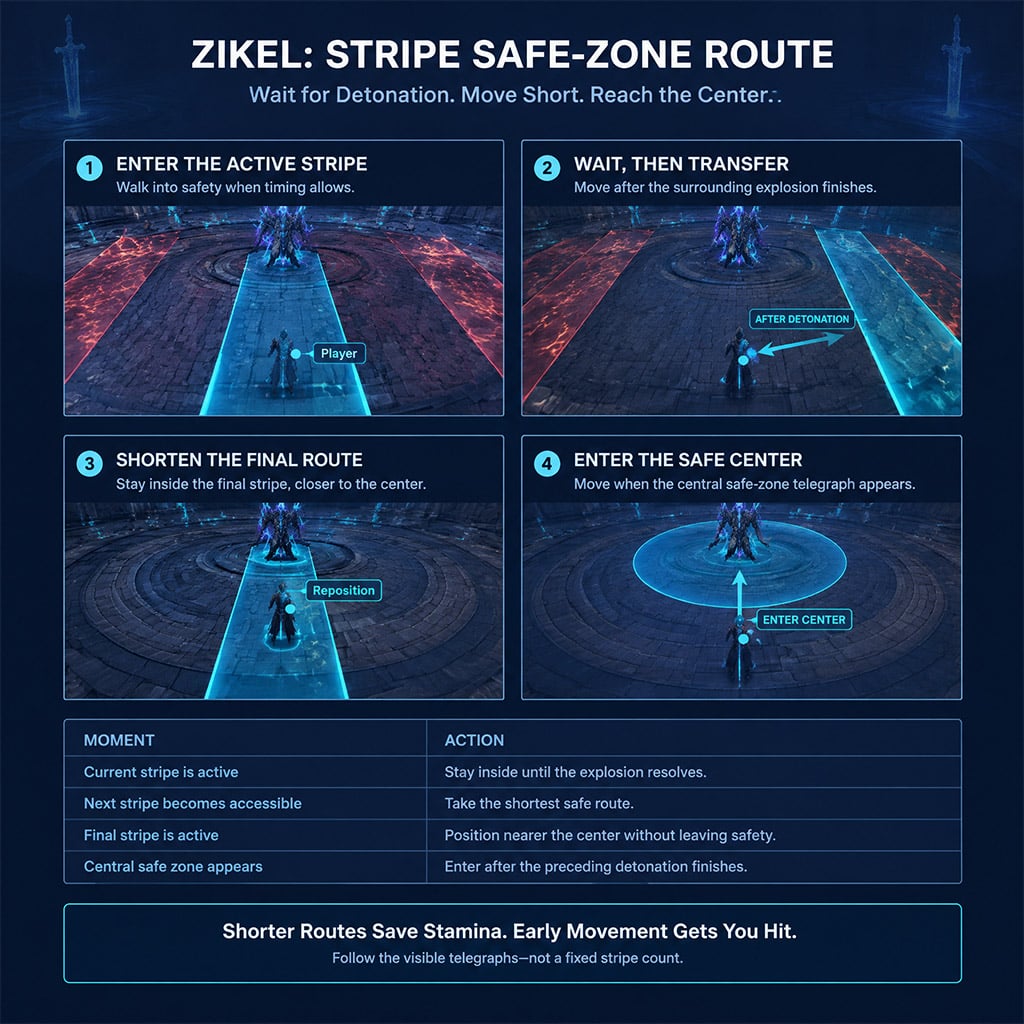
The stripe mechanic punishes leaving early, not just arriving late. We watch the current detonation first, then use Zikel's relocation to plan the next move.
1. Enter the first safe stripe without sprinting unnecessarily.
2. Stay inside until the surrounding explosion finishes.
3. Identify the next stripe as Zikel relocates.
4. Take the shortest safe route into it.
5. If another stripe appears, check its orientation before choosing a direction.
6. Within the final safe lane, stand closer to the center without leaving safety.
7. After the current detonation resolves, enter the central safe zone when its telegraph appears.
Distance is the advantage.
We shorten the final transition by positioning inside the safe lane near the center—not by cutting across dangerous ground early. Follow the visible sequence rather than assuming every attempt contains the same number of stripes.
Distinguish the Two Center Mechanics
A jump toward the center does not tell you the complete response. An expanding shockwave requires a jump; an outside-area explosion requires entry into the central safe zone.
Read the ground effect before committing. Running into the center because it was safe during the previous mechanic is a preventable mistake.
Treat Sorcerer Hibernation as an Optional Shortcut
If Hibernation protects you through the remaining stripe detonations in your current version, it can reduce movement demands. Do not assume its duration or protection covers the entire sequence.
We keep the standard route as the fallback. Before relying on the shortcut, test its activation timing, protection duration, and whether the final explosion lands after the effect ends.
Partial coverage is not a skip.
FAQ (Frequently Asked Questions)
Can You Beat Zikel's Apparition Below 3,000 Gear Score?
A recommended 3,000 GS label does not itself establish a hard entry requirement. Check the current entry conditions, then assess whether your build can survive the mechanics and finish within any applicable time limit.
Does Difficulty 1 Give Access to the Colossus Exchange?
Difficulty 1 is the Season 1 progression target for the relevant Colossus exchange. Check Exchange Shop → Statues for the current clear requirement and purchase cost before committing tickets to higher difficulties.
Why Does Your Health Keep Falling After Using a Potion?
Active bleed continues dealing damage after ordinary healing. Use a skill or potion that explicitly removes the relevant debuff, then heal once the ongoing damage stops.
How Do You Avoid Running Out of Stamina During the Stripes?
Avoid unnecessary sprinting and move between lanes only after each explosion resolves. We also position closer to the center within the final safe stripe and use available SP-regeneration food before pulling.
Can Sorcerer Hibernation Skip Zikel's Stripe Mechanic?
Hibernation is usable as a shortcut only if its current protection covers every remaining detonation. Test the interaction on a lower-cost attempt; if protection ends early, follow the normal safe-zone route.

I’m Emily Zhang, an American Research Writer at GGWTB covering Korean MMORPGs and games based on classic franchises. My guides focus on class choices, leveling routes, and long-term character progression. I look at what a class needs beyond its starter skills—and which upgrades are worth your materials before the next gear tier arrives.

Most Popular Posts
- AION 2 Global Best Classes: Current Meta, PvE/PvP Roles, and Class Picking Guide
- Aion 2 Global Class Tier List: Best for PvE, PvP & Solo Play
- AION 2 Global PvE Guides: Dungeons, Raids and Weekly Priorities
- AION 2 Pet Guide: Souls, Genus Insight, Owned Effects and What to Farm First
- AION 2 PvE DPS Tier List: Highest-DPS Classes Ranked by Dungeon Data
- Aion 2 Best Leveling Build for All Classes: Fast 1–45 Global Launch Guide
Popular Category Lists
- ARC Raiders / (360)
- Grow a Garden / (296)
- CoD: Black Ops 7 / (167)
- Star Citizen / (164)
- MLB 26 / (159)
- Monopoly Go / (153)
- ARK Survival Ascended / (128)
- Steal a Brainrot / (99)
- Blox Fruits / (74)
- Adopt Me / (74)
- Forza Horizon 6 / (72)
- Sailor Piece / (68)
- Grow a Garden 2 / (68)
- Diablo IV / (62)
- Aion 2 / (57)
- CoD: BLACK OPS 6 / (55)
- Path of Exile 2 / (48)
- Monster Hunter Wilds / (46)
- COD: Modern Warfare 4 / (45)
- Windrose / (44)