0
0 Created: Sep 6,2026 | Grim Dawn
Grim Dawn Berserker Guides: Bleed, Cold & Onslaught Builds

For a Bleeding Berserker, we recommend Soldier for a defense-oriented weapon build or Occultist for additional Bleeding resistance reduction. If you prefer Cold damage, build around a compatible Cold attack package rather than spreading points across Bleeding, transformations, and channelling.

Our first priority is compatibility: choose one damage direction and one main attack system. Crate's official Berserker overview establishes weapon combat, Cold damage, and shapeshifting as the mastery's central themes.
- 1. Choose a Build That Makes Your Skill Points Count
- Bleeding, Cold, or Transformation?
- Build Bleeding Around Application and Debuffs
- Keep Cold Conversion Focused
- Soldier or Occultist?
- 2. Fix Onslaught Timing, Boss Damage, and Recovery
- Give Onslaught a Defined Payoff
- Read Resistance-Reduction Wording
- Separate Bleeding Damage From Healing
- 3. Prioritize Devotions, Gear, and Reliable Damage Uptime
- Choose Devotions by Their Job
- Buy Function Before Damage Bonuses
- Audit Transformations and Channels Separately
- Change One Variable at a Time
- FAQ (Frequently Asked Questions)
- What Is the Best Secondary Mastery for a Bleeding Berserker?
- Should We Use Onslaught or Cadence?
- Can We Keep Weapon-Pool Skills When Shapeshifting?
- Why Does Our Berserker Struggle Against Bosses?
1. Choose a Build That Makes Your Skill Points Count
If your Berserker has plenty of abilities but weak damage, we start by removing investments that do not support the main attack. A transformation build and a weapon-pool build should not automatically share the same offensive allocation.
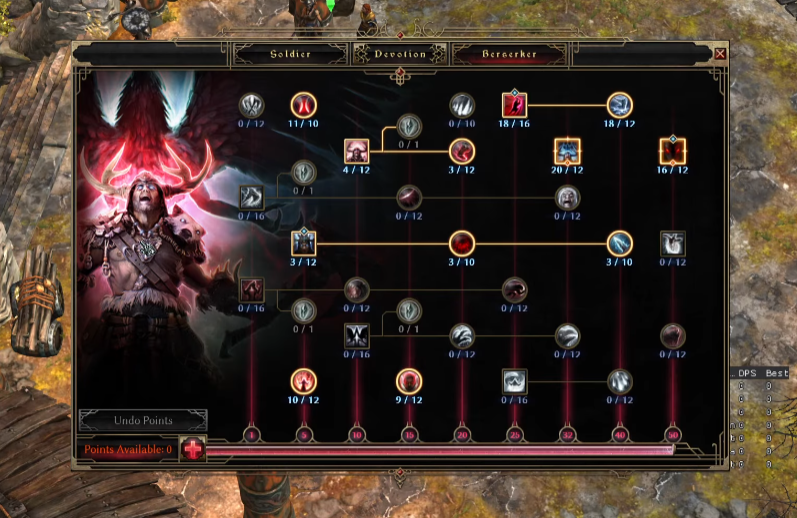
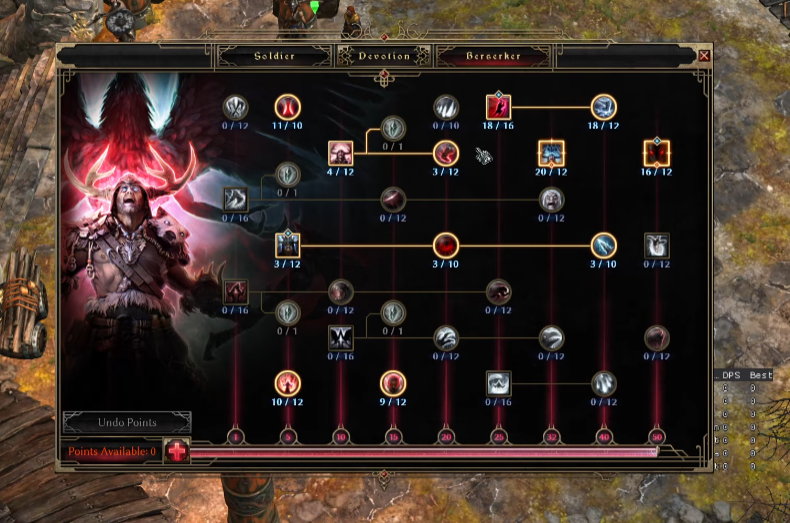
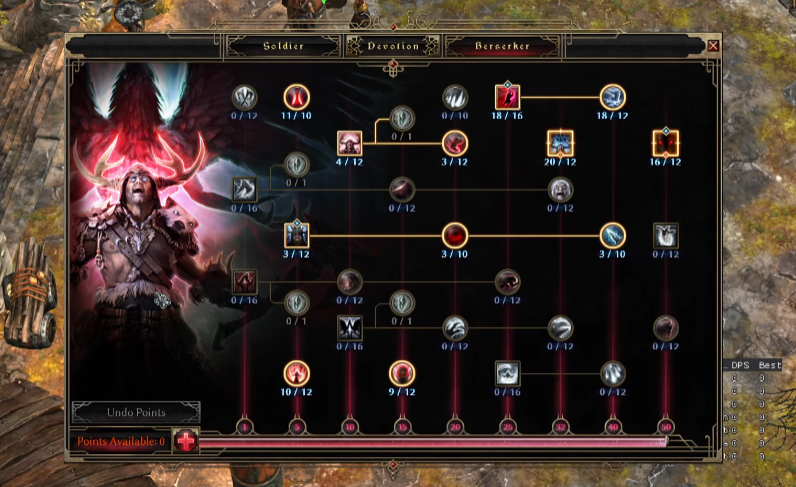
Bleeding, Cold, or Transformation?
Choose the attack system before chasing supporting bonuses.
| Build Path | Core Investment | Main Trap |
|---|---|---|
| Bleeding weapon attacker | Compatible weapon attacks, Leap, Bleeding resistance reduction | Expecting Bleeding ticks to provide life steal |
| Cold weapon attacker | Cold attack support, relevant conversion, Cold resistance reduction | Assuming conversion also converts Bleeding |
| Werewolf or Wereraven | Granted attacks and form-compatible support | Retaining skills that the transformed attacks cannot use |
| Winds of Asterkarn | Channel damage, energy sustain, stationary defense | Ignoring damage lost to forced movement |
We recommend a weapon-attacking route first unless you specifically want to build around transformation or channelling.
Build Bleeding Around Application and Debuffs
The supplied walkthrough centers its Bleeding approach on Leap, Bloodfangs, Bonechilling Cry, and supporting Bleeding modifiers.
We prioritize them by function:
1. Establish a dependable main attack.
2. Develop Leap as a secondary Bleeding source.
3. Add resistance reduction.
4. Secure recovery and mitigation.
5. Expand damage and duration once the rotation works.
Duration buys movement time. When a boss forces you out of melee range, existing Bleeding effects can keep dealing damage while you reposition.
Do not mistake repeated applications from one source for unlimited independent stacks. Adding another meaningful Bleeding source is different from repeatedly refreshing the same one.
Keep Cold Conversion Focused
If you choose Cold, inspect the damage composition of your main attack before investing in conversion. We want conversion that affects the skill doing the work—not an attractive bonus attached to the wrong damage source.
Physical-to-Cold conversion does not convert Bleeding into Frostburn. Bleeding is a separate damage type; Crate's combat guide explains the underlying conversion rules.
Soldier or Occultist?
Compare the support you will use, not the number of appealing skills available.
| Decision | Berserker + Soldier | Berserker + Occultist |
|---|---|---|
| Main reason to choose it | Defensive passives and weapon support | Bleeding debuffs and complementary support |
| Useful tools | Military Conditioning, Field Command, equipment-compatible defenses | Curse of Frailty, Blood of Dreeg line, relevant Bleeding bonuses |
| Critical restriction | Menhir's Will requires qualifying equipment; shield skills require a shield | Possession competes with Berserker exclusive skills |
| Our preferred use | Defense-oriented Bleeding weapon build | Debuff-oriented Bleeding build |
Choose Soldier for its usable defensive package—not for shield bonuses your character cannot activate.
With Occultist, decide on the exclusive skill deliberately. We normally cannot maintain Possession alongside another exclusive, so its defenses are not a free addition to a Berserker exclusive.

2. Fix Onslaught Timing, Boss Damage, and Recovery
If ordinary packs collapse but bosses stall your progress, we check debuff uptime, attack sequencing, and single-target sustain before adding more damage bonuses.
Pack clearing hides weaknesses. Bosses expose them.
Give Onslaught a Defined Payoff
The supplied walkthrough describes Onslaught as the setup for an empowered follow-up. A community mechanics discussion also distinguishes stack generation from release, but contains disputed interpretations of charge terminology.
We therefore avoid assuming that every active skill interacts identically.
For an Onslaught-and-Leap concept:
1. Maintain defensive buffs.
2. Apply relevant resistance reduction.
3. Build Onslaught stacks.
4. Use the intended compatible follow-up.
5. Watch the stack display to confirm the interaction.
6. Reposition and refresh debuffs as needed.
If a dangerous telegraph appears before the payoff, move. Finishing the sequence is optional; surviving is not.
Read Resistance-Reduction Wording
Why does a large planned resistance-reduction total still disappoint? Different reduction categories do not all add together, and inactive debuffs contribute nothing.
Use the exact tooltip wording.
| Tooltip Pattern | General Stacking Rule | Build Implication |
|---|---|---|
| −X% Resistance | Different qualifying sources generally add together | Combine distinct relevant debuffs |
| X Reduced target's Resistances | Multiple effects in this category generally do not add | Identify the strongest applicable effect |
| X% Reduced target's Resistances | Separate category; multiple effects generally do not add | Do not count it as another additive reduction |
Prioritize reliable overlap between compatible sources before chasing a larger theoretical total.
For Bleeding Occultist builds, inspect Curse of Frailty, Bonechilling Cry, and Rend at their equipped ranks. The supplied walkthrough lacks the build export and rank context needed to substantiate its approximate combined reduction figure.
Separate Bleeding Damage From Healing
Bleeding ticks do not provide ordinary attack-damage-converted-to-health recovery. We can still use life steal on a Bleeding weapon character, but healing depends on eligible direct damage.
If you recover well against crowds but struggle against one boss:
- Check how much eligible direct damage your attacks deliver.
- Add or improve dependable healing and regeneration.
- Inspect resistances, armor absorption, and Defensive Ability.
- Treat circuit breakers as emergency protection, not baseline sustain.
The walkthrough identifies Battle Surge, Untamed Rage, and Rallying Cry as defensive tools. Check their current triggers and equipped-rank values rather than copying its unverified percentages.
More emergency procs do not guarantee more rescue windows: several can activate together and then leave you exposed during overlapping cooldowns.
3. Prioritize Devotions, Gear, and Reliable Damage Uptime
If your build depends on equipment you have not found, we keep leveling with a simpler working setup. Develop one damage engine, unlock necessary support, and specialize when the required items arrive.
Choose Devotions by Their Job
The walkthrough recommends these candidates for Bleeding; it does not supply a complete, reproducible affinity route.
| Devotion | Intended Role | What We Check |
|---|---|---|
| Falcon | Early offensive proc | Useful activation and damage during progression |
| Nighttalon | Bleeding-oriented support | Current bonuses and affinity value |
| Huntress | Rend and Bleeding resistance reduction | Reliable single-target activation |
| Wolf | Bleeding-oriented support and utility | Current node benefits versus route cost |
| Ghoul | Emergency support for suitable attackers | Enough eligible direct damage to exploit life steal |
| Behemoth | Recovery through Giant's Blood | Trigger conditions, binding, and recovery needs |
Prioritize dependable Rend uptime; do not force every suggested constellation into the same route.
A devotion binding that excels against crowds may perform poorly against one enemy. We evaluate compatibility, activation opportunities, cooldowns, and whether the normal rotation consistently uses the bound skill.
Buy Function Before Damage Bonuses
Use this order when replacing gear:
1. Protect core resistances and address relevant debuff exposure.
2. Fix outdated armor and recovery weaknesses.
3. Improve the main skill through relevant bonuses or modifiers.
4. Add appropriate Offensive Ability and attack support.
5. Refine conversion and secondary damage.
An item that raises Bleeding damage while opening a serious resistance gap is not automatically an upgrade.
Audit Transformations and Channels Separately
If you switch to Werewolf or Wereraven, inspect the granted attacks and reassess weapon-pool compatibility. Recheck devotion bindings before retaining points in your old attack package.
For Winds of Asterkarn, we judge the build by safe channel uptime, not its fully ramped damage alone. Secure energy sustain, choose a position with an escape route, and interrupt the channel when enemy mechanics demand movement.
Change One Variable at a Time
Use the same durable target and repeat the encounter after each meaningful change. Track damage consistency, debuff coverage, energy, and health recovery—not just the fastest attempt.
Swapping your weapon, exclusive skill, and devotion route simultaneously may improve the build, but it obscures which change helped.
FAQ (Frequently Asked Questions)
These decisions resolve the most common build-planning problems.
What Is the Best Secondary Mastery for a Bleeding Berserker?
We recommend Soldier for defense-oriented weapon builds and Occultist for additional Bleeding resistance reduction. Choose according to equipment compatibility, preferred rotation, and recovery needs rather than treating either pairing as universally superior.
Should We Use Onslaught or Cadence?
Choose the attack that supports your intended rotation; neither is an automatic upgrade over the other. We favor Onslaught for a deliberate setup-and-payoff concept and avoid investing heavily in both without a verified interaction that justifies the cost.
Can We Keep Weapon-Pool Skills When Shapeshifting?
Do not assume your normal weapon-pool setup works with transformed attacks. Check the form's granted skills and compatibility, then remove unsupported investments and reassess devotion bindings.
Why Does Our Berserker Struggle Against Bosses?
Weak debuff uptime, unreliable healing, low attack reliability, or energy shortages can undermine boss damage even when pack clearing feels strong. Test against one durable enemy: confirm resistance reduction first, observe the intended Onslaught payoff, and check whether recovery remains effective without additional targets.

I’m Hiroshi Tanaka, a Japanese Technical Content Writer at GGWTB covering action RPGs, loot farming, and gear builds. My guides connect character progression with stat priorities, gear synergies, and targeted farming routes. A build needs to work before the perfect drop arrives—not just after every slot is filled.
Most Popular Posts
- Grim Dawn Veilwalker Pet Build Guide: Level 100 Necromancer + Berserker Endgame Setup
- Grim Dawn Berserker Guides: Bleed, Cold & Onslaught Builds
- Grim Dawn Chaos Juggernaut Witchblade 1–85 Leveling Guides
- Grim Dawn Classes Mastery Tier List And Best Beginner Builds
Popular Category Lists
- ARC Raiders / (350)
- Grow a Garden / (294)
- CoD: Black Ops 7 / (167)
- Star Citizen / (162)
- MLB 26 / (159)
- Monopoly Go / (152)
- ARK Survival Ascended / (127)
- Steal a Brainrot / (99)
- Blox Fruits / (74)
- Adopt Me / (74)
- Forza Horizon 6 / (72)
- Sailor Piece / (68)
- Grow a Garden 2 / (68)
- Diablo IV / (62)
- CoD: BLACK OPS 6 / (55)
- Aion 2 / (50)
- Path of Exile 2 / (48)
- Monster Hunter Wilds / (46)
- Windrose / (44)
- Donut SMP / (41)