0
Created: Sep 26,2026 | Grow a Garden
Grow a Garden Secret Badge Walkthrough: Carrot Weight & Puzzle Guide

To unlock the secret badge in Grow a Garden, you must feed exactly 8 kg of standard harvested carrots to Green Bean, access the concealed bridge behind the seed shop, and execute a three-part puzzle sequence. Follow this walkthrough to avoid the common lever-trap mistake that resets underground progress.
- Phase 1: Farm Carrots and Unlock the Underground
- Phase 2: Solve the Three Underground Chambers
- FAQ (Frequently Asked Questions)
- Can I use Golden, Shocked, or event-variant carrots for Green Bean?
- Why does the invisible bridge behind the seed shop cause me to fall?
- Does the puzzle order change across servers?
- How do I know if the flora sequence reset after a misclick?
- Do I need to claim anything in the event hub after getting the badge?
Phase 1: Farm Carrots and Unlock the Underground
Before heading into the puzzle chambers, prepare your inventory:
- Purchase basic Carrot Seeds from the main merchant. Mutated, seasonal, or event-specific carrot variants will not register with Green Bean.
- Farm carrots until your cumulative inventory weight reaches at least 8 kg. Individual carrot count does not matter; weight calculation is the sole trigger.
- Locate the Green Bean NPC stationed near the gear shop and pet-mutation enclosure.
- Interact and choose Give all carrots. The system consumes only the necessary 8 kg threshold; extra weight remains safely in your bag.
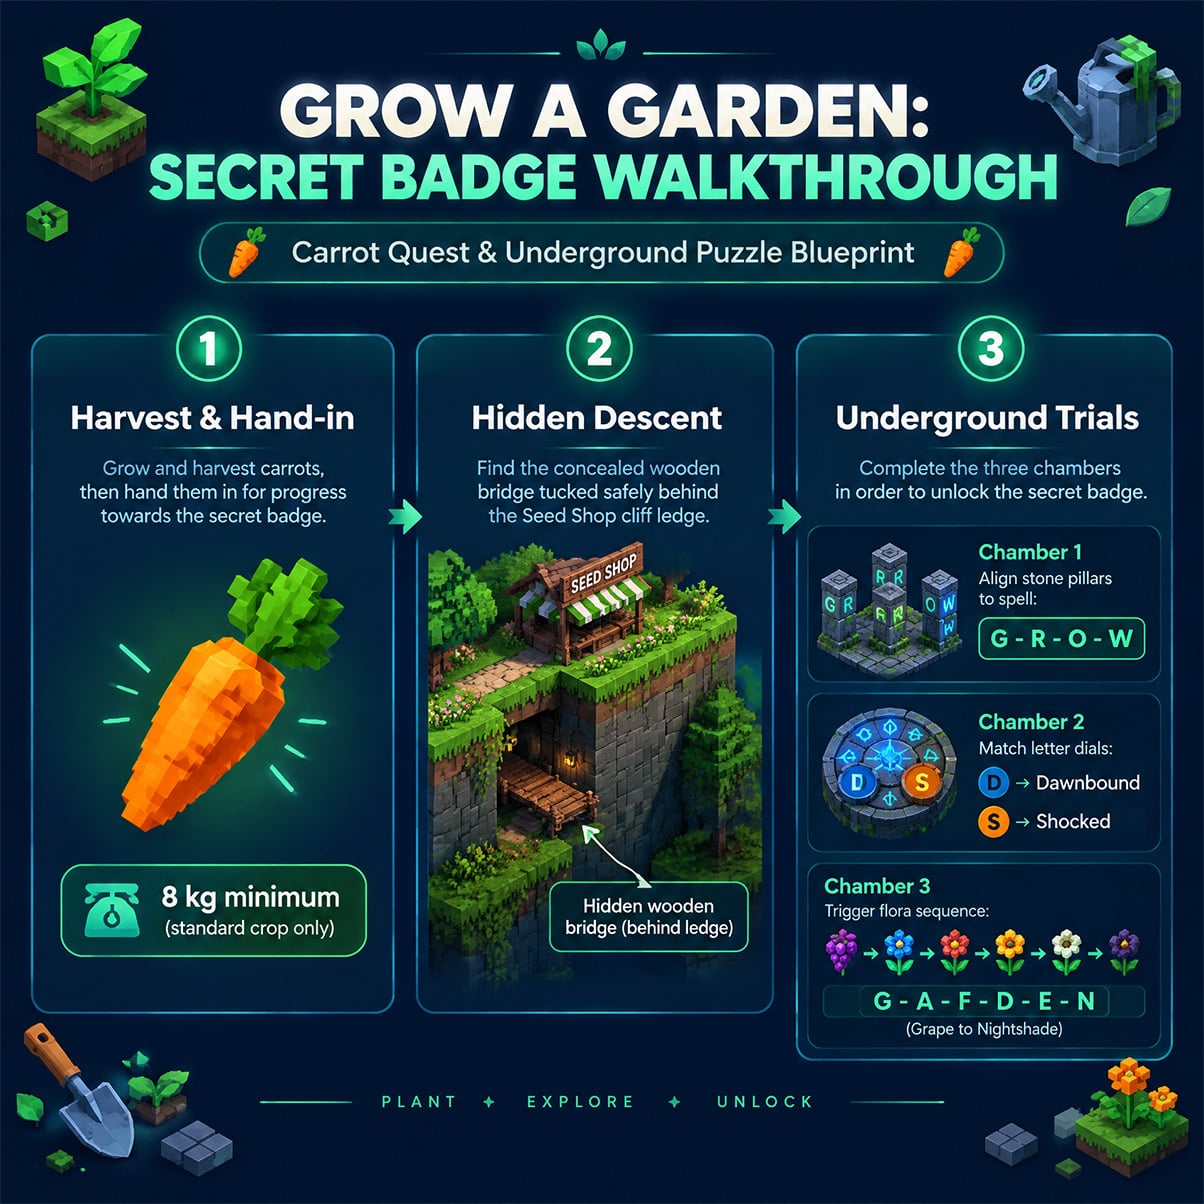
Head directly behind the exterior wall of the Seed Shop. Walk to the island's edge and pan your camera down to locate the recessed rock ledge and the invisible truss bridge. Walk off the edge directly onto the lower beam—jumping introduces physics jitter that can cause you to clip past the collision box into the void.
Phase 2: Solve the Three Underground Chambers
The subterranean trial consists of three sequential puzzle rooms. Each completed stage lowers an iron gate to the next area.
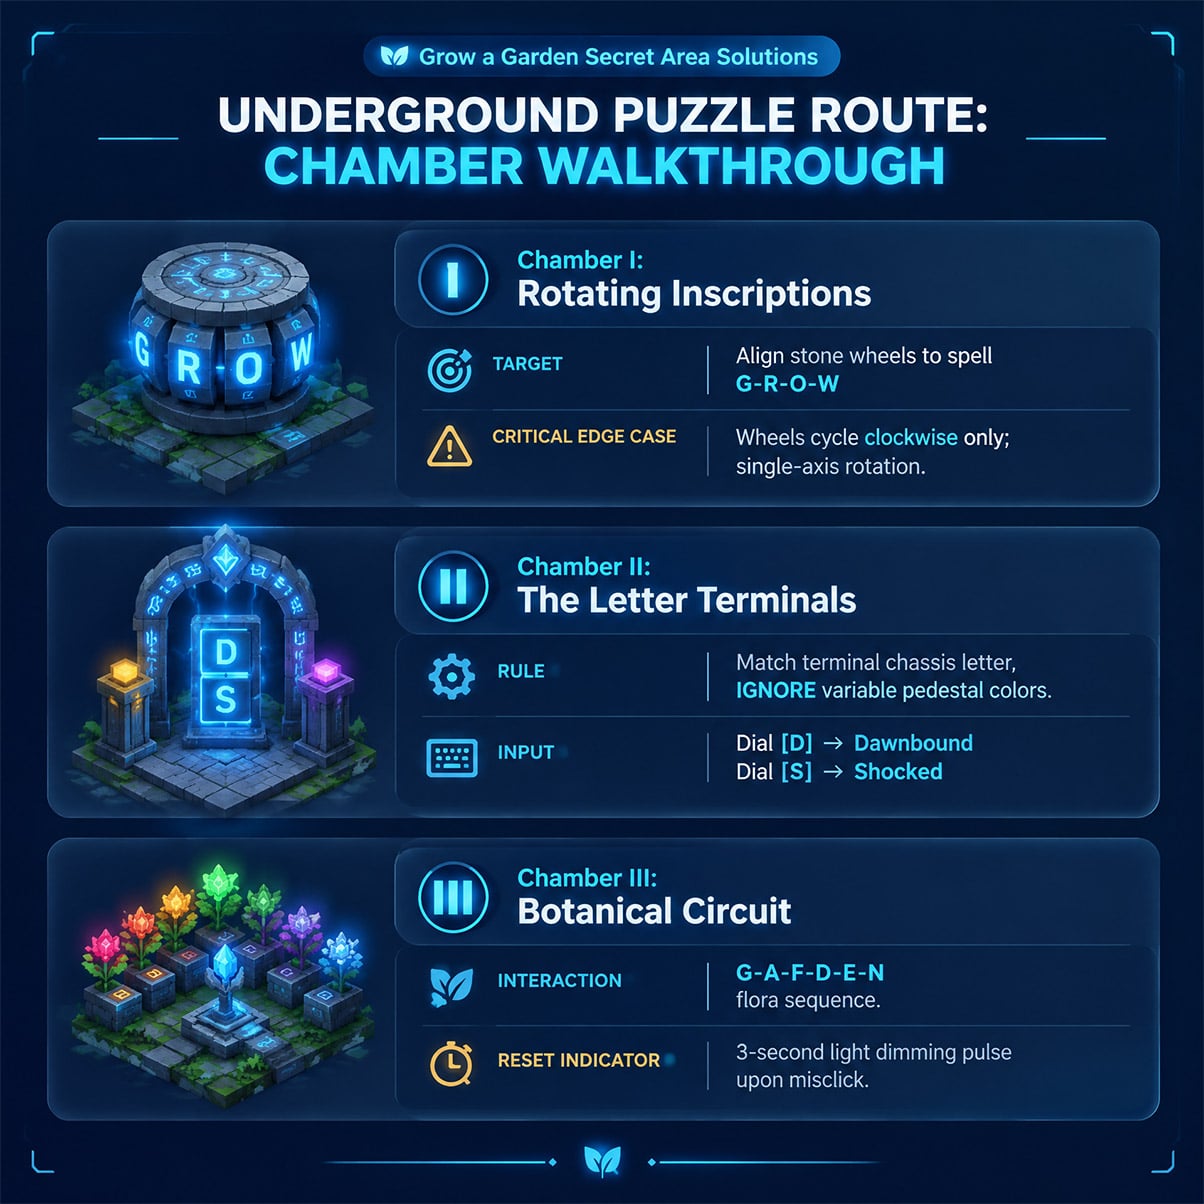
Use this failure-recovery matrix to troubleshoot input errors:
| Puzzle Stage | Correct Interaction | Fail State / Edge Case | Recovery Action |
|---|---|---|---|
| 1. Rotating Pillars | Cycle the four stone wheels until the horizontal inscription spells G - R - O - W. | One wheel misaligned by 90 degrees leaves the chamber gate locked. | Rotate past the target letter fully; wheels only cycle clockwise. |
| 2. Letter Displays (The Trap) | Match D to Dawnbound and S to Shocked using the wall terminal wheels. | Trusting guide colors (red/blue). Lever colors randomize per server instance. | Ignore terminal chassis colors entirely; read the etched letter above each terminal slot. |
| 3. The GARDEN Flora Run | Interact with the six flower switches in strict spelling order: Grape → Apple → Foxglove → Dragon Fruit → Egg Fruit → Nightshade. | Hitting any switch out of sequence emits a dull audio thud and locks input. | Wait 3 seconds for the plants to stop vibrating, then restart from Grape. |
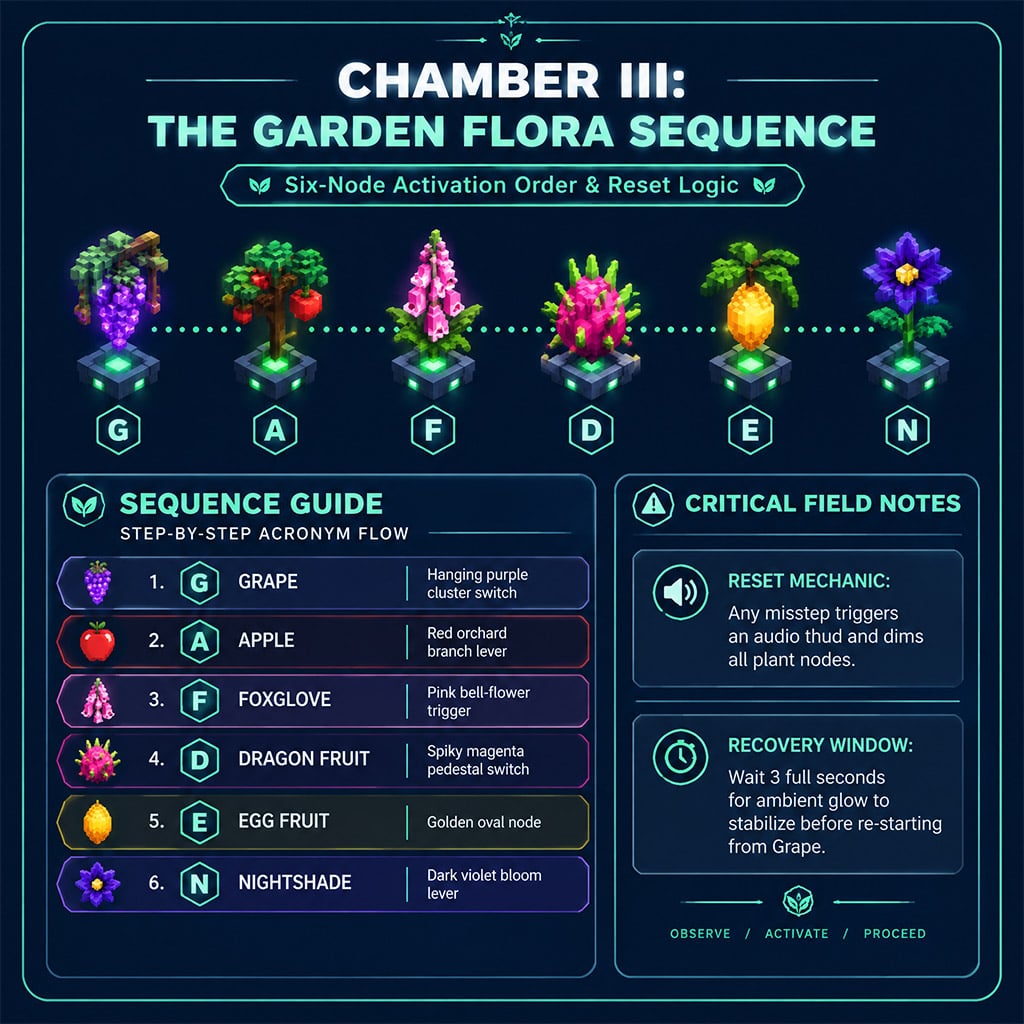
Once the Nightshade switch activates, the final chamber gate drops, and the system immediately generates the official secret badge completion pop-up on your screen.
FAQ (Frequently Asked Questions)
Can I use Golden, Shocked, or event-variant carrots for Green Bean?
No. Green Bean's quest checks strictly for standard, unmutated carrots grown from regular carrot seeds. Mutated traits or holiday variants will fail the interaction check and remain in your inventory.
Why does the invisible bridge behind the seed shop cause me to fall?
The bridge collision mesh activates only after Green Bean's dialogue confirms the 8 kg carrot turn-in. If you fall through, return to the surface, confirm Green Bean's dialog is exhausted, and drop straight down without sprinting or jumping.
Does the puzzle order change across servers?
The puzzle sequence is always the rotating pillars, the Dawnbound/Shocked terminal, and the GARDEN flower sequence. However, the pedestal colors on the second puzzle swap between server instances, which is why matching by letter (D and S) is the only reliable method.
How do I know if the flora sequence reset after a misclick?
An incorrect switch press triggers an immediate low-pitched audio cue and causes all six plant nodes to dim. Once the ambient glow returns after roughly three seconds, the circuit is fully reset and ready for the Grape input.
Do I need to claim anything in the event hub after getting the badge?
The secret badge registers to your platform profile immediately upon entering the final room. If the badge is tied to an active seasonal event hub, open the game's event dashboard from the main menu and hit the manual claim button to collect any accompanying cosmetics.

I’m Chloe Whitaker, a British Fact Checker at GGWTB focused on Currency farming, pet collecting, and management games, alongside Minecraft sandbox content. I check the details that shape your next move: growth timers, unlock requirements, and whether a reward is still obtainable. An old event tip shouldn’t cost you an evening chasing a pet you can no longer get.
Most Popular Posts
- Grow a Garden Secret Badge Walkthrough: Carrot Weight & Puzzle Guide
- Grow a Garden Get Secret Seeds & Rare Pets Guides: DLC Codes + Trading Guide
- Grow a Garden Enfield Guide: Everfallen Roll Rules & Level Loss
- Grow a Garden Moon Harvest Part 4 Guide: Gear Odds, Reset Rewards, Cornling Strategy, New Seeds
- Grow a Garden Pet Mutations Guide: Best Abilities, Costs & Odds
- Grow a Garden: Beanpod Chest Farming and Elder Beanstalk Guides
Popular Category Lists
- ARC Raiders / (366)
- Grow a Garden / (298)
- CoD: Black Ops 7 / (167)
- Star Citizen / (166)
- MLB 26 / (159)
- Monopoly Go / (153)
- ARK Survival Ascended / (130)
- Steal a Brainrot / (100)
- Adopt Me / (75)
- Blox Fruits / (74)
- Forza Horizon 6 / (72)
- Sailor Piece / (68)
- Grow a Garden 2 / (68)
- Diablo IV / (62)
- Aion 2 / (61)
- CoD: BLACK OPS 6 / (55)
- COD: Modern Warfare 4 / (51)
- Maplestory Classic / (49)
- Path of Exile 2 / (48)
- Monster Hunter Wilds / (46)