0
0 Created: Oct 15,2026 | Grow a Garden
Grow a Garden Pet Mutations Guide: Best Abilities, Costs & Odds

Rolling the wrong pet mutation in Grow a Garden will wipe out your existing passive bonus, drain 500 million Sheckles, and reset your Age 50+ pet back to Age 1. To maximize your farm's output, prioritize Rainbow or Nightmare for raw passive ability scaling, Inverted or Mega for rapid leveling, and IronSkin to counter fruit theft in public servers.

- Mutation Machine Rules & Pre-Roll Checklist
- Core Machine & Passive Boost Mutations
- Event Shards & Crop-Application Mutations
- Specialist Support, Cooldown & High-Risk Mutations
- Critical Mechanics to Watch
- Decision Matrix: Which Mutation Should You Run?
- FAQ (Frequently Asked Questions)
- What is the best pet mutation in Grow a Garden?
- Can pet mutations stack on the same pet?
- Does the Mutation Machine reset pet age to 1?
- What is the theft-prevention mutation in Grow a Garden?
- Why is my Hyper Hunger pet mutation not boosting my stats?
Mutation Machine Rules & Pre-Roll Checklist
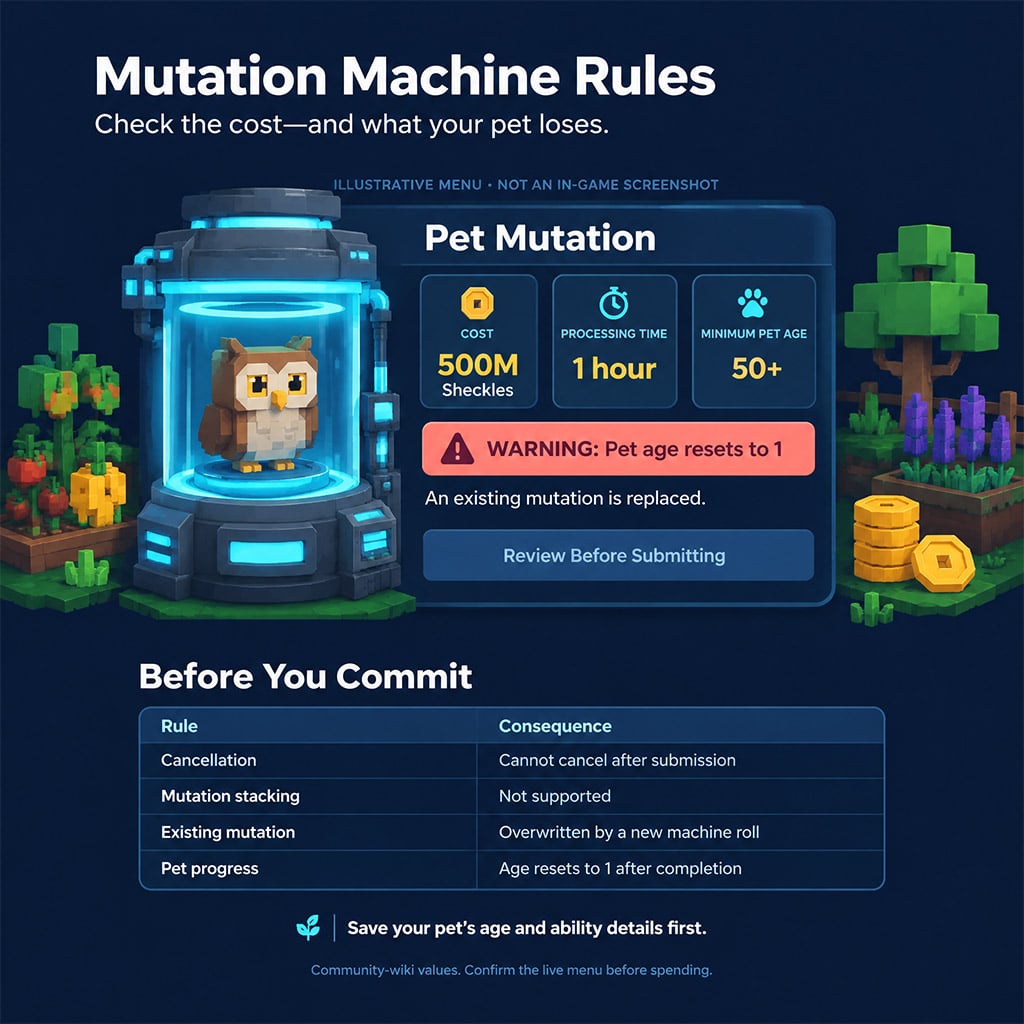
The Mutation Machine executes a complete overwrite, not an additive upgrade. Submitting an already mutated pet permanently deletes its current trait.
| Machine Parameter | Verified Requirement & Consequence |
|---|---|
| Minimum Pet Eligibility | Age 50+ |
| Roll Cost | 500,000,000 Sheckles per attempt |
| Processing Duration | 60 Minutes (1 real-time hour) |
| Post-Roll Pet Age | Resets to Age 1 immediately upon completion |
| Cancellation Policy | Locked once submitted; cannot be aborted |
| Stacking Mechanics | Zero stacking; new roll overwrites existing machine or shard mutations |
Lock your high-tier pets before approaching the machine. Never roll on a pet whose base ability carries your farm unless you have a backup active in your garden to cover the one-hour processing downtime and subsequent age rebuild.
Record your baseline stats before confirming a roll:
1. Screenshot the exact ability tooltip at Age 50+ to measure how much age scaling you are temporarily sacrificing.
2. Log current XP per second and hunger decay rates so you can accurately verify whether flat XP mutations outperform percentage modifiers on that specific pet species.
Core Machine & Passive Boost Mutations
When rolling the standard Mutation Machine or applying core achievement shards, you are competing against heavily weighted RNG. Shiny and Inverted account for nearly half of all machine outcomes.
| Mutation | Acquisition Source | Machine Odds | Verified Effect & Scaling Trade-Off |
|---|---|---|---|
| Shiny | Mutation Machine | 32.15% | +30% Pet XP/sec. Baseline leveling filler; replace once capped. |
| Inverted | Mutation Machine | 16.08% | +50% Pet XP/sec. Strongest common percentage XP scaler. |
| Frozen | Mutation Machine | 9.65% | Variable timer; 20–30% chance to apply Frozen to nearby crops. |
| Windy | Mutation Machine | 9.65% | Variable timer; 20–30% chance to apply Windstruck to nearby crops. |
| Golden | Machine / Gold Shard / Divine | 6.43% | +10% Passive Boost to the pet's native ability values. |
| Tiny | Mutation Machine | 6.43% | +6.5 XP/sec; 20% slower hunger drain; shrinks pet hitbox/model. |
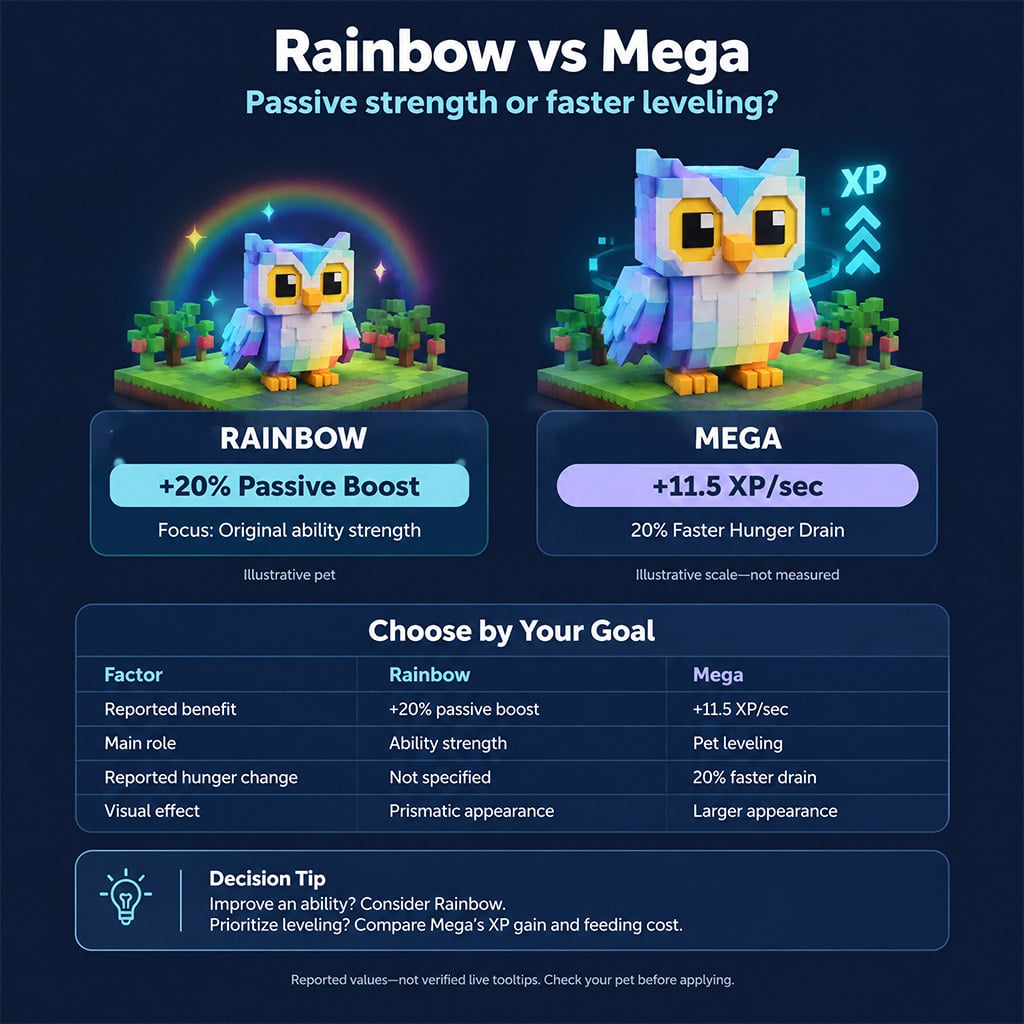
| Mega | Mutation Machine | 6.43% | +11.5 XP/sec; 20% faster hunger drain; enlarges pet model. |
| Rainbow | Machine / Rainbow Shard / Prismatic | 3.22% | +20% Passive Boost. Top-tier standard scaler for end-game passives. |
| Aurora | Mutation Machine | 3.22% | Every 37 mins, 33% chance to apply Aurora to nearby fruit. |
| Radiant | Mutation Machine | 3.22% | Periodic light pulse that advances nearby plant growth/mutation state. |
| Shocked | Mutation Machine | 3.22% | During thunderstorms, 25.2% chance every 50 secs to attract lightning. |
| Ascended | Mutation Machine | 0.32% | Every 6 hours, 75.3% chance to apply Dawnbound to a fruit. |
| Silver | Silver Shard / Achievements | N/A (Shard) | +5% Passive Boost. Entry-level placeholder. |
Calculate the flat vs. percentage XP crossover before keeping Shiny or Inverted. If your pet's base XP gain is low, Mega (+11.5 flat XP/sec) or Tiny (+6.5 flat XP/sec with reduced feeding maintenance) will outpace Inverted (+50% XP) until your garden is stacked with external base-XP multipliers.
Event Shards & Crop-Application Mutations
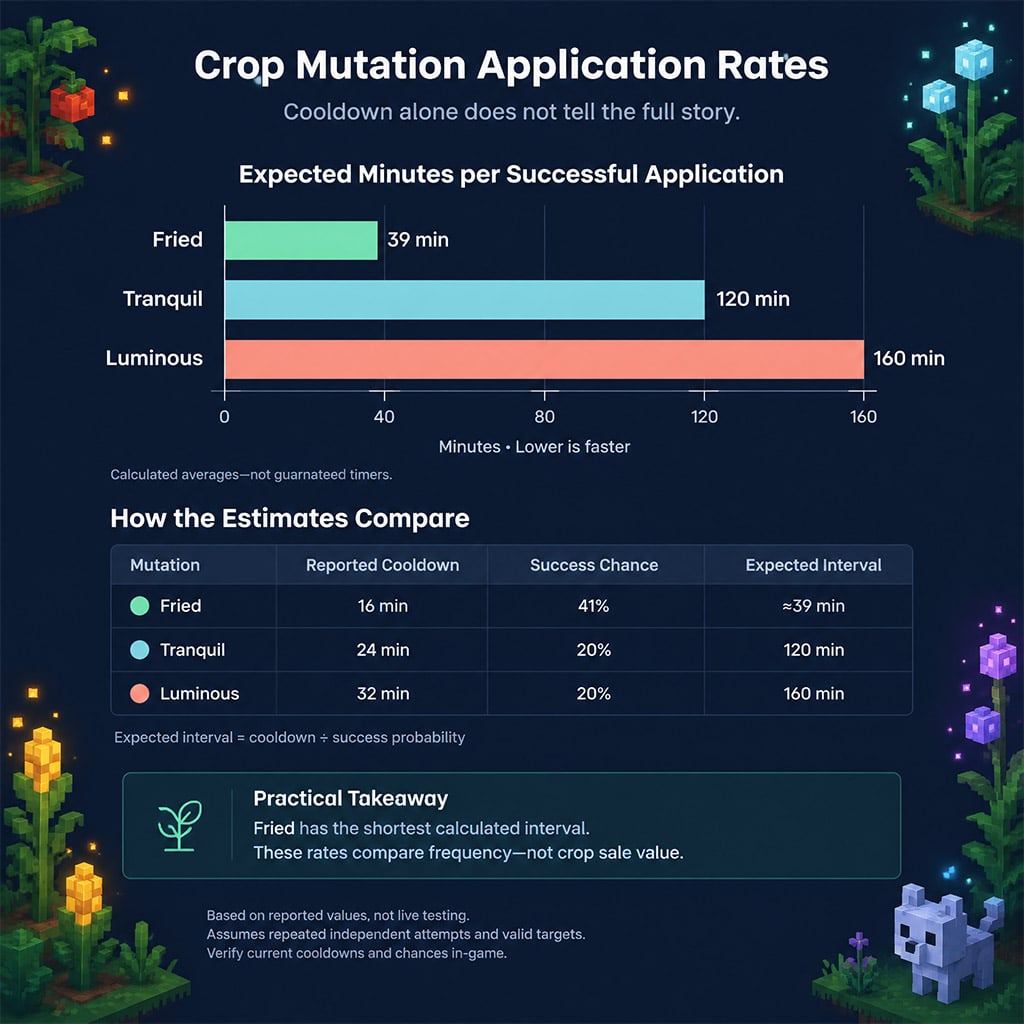
Crop-mutating pets are only as good as their Effective Application Rate (Cooldown divided by Trigger Probability). A short cooldown with a low proc chance wastes garden slots.
| Mutation | Shard / Event Source | Trigger Cycle | Proc Chance & Special Mechanics |
|---|---|---|---|
| Fried | Cooking Shard | Every 16 mins | 41% chance to apply Fried (~1 success per 39 mins). High efficiency. |
| Tranquil | Zen Shard | Every 24 mins | 20% chance to apply Tranquil (~1 success per 120 mins). |
| Corrupted | Corrupted Zen Shard | Every 24 mins | 20% chance to apply Corrupted (~1 success per 120 mins). |
| Aromatic | Cooking Shard | Every 24 mins | 20% chance to apply Aromatic (~1 success per 120 mins). |
| Glimmering | Fairy Shard | Every 24 mins | 20% chance to apply Glimmering (~1 success per 120 mins). |
| Luminous | Fairy Shard | Every 32 mins | 20% chance to apply Luminous (~1 success per 160 mins). |
| Nocturnal | Christmas Shard | Every 11 mins | Advances random fruit 12 hours; cooldown ticks 2x faster at night. |
| Jolly Decorator | Ice Golem | Every 4 mins | Applies Ornamented to a random fruit. High-frequency applicator. |
| Soulflame | Headless Horseman | Every 15 mins | +60% XP; 20% chance for Burnt (secondary roll for Flaming). |
| Bountiful | Harvest Moon | On Harvest | +15% XP; 10% chance to duplicate collected Night fruit. |
| Lunarbound | Harvest Moon | On Harvest | +20% XP; 5% chance to apply Moonbeam upon crop collection. |
Prioritize Fried and Jolly Decorator for active mutation farming. Because failed trigger rolls still consume the full cooldown cycle, Fried (averaging one successful application every 39 minutes) generates more than triple the mutation volume of Tranquil, Aromatic, or Glimmering (120 minutes per average hit).
Specialist Support, Cooldown & High-Risk Mutations
Boss drops and seasonal shards introduce complex mechanics like shared cooldown pools, fruit sacrifices, and hunger-gated passives. Mismanaging these traits will actively penalize your progression.
| Mutation | Source | Primary Boost | Operational Mechanics & Edge-Case Risks |
|---|---|---|---|
| IronSkin | Legacy Machine / Special | Defense | 35–45% chance to retain a copy of fruit stolen by other players[1], [3]. |
| Nightmare | Headless Horseman | +22% Passive | Increases pet model size; zero hunger penalty. Superior to Rainbow. |
| Blossoming | Elder Candy Blossom | +23% Passive | Grants +25 XP/sec alongside passive scaling. Dual-purpose powerhouse. |
| Hyper Hunger | Christmas Shard | +30% Passive | Deactivates below 25% hunger; accelerates hunger drain significantly. |
| Starry | Harvest Moon | +25% Passive | Every 2 mins, cuts random cooldown by 40s per Starry pet in garden. |
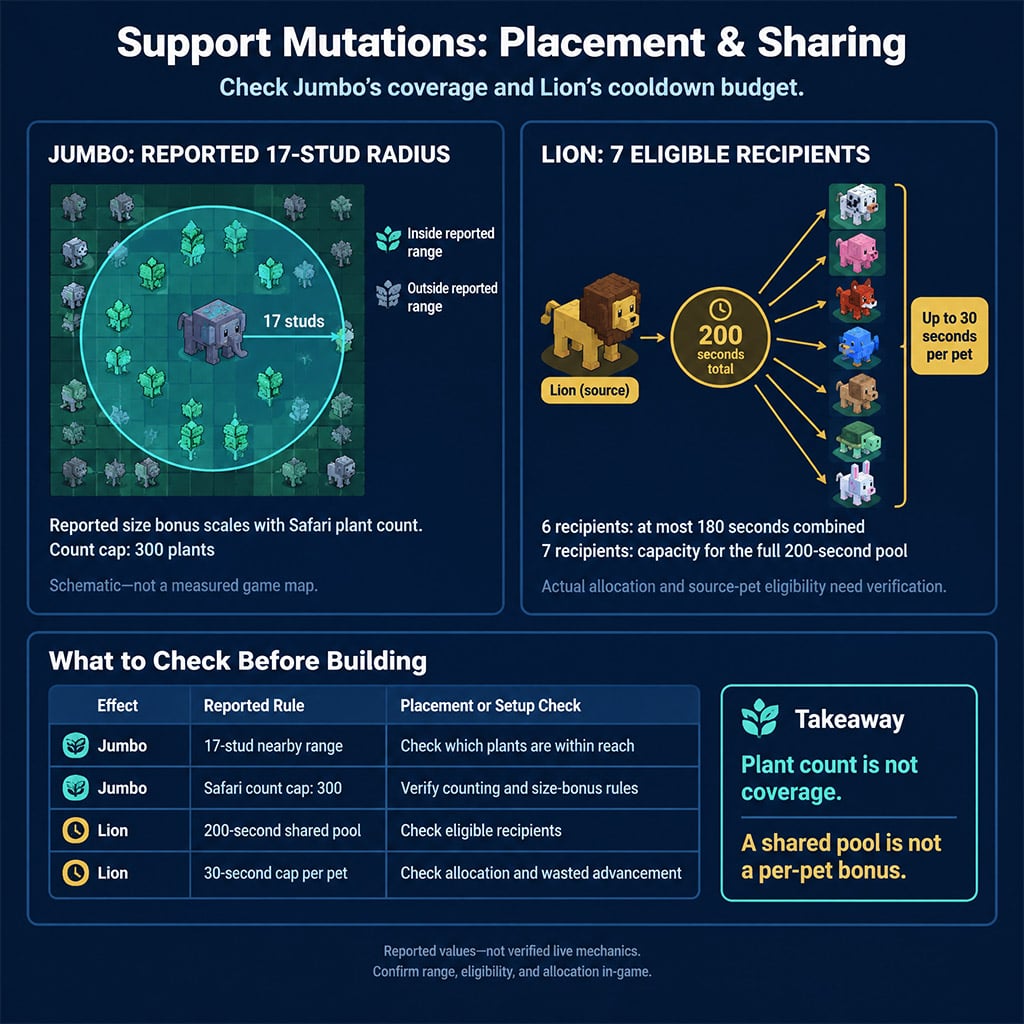
| Lion | Lion Shard (Safari) | +7% Passive | Every 19 mins, distributes 200s cooldown reduction (max 30s/pet). |
| Rhino | Rhino Shard (Safari) | +4.5% Passive | Every 20 mins, halves egg hatch timer or applies Mirage. Cannot be mimicked. |
| Merry Nursery | Ice Golem | Egg Support | Every 20 secs, cuts 55s off longest egg (+0.2s per Christmas plant). |
| Forger | Smithing Shard | +7% Passive | Every 6 mins, advances active crafting timers by 80 seconds. |
| Threshing | Harvest Moon | +15% Passive | 12% chance to prevent consumption of Reclaimer or Harvest Tools. |
| Jumbo | Jumbo Shard (Safari) | +50% XP | +0.01x plant size per Safari plant within 17 studs (caps at 300 plants). |
| Dreadbound | Headless Horseman | +8 XP/sec | Flat XP tick; outclasses Shiny on low-base-XP pets early on. |
Critical Mechanics to Watch
The Lion Cooldown Cap Trap: Lion's 200-second cooldown reduction pool caps at 30 seconds per eligible pet. Running fewer than 7 active cooldown-dependent pets wastes the overflow reduction.
Hyper Hunger Uptime Math: A 30% passive boost that drops offline whenever hunger dips below 25% requires constant manual feeding or automated feeder setups. If your pet sits starving for a third of your session, your effective boost drops to 20%—making Nightmare (22% unconditional) or Blossoming (23% unconditional) strictly better for AFK play.
Sacrifice & Drain Hazards: Avoid applying Nutty (Chubby Chipmunks) to high-age pets, as failed 21% double-cast rolls risk level loss. Similarly, treat Peppermint (consumes 12 Christmas fruits every 8 minutes—90 fruits/hour) and Everchanted/Everfallen (consumes 7+ mutation fruits every 8 minutes) purely as end-game sinks when you have automated surplus crop production.
Decision Matrix: Which Mutation Should You Run?
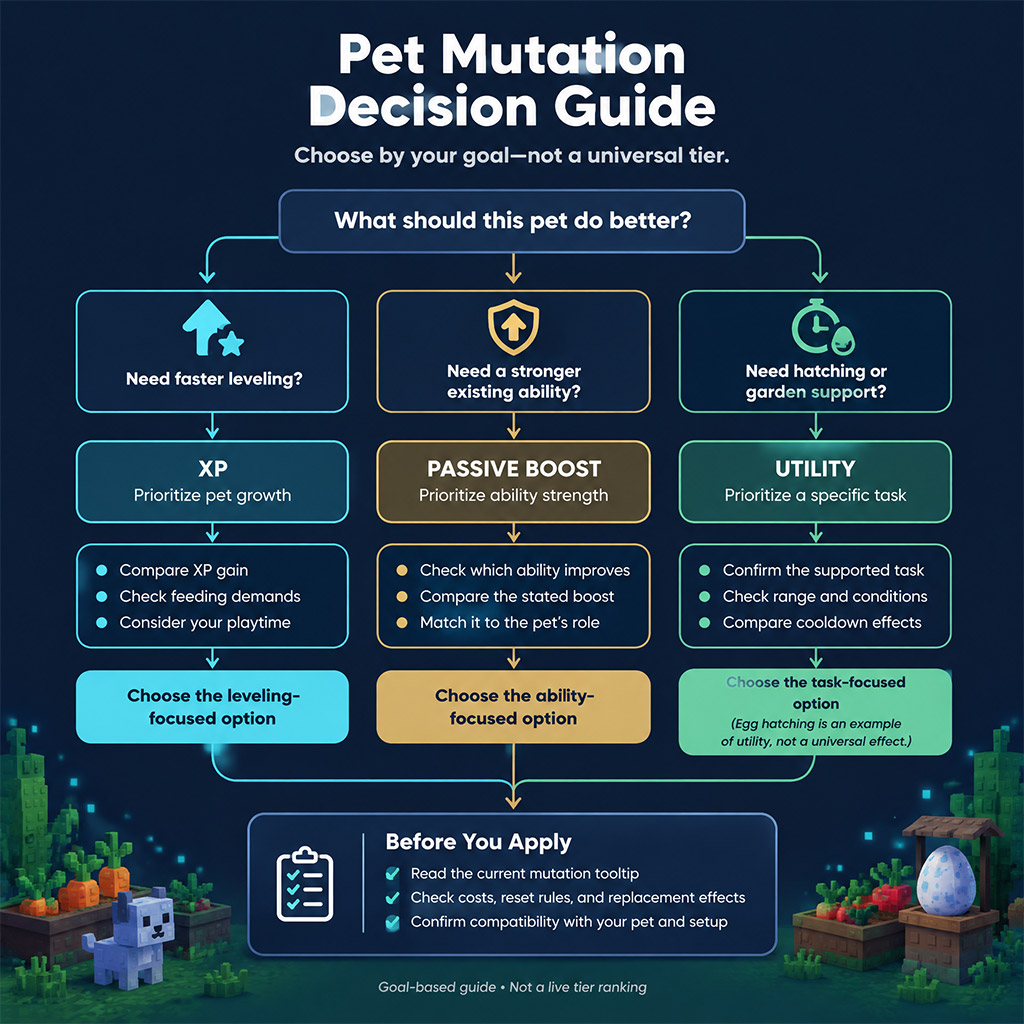
Stop chasing low-probability rolls that do not solve your current farm bottleneck. Match your pet's base role to the exact mutation category below.
| Farm Bottleneck | Best-in-Slot Target | Budget / High-Odds Alternative | Execution Rule |
|---|---|---|---|
| Single-Pet Leveling | Blossoming (+25 XP/s) or Soulflame (+60% XP) | Inverted (+50% XP) or Mega (+11.5 XP/s) | Use flat XP (Mega/Dreadbound) at Age 1; swap to percentage (Inverted) once base XP scales up. |
| AFK Leveling (No Food) | Tiny (+6.5 XP/s, -20% drain) | Shiny (+30% XP, normal drain) | Never run Mega or Giant Bean while AFK unless hunger no longer gates XP ticks on your patch. |
| Maximizing Native Passives | Blossoming (23%) or Nightmare (22%) | Rainbow (20%) or Golden (10%) | Skip Hyper Hunger (30%) unless you actively maintain >25% hunger uptime. |
| Egg Hatch Speed | Merry Nursery (-55s every 20s) | Rhino (Halves timer every 20m) | Stack Christmas plants around Merry Nursery to scale the +0.2s per-plant bonus. |
| Ability Cooldown Cycling | Starry (Stackable -40s/2m) | Lion (200s pool) or Oxpecker (-7.5s) | Run Starry in multiples; only use Lion if 6–7 active pets need simultaneous reduction. |
| Public Server Protection | IronSkin (35–45% theft refund) | Private Server (Free/Paid) | Essential when growing high-multiplier giant crops in public lobbies[1], [3]. |
FAQ (Frequently Asked Questions)
What is the best pet mutation in Grow a Garden?
Blossoming (+23% passive boost and +25 XP/sec) and Nightmare (+22% unconditional passive boost) are the strongest all-around mutations for scaling pet abilities. For standard Mutation Machine rolls, Rainbow (+20% passive boost) is the top prize for ability scaling, while Inverted (+50% XP) and Mega (+11.5 XP/sec) are best for leveling.
Can pet mutations stack on the same pet?
No, pet mutations never stack. Rolling a pet in the Mutation Machine or applying a mutation shard completely overwrites its existing mutation. However, team-wide support passives like Starry or Christmas Rally will stack their buffs across multiple pets active in your garden at the same time.
Does the Mutation Machine reset pet age to 1?
Yes, every completed roll in the standard Mutation Machine resets your Age 50+ pet back to Age 1. Only submit a high-age pet if the new mutation's passive multiplier or XP boost outweighs the time required to level the pet back to its peak age bracket.
What is the theft-prevention mutation in Grow a Garden?
The anti-theft mutation is IronSkin[1]. When another player steals a crop from your garden, an active IronSkin pet gives you a 35% to 45% chance to automatically receive a duplicate of the stolen fruit[1], [3].
Why is my Hyper Hunger pet mutation not boosting my stats?
Hyper Hunger provides a massive 30% passive boost, but the effect completely disables the moment your pet's hunger bar drops below 25%. Because this mutation also accelerates hunger drain, you must feed the pet constantly to keep the buff active.

I’m Tomás Ferreira, a Portuguese SEO Content Editor at GGWTB covering Roblox competitive games, tower defense, and resource-control modes. I organize guides around the decisions that matter in a short match: when to push, where to defend, and whether to spend resources now or save for an upgrade. The goal is to make the answer easy to find before the next round starts.
Most Popular Posts
- Grow a Garden Secret Badge Walkthrough: Carrot Weight & Puzzle Guide
- Grow a Garden Get Secret Seeds & Rare Pets Guides: DLC Codes + Trading Guide
- Grow a Garden Enfield Guide: Everfallen Roll Rules & Level Loss
- Grow a Garden Moon Harvest Part 4 Guide: Gear Odds, Reset Rewards, Cornling Strategy, New Seeds
- Grow a Garden: Beanpod Chest Farming and Elder Beanstalk Guides
- Grow a Garden Arctic Fox Guide: Best AFK Setup for Seeds, Gears, Eggs & Pet XP
Popular Category Lists
- ARC Raiders / (349)
- Grow a Garden / (294)
- CoD: Black Ops 7 / (167)
- Star Citizen / (162)
- MLB 26 / (159)
- Monopoly Go / (152)
- ARK Survival Ascended / (127)
- Steal a Brainrot / (99)
- Blox Fruits / (74)
- Adopt Me / (74)
- Forza Horizon 6 / (72)
- Sailor Piece / (68)
- Grow a Garden 2 / (68)
- Diablo IV / (62)
- CoD: BLACK OPS 6 / (55)
- Aion 2 / (49)
- Path of Exile 2 / (48)
- Monster Hunter Wilds / (46)
- Windrose / (44)
- Donut SMP / (41)