0
0 Created: Aug 22,2026 | Mistfall Hunter
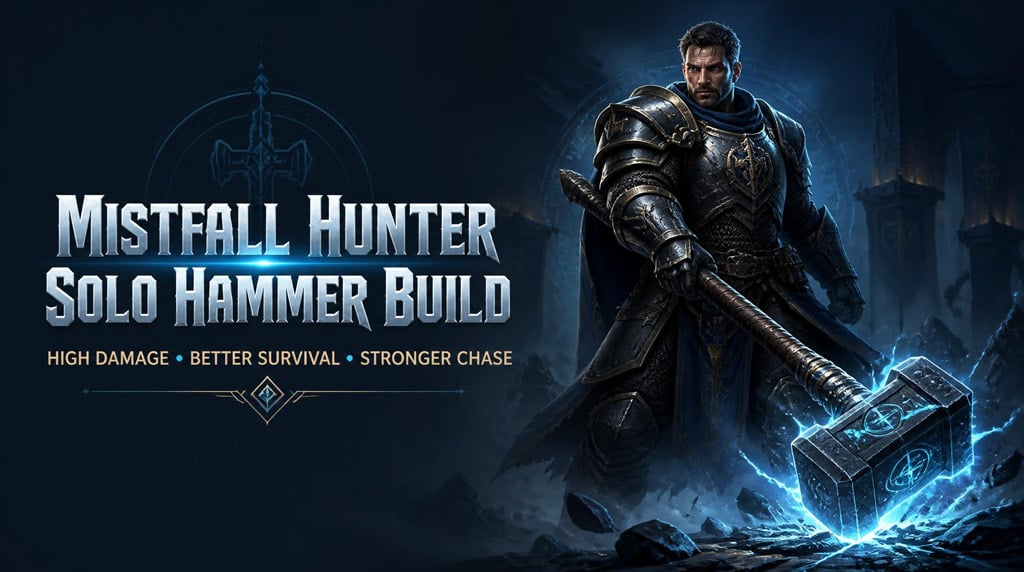
Mistfall Hunter Solo Hammer Build Guide: Best Mercenary Setup for Damage, Survival, and Chase

The solo Hammer Mercenary is not slow when built correctly. It is a pressure weapon. You bait attacks, dodge out, punish with left-click into right-click, then use Hammer Dash to stop escapes. This build keeps Hammer's burst damage while adding enough survivability to survive stuns, bad trades, and fast classes trying to kite you.
- Best Solo Hammer Build Overview
- Best Hammer Skills for Solo Mercenary
- Hammer Dash
- Earth Shaker
- Best Hammer Talents for Solo Play
- Why Relentless Advance Matters
- Why Leap Step Is Core
- Gear, Stats, and Affixes
- Target Stats
- Best Affixes
- Why Resilience Is Non-Negotiable
- Core Hammer Combo and Combat Loop
- How to Use Hammer Dash Correctly
- How to Use Earth Shaker for Pressure
- Solo Matchup Tips
- Against Fast Classes
- Against Burst and Control Classes
- Against Other Bruisers
- Common Hammer Mistakes
- Practical Hammer Game Plan
- FAQ
- What is the best solo Hammer build in Mistfall Hunter?
- Why is Resilience so strong for Hammer Mercenary?
- Should I use Hammer Dash aggressively or defensively?
- How do I land Earth Shaker more often?
- What is the main Hammer combo for beginners?
- Summary
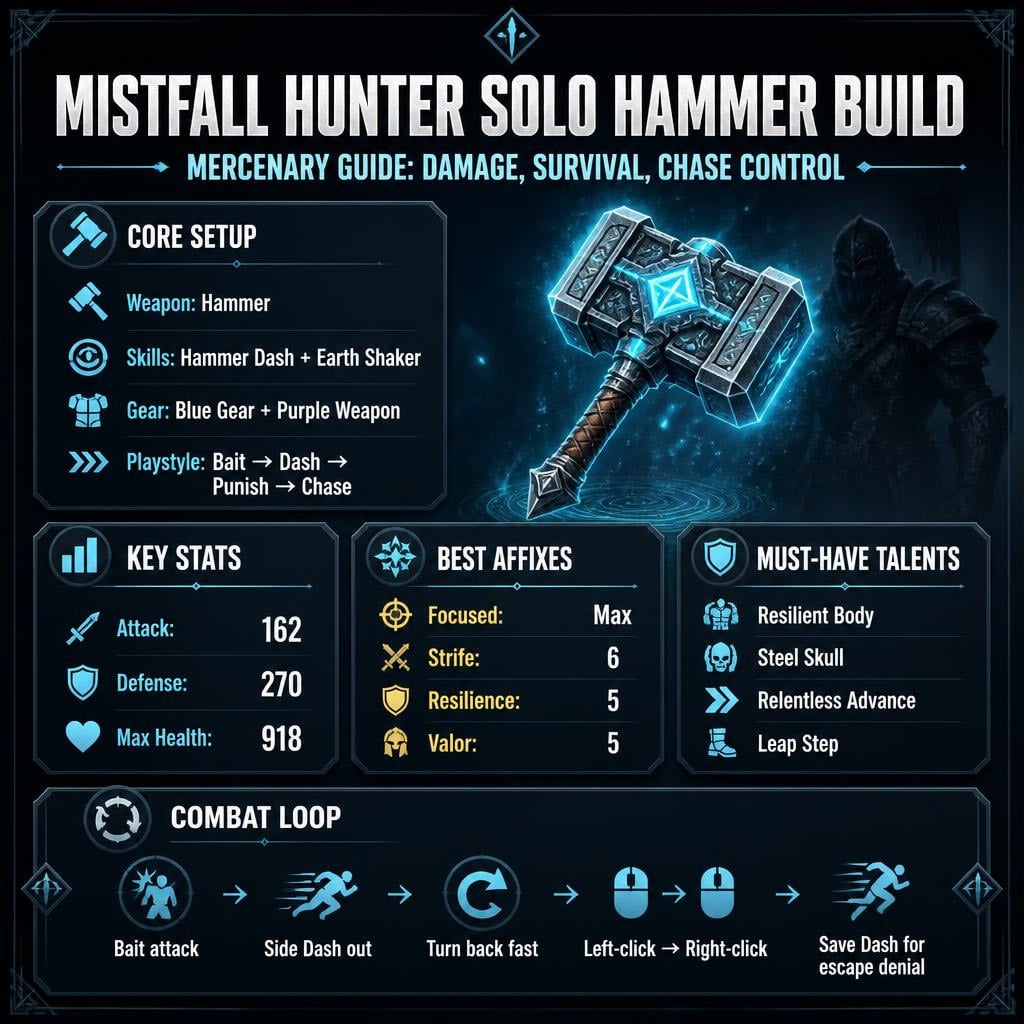
Best Solo Hammer Build Overview
This setup is built for solo fights, not passive tanking. You win by forcing mistakes and punishing recovery windows.
| Slot | Best Choice | Purpose |
|---|---|---|
| Weapon | Hammer | High punish damage, strong reach |
| Skills | Hammer Dash + Earth Shaker | Chase, pressure, defensive control |
| Gear | Blue gear + Purple weapon | Efficient damage-to-survival balance |
| Core Affixes | Focused, Strife, Resilience, Valor | Damage, durability, control resistance |
| Playstyle | Bait, dodge, punish, chase | Best rhythm for solo duels |
The build feels rough if you spam attacks. It becomes nasty once you learn spacing.
Best Hammer Skills for Solo Mercenary
Hammer Dash
Hammer Dash is mandatory. It fixes Hammer's biggest weakness: getting kited.
Use it for:
- Chasing low-HP enemies
- Dodging out after baiting attacks
- Punishing players who try to heal
- Escaping after a missed engage
- Re-entering fights from an angle
Do not only Dash forward. That gets predictable.
Use side Dash, back Dash, and diagonal Dash. The best Hammer players use Dash to reset spacing, not just to sprint at someone.
Earth Shaker
Earth Shaker is your pressure button.
It is not only for damage. It forces enemies to dodge, backpedal, or panic.
Use Earth Shaker when:
- The enemy is holding dodge.
- You need safer pressure.
- You want to bait movement.
- You want to scare someone off a heal.
- You need defensive presence before trading.
With Leap Step, Earth Shaker gets much stronger because you can move, jump, and dodge while charging.
That means you are not locked in place. You are threatening, moving, and reading the enemy at the same time.
Best Hammer Talents for Solo Play
This build prioritizes survivability first, then mobility and punish consistency.
| Talent Area | Pick | Why It Matters |
|---|---|---|
| Defense | Resilient Body | Better survival in extended fights |
| Defense | Steel Skull | More critical damage resistance |
| Survival Stack | Indomitable Will | Adds durability when fights drag |
| Dash Tree | Full Dash upgrades | More range, better chase, Super Armor value |
| Weapon Tree | Hammer Mastery to Relentless Advance | Better movement during Hammer pressure |
| Earth Shaker Support | Leap Step | Move, jump, and dodge while charging |
Why Relentless Advance Matters
Hammer without movement support feels clunky.
With Relentless Advance, your basic attacks and charge pressure become easier to stick with. This matters most against mobile classes.
If you keep missing enemies by a step, this talent path fixes a lot of that.
Why Leap Step Is Core
Leap Step turns Earth Shaker from a slow attack into a mind game.
If the enemy dodges early, hold the charge.
If they wait, walk them down.
If they swing into you, dodge while charging.
That is how you make Hammer feel oppressive instead of predictable.
Gear, Stats, and Affixes
Use blue gear with a purple weapon.
The purple weapon gives the damage you need. Blue armor keeps the build realistic and efficient.
Target Stats
| Stat | Value | Reason |
|---|---|---|
| Attack | 162 | Enough damage to punish hard |
| Defense | 270 | Lets you survive trades |
| Max Health | 918 | Good buffer for solo mistakes |
This is a balanced solo setup. You are not a glass cannon. You are not a harmless tank.
You hit hard and live long enough to finish the fight.
Best Affixes
| Affix | Level | Value |
|---|---|---|
| Focused | Max with wine | Main offensive consistency |
| Strife | 6 | Better fight pressure |
| Resilience | 5 | Shorter crowd control, more resistance |
| Valor | 5 | More stable combat power |
Why Resilience Is Non-Negotiable
Resilience reduces the duration of:
- Stun
- Frozen
- Immobilize
- Dodge distance reduction
It also gives physical resistance and magic resistance.
This is huge in solo fights.
If you get stunned for too long, you die. If you recover faster, you can Dash out, counter, or re-engage while the enemy is still stuck in their own animation.
Resilience also works extremely well with Super Armor clash interactions. When clash timing goes your way, faster recovery can turn a defensive moment into a kill window.
Core Hammer Combo and Combat Loop
Hammer wins through timing, not spam.
Your basic loop:
1. Step into threat range.
2. Bait the enemy attack.
3. Dash away or sideways.
4. Turn back instantly.
5. Hit left-click into right-click.
6. Watch for dodge.
7. Chase or reset.
| Action | Purpose |
|---|---|
| Bait first | Makes the enemy waste damage |
| Dash out | Avoids the hit |
| Turn back | Keeps pressure alive |
| Left-click | Starts the punish |
| Right-click | Lands the heavy damage |
| Reset | Prevents greedy deaths |
The key is patience.
If they still have dodge, pressure them.
If they waste dodge, punish them.
If they miss a skill, go in hard.
How to Use Hammer Dash Correctly
Hammer Dash is powerful, but bad Dash usage gets you killed.
The main rule: do not commit after a missed Shoulder Charge.
If you miss the first hit, the follow-up swing becomes easy to punish.
| Situation | Correct Play | Bad Play |
|---|---|---|
| Enemy is low HP | Dash after their escape | Dash too early |
| Enemy attacks first | Side Dash, then punish | Dash into the hit |
| You miss Shoulder Charge | Break away and reset | Finish the full animation |
| Enemy chases your whiff | Dash out, turn, light attack | Panic swing |
| Enemy has no dodge | Chase aggressively | Let them heal |
If you miss, stop chasing damage. Reset first.
That single habit saves more fights than any stat upgrade.
How to Use Earth Shaker for Pressure
Bad Hammer players use Earth Shaker as a raw hit.
Good Hammer players use it to force bad choices.
| Enemy Reaction | Your Answer |
|---|---|
| Dodges instantly | Hold charge and walk forward |
| Runs backward | Take space and cut off healing |
| Swings into you | Dodge while charging with Leap Step |
| Waits patiently | Cancel pressure or mix basic attacks |
| Panics near low HP | Release or Dash after dodge |
You do not need Earth Shaker to hit every time.
If it burns dodge, blocks a heal, or forces bad movement, it already did its job.
Solo Matchup Tips
Against Fast Classes
Fast classes want you to whiff.
Do this:
- Save Hammer Dash for their escape.
- Use Earth Shaker to force dodge.
- Do not chase with no cooldowns.
- Punish after they waste movement.
- Keep them from healing around corners.
If you Dash too early, they reset. If you Dash after their dodge, they die.
Against Burst and Control Classes
These fights are why we take Resilience.
Do this:
- Avoid greedy swings.
- Respect their opener.
- Let them waste control first.
- Use Dash after stun recovery.
- Punish missed burst skills immediately.
You are not trying to out-spam burst classes. You are trying to survive their first window and smash them during recovery.
Against Other Bruisers
Mirror-style melee fights are patience checks.
Do this:
- Do not swing first every time.
- Side Dash their charge.
- Delay Earth Shaker release.
- Wait for their dodge.
- Punish recovery, not armor.
The player who panics first usually loses.
Common Hammer Mistakes
| Mistake | Why It Loses Fights | Fix |
|---|---|---|
| Spamming attacks | Easy to dodge and punish | Bait first |
| Dashing only forward | Predictable pathing | Mix side/back Dash |
| Releasing Earth Shaker instantly | Free dodge for good players | Vary timing |
| Hitting too early after knockdown | Enemy dodges on wake-up | Wait, follow, punish |
| Ignoring nearby AI | Creates chaos and third-party pressure | Reposition or clear safely |
| Chasing with no cooldowns | No escape if baited | Wait for Dash or dodge |
One important habit: after a knockdown, do not instantly swing every time.
Many players dodge as soon as they stand up. Let them dodge first, follow with your own movement, then land left-click into right-click.
Practical Hammer Game Plan
Use this rhythm in real solo fights:
| Fight Stage | Your Goal |
|---|---|
| Opening | Test spacing and enemy dodge habits |
| First trade | Bait, Dash out, punish |
| Mid-fight | Use Earth Shaker to force movement |
| Enemy low HP | Save Dash for escape denial |
| Bad engage | Reset immediately |
| Finish | Chase only when you have cooldowns |
If you are losing with Hammer, check your tempo.
Most losses come from attacking too early, using Dash too soon, or forcing Earth Shaker like a normal damage skill.
FAQ
What is the best solo Hammer build in Mistfall Hunter?
The best solo Hammer build uses Hammer Dash, Earth Shaker, Resilience, Hammer Mastery to Relentless Advance, and Leap Step. Run blue gear with a purple weapon for strong damage and reliable survivability.
Why is Resilience so strong for Hammer Mercenary?
Resilience shortens stun, freeze, immobilize, and dodge reduction effects. It also adds physical and magic resistance. For Hammer, faster recovery means you can survive control chains and re-engage before the enemy fully resets.
Should I use Hammer Dash aggressively or defensively?
Use it both ways, but do not waste it early. Dash defensively to avoid attacks, then offensively when the enemy has used dodge or is trying to heal. Never fully commit after a missed Shoulder Charge.
How do I land Earth Shaker more often?
Stop releasing it instantly. Hold the charge when enemies dodge early. Walk forward if they run. Mix in cancels and basic attacks if they wait. Earth Shaker is a pressure tool first, damage tool second.
What is the main Hammer combo for beginners?
Practice bait attack → Dash out → turn back → left-click → right-click. This teaches spacing, timing, and punish discipline. It is the core loop of the entire build.
Summary
This Mistfall Hunter solo Hammer build works because it covers Hammer's real weaknesses: mobility, control recovery, and punish consistency.
Run Hammer Dash + Earth Shaker.
Take Resilience, Steel Skull, Relentless Advance, and Leap Step.
Use blue gear with a purple weapon.
Prioritize Focused, Strife 6, Resilience 5, and Valor 5.
Do not spam. Do not panic Dash. Do not force Earth Shaker.
Bait first. Dash clean. Punish hard. Chase only when the kill is real.

Most Popular Posts
- Mistfall Hunter Class Guide: 6 Classes Ranked for Launch
- Ultimate Gyldenblod Farm Guide for Mistfall Hunter
- Mistfall Hunter Wither Knight Build: Unkillable Polearm & Shield Guide
- Mistfall Hunter Solo Hammer Build Guide: Best Mercenary Setup for Damage, Survival, and Chase
- Mistfall Hunter Best Withered Knight Greatsword Build After Buff: Mistfall Hunter PvP Guide
- Mistfall Hunter Greatsword Wither Knight: Buffed PvP Build Guides
Popular Category Lists
- ARC Raiders / (354)
- Grow a Garden / (294)
- CoD: Black Ops 7 / (167)
- Star Citizen / (163)
- MLB 26 / (159)
- Monopoly Go / (153)
- ARK Survival Ascended / (128)
- Steal a Brainrot / (99)
- Blox Fruits / (74)
- Adopt Me / (74)
- Forza Horizon 6 / (72)
- Sailor Piece / (68)
- Grow a Garden 2 / (68)
- Diablo IV / (62)
- CoD: BLACK OPS 6 / (55)
- Aion 2 / (52)
- Path of Exile 2 / (48)
- Monster Hunter Wilds / (46)
- Windrose / (44)
- Maplestory Classic / (42)