



 0
0 Created: Aug 22,2026 | ARC Raiders
ARC Raiders Medium Ammo Trials Guide: Best Weapons, Scoring, and High-Point Farming Routes

Forget shoot everything, get points. That's not how this trial works. We ran the numbers, farmed the enemies, and found the bugs so you don't waste a raid finding them yourself.
Bottom line: enemy score is fixed regardless of weapon. Your gun choice only affects speed and survival. And one strategy — Matriarch core damage — makes every other route look like pocket change.
- Medium Ammo Weapons: What Actually Works
- Two Bugs That Will Waste Your Time
- Kanto Doesn't Score
- Bastion Armor Is a Trap
- How Scoring Actually Works
- The Math Problem
- Full Enemy Score Table
- Best Strategy: Matriarch Core Farming
- Alternative 1: Bombardier Farming
- Alternative 2: Stella Montis Shredder Farming
- Targeting Rules — Don't Leave Points on the Table
- Mistakes That Kill Your Score
- FAQ
- What's the best weapon for the Medium Ammo trial?
- Is the Kanto usable?
- Does the weapon change how many points an enemy gives?
- What's the best non-Matriarch target?
- Why is Matriarch core farming so dominant?
- Bottom Line
Medium Ammo Weapons: What Actually Works
Eight medium weapons exist. Only three matter.
| Weapon | Damage | Verdict |
|---|---|---|
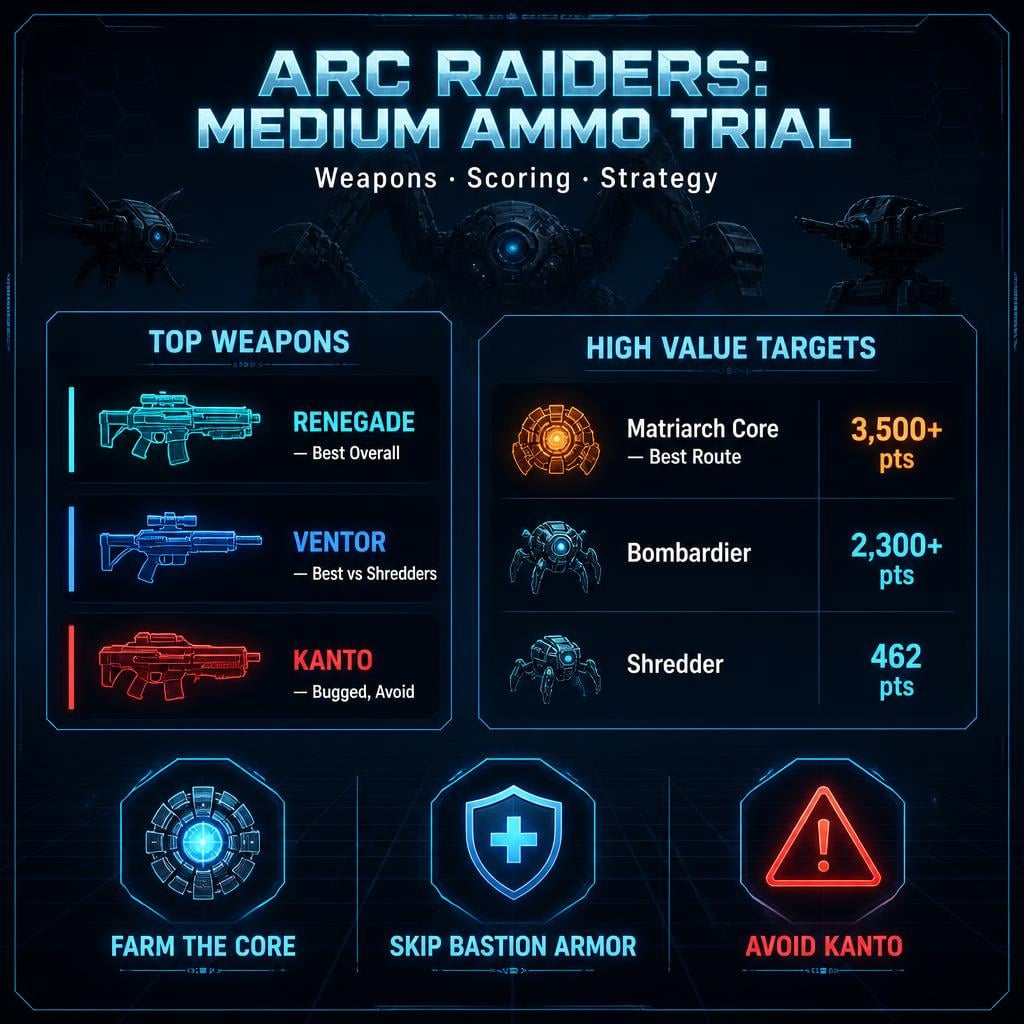
| Renegade | 35/shot | Best overall. Fast, controllable, deep mag |
| Ventor | 16/pull (2 rounds) | Best vs. Shredders, ammo-efficient |
| Rattler | 9/shot | Solid budget pick |
| Osprey | 45/shot | Hits hard, scores slow |
| Tempest | 10/shot | Ammo hungry |
| Arpeggio | 9.5/bullet, 3-burst | Fine if you control recoil |
| Torrene | High volume | Inefficient |
| Kanto | 6.5/bullet | Broken — do not use |
Key insight: a Shredder killed with a Renegade scores the same as one killed with a Ventor. Weapon choice = speed and safety, not bonus points.
Two Bugs That Will Waste Your Time
Kanto Doesn't Score
We tested it across multiple enemy types. Damage numbers popped up on screen — trial score didn't move. Whatever the fire rate looks like on paper, this gun is dead weight right now. Leave it in storage.
Bastion Armor Is a Trap
Shooting Bastion body armor gives inconsistent, often zero, trial points. The only real payout is the core — and reaching it means paralyzing a leg first. Too slow, too risky, not worth it unless the window falls in your lap.
How Scoring Actually Works
Normal enemies = fixed score. Full stop. The Matriarch core is the exception — it eats sustained damage and keeps paying out.
That single fact reshapes the whole trial.
The Math Problem
If top scores sit around 35,000 points, here's what grinding normal enemies actually costs you:
| Enemy | Points | Kills for 35,000 |
|---|---|---|
| Shredder | 462 | ~76 |
| Firefly | 240 | ~146 |
| Wasp | 132 | ~266 |
| Spotter | 96 | ~365 |
| Tick | 12 | ~2,917 |
Nobody is killing 76 Shredders in one raid. That's the whole point — normal farming can't compete.
Full Enemy Score Table
| Enemy | Points | Targeting | Farm It? |
|---|---|---|---|
| Tick | 12 | Direct | No |
| Pop | 24 | Direct | No |
| Fireball | 24 | Skip armor | No |
| Spotter | 96 | Center mass | Low value |
| Sentry Turret | 96 | Peek and destroy | Low value |
| Wasp | 132 | Kill airborne | Low value |
| Comet | 180 | Center ring | Situational |
| Snitch | 190 | Kill airborne | Situational |
| Hornet | 240 | Focus body | Situational |
| Firefly | 240 | Center/lower canister | Situational |
| Surveyor | 281+ | Exposed sections | Inconsistent |
| Sentinel Turret | 360 | Use cover | Situational |
| Shredder | 462 | Ventor/Renegade | Good |
| Leaper | 1,273 | Red eye | Good, risky |
| Rocketeer | 1,320 | Center mass | Good |
| Vaporizer | 1,800 | Sustained fire, rotate cover | High, slow |
| Bombardier | 2,300+ | Safe angle | Very good |
| Bastion Core | Variable | Paralyze leg | Not consistent |
| Matriarch Core | Massive | Sustained fire | Best route, period |
Best Strategy: Matriarch Core Farming
This is the meta. No way around it.
Why it wins: the core soaks up repeated hits and keeps paying score. You're not chasing 76 Shredders across the map — you're parked in one spot, stacking damage.
Weapon: Renegade. Strong per-shot damage, fast follow-up, big magazine potential once upgraded. It's built for exactly this.
Loadout:
- Renegade as primary
- Max medium ammo — core damage burns through it fast
- Mobility/survival tools to reach and hold your position
- Commit once you're in the window — don't half-send it
If leaderboard placement is the goal, learn this route. There's no realistic substitute right now.
Alternative 1: Bombardier Farming
2,300+ points per kill. Second-best target in the game.
The catch: mortars. Find a safe angle first — hard cover, elevation, a corner that blocks the arc. Fight one in the open and you'll burn healing and time faster than you earn points.
Best spawns:
- Blue Gate Night Raid — double Bombardier possible
- Blue Gate EM Storm — double spawn, more dangerous
- Spaceport — reliable safe-angle setups
- Blue Gate Day Raid — rare double spawn
Loadout: Renegade or Ventor, heavy ammo reserve, healing tools. Slow but steady.
Alternative 2: Stella Montis Shredder Farming
Not flashy — but repeatable. 462 points per kill, and Stella Montis night raids keep them coming.
Run it like this:
1. Move through high-traffic Shredder zones
2. Ignore low-value trash unless it's a threat
3. Take cover, burn the Shredder down fast
4. Loot only if safe
5. Rotate — don't force a dead area
Weapon: Ventor first choice, Renegade as backup for flexibility.
This won't touch a Matriarch run's ceiling, but it's low-risk and consistent.
Targeting Rules — Don't Leave Points on the Table
| Enemy | Do | Don't |
|---|---|---|
| Wasp / Snitch | Kill airborne | Let it crash first |
| Hornet / Rocketeer | Focus main body | Only clip wings |
| Firefly | Center mass/canister | Spray armor |
| Comet | Center ring | Shoot outer shell |
| Leaper | Red eye | Waste shots on legs |
| Bombardier | Safe angle | Fight in the open |
| Bastion | Core only, if exposed | Farm the armor |
Rule of thumb: weak point exists → shoot it. Enemy can crash → finish it airborne. Thick armor → don't waste medium ammo on it.
Mistakes That Kill Your Score
- Running the Kanto — high fire rate, zero payout. Skip it.
- Shooting Bastion armor — unreliable, slow, not worth the ammo.
- Chasing Ticks, Pops, Spotters — kill if they're in your way, never build a route around them.
- Letting flyers crash — commit to finishing them airborne or you lose value.
- Fighting Bombardiers in the open — cover first, damage second.
FAQ
What's the best weapon for the Medium Ammo trial?
Renegade. Strong damage, fast follow-up shots, and the sustained fire needed for Matriarch core farming.
Is the Kanto usable?
No. It's currently bugged and doesn't reliably register trial points. Skip it until it's patched.
Does the weapon change how many points an enemy gives?
No — for normal enemies, score is fixed. Weapon choice only affects kill speed and survivability.
What's the best non-Matriarch target?
Bombardier, worth 2,300+ points. Fight it from a safe angle or the mortars will eat your run.
Why is Matriarch core farming so dominant?
It's the only target that rewards sustained damage instead of a fixed per-kill score, letting you stack points far faster than any normal enemy grind.
Bottom Line
Want leaderboard numbers? Learn the Matriarch core strategy with a Renegade. No shortcuts around it.
Want solid points without the setup? Farm Bombardiers from cover, or run Stella Montis Shredders with a Ventor.
Either way: skip the Kanto, skip Bastion armor, skip anything under 200 points. Your ammo and time are worth more than that.


The GGWTB Editorial Team features 10 full-time gaming editors and 23 specialist contributors, delivering hands-on tested walkthroughs, easter egg breakdowns, and game updates.
ELSA — who spearheads our in-depth COD: BLACK OPS 7, ARC Raiders guides, and patch notes—every guide is rigorously verified on live servers for accuracy.

Most Popular Posts
- ARC Raiders Update 1.42: Phantom Targets Farming Guide (Glitched Wasps, Rewards, Regional Conditions)
- ARC Raiders Hullcracker Blueprints: Fastest Way to Complete The Major's Footlocker
- ARC Raiders Best Pop Trigger Strategy: Fast Phantom Targets Damage Guide
- ARC Raiders Subway Skin Guide: Unlock the Subterranean Outfit
- ARC Raiders Looting Mk. 3 Survivor Blueprint Guide: Best Blue Gate Route and Drop Locations
- ARC Raiders Medium & Heavy Gun Parts Blueprint Guide: Best Farm Route, Locations, and Refiner Crafting
Popular Category Lists
- ARC Raiders / (354)
- Grow a Garden / (294)
- CoD: Black Ops 7 / (167)
- Star Citizen / (163)
- MLB 26 / (159)
- Monopoly Go / (153)
- ARK Survival Ascended / (128)
- Steal a Brainrot / (99)
- Blox Fruits / (74)
- Adopt Me / (74)
- Forza Horizon 6 / (72)
- Sailor Piece / (68)
- Grow a Garden 2 / (68)
- Diablo IV / (62)
- CoD: BLACK OPS 6 / (55)
- Aion 2 / (52)
- Path of Exile 2 / (48)
- Monster Hunter Wilds / (46)
- Windrose / (44)
- Maplestory Classic / (42)






