0
0 Created: Oct 31,2025 | Battlefield 6
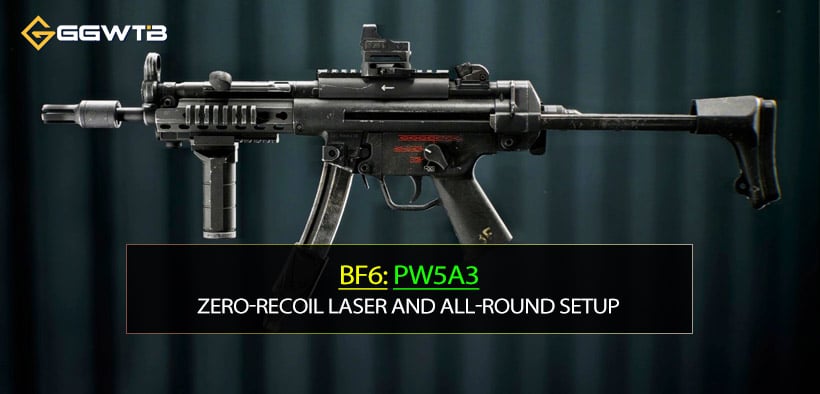
Best Battlefield 6 PW5A3 (MP5) Builds: Zero-Recoil Laser and All-Round Setup Explained

If you picked up the PW5A3 early and thought wow, this barely moves, you're not alone. The gun doesn't top any single stat on paper, yet in real matches works. Low recoil, quick reloads, solid damage, and surprisingly strong hip fire make it one of the most dependable SMGs in Battlefield 6. The trick isn't brute forcing fights—it's leaning into consistency and information advantage. What does that mean for you? Two refined builds: one that performs on any map and mode, and one that pushes recoil control into laser pointer territory.
Why the PW5A3 Works Everywhere
- - Extremely low recoil for an SMG, fast handling, reliable hip fire, and reload speeds that let you chain fights without stalling.
- - It's not the fastest time-to-kill up close. Aggro carbines/ARs with high RPM can edge you in pure face-to-face trades.
- - Control exposure, leverage cover, and pick fights where your stability wins—especially 15–40 meters. Past 40 m, tap fire to manage spread.
How to Play It Smarter
- - Positioning: If you find yourself losing to high-RPM rifles in tight hallways, then slow the entry by pre-aiming and slicing angles instead of wide swinging.
- - Tempo: If your team is pushing a marked objective, then arrive slightly off-angle—PW5A3 thrives when you're the second contact, not the first to peek.
- - Fire discipline: Once you're beyond 40 m, switch to short bursts or tap fire; the gun's low recoil means those taps land reliably if you don't overhold.
Build 1: The All-Round Main Build
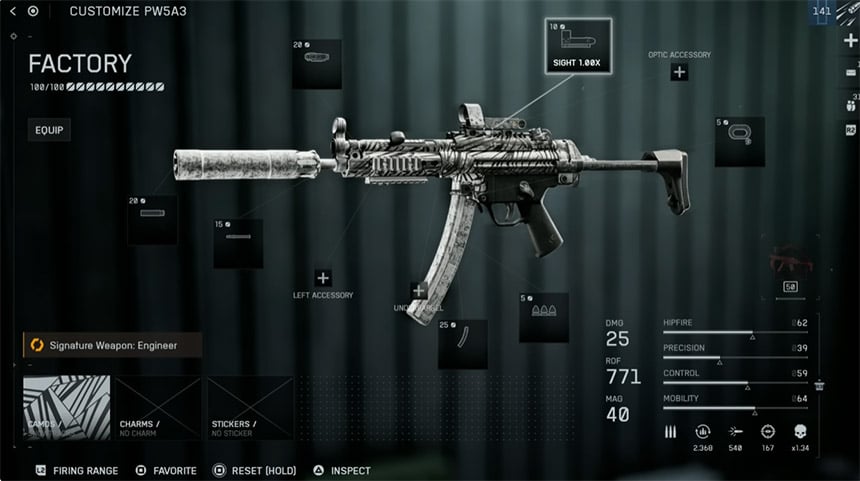
- Optic: OSA 7 1.0x (or any clean 1x)
- Why: You'll fight CQB to mid-range constantly; 1x preserves FOV and lets you track while strafing. The gun is stable enough to try 1.75x, but 1x is more forgiving in chaotic pushes.
- Laser: Green laser
- Why: Best hip fire stats for snapping in rooms and tight lanes. But it's visible—point the muzzle into floor/wall while healing or pre-peeking to avoid broadcasting your position.
- If you hate being seen: Swap to red laser for less visibility at a small hip-fire tradeoff.
- Muzzle: Standard suppressor
- Why: Hides in-world spotting and shrinks the minimap reveal radius when firing. Since PW5A3 doesn't insta-delete up close, not being pre-aimed by the whole room boosts survival and multikill odds.
- Tradeoff: Slight hip-fire accuracy hit, which your laser largely compensates for.
- Barrel: Extended barrel
- Why: Higher projectile velocity = easier mid-range tracking, especially while strafing. Because the gun's recoil is already tame, you benefit more from hit probability gains than extra recoil control here.
- Grip: None
- Why: You already control recoil easily to 40 m; attachment points are better spent elsewhere. On both PC and console, it stays manageable.
- Magazine: 40-round extended mag
- Why: Costs 25 points, but worth it. You'll clear more than one opponent per mag without frantic reloads during a push. Testing back-to-back with 30 → 40 rounds feels immediately better in multi-enemy holds.
- Ammo: FMJ (standard)
- Why: Reliable baseline; no weird handling penalties.
- Mag catch: Upgraded/reinforced mag catch (faster reload)
- Why: Keeps tempo high when you're cycling fights around objectives.
When to use
- - Any map, any mode; shines in point assaults/defenses where you fight 5–30 m with frequent 25–35 m picks.
- - If you regularly take on two players before reloading, the 40-round mag is the difference between winning and being caught mid-swap.
Play notes
- - Don't overextend: Take the first duel, then instantly re-angle or drop line of sight; let the suppressor work.
- - Laser discipline: If you notice enemies pre-aiming you around corners, dip the laser to the floor until you slice the angle.
Build 2: Near-Zero-Recoil Laser Beam
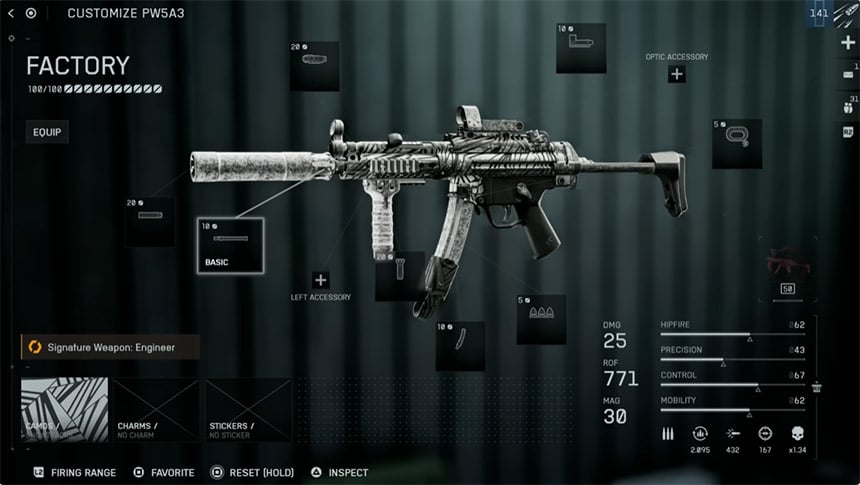
- Optic: 1x standard; consider 1.75x or even 2x if you prefer head-height lane holding.
- Why: With recoil trimmed further, magnification becomes viable without the reticle bouncing off the target.
- Laser: Green laser (same caveats as above)
- Muzzle: Standard suppressor (keep the info advantage consistent)
- Barrel: Basic barrel
- Why: Frees points and prevents over-indexing on velocity since recoil is now your focus.
- Grip: Vertical grip (recoil-focused)
- Why: Moderately reduces recoil; the tradeoff is worse ADS accuracy while moving. Translation: Stop long-range strafing. Plant your feet for beams; strafe freely only under 15 m where bloom won't punish you.
- Magazine: 30-round fast mag
- Why: Faster reloads + extra points for the grip. If you structure fights (one pick → reload → re-peek), you won't miss the 40 rounds.
- Ammo: FMJ (standard)
- Mag catch: Faster reload (stacks your tempo theme)
When to use
- - Lanes with 20–45 m sightlines, where you can post up and beam. Works well with a 1.75x optic if you're disciplined with movement.
- - If your aim is steady but you lose to micro-recoil at range, this build makes your reticle feel glued.
Movement rules for Build 2
- - Under 15 m: Strafe like normal; target dies before movement penalties matter.
- - 15–40 m: Minimal strafe or AD-stutter; prioritize micro-corrections over wide swings.
- - 40 m+: Burst/tap; think marksman rhythm, not SMG spray.
Practical Scenarios and Why They Work
- - Objective push (Marked Alpha): Lead with a teammate. If you're first contact, pre-aim the most likely off-angle and slice the doorway. Your suppressor keeps follow-up enemies guessing; 40 rounds means you don't panic reload after one pick.
- - Mid-lane hold: With the laser build, anchor head height and throttle strafing. You'll win simply because your crosshair doesn't drift while theirs does.
- - Corner dancing: If you notice your laser giving you away, flip it toward the floor until you're ready to swing. That one habit saves more lives than any stat tweak.
Tap-Fire Guidance by Distance
- - 0–15 m: Full-auto; hip fire is reliable with laser even when suppressed.
- - 15–30 m: Controlled 8–12 round bursts; reset when the sight picture lifts.
- - 30–40 m: 4–6 round bursts or rapid tap; let the sight settle between bursts.
- - 40 m+: Single/double taps. You're now playing consistency over speed.
Mistakes to Avoid
- - Over-zooming by default: Yes, you can run 1.75x, but in hectic CQB you'll lose track of flanks and utility. If you find yourself tunnel visioning, drop back to 1x.
- - Strafing long-range with the vertical grip: That penalty is the whole tradeoff; plant your feet to beam.
- - Loud peeks without suppressor: PW5A3 isn't a face-melter—if they all know where you are, your margin disappears.
FAQ
Q: Is the 40-round extended mag really worth 25 points?
A: If you regularly fight multiple enemies per peek or play objective stacks, yes—it's the single best QoL upgrade. If you take one duel then reset angles, the 30-round fast mag plus vertical grip (laser build) can outperform for you.
Q: 1.75x on an SMG—isn't that risky?
A: On most SMGs, yes. On PW5A3, the recoil is low enough to make it viable. Use it when you're posting on mid lanes, not clearing tight rooms.
Q: Green laser gives me away too much. Alternatives?
A: Red laser trades a bit of hip-fire performance for less visual giveaway. Or keep the green and build the habit: muzzle to wall/floor until you're about to peek.
Q: Do I need a grip on the main build?
A: Not if you're playing within 40 m and already comfortable with recoil. The barrel velocity + 40 rounds do more for real win rate than slight extra control.
Q: How should I shoot past 40 m?
A: Tap fire—think DMR tempo. The gun's low recoil means taps land if you let the sight settle.
Summary
If you want a setup that simply works anywhere, go with the all-round build: 1x optic, green laser, standard suppressor, extended barrel, 40-round mag, FMJ, faster mag catch. It maximizes information advantage and mid-range reliability without overcomplicating control. If you crave the flattest possible recoil trace, pivot to the laser build: standard suppressor, basic barrel, vertical grip, 30-round fast mag, and consider 1.75x when you're anchoring lanes. If you notice your deaths come from giving away position or strafing at the wrong ranges, then fix those habits first—this weapon rewards thoughtful pacing and clean sight discipline.
Most Popular Posts
- Battlefield 6 Season 1 Ultimate Weapon Tier List: Best Guns, TTK Data, Loadouts, and Pro Tips
- Top 10 Low-Recoil BF6 Guns: Most Accurate Battlefield 6 Weapons
- Battlefield 6 AFK XP After Patch: Easy Passive Leveling Using 4-Minute Portal Lobbies
- How To Unlock the PSR (M98B) in Battlefield 6 Fast?
- Battlefield 6 Fast Weapon Leveling Guide: Unlock Attachments
- Battlefield 6 Top 10 Meta Weapons: Builds, TTK Insights, and Practical Tips
Popular Category Lists
- ARC Raiders / (356)
- Grow a Garden / (295)
- CoD: Black Ops 7 / (167)
- Star Citizen / (163)
- MLB 26 / (159)
- Monopoly Go / (153)
- ARK Survival Ascended / (128)
- Steal a Brainrot / (99)
- Blox Fruits / (74)
- Adopt Me / (74)
- Forza Horizon 6 / (72)
- Sailor Piece / (68)
- Grow a Garden 2 / (68)
- Diablo IV / (62)
- CoD: BLACK OPS 6 / (55)
- Aion 2 / (54)
- Path of Exile 2 / (48)
- Monster Hunter Wilds / (46)
- Windrose / (44)
- COD: Modern Warfare 4 / (44)