0
0 Created: Aug 30,2026 | EverQuest Legends
EverQuest Legend Best High-Level Mote Farm Spot: Plane of Sky Island Seven guide

Plane of Sky Island Seven does not care about your feelings. It throws Drakes into clean pulls, punishes greedy DPS, and occasionally rewards a full clear with almost nothing.

But if you're geared, running with a group, and willing to farm it properly, this island is one of the strongest high-level mote spots in the game.
- Why Island Seven Outperforms Normal Farming Spots
- D3 or D4: Pick Your Risk Level
- What Kind of Mote Yield Should You Expect?
- Should You Actually Farm This Island?
- The Group Setup That Actually Works
- Step-by-Step: How to Pull Island Seven Without Dying
- Solo vs Duo vs Group: What's the Real Difference?
- Island Seven vs Befallen: The Real Decision
- Mistakes That Wreck Island Seven Runs
- Your Farming Plan
- FAQ
- Farm Smart, Not Reckless
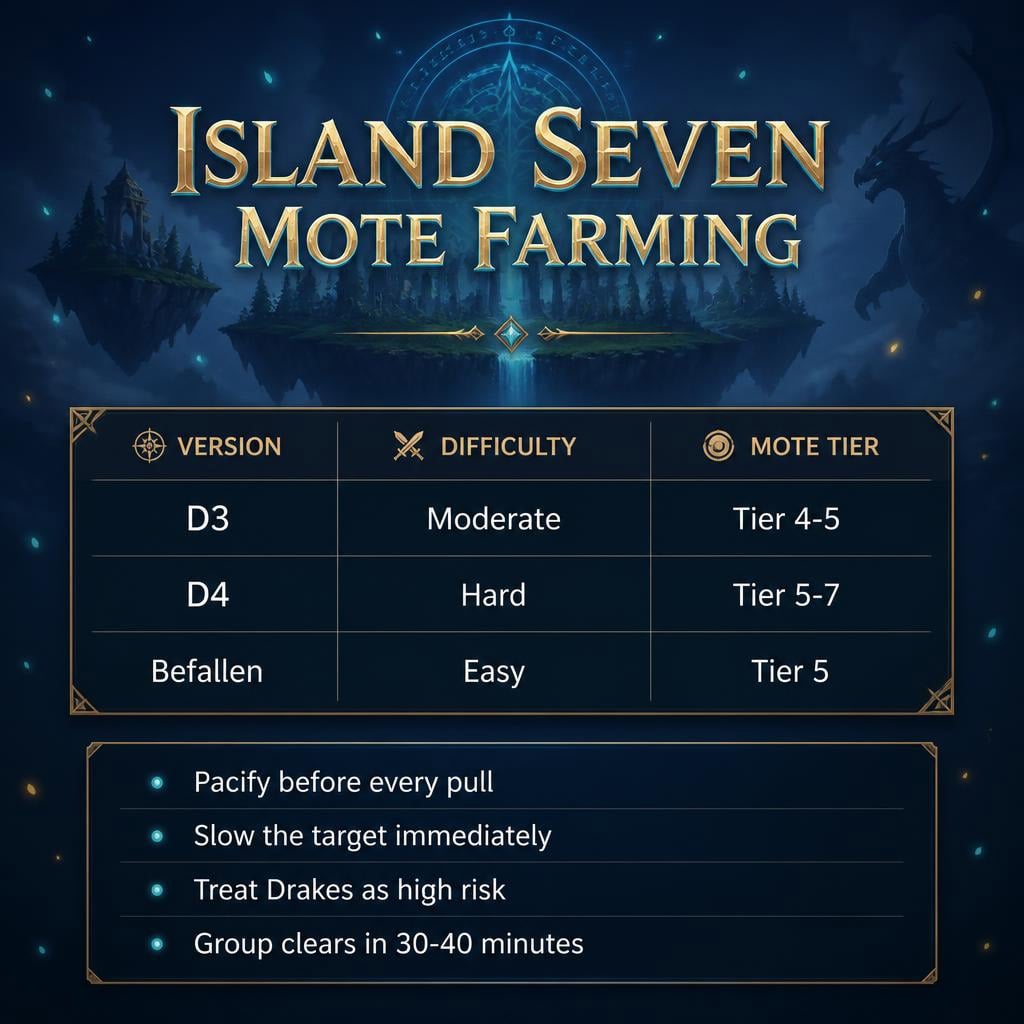
Why Island Seven Outperforms Normal Farming Spots
Most mote farms live and die by named spawns. You kill the named, you get a shot at a drop, then you wait through respawn timers hoping for the same RNG roll again.
Island Seven breaks that pattern.
Every trash mob here is tagged with three classes, which functions like a hidden raid-mob flag. That tagging appears to push mote drop rates far above what you'd expect from normal trash.
What this actually means: you're not farming one named mob per loop. You're farming an entire island of mobs that all behave like mini-jackpots.
Here is the catch. This only pays off if you can clear fast. Slow, messy pulls turn a high-value farm into a low-value grind, and Befallen will out-earn you on raw consistency.
D3 or D4: Pick Your Risk Level
D3 is where you learn the island without getting punished for mistakes. D4 is where the real rewards live, but it bites back harder.
If you see a Tier 4 mote in D3, treat the D4 equivalent as roughly one tier higher. D4 doesn't just add danger — it shifts your entire reward curve up.
| Farm Version | Difficulty | Expected Mote Quality | Best For | Main Risk |
|---|---|---|---|---|
| D3 Island Seven | Moderate-hard | Frequent Tier 4-5 | Solo players, route testing | Slow value if clears drag |
| D4 Island Seven | Hard | Frequent Tier 5-7 | Geared duos, trios, groups | Bad pulls snowball fast |
| Befallen Farm | Easy-moderate | Mostly Tier 5 | Low-stress repetition | Low high-tier ceiling |
| Full Group D4 | Hard, manageable | Best overall potential | 30-40 min organized clears | Needs coordination |
D3 teaches you the island. D4 is where you cash in.
What Kind of Mote Yield Should You Expect?
Never judge this farm off three kills. RNG will lie to you either way — judge it off full clears, tracked over multiple runs.
A solid Befallen loop nets 15-20 motes per hour, mostly Tier 5 with an occasional Tier 6. Safe, boring, predictable.
Island Seven plays a different game:
- 10-20 motes per full clear
- Higher average tier than low-zone farming
- Real shot at Tier 6-7 in D4
- Rare spikes above that when RNG feels generous
Here's why that matters for your progression: a single higher-tier mote often replaces multiple lower-tier ones in upgrade value. One Tier 7 drop can outclass a stack of Tier 5s. That's the entire appeal of eating the extra risk.
Should You Actually Farm This Island?
Island Seven is not for everyone, and pretending otherwise would waste your time.
Farm it if:
- You want to run your main, not re-level throwaway characters
- You have pacify, crowd control, or feign death access
- Your group can clear pulls fast without burning every cooldown
- You want tier upside over guaranteed volume
Skip it if:
- You're dying on pulls you can't split cleanly
- Your time-to-kill is too slow to justify the danger
- You lack any form of pull control
Island Seven rewards execution. Befallen rewards repetition. Pick based on which one you're actually good at.
The Group Setup That Actually Works
Soloing is possible for a handful of strong builds, but grouping is where this farm turns efficient. The real value of a group isn't damage — it's recovering from bad pulls before they become wipes.
| Role | Why It Matters | Ideal Tools | Impact on Speed |
|---|---|---|---|
| Pull Control | Stops accidental multi-pulls | Pacify, lull, invis, FD | Very high |
| Tank/Pet Frontline | Absorbs the dangerous hits | Mitigation, defensives | High |
| Healer/Recovery | Saves bad pulls from wiping | Strong heals, mana tools | Very high |
| Damage Dealer | Cuts exposure time | Sustained DPS, AoE | High |
| Crowd Control | Buys time on messy pulls | Mez, slow, root | High |
The best comp isn't the highest DPS setup. It's the one that stays in control while still killing fast enough to reset.
Step-by-Step: How to Pull Island Seven Without Dying
Most bad runs start the same way: someone gets excited about an early mote, pulls sloppy, and finds out this island doesn't forgive positioning mistakes.
1. Scout with invis first. Check for nearby Drakes, patrol paths, and retreat routes before committing to anything.
2. Pull to a controlled corner. Stay away from clusters, keep the group stacked, leave yourself room to kite or reset.
3. Pacify before you pull, not after. If you skip this step, one bad pull becomes a double pull — and solo, that's a corpse run.
4. Slow the mob the second it lands. Named mobs and Drakes hit hard enough that greed gets punished immediately.
5. Treat every Drake as a high-risk pull. If one shows up mid-fight, stabilize your main target, burn defensives early, and feign or reset if the pull turns bad.
6. Clear and reset the instance. Aim for 30-40 minute full clears. If you're pushing past an hour, compare your results against Befallen — the tier upside only matters if your clear speed keeps pace.
Solo vs Duo vs Group: What's the Real Difference?
| Setup | Clear Speed | Safety | Mote Efficiency | Recommendation |
|---|---|---|---|---|
| Solo | Slow-moderate | Low-medium | Inconsistent | Only for strong builds |
| Duo | Moderate | Medium | Good | Best entry point |
| Trio | Fast | High | Very good | Strong all-around balance |
| Full Group | Fastest | Highest | Excellent | Best for D4 |
One reliable partner changes this farm more than any gear upgrade will.
Island Seven vs Befallen: The Real Decision
| Category | Island Seven | Befallen |
|---|---|---|
| Difficulty | High | Low-moderate |
| Best Version | D3 to learn, D4 to farm | Standard loop |
| Average Mote Tier | Higher | Lower ceiling |
| Hourly Consistency | Clear-speed dependent | Very consistent |
| Group Value | Extremely high | Helpful, not required |
If you want steady volume, run Befallen. If you want higher-tier upside and a real challenge on your main, Island Seven is the better play.
Mistakes That Wreck Island Seven Runs
Pulling too fast. If your group hasn't rebuffed or repositioned, wait. A clean pull chain beats a wipe every time.
Skipping pacify. This tool is what turns chaos into control. Use it before every clustered pull, not just the risky-looking ones.
Rushing into D4 unprepared. If your group can't clear D3 smoothly, D4 will punish you harder than the reward justifies. A fast D3 clear beats a sloppy D4 disaster.
Judging the spot off four kills. One quiet mob doesn't mean the farm is bad. Evaluate by full clears, not isolated RNG.
Your Farming Plan
Run 1 — Test in D3. Learn mob positions, practice pacify pulls, and track your actual mote drops across a full clear.
Run 2 — Bring a duo or trio. Prioritize pull control and healing over raw DPS. One competent partner beats three uncoordinated ones.
Run 3 — Push D4. Once D3 feels clean, move up. Expect harder fights, but also a real shot at Tier 6-7 drops that justify the risk.
FAQ
What is the best high-level mote farming spot in EverQuest Legend?
Plane of Sky Island Seven, because nearly every mob is tagged like a high-value target. That gives it standout drop potential in both D3 and D4.
Should we farm Island Seven in D3 or D4?
Run D3 while learning pulls or soloing. Move to D4 once your group can clear cleanly — the tier upside only matters if your clear speed keeps up.
Is Island Seven better than Befallen for motes?
Befallen wins on consistency. Island Seven wins on ceiling. Pick based on whether you value steady Tier 5 volume or a shot at Tier 6-7.
Can you solo Island Seven?
Yes, but only with strong gear and reliable pull control. Bad pulls, resists, and Drakes spiral fast without backup — most players are better off duoing.
Farm Smart, Not Reckless
Start in D3. Learn the pulls, bring one reliable partner, and only push D4 once your clears are clean. Reset the instance, run it again, and let the tier upside do the work.

Most Popular Posts
- EverQuest Legends Trio Guide: Stop Overthinking, Start Playing
- EverQuest Legends Plane of Sky Solo Guide: Key Farming, Class Unlocks & Boss Priority
- EverQuest Legends Motes Guide: Stop Wasting Motes on Upgrades
- EverQuest Legends Soldiers Brooch Guide: Get and Max DPS
- EverQuest Legends Kerran Unlock: The Fast Route (No Zone-Hopping)
- EverQuest Legends Shadow Knight/Shaman/Necromancer Build: DoT-Tank Progression Guide
Popular Category Lists
- ARC Raiders / (345)
- Grow a Garden / (292)
- CoD: Black Ops 7 / (167)
- Star Citizen / (161)
- MLB 26 / (159)
- Monopoly Go / (152)
- ARK Survival Ascended / (126)
- Steal a Brainrot / (98)
- Blox Fruits / (74)
- Adopt Me / (73)
- Forza Horizon 6 / (72)
- Sailor Piece / (68)
- Grow a Garden 2 / (68)
- Diablo IV / (62)
- CoD: BLACK OPS 6 / (55)
- Path of Exile 2 / (48)
- Monster Hunter Wilds / (46)
- Aion 2 / (46)
- Windrose / (44)
- Donut SMP / (41)