0
0FFXIV Melee Jobs Guide: Mechanics, Abilities and Playstyles
In Final Fantasy XIV: Dawntrail, melee DPS jobs are the most flexible and dynamic of all roles and they specialize in dealing damage in close range. Different jobs come with different mechanics, abilities, and playstyles so they are very popular among the players. This guide is created to analyze and compare the six melee jobs to make the selection process more efficient and easier whether it is based on personal preference or skill objectives.
↖ Monk
Monks, unlike the other melee roles, have the flexibility of selecting any Step 1, Step 2, and Step 3 for their rotation. That said, their choice is project management based:
- AoE Case: AoE skills ought to be used.
- Single-Target Case: Prioritize Fury Gauge management: 1. Spend if Fury is full; 2. If Fury is empty, use appropriate skills to create Fury.
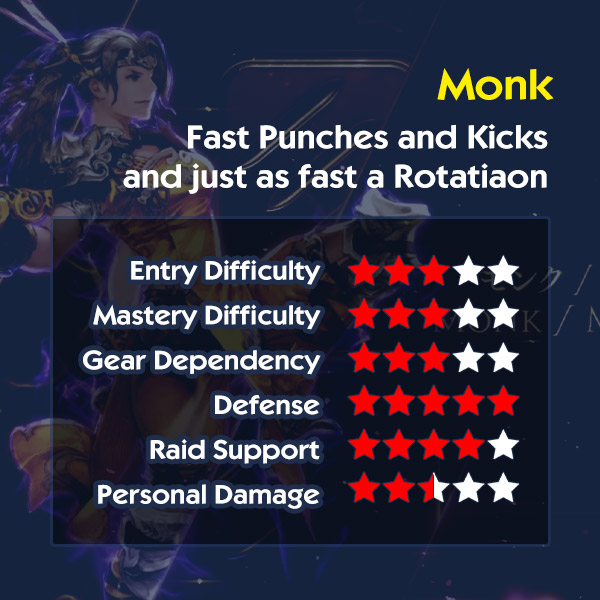
Pros & Cons:
- Pros: Flexible shifts, little to no set up before the fight, extremely strong burst damage.
- Cons: For optimal output, certain skill speed settings must be fine-tuned.
Key Features:
- Gaming Style: Has form-based fluid combos with high mobility.
- Special Feature: Fury Gauge and Perfect Balance system.
- Other skills: Less complex in rotation, sabasasu mobility, strong burst, and great mobility.
Basic Rotation Mechanics:
The Monk spins around three forms.
- Opo-Opo Form: First step in the combo.
- Raptor Form: Intermediate step in the combo.
- Coeurl Form: Final step of the combo.
Burst:
The Monk's burst phase is determined by two particular abilities:
- Riddle of Fire: Generates bursts of high-damage output.
- Perfect Balance: Free formable combo chaining into Masterful Blitz.
Defensive Toolkit:
Monks have a solid defensive skillset:
| Skill | Function |
| Bloodbath | Converts damage dealt into healing |
| Second Wind | Instant self-heal |
| Thunderclap | Enhances mobility with a gap closer/escape |
| Riddle of Earth | Reduces damage taken and provides minor AoE healing |
↖ Samurai
Samurai's burst is timed with teammates' provided raid buffs and overall it is done every two minutes. For bursts, build two charges of Tsubame-gaeshi to enable double Midare Setsugekka. Do not waste resources such as Sen or Kenki outiside bursts.
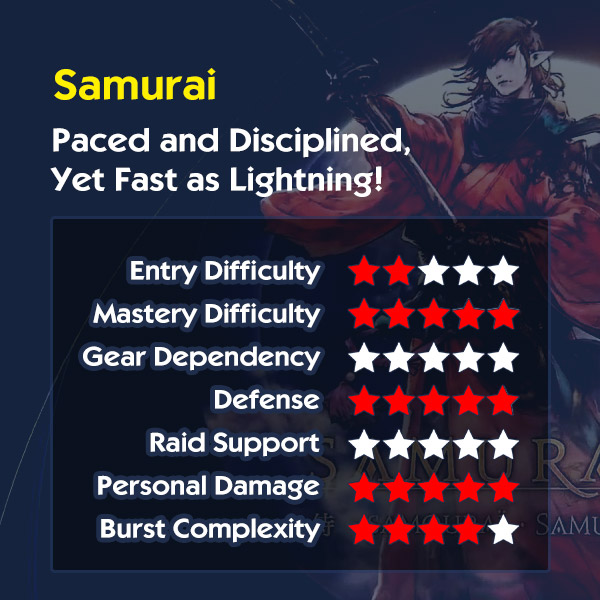
Pros & Cons:
- Pros: Self-sufficient defensives, personal performance unaffected by raid buffs, concentrated burst damage.
- Cons: Time-wasting downtime can be detrimental to rigid rotation, precise timing is needed in order to perform optimally.
Key Features:
- Playstyle: Complex rotation patterns with high-damage combination attacks.
- Unique Mechanic: Unique finishing moves made possible by the Kenki Gauge and Sen system.
- Strengths: Greatly simplified gameplay with amazing burst damage.
Basic Mechanics:
The Samurai's rotation focuses on building and spending resources efficiently:
- Maintain buffs (Higanbana, Jinpu, and Shifu) through combo sequences.
- Build Sen (Setsu, Getsu, Ka) to unleash powerful finishers like Midare Setsugekka.
Key Abilities:
- Higanbana: Damage-over-time effect (DoT).
- Midare Setsugekka: High-damage finisher using 3 Sen.
- Tsubame-gaeshi: Mirrors Midare Setsugekka for burst.
Defensive Toolkit:
Samurai has a robust defensive kit compared to other melee jobs:
| Skill | Function |
| Third Eye | Reduces damage taken for one attack |
| Merciful Eyes | Self-healing ability tied to Third Eye |
| Gyoten | Gap closer for increased mobility |
| Yaten | Gap widener for disengaging from danger |
↖ Dragoon
The Dragoon role is a well-known job in FFXIV for it's signature jumps, dragon-themed skills, and intricate game rotations. Their everyday operations consist of a five-step filler combo and a cooldown burst system.
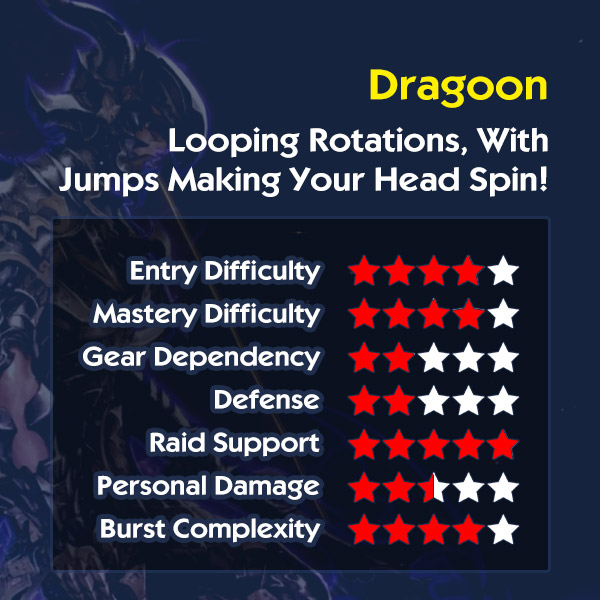
Pros & Cons:
- Pros: High burst damage potential, Unique aerial abilities, Exciting dual-layered rotation.
- Cons: Complex rotation with overlapping buffsRequires precise timing for cooldowns, Can feel hectic during burst windows.
Key Features:
- Primary Weapon: Lance
- Special Traits: Five filler step system, burns over multiple cooldowns, and filler heavy bursts.
- Defensive Abilities: Somewhat higher mobility and moderate physical damage absorption.
Core Mechanics:
- Filler Combo: A separate feature of Dragoon is the five-step special combo which differs from the usual three-step combos. This generates a fluid rotation which feels like a continuous 10-step sequence. This continues dealing damage is very important.
- Cooldown Management: Dragoon also has reliance on cooldowns such as Lance Charge, Battle Litany and Geirskogul which are used to deal damage. Lunchbox attack systems are a multi-tiered system of attacks where the base actions grant additional actions which in turn grant more actions. These actions often branch out into more actions, and so do the abilities that deal with cooldowns.
- Burst: Cooldowns not aligned with raid buffs will not have effective bursts.Life Surge and other abilities need to be timed precisely to take full advantage of a raid window.
Defensive Tools:
- Mobility Options:
- 1 - Elusive Jump: Gap closer or escape tool
- 2 - Dragonfire Dive and Spineshatter Dive: High-damage jumps with mobility utility.
- Durability: Slightly higher physical defense compared to other melee jobs.
↖ Reaper
The Reaper merges scythe combat with dark magic evoking a splendid edgy aesthetic. The rotation is simple yet rewarding. Playstyle is characterized by burst damage during the raid windows and resource management.
Pros & Cons:
- Pros: High mobility with teleportation, Minimal positional requirements, Strong raid utility (Arcane Circle)
- Cons: Requires precise resource management, Burst phases can be punishing with poor latency, Long filler phases may feel slow compared to bursts
Key Features:
- Primary Weapon: Scythe
- Unique Mechanics: Builder-spender rotation, fast bursts, and minimal positional requirements
- Defensive Tools: Mobility skills and party-wide healing utility
Core Mechanics:
- Resource Management: Reaper generates two resources (Soul Gauge & Shroud Gauge). There are powerful burst phases after filler rotations, meaning resources are generated during the diaxotic phases. That ensures builder-spender dynamics.
- Burst Phases: Like other classes in the game, the Reaper has two burst windows that are the fastest in the game with an ability called Enshroud where the Reaper transforms into a high-damage shark. The Reaver is able to optimize bursts with chained Enshrouds by intentionally parte delaying actions between the first and second Enshroud phases.
- Raid Buffs: In addition, the Reaper also offers useful raid buffs with damaging party support every two minutes through Arcane Circle.
Defensive Tools:
| Mobility Skills | Party Utility |
| Arcane Crest: Creates a barrier for the Reaper and heals the whole group if damaged. |
↖ Ninja
Ninjas excel in inflicting rapid damage and are proficient in combat mobility. Mastery of the class's unique Mudra system is required to cast effective abilities that also support the party's damage output.
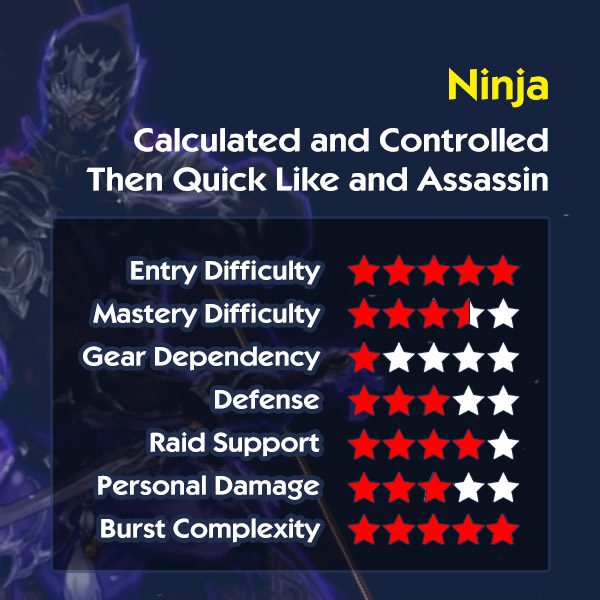
Pros & Cons:
- Pros: High mobility and flexibility, Strong raid utility with Trick Attack, Relaxed rotation outside of burst windows.
- Cons: Burst-centric playstyle requires precision, Challenging optimization in complex fights, Punishing if Mudras are mismanaged.
Key Features:
| Feature | Description |
| Mudra System | Perform hand signs in specific sequences to cast unique abilities |
| Burst-Centric Rotation | Stockpile cooldowns and resources for high-damage windows |
| Raid Utility | Provides a debuff (Trick Attack) that increases enemy damage taken |
| Mobility | Enhanced movement speed and teleportation skills for superior positioning |
Rotation Breakdown:
- In Burst Prep: Keep Huton up while using Armor Crush, Use standard pedal rotations (Spinning Edge → Gust Slash → Aeolian Edge), Prepare bursts by saving Ninki Gauge.
- During Bursts: Execute Ten Chi Jin and Raiton while applying the sequential Mudras, Activate Hoji Ninki Gauge with Bhavacakra or Hellfrog Medium, Apply Trick Attack during burst windows to optimize party damage.
Defensive Tools:
| Skill | Effect |
| Shukuchi | Teleport to a targeted location for quick repositioning |
| Shade Shift | Grants a shield to absorb damage (moderate cooldown) |
| Enhanced Speed | Passive 10% movement speed increase, useful for mechanics and positioning |
↖ Viper
The Viper is a dual bladed melee dps class that fuses weapons into a glaive. Due to its effectiveness and ease of use, It is safe to say that Viper units are welcomed to the Viper class because their design is compramised with features from other classes.
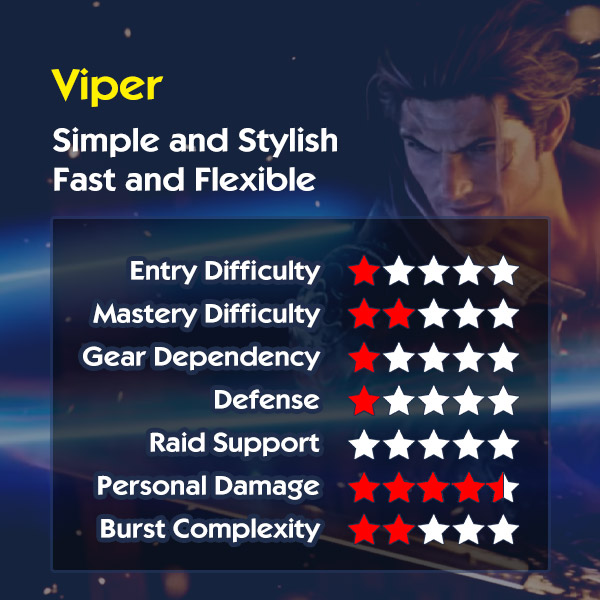
Pros & Cons:
- Pros: Simple and beginner-friendly rotation, Flexible burst windows, Effective at dealing with downtime scenarios.
- Cons: Struggles with high latency environments, Lacks strong defensive options, Fast-paced OGCD weaving can be demanding.
Key Features:
| Feature | Details |
| Dual Weapon System | Switch between twin blades and a glaive seamlessly |
| Simple Rotation | Easy-to-learn combos with minimal positional requirements |
| Flexible Burst Timing | Execute bursts at any time, independent of temporary cooldowns |
| Range-Friendly Options | Includes ranged attacks as part of its standard rotation |
Rotation Breakdown:
- Basic Rotation: Maintain buffs like Damage Buff and Speed Buff with the 1-2-3 combo sequence, For attack combinations use Vice Winder Combo for Rattling Coil resource generation.
- Burst Phase: Start with Reawaken, then do multiple OGCD attacks in the correct order, Use rangeable Uncoiled Fury and spend Rattling Coils, Try to use timing bursts during raid buff windows.
Defensive Tools:
| Skill | Effect |
| Slither | Allows quick movement similar to Monk's Thunderclap for repositioning |
Monk is excellent for newbies because it has an easy rotation and other melee roles can be merged with it. Otherwise, Dragoon is an easier option with a lower pace initially which increases as it progresses further.
With proper knowledge of the job's strengths and mechanics, you can select the one that meets your playstyle and objectives in FFXIV.
Most Popular Posts
- FFXIV Latest Meta Tier List and Ranking | Patch 7.05 Dawntrail
- Top 10 Best MMOs and MMORPGs to Worth Play in 2025
- FFXIV Dawntrail Healers Guide: Strengths, Weaknesses, and Overall Performance
- Top 10 MMORPGs on Steam by Active Players in October 2025 — New World Jumps, FFXIV Surges
- FFXIV Raiding FAQs: Endgame, Combat System, Loot and Tips
- Which is the Best Free-to-Play MMORPGs of 2025?
Popular Category Lists
- Grow a Garden / (286)
- ARC Raiders / (262)
- CoD: Black Ops 7 / (166)
- Monopoly Go / (146)
- MLB 26 / (145)
- Star Citizen / (112)
- Steal a Brainrot / (89)
- Sailor Piece / (68)
- ARK Survival Ascended / (67)
- Diablo IV / (61)
- Forza Horizon 6 / (60)
- Blox Fruits / (60)
- CoD: BLACK OPS 6 / (55)
- Adopt Me / (53)
- Path of Exile 2 / (48)
- Monster Hunter Wilds / (46)
- Windrose / (44)
- Path of Exile / (40)
- Grow a Garden 2 / (40)
- Bee Swarm Simulator / (36)