0
0 Created: Aug 14,2026 | Madden NFL 27
Madden NFL 27 Best Settings: Competitive Setup for Passing, Catching, Defense, and Coaching Adjustments

Madden NFL 27 has more settings that actually matter. Not menu fluff. Real gameplay settings.
If you leave everything on default, you give up control before kickoff. Passing feels less precise. Catch timing is harder to read. Your defense may align wrong. Your pass protection may leave free rushers.
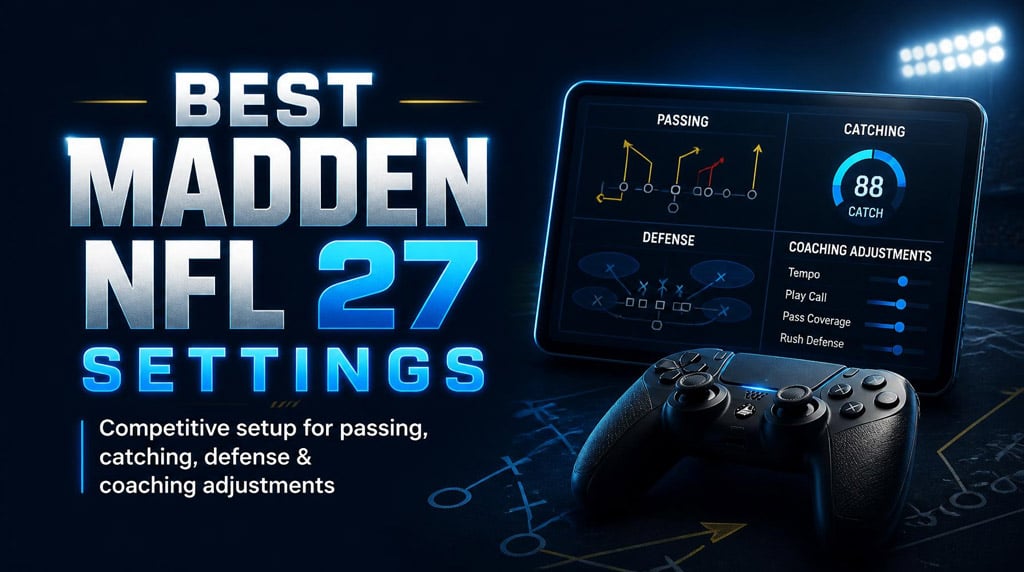
Here is the competitive Madden NFL 27 settings setup we use first. Copy the table, then adjust the situational settings based on how you play.
- Best Madden NFL 27 Settings: Quick Copy Table
- Core Madden NFL 27 Game Settings
- Difficulty: All-Pro
- Game Style: Competitive
- Clock Settings
- Coin Toss and Kicking Settings
- Coin Toss: Kick First
- Kick Meter: Multimeter
- Best Passing Settings in Madden NFL 27
- Passing Mechanics Setup
- Why Placement & Accuracy Is Best
- Reticle Speed: Use 7
- Best Catching Settings in Madden NFL 27
- Catching Setup
- 5 Yards vs 10 Yards
- Catch Feedback: Keep It On
- Gameplay Helpers and Accessibility
- Best Gameplay Helper Settings
- Ball Hawk: On
- Heat Seeker: On at 200%
- Controlled Player Art: On
- Enlarge On-Field Graphics: On
- Offensive Coaching Adjustments
- Best Offensive Coaching Settings
- Intermediate Catching: Aggressive
- Blocking: Balanced
- Auto Pass Protection: Base or Empty
- Untarget User Defender
- WR Scramble Support: Aggressive
- Zone Window Awareness: Off
- Defensive Coaching Adjustments
- Best Defensive Coaching Settings
- Auto Flip: On for Most Players
- Cornerback Matchups: Balanced
- Defensive Motion Response: Disabled
- Gap Integrity: Conservative
- Option and RPO Defense
- Strip Ball and Tackling
- Coverage Strategy Settings
- Best Coverage Strategy Setup
- Zone Strategy: Aggressive
- Plaster: Aggressive
- Zone Drops: Default
- Coverage Shells and Formation Shifting
- Coverage Shells
- Formation Shifting
- Priority Settings to Change First
- FAQ
- What are the best passing settings in Madden NFL 27?
- Should I use timing-based catching in Madden NFL 27?
- Should Auto Flip Defense be on or off?
- Is Auto Pass Protection better on Base or Empty?
- Should I change Zone Drops in Madden NFL 27?
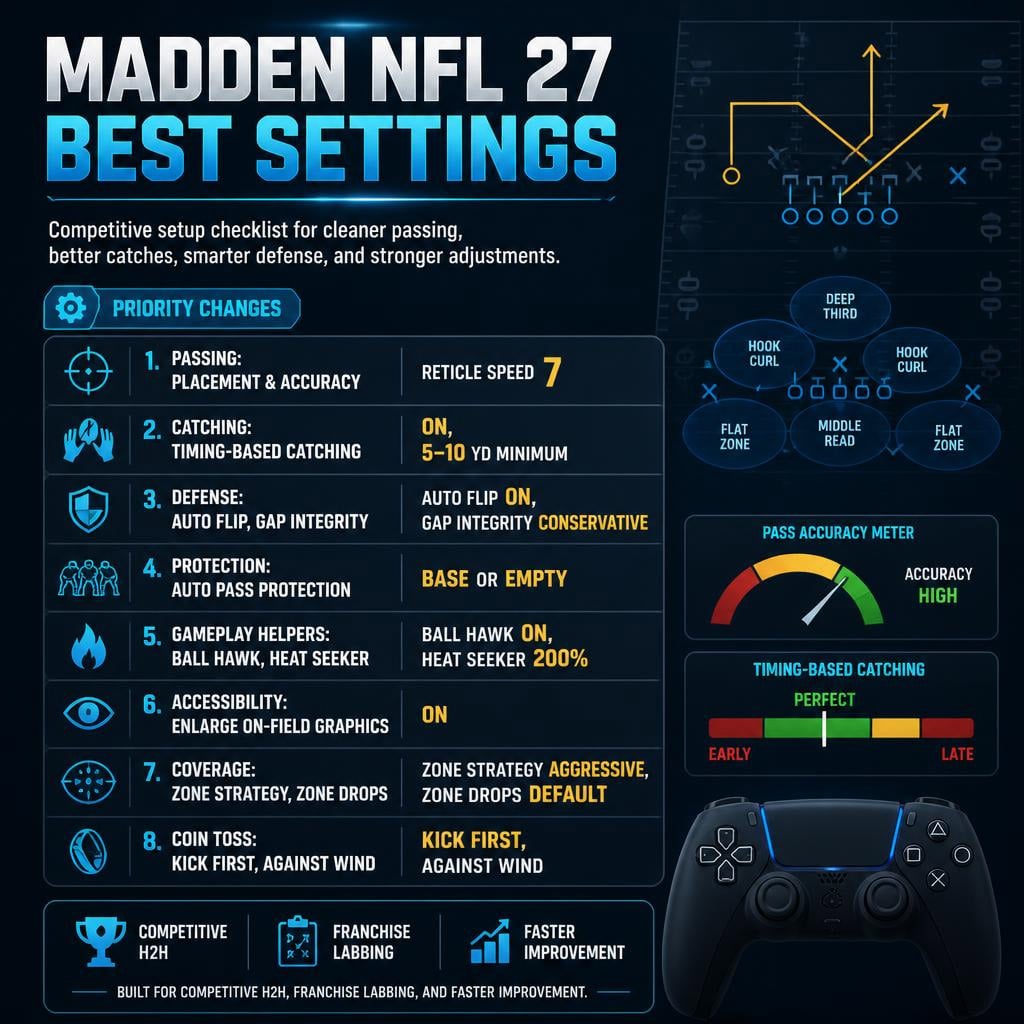
Best Madden NFL 27 Settings: Quick Copy Table
| Setting Area | Setting | Best Value | Why It Matters |
|---|---|---|---|
| Difficulty | Skill Level | All-Pro | Best practice feel for online tuning |
| Game Style | Game Style | Competitive | Rewards user input |
| Clock | Quarter Length | 4–5 minutes | Faster lab games |
| Clock | Accelerated Clock | Off | Full tempo control |
| Coin Toss | First Choice | Kick | Get ball after halftime |
| Coin Toss | Second Choice | Against Wind | Wind advantage late |
| Kicking | Kick Meter | Multimeter | Competitive standard |
| Passing | Passing Type | Placement & Accuracy | Best control and accuracy |
| Passing | Pass Lead Increase | Small | Prevents wild over-leads |
| Passing | Reticle Speed | 7 | Best balanced speed |
| Catching | AI WR Catching | On | Safety net on missed input |
| Catching | Timing-Based Catching | On | Enables green catch timing |
| Catching | Minimum Distance | 5 or 10 yards | 5 advanced, 10 safer |
| Gameplay | Ball Hawk | On | Better click-on picks |
| Gameplay | Heat Seeker | On / 200% | Better safe tackle pull |
| Gameplay | Controlled Player Art | On | Shows assignments |
| Accessibility | Enlarge On-Field Graphics | On | Bigger icons and meters |
| Offense Coaching | Auto Pass Protection | Base or Empty | Better blocking logic |
| Offense Coaching | WR Scramble Support | Aggressive | Better off-script routes |
| Defense Coaching | Auto Flip | On for most players | Aligns to offensive strength |
| Defense Coaching | Motion Response | Disabled | Motion won't ruin your setup |
| Defense Coaching | Gap Integrity | Conservative | Better run fits |
| Coverage | Zone Strategy | Aggressive | Tighter short zones |
| Coverage | Plaster | Aggressive | Faster scramble coverage |
| Coverage | Zone Drops | Default | Keeps match coverage intact |
Core Madden NFL 27 Game Settings
These are the first settings to change. They shape the whole game.
Difficulty: All-Pro
Set Skill Level to All-Pro.
All-Pro gives the cleanest practice environment for most online players. DB-WR interactions, pursuit, catch windows, and pass timing feel closer to competitive play.
If you lab on All-Madden, then play online, your timing can feel off. We want reps that transfer.
Game Style: Competitive
Set Game Style to Competitive.
This reduces randomness and puts more weight on user control. Better reads, better timing, and cleaner stick work matter more.
| Game Style | Use It For | Verdict |
|---|---|---|
| Arcade | Casual chaos | Skip for comp |
| Simulation | Franchise realism | Fine offline |
| Competitive | Online / H2H | Best choice |
Clock Settings
Use this for practice and quick games:
| Clock Setting | Best Value |
|---|---|
| Quarter Length | 4–5 minutes |
| Play Clock | On |
| Accelerated Clock | Off |
Why? More control. More reps. Less dead time.
If you are labbing formations, protections, and adjustments, Accelerated Clock Off matters.
Coin Toss and Kicking Settings
Small settings. Big fourth-quarter impact.
Coin Toss: Kick First
Use this setup:
| Coin Toss Setting | Best Value | Result |
|---|---|---|
| First Choice | Kick | Receive after halftime |
| Second Choice | Against Wind | Kick with wind late |
Getting the ball after halftime is a real edge. If you score before half and receive after half, you can steal a two-possession swing.
Choosing Against Wind early also helps late-game field goals. Depending on wind, that can mean 5–10 extra yards of range.
Kick Meter: Multimeter
Set Kick Meter Style to Multimeter.
| Kicking Setting | Best Value |
|---|---|
| Kick Meter Style | Multimeter |
| Control Scheme | Tap & Hold or Tap & Tap |
Use the control scheme you time best.
If you overfill the meter, you lose accuracy. If you release too early, you lose power. Don't chase max power every kick. Chase repeatable timing.
Best Passing Settings in Madden NFL 27
Passing settings affect every drive. Bad settings make good reads look bad.
Passing Mechanics Setup
Go to Settings > Game Options > Passing Mechanics.
| Passing Setting | Best Value | Notes |
|---|---|---|
| Passing Type | Placement & Accuracy | Best overall passing type |
| Passing Slowdown | Off | Use only briefly if brand new |
| Pass Lead Increase | Small | Controlled free-form passing |
| Reticle Speed | 7 | Balanced and reliable |
| Reticle Visibility | User Only | Less screen clutter |
| Meter Visibility | User Only / Visible | Personal preference |
Why Placement & Accuracy Is Best
Use Placement & Accuracy.
It gives full control over ball placement while still rewarding accurate timing. This is the best option for:
- Corner routes
- Deep outs
- Seams
- Crossers
- Red zone throws
- Sideline lasers
Classic passing is easier, but capped. Placement & Accuracy has the higher ceiling.
Reticle Speed: Use 7
Set Reticle Speed to 7.
| Reticle Speed | Feel | Problem |
|---|---|---|
| 1–4 | Too slow | Hard to lead throws |
| 5–9 | Balanced | Best range |
| 10–20 | Too fast | Easy to over-lead |
If you throw behind routes, raise it by 1.
If you sail balls too far outside, lower it by 1.
Best Catching Settings in Madden NFL 27
Timing-based catching is one of the biggest Madden 27 changes. Learn it early.
Catching Setup
| Catching Setting | Best Value | Why |
|---|---|---|
| AI WR Catching | On | Prevents dead plays on missed input |
| Timing-Based Catching | On | Enables green catch timing |
| Minimum Distance Offense | 5 or 10 yards | Depends on skill |
| Minimum Distance Defense | 5 or 10 yards | Keep consistent |
| UI Feedback | On | Shows timing quality |
5 Yards vs 10 Yards
| Minimum Distance | Best For | Result |
|---|---|---|
| 5 yards | Advanced players | More green-catch chances |
| 10 yards | Newer players | Less clutter on quick throws |
Start at 10 yards if the meter feels busy.
Move to 5 yards when you can time short and intermediate catches cleanly.
Catch Feedback: Keep It On
Keep Catching UI Feedback on.
| Feedback Color | Meaning |
|---|---|
| Green | Best timing, strongest result |
| Yellow | Normal catch chance |
| Red | Bad timing or bad situation |
This tells you why the play failed. That is how you improve fast.
Gameplay Helpers and Accessibility
These settings make the game easier to read and clean up user control.
Best Gameplay Helper Settings
| Gameplay Helper | Best Value | Why |
|---|---|---|
| Pre-Play Coach Speak | On | Useful reminders |
| Defensive Ball Hawk | On | Better click-on ball plays |
| Heat Seeker Assist | On | Helps tackle pursuit |
| Heat Seeker Window | 200% | Max assist window |
| Defensive Switch Assist | On | Cleaner switch control |
| Switch Stick Delay | Slight | Prevents snap mistakes |
| Controlled Player Art | On | Shows assignment/run fit |
Ball Hawk: On
Set Defensive Ball Hawk to On.
It helps when you click onto a defender and play the ball. It will not save bad positioning, but it reduces those why did he not react? moments.
Heat Seeker: On at 200%
Set Heat Seeker Assist to On and Heat Seeker Window to 200%.
This helps most on:
- QB scrambles
- Screens
- Outside runs
- Checkdowns
- Open-field tackles
If you overrun tackles, this setting helps pull you into better angles.
Controlled Player Art: On
Set Controlled Player Art to On.
You can see your selected player's assignment before the snap. That matters in match coverage, run fits, blitzes, and user defense.
If you keep abandoning your responsibility by accident, this setting fixes that fast.
Enlarge On-Field Graphics: On
Set Enlarge On-Field Graphics to On.
This makes receiver icons, meters, player indicators, and catch feedback bigger.
| Bigger Graphic | Why It Helps |
|---|---|
| Receiver icons | Faster reads |
| Catch meter | Better timing |
| Player indicators | Cleaner user control |
| Assignment art | Easier pre-snap checks |
If you play on a TV, this is close to mandatory.
Offensive Coaching Adjustments
These settings save time and make your offense more consistent.
Best Offensive Coaching Settings
| Offensive Setting | Best Value | Why |
|---|---|---|
| Deep Pass Catching | Conservative / Balanced | Safer deep balls |
| Intermediate Pass Catching | Aggressive | Better RAC chances |
| Blocking | Balanced | Fewer penalties |
| Auto Pass Protection | Base or Empty | Better protection rules |
| Ball Carrier | Balanced | Mostly AI behavior |
| Untarget User Defender | Situational | Depends on blitz handling |
| WR Scramble Support | Aggressive | Better broken-play movement |
| Zone Window Awareness | Off | Routes keep moving |
Intermediate Catching: Aggressive
Set Intermediate Pass Catching to Aggressive.
This helps on:
- Crossers
- Digs
- Posts
- Seams
- Deep curls
With timing-based catching, good meter timing can turn these into bigger RAC plays.
For Deep Pass Catching, use Conservative or Balanced unless you are elite with the catch meter.
Blocking: Balanced
Set Blocking to Balanced.
Aggressive blocking can feel tempting, but penalties kill drives. Balanced gives stable blocking without risking cheap holding calls.
Auto Pass Protection: Base or Empty
Do not leave Auto Pass Protection Off.
| Setting | Best Against | Use Case |
|---|---|---|
| Base | Normal rushes | Simple, steady protection |
| Empty | Stunts and twists | Better vs complex pressure |
| Off | None | Avoid it |
If you see normal four-man rushes, use Base.
If you see loops, stunts, or interior pressure, use Empty.
Untarget User Defender
This one depends on your skill.
| Setting | Use If | Risk |
|---|---|---|
| Off | You manually adjust protection | Requires attention |
| On | A-gap hover blitzes beat you | Smart players may exploit it |
If you keep getting screamed at by hover blitzes, turn it On.
If you know how to manually identify and untarget, keep it Off.
WR Scramble Support: Aggressive
Set WR Scramble Support to Aggressive.
It helps receivers uncover when the play breaks down. Best for mobile QBs, rollout offenses, and late crossers.
Zone Window Awareness: Off
Set Zone Window Awareness to Off.
We do not want receivers slowing down too early in zone windows. Keep routes moving. Throw them open yourself.
Defensive Coaching Adjustments
Defense is alignment, leverage, and discipline. These settings keep your structure clean.
Best Defensive Coaching Settings
| Defensive Setting | Best Value | Why |
|---|---|---|
| Auto Flip | On for most players | Matches offensive strength |
| Cornerback Matchups | Balanced | Avoids coverage bugs |
| Defensive Motion Response | Disabled | Keeps your setup intact |
| Defender Aggression | Aggressive | Better pass-rush effort |
| Gap Integrity | Conservative | Better run fits |
| Option Read Key | Conservative | Accounts for QB keep |
| Option Pitch Key | Aggressive | Attacks pitch threat |
| RPO Read Key | Conservative | Safer vs QB/run |
| RPO Pass Key | Conservative | Protects quick pass |
| Strip Ball | Conservative | Fewer bad strip attempts |
| Tackling | Balanced | Less fall-forward damage |
| CB Depth | 7 yards | Strong baseline |
| CB Width | Default | Keeps formation spacing |
| Safety Depth | 9 yards | Good for Cover 4/match |
Auto Flip: On for Most Players
Set Auto Flip Defensive Play Call to On unless you manually flip every snap.
Auto Flip aligns your defense to the offense's strong side. That helps against overload formations, outside runs, and flood concepts.
| Auto Flip | Who Should Use It |
|---|---|
| On | Most players |
| Off | Advanced players with manual flip rules |
If you are unsure, keep it On.
Cornerback Matchups: Balanced
Set Cornerback Matchups to Balanced.
Other matchup settings can create weird coverage movement. Balanced keeps the call intact.
Defensive Motion Response: Disabled
Set Defensive Motion Response to Disabled.
If you set up a blitz or coverage shell, you do not want offensive motion changing it for you. Adjust manually.
Gap Integrity: Conservative
Set Gap Integrity to Conservative.
This helps stop:
- Inside zone
- Stretch
- Cutbacks
- QB runs
- RPO handoffs
If your defense keeps losing leverage, this is one of the first fixes.
Option and RPO Defense
Use this setup:
| Setting | Best Value | Goal |
|---|---|---|
| Option Read Key | Conservative | Contain QB |
| Option Pitch Key | Aggressive | Stop pitch/outside |
| RPO Read Key | Conservative | Respect QB/run |
| RPO Pass Key | Conservative | Protect quick pass |
The goal is simple: force the ball inside, where help exists.
Strip Ball and Tackling
Use:
| Setting | Best Value |
|---|---|
| Strip Ball | Conservative |
| Tackling | Balanced |
Conservative strip ball avoids dumb missed tackles.
Balanced tackling prevents too much fall-forward yardage.
Coverage Strategy Settings
This is one of the most important new Madden NFL 27 settings areas.
Best Coverage Strategy Setup
| Coverage Setting | Best Value | Why |
|---|---|---|
| Zone Strategy | Aggressive | Tighter underneath coverage |
| Plaster Strategy | Aggressive | Faster receiver matching |
| Plaster Time | Aggressive | Less passive zone behavior |
| Plaster Trigger | Out of Pocket + Time | Best default trigger |
| Zone Drops | Default | Preserves match coverage |
| Coverage Checks | Default | Avoid untested logic |
Zone Strategy: Aggressive
Set Zone Strategy to Aggressive.
This tightens short and intermediate zones. That matters because most good Madden offenses live on:
- Flats
- Drags
- Curls
- Crossers
- Seams
If you give up too many bombs, move back to Balanced. If you get dinked all game, stay Aggressive.
Plaster: Aggressive
Set Plaster Strategy and Plaster Time to Aggressive.
This helps defenders attach faster when the QB scrambles or the play breaks down.
Best against:
- Rollouts
- Mobile QBs
- Broken plays
- Late crossers
- Scramble drills
Zone Drops: Default
Keep Zone Drops on Default.
Custom zone drops can break match coverage. Match is too valuable to ruin by accident.
Only change zone drops for specific problems:
| Problem | Possible Adjustment |
|---|---|
| Flats every play | Lower flat zones |
| Corner route spam | Raise curl flats |
| Red zone quick throws | Shorten drops |
| Deep sideline shots | Adjust with caution |
Default is the best everyday setting.
Coverage Shells and Formation Shifting
These are not normal menu settings, but they are must-use Madden NFL 27 tools.
Coverage Shells
Coverage shells disguise your defense.
| Shell Look | Offense Thinks | You Can Actually Run |
|---|---|---|
| Cover 0 | Man blitz | Cover 2 / Cover 3 / Cover 4 |
| Cover 2 | Two-high zone | Man / Blitz / Match |
| Cover 3 | One-high zone | Cover 4 Match / Man |
| Cover 4 | Quarters | Cover 0 / Tampa 2 / Cover 3 |
Use shells to make different calls look the same. That forces late reads. Late reads create sacks and picks.
Formation Shifting
Formation shifting hides your real offensive look.
Use it when:
- Your opponent keys your formation
- You spam one favorite concept
- You want late defensive movement
- You need better audible disguise
Good players identify formations fast. Formation shifting makes them process later.
Priority Settings to Change First
If you only change five Madden NFL 27 settings, change these:
| Priority | Setting | Value |
|---|---|---|
| 1 | Passing Type | Placement & Accuracy |
| 2 | Timing-Based Catching | On |
| 3 | Auto Pass Protection | Base or Empty |
| 4 | Enlarge On-Field Graphics | On |
| 5 | Auto Flip Defense | On for most players |
These affect the most snaps. Fix these first, then tune the rest.
FAQ
What are the best passing settings in Madden NFL 27?
Use Placement & Accuracy, Pass Lead Increase: Small, and Reticle Speed: 7. This gives the best mix of control, accuracy, and stable pass leading.
Should I use timing-based catching in Madden NFL 27?
Yes. Turn Timing-Based Catching On. Use 10 yards if you are learning. Use 5 yards if you want more green-catch chances on shorter throws.
Should Auto Flip Defense be on or off?
Keep Auto Flip On for most players. It aligns your defense to the offense's strong side. Turn it Off only if you manually flip your defense every snap.
Is Auto Pass Protection better on Base or Empty?
Use Base against normal rushes. Use Empty against stunts, twists, and complex pressure. Do not leave it Off.
Should I change Zone Drops in Madden NFL 27?
Keep Zone Drops Default unless you are countering a specific route. Custom drops can break match coverage, which is not worth it as a default setup.
Summary
The best Madden NFL 27 settings are about control.
Use Placement & Accuracy passing. Turn Timing-Based Catching On. Set Auto Pass Protection to Base or Empty. Keep Auto Flip On unless you have an advanced defensive plan. Turn Heat Seeker On at 200%. Use Enlarge On-Field Graphics so every meter and icon is easier to read.
This setup removes bad default behavior and gives us a cleaner competitive base. From there, wins come down to reads, adjustments, timing, and not handing the game free mistakes.
Most Popular Posts
- Madden NFL 27 Best Settings: Competitive Setup for Passing, Catching, Defense, and Coaching Adjustments
- Madden NFL 27 Defensive Adjustments Guide: Best Coverage, D-Line, and Linebacker Controls
- Madden 27 Skill-Based Passing: Placement & Accuracy Settings, Free-Form Leads, and Man-Beaters Work
- MUT 27 Coins Making Guide: Sniping, Sets, Evos, Investments, and Market Crashes
Popular Category Lists
- ARC Raiders / (348)
- Grow a Garden / (293)
- CoD: Black Ops 7 / (167)
- Star Citizen / (161)
- MLB 26 / (159)
- Monopoly Go / (152)
- ARK Survival Ascended / (127)
- Steal a Brainrot / (99)
- Blox Fruits / (74)
- Adopt Me / (73)
- Forza Horizon 6 / (72)
- Sailor Piece / (68)
- Grow a Garden 2 / (68)
- Diablo IV / (62)
- CoD: BLACK OPS 6 / (55)
- Path of Exile 2 / (48)
- Aion 2 / (47)
- Monster Hunter Wilds / (46)
- Windrose / (44)
- Donut SMP / (41)