0
0 Created: Aug 18,2026 | Palworld
Palworld Hard Mode Zenara & Astralym Guide: 1-Pal Frostallion Noct Setup

Hard mode Zenara and Astralym punishes players who try to solve every mechanic. Lasers, tentacles, ground explosions, DPS checks — it's a lot.

Skip all that. Build around Frostallion Noct. It flies over ground AoE, hits hard with dark skills, and tanks mistakes better than almost anything else in the current meta. This isn't the fastest clear. It's the most forgiving one.
- Why This Pal Carries the Fight
- Player Setup — Level 80, No Exceptions
- Frostallion Noct Build
- Passives That Actually Matter
- Skills
- Support Party (This Is Not Optional)
- Pre-Fight Checklist
- The Fight Loop
- Phase 1: Build Rhythm
- Phase 2: Red Laser = Real Danger
- Final DPS Check
- Quick Reaction Table
- Frostallion Noct vs Bellanoir
- Common Mistakes
- Expected Clear Style
- FAQ
- What level should I be for hard mode Zenara and Astralym?
- Is Frostallion Noct mandatory for this strategy?
- How do I survive the big red laser?
- Can Bellanoir clear this faster?
- What's the #1 reason runs fail?
- Bottom Line
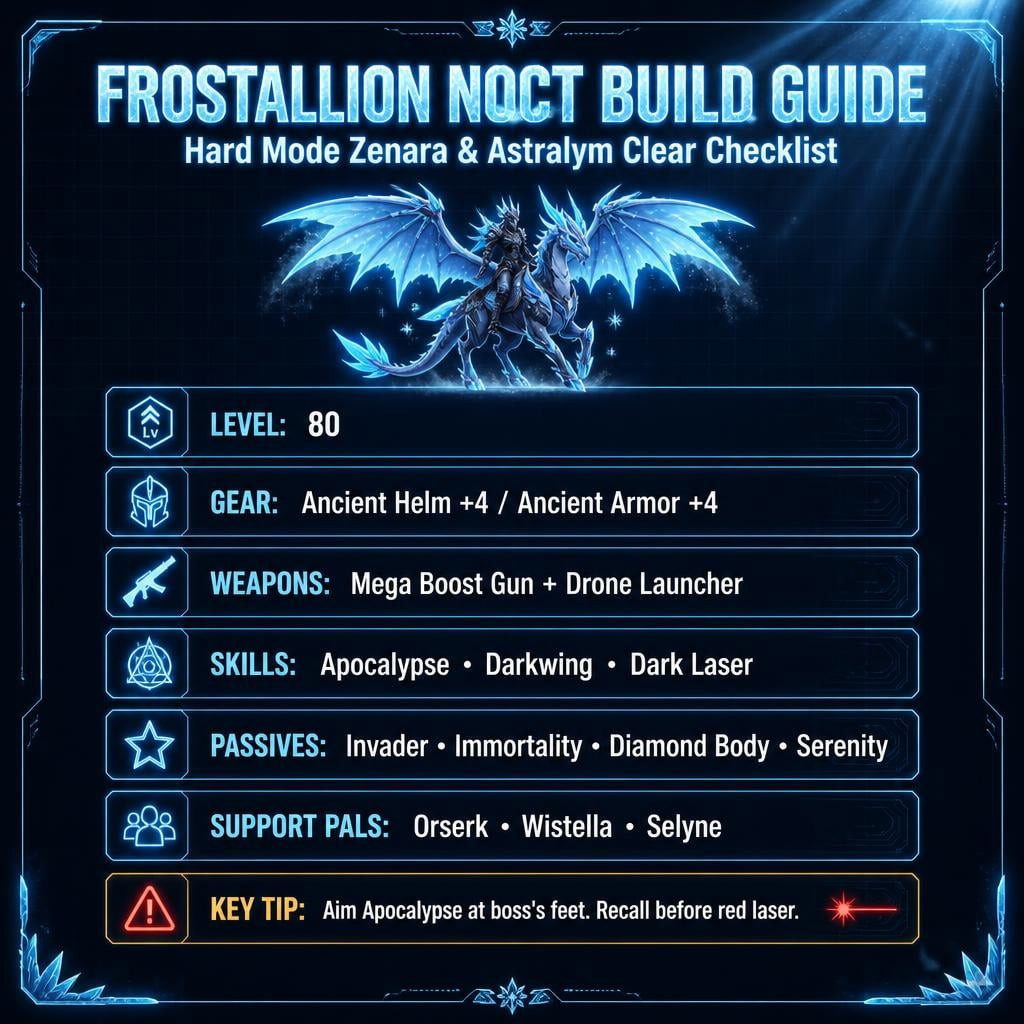
Why This Pal Carries the Fight
- Flies — most ground AoE just stops being a threat.
- Dark-type skills shred both bosses.
- Mounted movement = instant repositioning.
- With the right souls/passives, it eats hits that would delete a squishier Pal.
- Still clears the DPS checks when buffed properly.
Translation: sloppy movement won't end your run.
Player Setup — Level 80, No Exceptions
Attempt this below level 80 and you're gambling. Hard mode doesn't scale down for you.
| Slot | Item | Why |
|---|---|---|
| Helmet | Ancient Helm +4 | Survivability |
| Armor | Ancient Armor +4 | Absorbs laser tick damage |
| Weapon 1 | Mega Boost Gun | Buffs your active Pal |
| Weapon 2 | Drone Launcher | Triggers Orserk's stat boost |
| Accessories | Darkness / defensive picks | Stability for you and your Pal |
You are not the damage source. Your job: buff, mount, dismount, recall, survive.
Frostallion Noct Build
| Category | Setup |
|---|---|
| Level | 80 |
| Souls | HP / ATK / DEF maxed (~60%+ investment) |
| Condensing | 4-star if possible |
| Role | Mounted damage + evasive tank |
Passives That Actually Matter
| Passive | Purpose |
|---|---|
| Invader | Raw offense |
| Immortality | Survives mistakes |
| Diamond Body | Flat tankiness |
| Serenity | Smoother skill cycling |
Missing perfect passives? Fight's still doable — you just get less margin for error.
Skills
| Skill | Role | Key Tip |
|---|---|---|
| Apocalypse | Main burst | Aim at the boss's feet, not up |
| Darkwing | Mobility + damage | Best for chasing |
| Dark Laser | Filler DPS | More reliable than slow multi-hits |
Skip Dark Wisp-type skills here — too slow to fully connect in this fight.
Support Party (This Is Not Optional)
| Pal | Role | Why |
|---|---|---|
| Orserk | Drone Launcher combo | Buffs active Pal's ATK/DEF |
| Wistella | Vanguard / Stronghold Strategist | Team durability |
| Selyne (or similar) | Healing support | Keeps you alive |
| 4th support | Idiosyncratic Being / healing | Passive sustain |
Orserk + Drone Launcher is the backbone. It's the difference between tanky and basically unkillable during damage windows.
Pre-Fight Checklist
| Item | Target |
|---|---|
| Player + Noct Level | 80 |
| Armor | Ancient Helm/Armor +4 |
| Souls | HP/ATK/DEF near-maxed |
| Mega Boost Gun / Drone Launcher | Equipped |
| Apocalypse / Darkwing / Dark Laser | Equipped |
If the boss survives your final push with too much HP left, the fix is almost always: better souls, better passives, or cleaner Apocalypse placement.
The Fight Loop
1. Mega Boost Gun on Noct.
2. Drone Launcher to trigger support.
3. Mount up, fly in.
4. Darkwing to close distance.
5. Apocalypse at the boss's feet.
6. Dark Laser when it's safe.
7. Recall if danger is incoming.
8. Remount, repeat.
No frame-perfect timing needed. Just don't attack into danger.
Phase 1: Build Rhythm
Stay mounted. Aim Apocalypse low. Chase with Darkwing.
If tentacles or a big ground attack starts: fly up, stay airborne, wait it out if unsure. Flight turns this mechanic into a non-issue.
Phase 2: Red Laser = Real Danger
This is where runs actually die.
| Situation | Response |
|---|---|
| Close to boss | Move under its body |
| Noct about to eat full laser | Recall immediately |
| Shield full | Can tank a few ticks — don't stand still |
| Shield broken | Survival over damage |
| Far and exposed | Fly sideways, fast |
Getting under the boss beats sprinting through the beam. Do not face-tank the whole laser unless you enjoy respawn screens.
Final DPS Check
Near the end, the boss forces a damage check. This is where you dump everything:
1. Keep Noct active.
2. Apocalypse immediately.
3. Darkwing follow-up if close.
4. Dark Laser as filler.
5. Only recall for a clearly lethal attack.
Missed hits here are fine as long as damage keeps flowing.
Quick Reaction Table
| You See... | Do This |
|---|---|
| Apocalypse whiffing | Aim lower, at the feet |
| Noct taking heavy damage | Recall now |
| Red laser | Move under boss or recall |
| Ground AoE | Fly up |
| Boss fleeing | Darkwing to chase |
| Shield breaks | Stop attacking, reposition |
| Final phase | Dump cooldowns |
Frostallion Noct vs Bellanoir
| Pal | Strength | Weakness | Best For |
|---|---|---|---|
| Frostallion Noct | Safe flight, strong dark damage | Slower than pure DPS | First clears, sloppy players |
| Bellanoir | Higher damage ceiling | Punishes bad movement | Faster clears, clean execution |
For a first hard mode clear, Noct wins on comfort every time.
Common Mistakes
- Aiming Apocalypse too high — whiffs damage.
- Refusing to recall — recalling is a strategy, not a failure.
- Attempting below level 80 — the fight gets brutal fast.
- Skipping support passives — they're doing more work than you think.
- Tanking the full red laser — just don't.
Expected Clear Style
This isn't a clean duel. Expect late recalls, missed Apocalypse casts, a few laser ticks you should've dodged, and messy repositioning. It still clears. That's the whole point of the build.
FAQ
What level should I be for hard mode Zenara and Astralym?
Level 80, minimum. Anything lower needs exceptional gear and Pal investment to compensate.
Is Frostallion Noct mandatory for this strategy?
For this low-effort version, yes. Flight, dark damage, and durability are what make the fight forgiving.
How do I survive the big red laser?
Get close to or under the boss, or recall Noct before it eats the full beam. Don't stand still in the path.
Can Bellanoir clear this faster?
Yes, with cleaner execution. Frostallion Noct trades some speed for safety and easier movement.
What's the #1 reason runs fail?
Bad Apocalypse placement, an underbuilt Frostallion Noct, missing support passives, or tanking the full red laser. Fix these four and the fight stabilizes fast.
Bottom Line
Level 80. Ancient Armor +4. Fully invested Noct souls. Apocalypse at the feet. Fly over ground AoE. Recall before the red laser kills you. Push everything during the final DPS check.
Not the fastest clear. Not the flashiest. But it survives your mistakes — and that's exactly what a first hard mode clear needs.

Most Popular Posts
- Palworld 1.0 Combat Builds: 5 Party Setups That Actually Clear Hard Mode
- Palworld 1.0 Ranked Best Unique Base Locations
- Palworld 1.0 Gold Coins Farm Guide: Fastest Ways to Millions of Gold Coins
- Palworld 1.0 Items Farming Guides: Make Any Pal Broken OP Fast
- Palworld 1.0 Lore Guide: Astralym, Xynarra, the World Tree, and Real Ending Explained
- Palworld 1.0.3 Stat Fruit Farming Guides: Dusty Ravine Hybrid Route Hits
Popular Category Lists
- ARC Raiders / (351)
- Grow a Garden / (294)
- CoD: Black Ops 7 / (167)
- Star Citizen / (162)
- MLB 26 / (159)
- Monopoly Go / (152)
- ARK Survival Ascended / (128)
- Steal a Brainrot / (99)
- Blox Fruits / (74)
- Adopt Me / (74)
- Forza Horizon 6 / (72)
- Sailor Piece / (68)
- Grow a Garden 2 / (68)
- Diablo IV / (62)
- CoD: BLACK OPS 6 / (55)
- Aion 2 / (50)
- Path of Exile 2 / (48)
- Monster Hunter Wilds / (46)
- Windrose / (44)
- Donut SMP / (41)