0
0 Created: Aug 12,2026 | Anime Expeditions
Anime Expeditions Best Way to Farm AFK Tower: Auto Play Setup, Team Comps, and Floor 50+ Strategy

Auto Play remembers placement zones per map. Set it once, Tower farms itself forever on that map. Most players skip this step — that's why their runs fall apart.

This guide is built around one core idea: six roles, six jobs, zero babysitting. Carry, shield breaker, slow, buffer, leak control, farm. Stack these correctly and Floor 50+ stops being scary.
- The 6-Role Team (This Is the Whole Strategy)
- Why Megumi
- Why Itachi (Shield Breaker)
- Why Summon Sorcerer (Slow)
- Why Forbidden Teacher (Buffer)
- Why Toy Maker (Leak Control)
- Auto Play Placement: Make the Zone Small
- Main Preset: Stable Tower Farming
- Strict Auto Upgrade Priority: On or Off?
- Backup Preset: Toy Maker Safety
- Required Gameplay Settings
- The Auto Play Timeout Problem
- Floor 50+: Swap in Cuber
- Main DPS Alternatives
- Striker Tower Is Different
- Troubleshooting
- What's the best AFK Tower team in Anime Expeditions?
- Do I need Megumi specifically?
- Should Toy Maker be priority 2 or 3?
- What SPA should Summon Sorcerer hit?
- What changes after Floor 50?
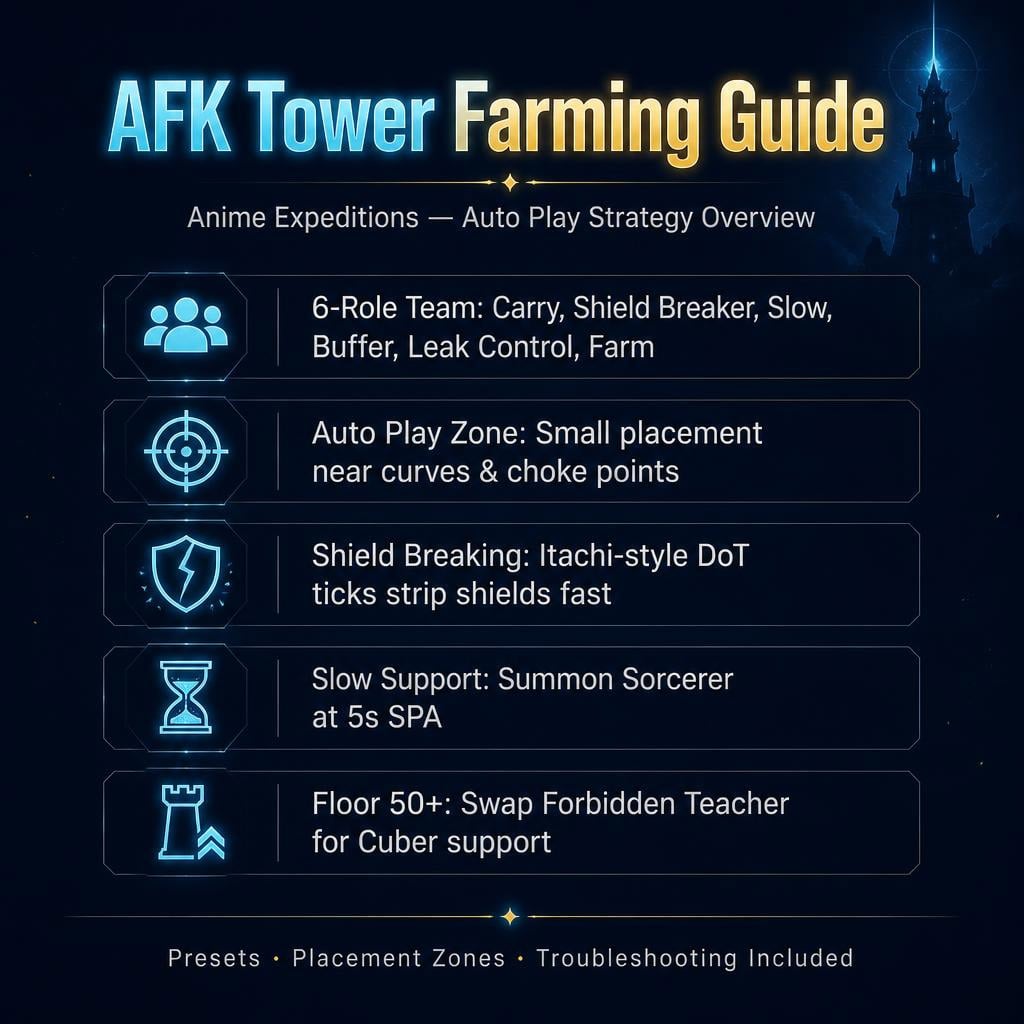
The 6-Role Team (This Is the Whole Strategy)
| Role | Unit | Job | Swappable? |
|---|---|---|---|
| Main DPS/Control | Megumi | Damage + stun + control | Yes, if replacement carries |
| Shield Breaker | Itachi | DoT ticks strip shields | Yes |
| Slow | Summon Sorcerer | Keeps enemies in range | Hard to replace |
| Buffer | Forbidden Teacher | Boosts main damage | Yes, especially post-Floor 50 |
| Leak Control | Toy Maker | Cleans early leaks | Strongly recommended |
| Farm | Senku | Funds everything | Required |
If you don't have these exact units, keep the roles, swap the names.
Why Megumi
Damage alone doesn't cut it on Tower. Megumi stuns and disrupts on top of hitting hard — that's the difference between a leak and a clean wave.
Unbound Megumi? Placement limit 1. Not unbound? Run 2 copies to stabilize.
Why Itachi (Shield Breaker)
Shielded enemies eat your carry's damage and then walk straight through anyway. Itachi's burn ticks strip shield layers without needing big hits.
Comparison: Itachi breaks shields best through repeated ticks. Crimson Brother works if you don't have him — decent raw shield damage, just less consistent.
Don't invest here. Auto Upgrade OFF, Placement Limit 1. He just needs to exist and tick.
Why Summon Sorcerer (Slow)
This is the unit most players undervalue. Slowed enemies = more time for your carry to stun, hit, and let shields get stripped.
Target: 5 seconds SPA.
| Current SPA | Setting |
|---|---|
| Already 5s | Don't auto-upgrade |
| Hits 5s at upgrade 1 | Max upgrade = 1 |
| Hits 5s at upgrade 2 | Max upgrade = 2 |
Over-upgrading this steals gold from your carry. Under-upgrading and enemies blow past your damage zone. Get this number right.
Why Forbidden Teacher (Buffer)
One job: buff the carry. Place her, auto-upgrade, done. Damage thresholds decide Tower — either the enemy dies before the turn or it doesn't. She pushes you across that line.
Why Toy Maker (Leak Control)
Auto Play doesn't place units in your ideal order. Early waves get messy before your carry is upgraded. Toy Maker's summons plug that gap.
Unbound Toy Maker = massively more reliable. In our runs, a strong unbound Toy Maker erased leaks that would've ended weaker setups outright.
Auto Play Placement: Make the Zone Small
Auto Play doesn't let you hand-place units mid-run — you pick a zone, it fills it. Smaller zone = tighter control.
A bad zone breaks everything: slow unit spawns too far back, carry ends up in a dead corner, run collapses.
Best spots: curves, loops, central intersections, long straight paths where units hit both incoming and outgoing lanes.
Map Prep (do this once, forever done):
1. Enter the map
2. Open Auto Play settings
3. Pick a tight zone near a choke point
4. Test the first few waves
5. Repeat for every story map
Tower rotates through maps randomly — prep them all or get blindsided.
Main Preset: Stable Tower Farming
| Unit | Auto Upgrade | Priority | Placement Limit |
|---|---|---|---|
| Farm | Yes | 1 | 3 |
| Megumi | Yes | 2 | 1–2 |
| Toy Maker | Yes | 3 | 1 |
| Forbidden Teacher | Yes | 4–5 | 1 |
| Itachi | No | Optional | 1 |
| Summon Sorcerer | Conditional | 6 | 3 |
Farm gets priority 1 — no economy, no upgrades, no run. Megumi at priority 2 scales once gold flows. Toy Maker at 3 stays as backup, not the main plan.
Strict Auto Upgrade Priority: On or Off?
This setting fully funds your top-priority unit before touching the next one.
| Situation | Setting |
|---|---|
| Strong carry + strong Toy Maker | ON |
| Weak Toy Maker, strong carry | Usually ON |
| Weak carry + weak Toy Maker | OFF |
| Leaking early waves constantly | OFF |
| Stage is easy | ON |
If your account is strong, strict priority means clean, fast scaling. If it's not, turning it off spreads gold across units and stops the bleeding.
Backup Preset: Toy Maker Safety
Only change: Toy Maker moves to priority 2, Megumi drops to 3.
| Unit | Main Preset | Safety Preset |
|---|---|---|
| Farm | 1 | 1 |
| Megumi | 2 | 3 |
| Toy Maker | 3 | 2 |
| Buffer | 4–5 | 4–5 |
| Slow | 6 | 6 |
Switch to this if: enemies reach the exit before Megumi scales, you're losing early waves, or your carry isn't unbound.
In our testing, the main preset alone reached Floor 51 without ever needing the swap — but weaker rosters may need it much sooner.
Required Gameplay Settings
| Setting | Value | Why |
|---|---|---|
| Auto Next | ON | Auto-advances stages |
| Auto Vote Start | ON | Auto-starts next stage |
| Auto Retry | ON (if farming unattended) | Retries failed runs |
| Auto Play | ON | Handles placement/upgrades |
| Pre-prioritized Phantom Placements | OFF | Stops wasted gold on junk placements |
That last one matters more than it looks — leaving it ON burns gold your carry needs.
The Auto Play Timeout Problem
Auto Play disables itself after a stretch of time — clearly built to stop true unattended farming.
Realistic fixes, ranked by risk:
| Method | Risk | Notes |
|---|---|---|
| Manual check every few minutes | Lowest | Safest, not true AFK |
| Simple clicker on Auto Play button | Medium | Common approach, use caution |
| Macro software | Higher | More likely to cause issues |
| Client-modifying tools | Avoid | Not worth it |
If using a clicker, keep the interval at 500ms — frequent enough to catch the timeout, not aggressive enough to be pointless.
| Interval | Result |
|---|---|
| 100ms | Overkill |
| 500ms | Sweet spot |
| 1000ms | Fine, slightly less responsive |
| 3000ms+ | Risk of missing the window |
Understand the risk before running anything third-party — this is on you.
Floor 50+: Swap in Cuber
Past Floor 50, enemies get tankier and shields hit harder. Raw damage stops being enough — support value spikes.
Cuber/Cooper buffs everything in his range AND stuns with cubes. Since your Auto Play zone is already tight, most of your team sits inside his range for free.
| Role | Unit | Why |
|---|---|---|
| Main DPS | Megumi / Elf Mage / strong awakened carry | Clears waves |
| Shield Breaker | Itachi | Strips shields |
| Support | Cuber/Cooper | Buff + stun |
| Slow | Summon Sorcerer | Keeps enemies in range |
| Leak Control | Toy Maker | Cleanup |
| Farm | Senku | Funds it all |
Comparison: Forbidden Teacher buffs specific damage types. Cuber buffs broader — better fit once your roster diversifies past Floor 50.
Main DPS Alternatives
| Unit | Strength | Weakness | Best Case |
|---|---|---|---|
| Fully Awakened Elf Mage | Strong AoE, buff-friendly | Needs investment | Floor 50+ |
| Baji-style unit | High damage | Expensive | Strong economy |
| Lady Giant-style | Cheap, reliable | Falls off late-game | Striker Tower |
| New event units | Varies | Kit-dependent | Test first |
Check buff compatibility before committing — a carry that doesn't take your buffer's element wastes half your team's value.
Striker Tower Is Different
No trait advantages here. Cheaper units and reliable AoE carries often outperform expensive scaling picks. Priority: reach the right power spike fast, not the highest raw DPS number.
Troubleshooting
| Problem | Cause | Fix |
|---|---|---|
| Early leaks | Toy Maker upgraded too late | Switch to Toy Maker Safety preset |
| Shields not breaking | Weak shield breaker | Add Itachi/Crimson Brother |
| Enemies too fast | Slow unit under-leveled | Push Summon Sorcerer to 5s SPA |
| Carry scaling slow | Farm priority wrong | Farm = priority 1 |
| Bad placement | Zone too large | Shrink zone to a choke point |
| Buffs not landing | Units outside range | Reposition zone |
| Run stops mid-farm | Auto Play timed out | Manual check or cautious clicker |
| Fails on specific maps | Zone never set for that map | Enter map, save zone |
Diagnosis order for early leaks:
1. Toy Maker placed/upgraded early enough?
2. Slow unit hitting 5s SPA?
3. Zone too far from entrance?
4. Shield breaker actually hitting shields?
5. Strict priority blocking balanced upgrades?
Nine times out of ten it's setup timing, not raw DPS.
FAQ
What's the best AFK Tower team in Anime Expeditions?
One carry, one shield breaker, one slow, one buffer, Toy Maker, one farm. Example: Megumi, Itachi, Summon Sorcerer, Forbidden Teacher/Cuber, Toy Maker, Senku.
Do I need Megumi specifically?
No. Any strong carry with AoE and control effects works. Megumi's just the strongest option available for this role.
Should Toy Maker be priority 2 or 3?
Unbound and strong → priority 3, let the carry scale first. Weaker or leaking early → priority 2.
What SPA should Summon Sorcerer hit?
5 seconds. Set max upgrade to whichever level reaches that number, then stop investing.
What changes after Floor 50?
Swap Forbidden Teacher for Cuber/Cooper. Broader buffs plus stuns matter more once enemies get tankier.
Summary
This is a system, not a single strong unit. Farm funds it, Megumi kills it, Itachi breaks shields, Summon Sorcerer slows it, Forbidden Teacher/Cuber buffs it, Toy Maker cleans up what slips through.
Prep every map's placement zone once. Run the main preset. Swap to Toy Maker Safety if you're leaking early. Swap to Cuber past Floor 50. That's the entire loop — the game doesn't play perfectly, but the system covers every gap Auto Play leaves open.

Most Popular Posts
- Anime Expeditions Update 0.5 Tier List: Best Units, Traits & Equipment Builds
- Best Traits & Equipment Builds for Every Anime Expeditions Unit
- Anime Expeditions Best Equipment Guide: Optimal Gear for Every Units
- Anime Expeditions 0.5 Villain Event Guide: Get Secret Itachi, Farm Crow Relics, Build the Best Team
- Anime Expeditions: Gold, Gems, Rerolls & AFK Macro Farming Guide
- Anime Expeditions Team Guide: Best Units, Gear & Tournament Builds
Popular Category Lists
- ARC Raiders / (345)
- Grow a Garden / (292)
- CoD: Black Ops 7 / (167)
- Star Citizen / (161)
- MLB 26 / (159)
- Monopoly Go / (152)
- ARK Survival Ascended / (126)
- Steal a Brainrot / (98)
- Blox Fruits / (74)
- Adopt Me / (73)
- Forza Horizon 6 / (72)
- Sailor Piece / (68)
- Grow a Garden 2 / (68)
- Diablo IV / (62)
- CoD: BLACK OPS 6 / (55)
- Path of Exile 2 / (48)
- Monster Hunter Wilds / (46)
- Aion 2 / (46)
- Windrose / (44)
- Donut SMP / (41)