0
0 Created: Dec 29,2025 | ARC Raiders
ARC Raiders Aphelion Weapon Solo Guide: Best Build, Playstyle, and Common Mistakes

Rarest is a dangerous word in ARC Raiders. It makes you assume the weapon is automatically worth the risk—when the real question, especially as a solo, is whether it reliably gets you to extract.
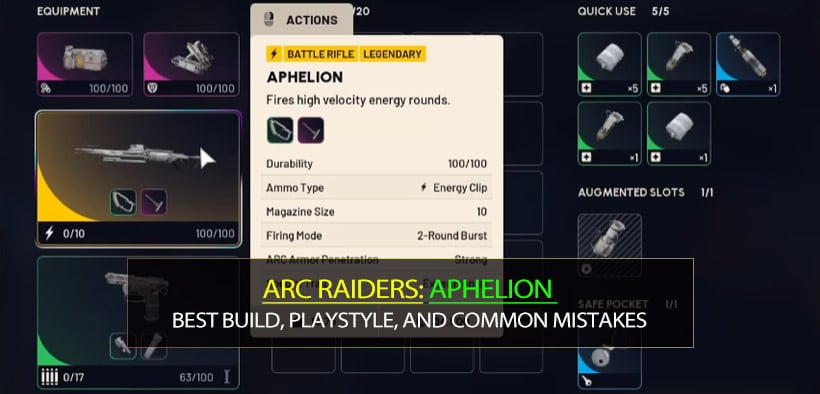
We started in the practice range to understand its handling, then ran real raids with a consistent loadout philosophy. My headline takeaway is simple: Aphelion is a close-to-mid range destroyer, but it demands discipline. The ADS is slow, the mag is only 10 rounds, and the reload feels long enough to age your character in real time. That means you play it like a methodical corner-holder, not a sprint-and-chase ARC Raiders weapons.
- 1) The One-Line Verdict (Who It's For / Who It Isn't)
- What that means in practice
- 2) Attachments: Why Lightweight Stock Is Best-in-Slot (For Solo)
- My pick
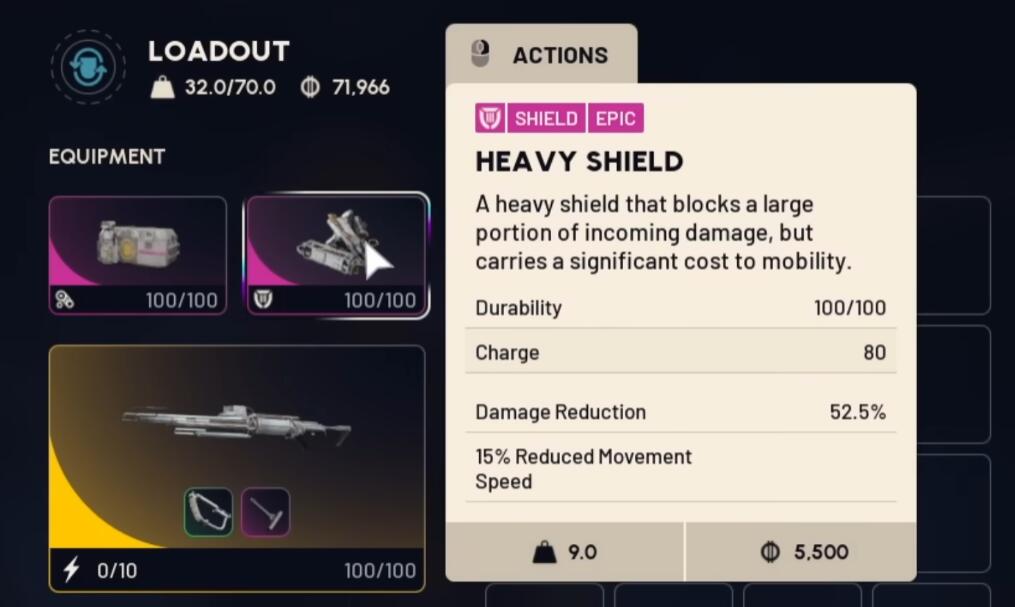
- 3) Why I Run Heavy Shield With Aphelion
- My steady solo package
- 4) How to Fight With Aphelion (The Rules That Make It Work)
- 4.1 My three hard rules
- 4.2 Decision table (what I do when…)
- 5) Is It Strong? — My Real Combat Feel
- What surprised me
- 6) Why I Died (And How You Avoid the Same Trap)
- Anti-tilt fixes I'd apply next run
- 7) Should You Bring Aphelion as a Solo? (Decision Tree)
- FAQ
- 1) What's the best attachment for Aphelion?
- 2) Why Heavy Shield instead of lighter shields?
- 3) Do I really need a secondary?
- 4) What range should I play?
- 5) Is it similar to Anvil?
- Summary
1) The One-Line Verdict (Who It's For / Who It Isn't)
Aphelion has a clear identity:
Aphelion is a solo angle-control weapon, not a solo run-and-gun weapon.
What that means in practice
| Category | My Verdict | What It Means for You |
|---|---|---|
| Best range | Close → mid | Doors, corners, short lanes = maximum value |
| Tempo | Slow | You win by being a patient turtle, not a hyperactive rabbit |
| Forgiveness | Low | 10 rounds + slow ADS + long reload punishes mistakes |
| Sound/attention | High | The energy signature is obvious; random shots attract pressure |
If you already like Anvil-style fights (hold angle, land clean shots, end it quickly), Aphelion will feel familiar.
If you rely on fast ADS and constant repositioning, Aphelion will fight you as much as it fights enemies.
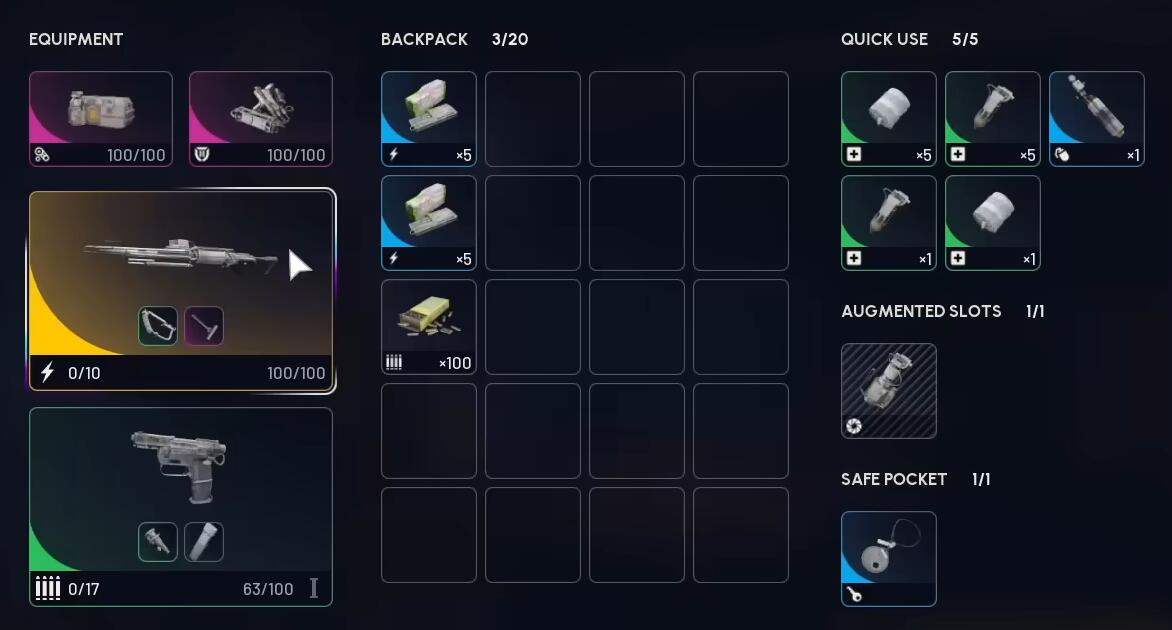
2) Attachments: Why Lightweight Stock Is Best-in-Slot (For Solo)
In the practice range, the biggest issue wasn't recoil—it was ADS speed, especially while moving.
My pick
| Slot (the real choice) | I Choose | Why | When the other option can make sense |
|---|---|---|---|
| Stock: Lightweight Stock vs Kinetic Converter | Lightweight Stock | Getting to pinpoint accuracy faster is everything with Aphelion | If you refuse to ADS and only take extreme close-range fights (not ideal for this gun) |
Why this matters: Aphelion rewards first-shot accuracy.
If your ADS lags, you give away first contact, and solos rarely get a second chance.
3) Why I Run Heavy Shield With Aphelion
I ran Heavy Shield because Aphelion naturally plays slower: slow ADS, slower-than-expected firing rhythm, small mag, long reload. Heavy Shield gives you the breathing room to stay in-control.
My steady solo package
| Slot | What I Bring | Purpose | Key Note |
|---|---|---|---|
| Shield | Heavy Shield | Buffer for slow tempo | It's not permission to face-tank squads |
| Primary | Aphelion | Angle-control kills | Don't fire just to test |
| Secondary | Beretta | Prevent died reloading moments | Plan swaps when Aphelion hits low ammo |
| Healing | Herbal bandages | HP recovery | Heal only after breaking contact |
| Shield rechargers | Yes | Multi-fight endurance | Recharge behind real cover |
| Utility | 1 Trailblazer | Deny pushes / force movement | Better as a bailout than an opener |
If you keep dying during reloads, a secondary pistol isn't optional—it's insurance.
4) How to Fight With Aphelion (The Rules That Make It Work)
Aphelion punishes sloppy habits. As a solo, your survivability is tied to information control.
4.1 My three hard rules
1. Don't take advertising shots.
Because the energy audio stands out, one careless shot can invite a collapse.
2. Force narrow fights.
Doors and corners compress the enemy's options. Aphelion loves predictability.
3. Reload early, not empty.
With a 10-round mag, waiting until 0 is basically signing a waiver.
4.2 Decision table (what I do when…)
| Situation | What I Do | Why |
|---|---|---|
| I hear VOIP/footsteps but can't pinpoint | Close doors, hold a safer angle | Solo wins by certainty, not bravado |
| Enemy is on the other side of a doorway | Don't hard-push; reposition or use utility | Slow ADS gets exposed on wide swings |
| Enemy disengages after taking damage | Don't chase into open ground | Chasing is where Aphelion's weaknesses punish you |
5) Is It Strong? — My Real Combat Feel
When Aphelion is in its comfort zone (close-to-mid), it hits hard enough to feel like a decision weapon. If your first shots land, opponents quickly get shoved into defensive play: shield pop, retreat, panic movement.
What surprised me
- I actually felt more confident at close range than I expected—because holding tight angles lets the gun do its job.
- The gun feels Anvil-adjacent in how it deletes people… except the ADS feels even slower.
If you notice you're winning when fights are tight and losing when fights become chases, then you're seeing Aphelion's true shape.
6) Why I Died (And How You Avoid the Same Trap)
My death wasn't Aphelion is weak. It was a classic solo failure state: PvE interference + player timing + slow reload/tempo stacking into a bad moment.
Anti-tilt fixes I'd apply next run
| Risk | Adjustment | Copy-Paste Rule |
|---|---|---|
| Fighting players while PvE is active (ticks/shredder pressure) | Break contact first | If PvE is on you, reset before dueling |
| Being collapsed on after firing | Shoot, then relocate | If you must fire, change position immediately |
| Getting caught mid-reload | Reload behind hard cover, earlier | At ~3 rounds left, start planning reload |
7) Should You Bring Aphelion as a Solo? (Decision Tree)
| Your playstyle / goal | Recommendation | Reason |
|---|---|---|
| You like slow clears, door play, angle holds | Yes | You'll extract value consistently |
| You like sprinting, wide swings, chasing | No (or learn it first) | Slow ADS + 10 rounds will punish you |
| Your raid goal is loot and leave safely | Yes, but shoot less | Keep it quiet; avoid attracting pressure |
| Your raid goal is seek fights nonstop | Only if you're already comfortable | Low forgiveness = expensive mistakes |
FAQ
1) What's the best attachment for Aphelion?
For solo practicality, Lightweight Stock. The faster path to stable accuracy matters more than theoretical upside elsewhere because ADS is the gun's biggest friction point.
2) Why Heavy Shield instead of lighter shields?
Because Aphelion's rhythm is slower. Heavy Shield gives you time to hold angles, manage reload windows, and avoid dying to a single mistake.
3) Do I really need a secondary?
If you're solo, yes. A 10-round mag plus a long reload creates embarrassing deaths. A pistol turns those into survivable moments.
4) What range should I play?
Close-to-mid. Treat it like an angle weapon. Don't build your plan around long chases or open-field tracking.
5) Is it similar to Anvil?
In how it deletes people at close-to-mid, yes. In how it handles, it's harsher—ADS feels slower, so you must be cleaner with positioning.
Summary
Aphelion is powerful, but it's picky. Slow ADS, a 10-round mag, long reload, and loud identity mean you can't pilot it like a run-and-gun rifle. As a solo, the winning formula is Heavy Shield + Lightweight Stock + strict angle discipline: close doors, force narrow fights, reload early, and reposition after shots.

Most Popular Posts
- ARC Raiders Update 1.42: Phantom Targets Farming Guide (Glitched Wasps, Rewards, Regional Conditions)
- ARC Raiders Hullcracker Blueprints: Fastest Way to Complete The Major's Footlocker
- ARC Raiders Best Pop Trigger Strategy: Fast Phantom Targets Damage Guide
- ARC Raiders Subway Skin Guide: Unlock the Subterranean Outfit
- ARC Raiders Spaceport Open Containers Guide: 19K+ Solo Trial Route
- ARC Raiders Looting Mk. 3 Survivor Blueprint Guide: Best Blue Gate Route and Drop Locations
Popular Category Lists
- ARC Raiders / (343)
- Grow a Garden / (292)
- CoD: Black Ops 7 / (167)
- Star Citizen / (160)
- MLB 26 / (159)
- Monopoly Go / (152)
- ARK Survival Ascended / (126)
- Steal a Brainrot / (98)
- Blox Fruits / (74)
- Adopt Me / (73)
- Forza Horizon 6 / (72)
- Sailor Piece / (68)
- Grow a Garden 2 / (68)
- Diablo IV / (62)
- CoD: BLACK OPS 6 / (55)
- Path of Exile 2 / (48)
- Monster Hunter Wilds / (46)
- Aion 2 / (45)
- Windrose / (44)
- Donut SMP / (41)