



 0
0 Created: Apr 6,2026 | ARC Raiders
ARC Raiders Assessor Loot Farming Safely With Smoke + Photoelectric Cloak

If you are trying to loot Assessors in ARC Raiders without burning meds or getting deleted by surrounding ARCs, the safest method right now is not raw damage. It is timing, smoke placement, and clean disengage. After repeated solo runs, the most consistent pattern is simple: stay off the ARC's radar before it lands, breach under smoke, then leave under Photoelectric Cloak before the area fully locks onto you.
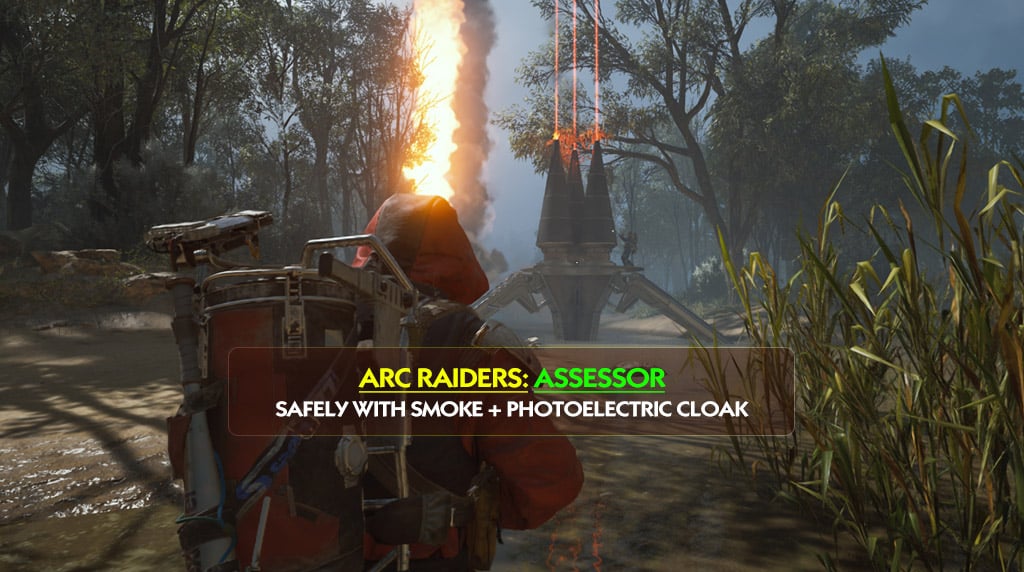
This is not a zero-skill trick, and it is not the fastest farming method in the game. But if your goal is safe, repeatable Assessor looting, this is one of the best ways to do it.
- Why This Method Works
- Recommended Loadout
- Best Way to Loot an Assessor
- 1. Let the Assessor Land First
- 2. Move In Only If the Area Is Calm
- 3. Throw Smoke at Your Feet and Start Breaching
- 4. Leave With Photoelectric Cloak
- What Makes Runs Fail
- Solo vs Crowded Runs
- Practical Tips From Repeated Runs
- FAQ
- Is this really the safest way to loot Assessors?
- Can we do this without Photoelectric Cloak?
- Do we need to kill the surrounding ARCs first?
- What is the most important rule?
- Final Thoughts
Why This Method Works
The idea is to treat the Assessor like a stealth objective, not a fight.
That changes everything:
- We avoid early aggro
- We use smoke to cover the breach
- We use Photoelectric Cloak to leave safely
- We only commit when the landing and positioning are in our favor
From experience, this works much better solo. Once extra players show up, ARC behavior gets messy fast. More aggro means less control, and less control is usually what gets players hit.
Recommended Loadout
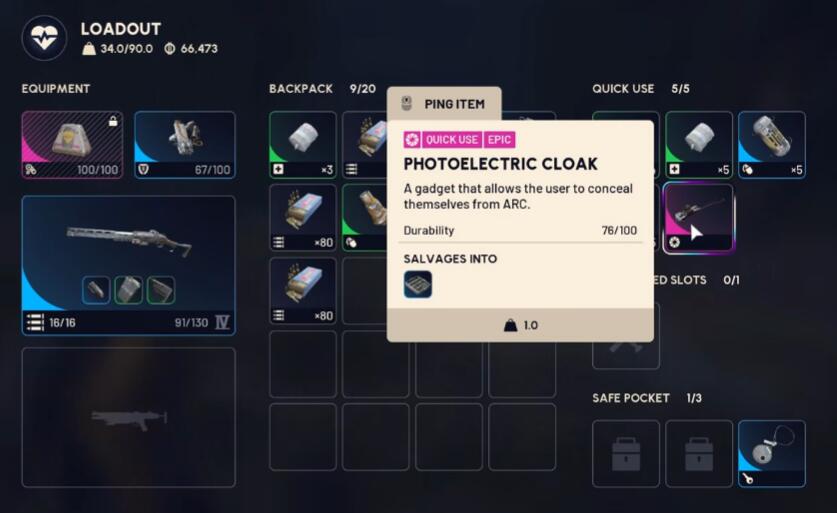
You do not need a stacked combat build, but you do need the right tools.
| Item | Priority | Why It Matters |
|---|---|---|
| Photoelectric Cloak | Essential | Safe entry and exit |
| Smoke Grenades | Essential | Covers the breach pad |
| Meds / Shields | Recommended | Backup if timing slips |
| Reliable Weapon | Optional | Emergency use only |
| Faster Breach Skill | Strongly Recommended | Less time exposed |
The two non-negotiables are smoke grenades and Photoelectric Cloak. Without them, the method loses most of its consistency.
Best Way to Loot an Assessor
The route is simple, but the timing matters.
1. Let the Assessor Land First
Do not force the opening too early.
We want to:
- stay out of sight,
- let the landing animation finish,
- move only when the pad is available.
If you get spotted before the landing is complete, then the run usually becomes much harder than it needs to be.
2. Move In Only If the Area Is Calm
This method is strongest when:
- you are solo,
- the Assessor lands near cover,
- nearby players are not dragging ARCs into the area.
If another player is already making noise, then either wait for a cleaner window or rotate out.
3. Throw Smoke at Your Feet and Start Breaching
This is the core sequence:
1. Step onto the pad
2. Throw smoke at your feet
3. Start breaching immediately
A single smoke is usually enough to protect the breach window. Once the action starts, the key is to stay committed and not hesitate halfway through.
4. Leave With Photoelectric Cloak
As soon as the breach finishes:
- switch back to Photoelectric Cloak,
- activate it,
- move back to cover.
If your cloak charge is low, then wait before attempting another probe. That small bit of patience is often what keeps the run clean.
What Makes Runs Fail
Most failed attempts come from the same few mistakes.
| Common Mistake | Why It Fails | Better Play |
|---|---|---|
| Getting aggro before landing | ARCs stay locked on you | Reset and wait for a clean attempt |
| Breaching without smoke | You stay exposed too long | Smoke first, then breach |
| Using cloak with low charge | Exit becomes risky | Recharge before re-engaging |
| Running it with too many players nearby | ARC attention gets chaotic | Prefer solo looting |
| Standing in the open after the breach | Easy follow-up damage | Rotate straight back to cover |
In practice, the biggest rule is this: do not get seen early. If that part goes wrong, everything else gets harder.
Solo vs Crowded Runs
This is where real match experience matters.
| Situation | How the Method Feels |
|---|---|
| Solo, calm area | Very consistent |
| Solo, light soft aggro | Still manageable |
| Multiple players nearby | Much less reliable |
| Full aggro before breach | Usually not worth forcing |
That is why this strategy feels much better in controlled solo runs than in crowded public fights. The mechanics are solid, but only if we give them room to work.
Practical Tips From Repeated Runs
A few habits make this method much more reliable:
- Bring enough smokes for multiple probes
- Keep cloak charge above half before going back in
- Use bushes and hard cover to break line of sight if soft aggro starts
- Do not rush back-to-back breaches if the area is still scanning
- Treat the run like a timing puzzle, not a firefight
That last point is the difference-maker. If you play patiently, the Assessor becomes much more manageable.
FAQ
Is this really the safest way to loot Assessors?
For solo players, it is one of the safest and most repeatable methods right now. It minimizes direct exposure and avoids turning the encounter into a full damage trade.
Can we do this without Photoelectric Cloak?
You can try, but the consistency drops hard. The cloak is what makes the safe exit work.
Do we need to kill the surrounding ARCs first?
Not usually. The whole point of the method is to avoid unnecessary fighting and loot during controlled windows.
What is the most important rule?
Do not get aggro before the Assessor lands. If you keep that clean, the rest of the sequence becomes much easier.
Final Thoughts
The best Assessor looting method in ARC Raiders right now is less about damage and more about control. We stay hidden, wait for the right moment, breach under smoke, and leave under cloak. That is why the strategy feels so much better than trying to brute-force the event.
It takes a little practice, but once the timing clicks, it becomes a very reliable way to loot Assessors safely without wasting resources on messy fights.

Most Popular Posts
- ARC Raiders Update 1.42: Phantom Targets Farming Guide (Glitched Wasps, Rewards, Regional Conditions)
- ARC Raiders Hullcracker Blueprints: Fastest Way to Complete The Major's Footlocker
- ARC Raiders Best Pop Trigger Strategy: Fast Phantom Targets Damage Guide
- ARC Raiders Subway Skin Guide: Unlock the Subterranean Outfit
- ARC Raiders Looting Mk. 3 Survivor Blueprint Guide: Best Blue Gate Route and Drop Locations
- ARC Raiders Medium & Heavy Gun Parts Blueprint Guide: Best Farm Route, Locations, and Refiner Crafting
Popular Category Lists
- ARC Raiders / (354)
- Grow a Garden / (294)
- CoD: Black Ops 7 / (167)
- Star Citizen / (163)
- MLB 26 / (159)
- Monopoly Go / (153)
- ARK Survival Ascended / (128)
- Steal a Brainrot / (99)
- Blox Fruits / (74)
- Adopt Me / (74)
- Forza Horizon 6 / (72)
- Sailor Piece / (68)
- Grow a Garden 2 / (68)
- Diablo IV / (62)
- CoD: BLACK OPS 6 / (55)
- Aion 2 / (52)
- Path of Exile 2 / (48)
- Monster Hunter Wilds / (46)
- Windrose / (44)
- Maplestory Classic / (42)






