0
0 Created: Aug 31,2026 | ARC Raiders
Arc Raiders Blueprint Farming Guide: Best Routes & Drop Tactics

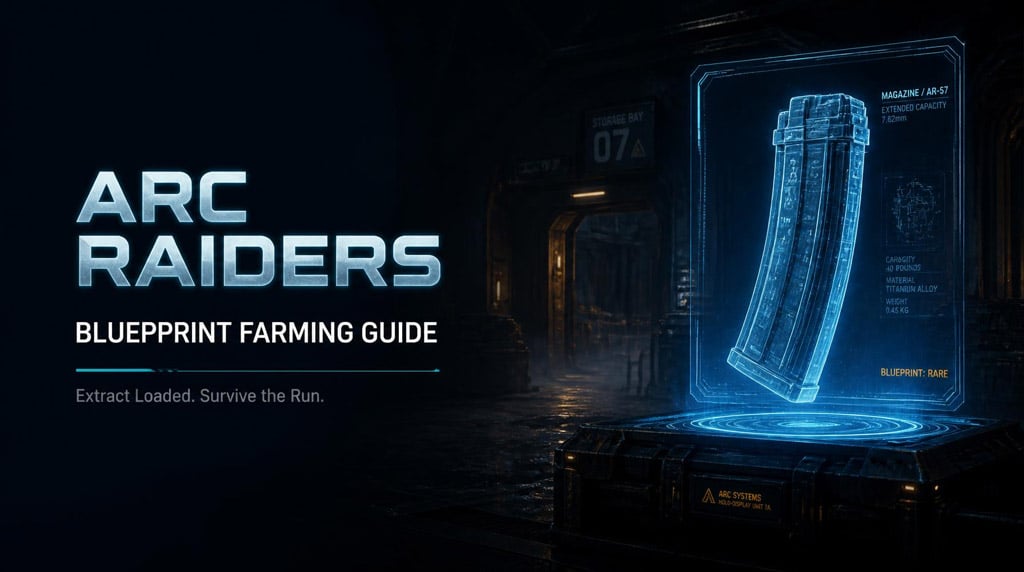
Blueprint farming in Arc Raiders can feel wildly inconsistent. One raid gives us nothing but scraps and stress; the next throws multiple blueprints at us from rooms, drops, and hidden loot spots until we are sprinting to extraction. The difference is rarely pure luck. It is usually about where we go, when we loot, how we respond to noise, and whether we know when to leave.
- Understanding Why Blueprint Runs Go Wrong
- The Common Pain Point: We Keep Dying After Finding Good Loot
- What We Learn From High-Blueprint Runs
- Best Blueprint Farming Priorities
- Priority Loot Sources for Blueprints
- Why Supply Drops Are So Dangerous
- Step-by-Step Supply Drop Method
- How to Route a Blueprint Run Without Throwing
- Phase 1: Spawn Assessment
- Phase 2: Fast High-Value Looting
- Phase 3: The Extraction Trigger
- Chasing Magazine Blueprints
- Why Magazine Blueprints Matter
- Light vs Medium Magazine Priorities
- Surviving Trios, Breaches, and High-Traffic Rooms
- How We Fight Around Breached Rooms
- How to Handle Trio Pressure
- Advanced Blueprint Farming Tips
- 1. Loot Backward Through Rooms
- 2. Treat Silence as Information, Not Safety
- 3. Stop Sorting Mid-Raid
- 4. Leave One Loot Spot Unchecked
- FAQ
- What is the best way to find more blueprints in Arc Raiders?
- Are supply drops worth calling for blueprint farming?
- Should we extract after finding one blueprint?
- Which magazine blueprint should we farm first?
- Final Takeaway: Respect the Raid
Below is a battle-tested strategy guide to help you stop wasting raids and start extracting real upgrades.
Understanding Why Blueprint Runs Go Wrong
Most failed blueprint runs do not collapse because we never found loot. They collapse because we found loot and then played like we were still empty-handed.
The Common Pain Point: We Keep Dying After Finding Good Loot
If you find yourself extracting with nothing after discovering rare items, then the problem is usually one of three things:
- You are looting too loudly in high-traffic rooms.
- You are overstaying after securing a blueprint.
- You are treating supply drops like private loot boxes instead of public alarms.
Why does this matter? Because Arc Raiders rewards controlled aggression, not blind scavenging. A blueprint in your bag is not progress until it leaves the raid with you.
What We Learn From High-Blueprint Runs
We have had runs where one locked room turned into three blueprints and a full panic sprint to extract. The key lesson is not simply to get lucky. The run shows several repeatable blueprint-farming principles:
- High-value rooms are often contested.
- Supply drops attract enemies quickly.
- Breach locations produce major loot but expose us to third parties.
- A lucky early find should trigger an extraction plan.
- Magazine blueprints are valuable enough to justify focused farming routes.
Here is the catch: the more blueprints we find, the less we should behave like a carefree looter.
Best Blueprint Farming Priorities
Blueprint farming works best when we stop treating every container equally. We need to prioritize the loot sources that have the best chance of producing upgrades, then move fast enough to avoid becoming the map's free delivery service.
Priority Loot Sources for Blueprints
We should build our raid around high-value sources, then use smaller containers as filler, not as the main plan.
Here is a practical comparison of the major blueprint sources and how we should approach them:
| Blueprint Source | Risk Level | Best Use Case | How We Should Play It |
|---|---|---|---|
| High-value loot rooms | High | Targeted blueprint farming | Breach, clear corners, loot fast, leave before squads rotate in |
| Supply call station drops | Very High | Fast chance at premium loot | Call drop only with cover nearby and an escape route ready |
| Breached rooms / locked spaces | High | Concentrated loot opportunities | Listen first, breach second, hold the doorway before looting |
| Random containers | Low to Medium | Supplemental loot while rotating | Loot only if it does not delay the main route |
| Wall spawns / unusual spots | Medium | Bonus blueprint chances | Check quickly while moving between major objectives |
Takeaway: Focus your run entirely on high-value sources and ignore low-tier clutter to keep your inventory clean and your movement fast.
Why Supply Drops Are So Dangerous
A supply drop is like honey to flies. It creates three immediate problems: noise, waiting time, and high visibility.
If we call a drop and stand still staring at it, we are asking to be pinched. Instead, call the drop, rotate immediately to hard cover, and watch the angles other squads are most likely to use.
Step-by-Step Supply Drop Method
1. Check the area before activating the station. If we hear footsteps, breaching, or gunfire nearby, we delay or relocate.
2. Call the drop and immediately leave the obvious position. Do not stand directly beside the station unless we have hard cover.
3. Hold the approach routes. Watch doors, rooftops, ramps, and long sightlines.
4. Let impatient players reveal themselves. If another squad rushes the drop first, we either punish them or let them waste resources.
5. Loot quickly. Prioritize blueprints, rare components, and compact valuables.
6. Extract or rotate immediately after a good pull. If we find a blueprint, the drop has already paid out.
How to Route a Blueprint Run Without Throwing
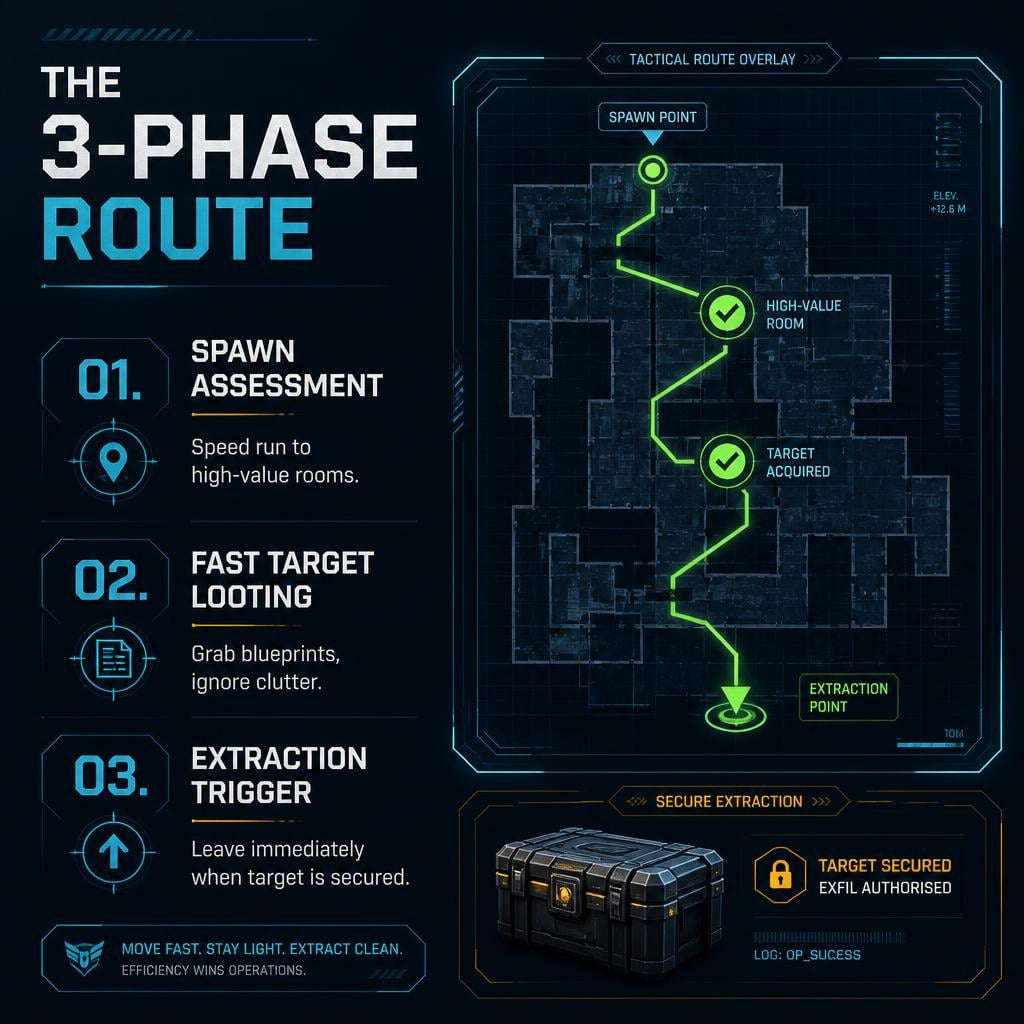
A strong blueprint run has three phases: entry, target looting, and extraction. Most players understand the first two. The third is where the disaster usually happens.
Phase 1: Spawn Assessment
A strong spawn can define the entire raid. If we spawn close to a high-value area, then we should move immediately. Speed matters because the first team into a premium room gets the safest loot window.
When we spawn, we should quickly ask:
- Are we close to a known high-value room?
- Can we reach a supply station before other squads?
- Is there early gunfire suggesting nearby player traffic?
- Do we have enough gear to contest, or should we loot quietly?
That first 30 to 60 seconds often decides whether we are farming blueprints or arriving late to empty shelves.
Phase 2: Fast High-Value Looting
Once we reach a premium area, we should not drift. Every second spent admiring loot is a second where another squad hears us.
Use this room-clearing pattern:
- Stop outside the room and listen. Breaching, footsteps, and container noises tell us if someone is already inside.
- Enter with a purpose. We check corners first, then loot.
- Prioritize blueprint-capable containers. If we see a blueprint, grab it immediately before sorting inventory.
- Avoid inventory management in the open. Dragging items around while exposed is how good raids become tragic clips.
- Leave after the high-value containers are done. Do not vacuum the room unless the area is completely quiet.
A greedy scavenger dies rich; a disciplined raider extracts loaded.
Phase 3: The Extraction Trigger
The biggest improvement we can make is deciding in advance what makes us leave.
| Situation | Recommended Decision | Reason |
|---|---|---|
| We find one target blueprint | Start moving toward extract | The main objective is complete |
| We find multiple blueprints | Extract immediately | Risk now outweighs extra loot |
| We hear multiple squads nearby | Rotate or disengage | Third parties can erase the run |
| We are low on healing or ammo | Leave the area | Fighting over more loot becomes inefficient |
| We have not found a blueprint | Hit one final target, then reset | Chasing too long creates bad fights |
Takeaway: Extraction should be part of the plan, not a panic button we remember after the lobby starts hunting us.
Chasing Magazine Blueprints
Magazine blueprints are especially valuable because they improve consistency in fights. A bigger magazine can turn a close-range duel from a loss into a squad wipe. Extended Light Mag III and Extended Medium Mag III are the holy grail of upgrades.
Why Magazine Blueprints Matter
More magazine capacity gives us:
- More forgiveness when tracking fast targets.
- Better pressure against squads.
- Fewer reloads during Arc or player encounters.
- Stronger finishing potential after cracking armor.
What this actually means is simple: if your weapon often loses fights because you reload at the worst possible moment, then magazine upgrades should become a farming priority.
Light vs Medium Magazine Priorities
Different weapon setups benefit from different magazine upgrades.
| Magazine Blueprint | Best For | Main Benefit | Who Should Prioritize It |
|---|---|---|---|
| Extended Light Mag III | Faster, lighter weapon setups | More sustained fire without sacrificing mobility | Aggressive players, solo raiders, close-range fighters |
| Extended Medium Mag III | Mid-range rifles and heavier sustained fights | Better pressure in squad engagements | Duo/trio players, objective fighters, players contesting drops |
| Lower-tier Extended Mags | Early progression and budget kits | Cheap reliability improvement | Newer players or anyone rebuilding after losses |
Takeaway: Both high-tier magazine blueprints are worth chasing, but the best one depends on your primary weapon class.
Surviving Trios, Breaches, and High-Traffic Rooms
Friendly trios are a myth. In a blueprint run, a trio is not just three players. It is three sets of eyes, three inventories, and three people who can punish us for looting too slowly.
How We Fight Around Breached Rooms
Breached rooms are dangerous because the sound announces intent. When someone breaches, everyone nearby gets information: there is a player, they are entering a valuable space, and they might be distracted.
If we are the ones breaching:
- Breach only after listening.
- Do not sprint straight to containers.
- Hold the entrance for a few seconds.
- Expect a third party within moments.
If someone else breaches first:
- Pause and listen for footsteps or combat.
- Let them open the room for us if they are careless.
- Avoid rushing into a doorway blind.
- Use their looting noise to time our push or rotation.
The better player is not always the one who opens the room first. Often, it is the one who understands what the breach sound does to the entire area.
How to Handle Trio Pressure
If we are solo or duo into trios, we should not take fair fights. That is the trap.
Use these rules:
- Split their attention. Shoot, reposition, and make them check multiple angles.
- Punish the front player. Trios often move with one impatient lead. That player is our opening.
- Never loot the first down immediately. The second and third player are waiting for that mistake.
- Use doors and corners. Tight spaces reduce the advantage of numbers.
- Leave after getting value. If we secure a blueprint or a kill, we do not need to wipe the lobby.
Advanced Blueprint Farming Tips
Once the basics are locked in, small habits start producing better results. These are the details that separate a clean blueprint farmer from someone who only gets lucky once.
1. Loot Backward Through Rooms
Most players enter a room and loot the first obvious container. If we suspect other players are nearby, we can sometimes move deeper first, grab the premium spots, then exit before they finish checking the front.
2. Treat Silence as Information, Not Safety
A quiet area can mean nobody is nearby. It can also mean a squad is crouched, listening, and waiting for us to open the expensive room. Before looting, pause for a few seconds.
3. Stop Sorting Mid-Raid
Inventory management gets players killed. If a blueprint is in the bag, we can sort later. Grab rare items first, drop low-value clutter quickly, and move to cover before reorganizing.
4. Leave One Loot Spot Unchecked
If a room is too hot, the drop is too exposed, or the extraction path is filling with shots, we skip the one more container instinct. One unchecked box is cheaper than one lost blueprint.
FAQ
What is the best way to find more blueprints in Arc Raiders?
The best method is to chain high-value loot sources: premium rooms, breached areas, supply drops, and unusual wall or rare loot spawns. We should move quickly, prioritize blueprint-capable containers, and extract after securing valuable finds instead of clearing the entire map.
Are supply drops worth calling for blueprint farming?
Yes, but only if we can defend the area or escape quickly. Supply drops attract players, so we should call the drop, reposition into cover, watch approach routes, loot fast, and leave once we get value.
Should we extract after finding one blueprint?
Usually, yes. If the blueprint is rare or one we specifically need, extracting is the correct play. Staying longer may feel efficient, but losing the blueprint turns the entire raid into wasted time.
Which magazine blueprint should we farm first?
If we play aggressive close-range weapons, Extended Light Mag III is a strong priority. If we prefer mid-range rifles or squad fights, Extended Medium Mag III may provide more value. Both are excellent because they reduce reload pressure during critical fights.
Final Takeaway: Respect the Raid
The best blueprint farmers are not the players who loot the most containers. They are the players who understand when the raid has already paid out. We go in with a target, hit the highest-value rooms first, and treat supply drops like PvP magnets. When the blueprint finally appears, we shift from hunter to survivor. Load in, pick the route, grab the upgrade, and extract with discipline.


The GGWTB Editorial Team features 10 full-time gaming editors and 23 specialist contributors, delivering hands-on tested walkthroughs, easter egg breakdowns, and game updates.
ELSA — who spearheads our in-depth COD: BLACK OPS 7, ARC Raiders guides, and patch notes—every guide is rigorously verified on live servers for accuracy.

Most Popular Posts
- ARC Raiders Update 1.42: Phantom Targets Farming Guide (Glitched Wasps, Rewards, Regional Conditions)
- ARC Raiders Hullcracker Blueprints: Fastest Way to Complete The Major's Footlocker
- ARC Raiders Best Pop Trigger Strategy: Fast Phantom Targets Damage Guide
- ARC Raiders Subway Skin Guide: Unlock the Subterranean Outfit
- ARC Raiders Looting Mk. 3 Survivor Blueprint Guide: Best Blue Gate Route and Drop Locations
- ARC Raiders Medium & Heavy Gun Parts Blueprint Guide: Best Farm Route, Locations, and Refiner Crafting
Popular Category Lists
- ARC Raiders / (345)
- Grow a Garden / (292)
- CoD: Black Ops 7 / (167)
- Star Citizen / (161)
- MLB 26 / (159)
- Monopoly Go / (152)
- ARK Survival Ascended / (126)
- Steal a Brainrot / (98)
- Blox Fruits / (74)
- Adopt Me / (73)
- Forza Horizon 6 / (72)
- Sailor Piece / (68)
- Grow a Garden 2 / (68)
- Diablo IV / (62)
- CoD: BLACK OPS 6 / (55)
- Path of Exile 2 / (48)
- Monster Hunter Wilds / (46)
- Aion 2 / (46)
- Windrose / (44)
- Donut SMP / (41)