0
Created: Mar 12,2026 | ARC Raiders
ARC Raiders Spaceport Hidden Loot Guide: Best Secret Spots & Keyless Tricks

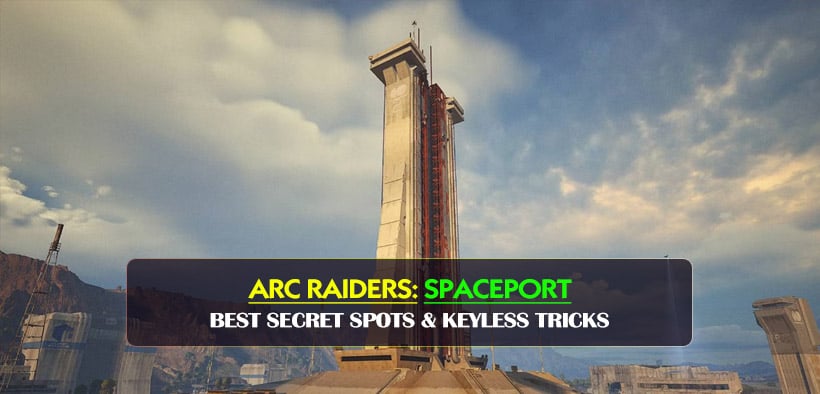
ARC Raiders Spaceport has a lot of hidden loot, but the real advantage comes from knowing which spots are worth checking, which mechanics save you a key, and how to recover from a bad spawn without forcing an early fight. This guide keeps it simple and practical.
- Best Hidden Loot Spots
- Secret Mechanics That Matter
- Trench Towers without a key
- Control Tower AS6 without a key
- Quiet entry at Arrival Building
- Best Routes by Spawn
- Priority Picks
- Best overall
- Best for low-risk solo runs
- Best if you brought mobility tools
- FAQ
- What is the best hidden loot spot on Spaceport?
- What should we do after a bad spawn?
- Is Rocket Assembly worth checking?
- Can we access locked areas without keys on Spaceport?
- Closing Takeaway
Best Hidden Loot Spots
These are the Spaceport spots most worth remembering.
| Area | Loot | Why It Matters |
|---|---|---|
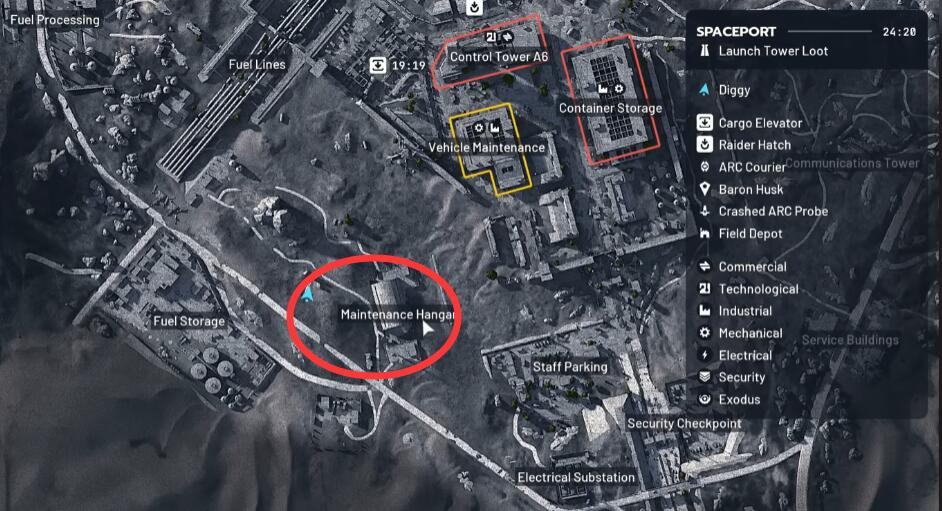
| Between Maintenance Harbor and Fuel Storage | Weapon crate | Safe outer-edge opener with low traffic |
| East Container Yard crane area | Weapon crate | Good stop while rotating through industrial lanes |
| Rifle Building roof | Weapon crate + medic/ammo | Solid rooftop utility and mid-route value |
| Rocket Assembly | Rare weapon crate + grenade case + backpack | Good layered loot, but crate spawn is inconsistent |
| Departure Building roof | Backpack spawns | Quiet, efficient, and strong for solo runs |
| Fuel Lines broken pipe | Weapon crate | Very hidden and easy to miss |
| Vehicle Maintenance side room | Backpack + ammo box | Small detour, good value |
| Underground corner | Weapon crate + backpack | Useful if you are already rotating below |
Secret Mechanics That Matter
These are the tricks that actually change how we play the map.
Trench Towers without a key
Normally, you need the key to enter. But if we bring a zipline or snap hook:
- go up to the roof,
- loot the backpack and ammo box,
- then enter from above.
This matters because we can skip the key requirement and still get the loot.
Control Tower AS6 without a key
With a zipline, we can:
- reach the upper exterior,
- grab the backpack by the window,
- and take the high ground.
We usually cannot fully loot the locked room, but the position and free backpack still make it worth it.
Quiet entry at Arrival Building
There is a breachable door here, but we do not always need to use it.
- go around the outside,
- enter quietly,
- save your breach tool,
- avoid making noise.
If another player is nearby, this route is much safer.
Best Routes by Spawn
Knowing the loot is helpful. Knowing how to chain it from spawn is what makes the raid smoother.
| Spawn Area | Best Route | Why It Works |
|---|---|---|
| Security Checkpoint | Checkpoint crate → Staff Parking backpack → Electrical Substation backpack | Best recovery route from a weak spawn |
| Maintenance / Fuel side | Desert crate → Fuel Lines pipe crate | Safe and efficient outer-edge opening |
| East Container Yard | Crane crate → pipeline backpack → Rocket Assembly | Clean industrial loot chain |
| Departure side | Roof backpack → second roof backpack | Quiet and reliable start |
| Trench Tower side | Roof bypass → hidden backpack → zip across | Best value if you brought mobility tools |
Priority Picks
If you only want to remember a few spots, start with these.
Best overall
- Trench Tower roof bypass
- Departure Building roof backpacks
- Fuel Lines broken pipe crate
- Security Checkpoint recovery route
- Vehicle Maintenance side room
Best for low-risk solo runs
- Departure roof
- Hangar-side backpack
- Staff Parking/Substation cluster
- Desert weapon crate
Best if you brought mobility tools
- Trench Towers
- Control Tower AS6
- Rocket Assembly roof
FAQ
What is the best hidden loot spot on Spaceport?
The Trench Tower roof bypass is one of the best because it gives us loot and access without needing the key.
What should we do after a bad spawn?
If we spawn near Security Checkpoint, we should hit the nearby weapon crate and the Staff Parking / Electrical Substation backpacks before rotating inward.
Is Rocket Assembly worth checking?
Yes, mainly for the grenade case and backpack route. The rooftop weapon crate has a lower spawn rate, so treat it as bonus loot.
Can we access locked areas without keys on Spaceport?
Yes, in some cases. Trench Towers and Control Tower AS6 both have mobility-based bypass options.
Closing Takeaway
The best way to play Spaceport is simple:
- use outer-edge loot to stabilize weak starts,
- use mobility tools to unlock rooftop routes and keyless entries,
- and check corners, rooftops, and pipes instead of only rushing major interiors.
That approach makes the map safer, cleaner, and much more profitable.
Most Popular Posts
- ARC Raiders Update 1.42: Phantom Targets Farming Guide (Glitched Wasps, Rewards, Regional Conditions)
- ARC Raiders Best Pop Trigger Strategy: Fast Phantom Targets Damage Guide
- ARC Raiders Subway Skin Guide: Unlock the Subterranean Outfit
- ARC Raiders Frozen Trail Update Guide: Pendola Pass, Frigate & Meta Loadouts
- ARC Raiders Ascending the Mountain: Fast Loot Routes and Item Guide
- ARC Raiders Broken Guidance System and Dual Anvil Build Guide
Popular Category Lists
- ARC Raiders / (370)
- Grow a Garden / (299)
- Star Citizen / (170)
- CoD: Black Ops 7 / (167)
- MLB 26 / (159)
- Monopoly Go / (153)
- ARK Survival Ascended / (132)
- Steal a Brainrot / (101)
- Adopt Me / (78)
- Blox Fruits / (74)
- Forza Horizon 6 / (72)
- Sailor Piece / (68)
- Grow a Garden 2 / (68)
- Aion 2 / (63)
- Diablo IV / (62)
- COD: Modern Warfare 4 / (56)
- CoD: BLACK OPS 6 / (55)
- Maplestory Classic / (50)
- Path of Exile 2 / (48)
- Monster Hunter Wilds / (46)