



 0
0 Created: Mar 25,2026 | ARC Raiders
ARC Raiders Survivor Blueprint Guide: Best Map, Farming Route, and Reset Strategy

If you're farming the Survivor Blueprint in ARC Raiders, the biggest mistake is not bad aim or bad luck. It's farming the wrong way.
After testing the main routes players keep talking about, the pattern is pretty clear: this blueprint is less about combat and more about attempt efficiency. If you keep forcing slow raids, overlooting, or running to the same hotspot from a bad spawn, you're burning time.
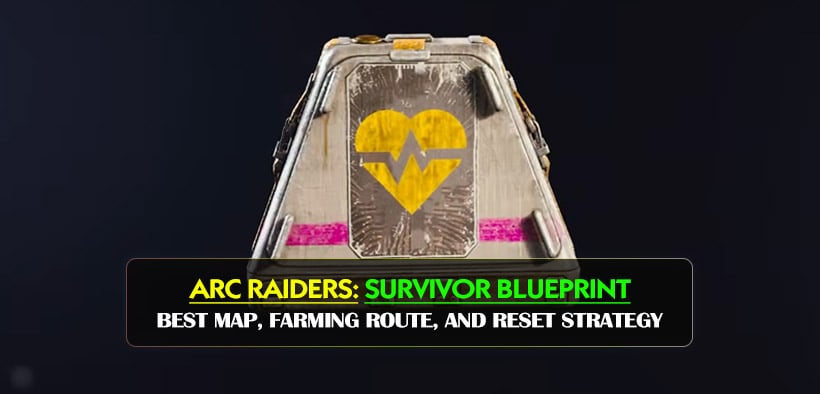
This guide keeps it simple: where to farm, which maps are worth it, when to reset, and what kind of kit gives you the best odds.
- Why the Survivor Blueprint Is Worth Farming
- Best Maps for Survivor Blueprint Farming
- My practical take
- Bluegate: Fastest Attempts, Worst Competition
- When Bluegate is worth playing
- When Bluegate wastes your time
- Buried City: Best Balance of Speed and Consistency
- Why Buried City feels better
- Stella Montus: Strong Option If You Can Keep Tempo
- Best approach on Stella
- Best Farming Strategy
- Two viable ways to farm
- Rule of thumb
- Loadout Advice
- Keep your loadout tied to the problem
- Common Mistakes
- 1. Forcing bad spawns
- 2. Overlooting early
- 3. Fighting unnecessary enemies
- 4. Copying community rumors too literally
- 5. Staying too long in a dead raid
- Recommended Farming Loop
- Trading Is Sometimes the Best Answer
- FAQ
- What is the best map for the Survivor Blueprint in ARC Raiders?
- Is Bluegate the only place worth farming?
- Should I do naked runs?
- Is Stella Montus good for farming?
- Is trading worth it?
- Final Thoughts
Why the Survivor Blueprint Is Worth Farming
The Survivor augment is one of the most valuable blueprints because it gives you a rare mix of carry strength, survivability, and safety.
| Benefit | Why It Matters |
|---|---|
| High carry capacity | Better loot runs and easier quest/item extraction |
| Medium shield support | Strong balance between defense and mobility |
| 3 safe pockets | Huge value for meds, keys, ammo, and rare finds |
| Strong downed utility | Gives you more chances to crawl out and extract |
From a practical point of view, this is not just a nice to have augment. It changes how comfortably we can raid, loot, and recover from mistakes.
Best Maps for Survivor Blueprint Farming
There's no confirmed single guaranteed spot, but a few maps clearly stand out based on route logic and player behavior.
| Map | Best For | Main Problem |
|---|---|---|
| Bluegate | Fast hotspot attempts | Very high competition |
| Buried City | Sustainable multi-container farming | Less explosive, more route-dependent |
| Stella Montus | Medical-area farming | PvE slows runs down |
| Dam Battlegrounds | Secondary testing route | Inconsistent and timing-sensitive |
My practical take
- Bluegate is the map most people tunnel on.
- Buried City is usually better if you want steady, repeatable runs.
- Stella Montus is underrated if you can clear PvE fast.
- Dam Battlegrounds is worth checking, but I would not build my whole farm around it.
This matters because a lot of players hear one rumor, then spend 6 hours dying in the same building. That's not farming efficiency. That's just suffering with extra steps.
Bluegate: Fastest Attempts, Worst Competition
Bluegate is the classic high-risk blueprint farm map.
If you get a strong spawn, you can contest the hotspot quickly. If you get a bad spawn, the run is often already dead before it starts.
When Bluegate is worth playing
- You know the route
- You're willing to reset quickly
- You accept that spawn distance decides a lot
When Bluegate wastes your time
- You keep forcing bad spawns
- You loot side rooms before the main target
- You bring a heavy kit and arrive late
| Bluegate Factor | Verdict |
|---|---|
| Attempt speed | High |
| Spawn dependency | Very high |
| PvP pressure | Very high |
| Best playstyle | Reset-focused |
If you spawn far, don't talk yourself into a miracle run. Reset and go again.
Buried City: Best Balance of Speed and Consistency
If Bluegate is chaos, Buried City is the more controlled option.
It works because there are more searchable containers and more ways to salvage a run if your first target is already looted. That makes it much better for longer sessions.
Why Buried City feels better
- More drawers, lockers, and crates
- Better route flexibility
- Less all-or-nothing than Bluegate
- Easier to turn a bad start into a decent search run
| Buried City Factor | Verdict |
|---|---|
| Loot density | High |
| Route flexibility | High |
| PvP pressure | Medium |
| Best playstyle | Light mobility build |
This is the map I'd recommend to most players first, especially if you want something practical instead of pure spawn gambling.
Stella Montus: Strong Option If You Can Keep Tempo
Stella Montus is a good farm map, but only if your kit solves the real problem: PvE delay.
A lot of players lose time fighting AI, taking bad angles, or getting stalled outside medical routes. If that keeps happening, the map feels terrible. If you clear fast, it becomes much more consistent.
Best approach on Stella
- Prioritize medical-side routes
- Bring enough damage to clear blockers quickly
- Skip unnecessary fights
- Keep the raid focused on search tempo
| Stella Factor | Verdict |
|---|---|
| Route structure | Good |
| PvE interference | High |
| Long-session value | High |
| Best playstyle | Light combat mobility |
In other words: if Bluegate is a sprint, Stella is a controlled grind.
Best Farming Strategy
The most efficient mindset is simple:
More clean attempts per hour = better odds.
That means we should stop treating every raid like a full loot run.
Two viable ways to farm
| Approach | Use It When | Trade-off |
|---|---|---|
| Light mobility build | You need flexibility and survivability | Slightly slower than pure reset runs |
| Naked reset run | Spawn distance decides everything | Very weak if the route gets contested or delayed |
Rule of thumb
- If the map is a pure race to one room, go lighter.
- If PvE or route flexibility matters, bring a small but functional kit.
- If you spawn too far from the hotspot, don't force it.
That last point alone saves hours.
Loadout Advice
A lot of players bring a normal good raid kit into a blueprint grind. That usually sounds smart, but in practice it often slows the whole farm down.
Keep your loadout tied to the problem
| Problem | What to Bring |
|---|---|
| Losing races to the hotspot | Lightweight mobility setup |
| Getting delayed by PvE | Fast-kill weapon and enough ammo |
| Multi-room searching | Balanced light kit |
| Repeating quick resets | Minimal investment loadout |
If you notice you're always arriving second, your build is too slow.
If you notice AI is eating half your raid clock, your build is too weak.
That's the kind of adjustment real farming requires.
Common Mistakes
1. Forcing bad spawns
If another player can reach the room first, your odds drop hard.
2. Overlooting early
Blueprint farming is about the target first, everything else second.
3. Fighting unnecessary enemies
If they are not blocking the route, don't waste time.
4. Copying community rumors too literally
A possible spawn is not the same as a reliable farm route.
5. Staying too long in a dead raid
If the area is picked clean, rotate fast or extract.
These are small mistakes on paper, but over dozens of runs, they are exactly why players feel unlucky.
Recommended Farming Loop
If you want a clean plan, this is the simplest version.
1. Start with Buried City
2. Use Bluegate for fast reset attempts
3. Rotate to Stella Montus for structured medical runs
4. Use Dam Battlegrounds only as a side option
| Priority Order | Why |
|---|---|
| Buried City | Best overall balance |
| Bluegate | Best for pure fast attempts |
| Stella Montus | Strong if PvE is manageable |
| Dam Battlegrounds | Backup option only |
This gives you a proper loop instead of gambling everything on one overfarmed room.
Trading Is Sometimes the Best Answer
This is the part many players ignore.
If the Survivor Blueprint is circulating in the player economy, trading can be smarter than farming. From experience, once a rare blueprint reaches that everyone wants it stage, the real question becomes how many hours you're willing to burn chasing your own copy.
| Option | Best When |
|---|---|
| Farm it | You enjoy the grind and know the routes |
| Trade for it | You have good duplicates or high-value items |
A fair trade is not cheesing the grind. It's respecting your own time.
FAQ
What is the best map for the Survivor Blueprint in ARC Raiders?
For most players, Buried City is the best overall farming map. Bluegate is faster but much more competitive.
Is Bluegate the only place worth farming?
No. It's the most talked-about map, but not always the most efficient one.
Should I do naked runs?
Only if the route is basically a spawn race. If PvE or rotation matters, use a light build instead.
Is Stella Montus good for farming?
Yes, especially around medical routes, but only if your loadout can clear AI without wasting time.
Is trading worth it?
Yes. If you have valuable duplicate blueprints or items, trading can save a huge amount of grind time.
Final Thoughts
The Survivor Blueprint farm gets much easier once we stop chasing hype and start playing for efficiency.
Buried City is the safest overall pick. Bluegate is the fastest if you get the right spawn. Stella Montus is solid if you can keep PvE from slowing you down. And if a fair trade appears, take it seriously.
The players who get this blueprint fastest usually are not the luckiest. They're the ones who reset faster, route cleaner, and stop wasting raids that were already lost.

Most Popular Posts
- ARC Raiders Update 1.42: Phantom Targets Farming Guide (Glitched Wasps, Rewards, Regional Conditions)
- ARC Raiders Hullcracker Blueprints: Fastest Way to Complete The Major's Footlocker
- ARC Raiders Best Pop Trigger Strategy: Fast Phantom Targets Damage Guide
- ARC Raiders Subway Skin Guide: Unlock the Subterranean Outfit
- ARC Raiders Looting Mk. 3 Survivor Blueprint Guide: Best Blue Gate Route and Drop Locations
- ARC Raiders Medium & Heavy Gun Parts Blueprint Guide: Best Farm Route, Locations, and Refiner Crafting
Popular Category Lists
- ARC Raiders / (354)
- Grow a Garden / (294)
- CoD: Black Ops 7 / (167)
- Star Citizen / (163)
- MLB 26 / (159)
- Monopoly Go / (153)
- ARK Survival Ascended / (128)
- Steal a Brainrot / (99)
- Blox Fruits / (74)
- Adopt Me / (74)
- Forza Horizon 6 / (72)
- Sailor Piece / (68)
- Grow a Garden 2 / (68)
- Diablo IV / (62)
- CoD: BLACK OPS 6 / (55)
- Aion 2 / (52)
- Path of Exile 2 / (48)
- Monster Hunter Wilds / (46)
- Windrose / (44)
- COD: Modern Warfare 4 / (43)






