0
0 Created: Apr 4,2026 | ARC Raiders
ARC Raiders Vaporizer Guide: Best Ways to Beat ARC Fast

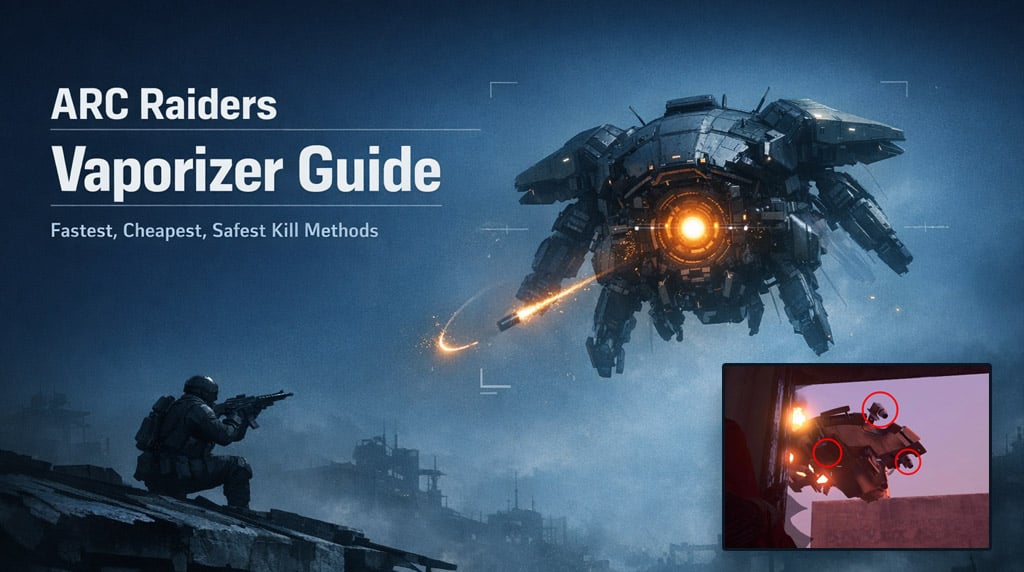
The ARC Raiders Vaporizer can feel chaotic the first few times you fight it, but after testing different weapons and setups, the pattern is fairly simple: this is a timing fight, not just a damage fight. If we force its shield at the right moment, hit the exposed core, and play around cover instead of face-tanking the laser, the fight becomes much more manageable.
- Why the Vaporizer is tricky
- Best Vaporizer methods at a glance
- Fastest way to kill the Vaporizer
- Crude Explosive + Wolfpacks
- Why Crude Explosive is the best bait
- Best low-cost way to kill the Vaporizer
- Method
- Best weapons
- Heavy weapon vs fast fire-rate
- Best positioning and survival tips
- What worked best in testing
- Why Photocloak matters
- Is the Hornet Driver worth using?
- What not to do
- Avoid focusing thrusters as your main strategy
- Avoid overcommitting in the open
- Avoid wasting movement tools
- FAQ
- How do you kill the Vaporizer fast in ARC Raiders?
- What is the best weak spot on the Vaporizer?
- What is the best cheap weapon setup against the Vaporizer?
- Is it worth shooting the thrusters?
- Is Photocloak necessary?
- Final notes
Why the Vaporizer is tricky
What makes the Vaporizer dangerous is not just its health pool. It is the combination of shield timing, erratic movement, and constant pressure.
From repeated fights, the most important things to know are:
- It will often open its shield when a thrown item gets close
- After shielding, it has a short cooldown window
- Its underbelly can be broken to expose the core
- Big single shots tend to trigger the shield faster
- Sustained fire can be more efficient in longer fights
That changes how we should approach it. Instead of dumping damage randomly, we want to create safe windows and punish them.
Best Vaporizer methods at a glance
Here's the short version before we break it down.
| Method | Speed | Cost | Reliability | Best For |
|---|---|---|---|---|
| Crude Explosive + Wolfpacks | Very fast | High | High | Fastest kills |
| Heavy weapon core shots | Medium | Medium | High | Reliable solo runs |
| Fast fire-rate weapons | Medium | Low-Medium | High | Budget farming |
| Hornet Driver | Fast when it works | Low-Medium | Low | Situational plays |
The practical takeaway: Wolfpacks are the fastest, but core-focused gunplay is the best all-around option.
Fastest way to kill the Vaporizer
If speed is all that matters, this is the cleanest method.
Crude Explosive + Wolfpacks
The combo is simple:
1. Throw a Crude Explosive near the Vaporizer
2. Let it trigger the shield
3. Wait for the shield to drop
4. Throw Wolfpacks during that cooldown window
That is the fastest consistent kill method we tested.
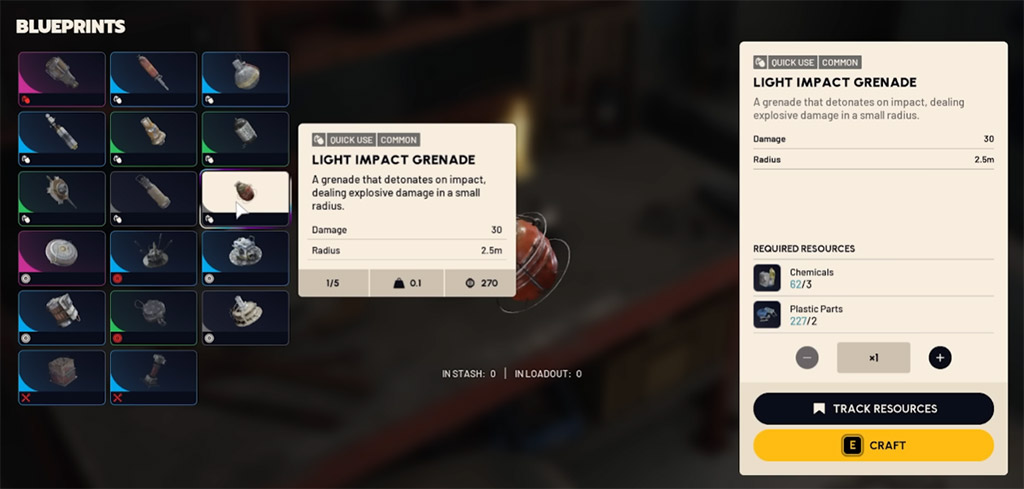
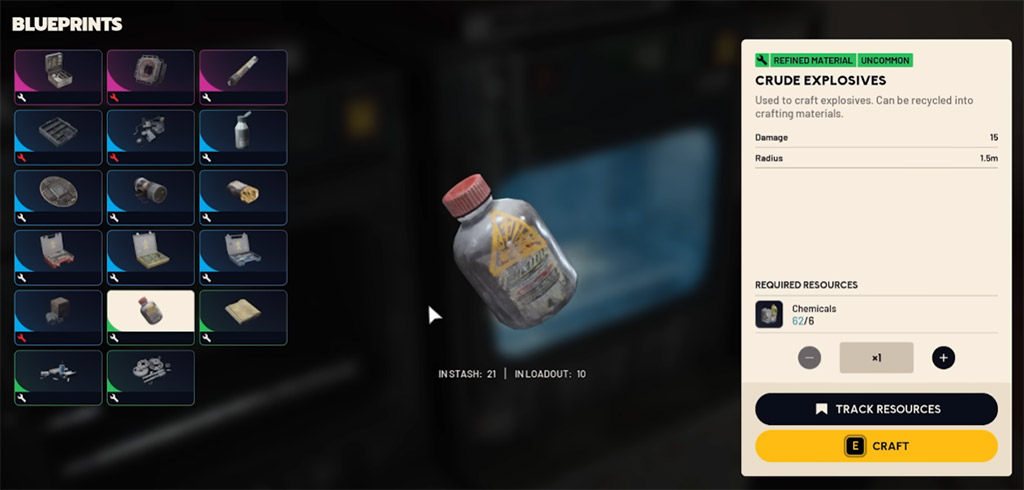
Why Crude Explosive is the best bait
It is cheap enough to bring in bulk, and more importantly, it stacks well.
| Bait Item | Craft Cost | Stack Size | Why It's Good |
|---|---|---|---|
| Crude Explosive | 6 Chemicals | 10 | Best inventory efficiency |
| Light Impact Grenade | Lower per craft | 5 | Fine, but worse stack value |
Even if another throwable looks cheaper on paper, Crude Explosive is usually better in real runs because it gives us more uses per slot.
Best low-cost way to kill the Vaporizer
If you do not want to spend Wolfpacks, the best option is much more straightforward: play for the core.
Method
- Shoot the underbelly first
- Expose the core
- Use cover between shield cycles
- Re-peek and repeat
Best weapons
From testing, these were the most practical:
- Jupiter for heavy shots
- Equalizer
- Tempest
- Patina / Betina
- Renegade if you are working with fewer resources
Heavy weapon vs fast fire-rate
| Style | Strength | Weakness | Best Use |
|---|---|---|---|
| Heavy-hitting weapons | Big core damage | Triggers shield more often | Controlled peek fights |
| Fast fire-rate weapons | Smoother sustained damage | Higher ammo use | Longer budget fights |
If you are using a heavy weapon, take your shot and expect the shield.
If you are using a fast fire-rate weapon, you can often stay on target longer, but you need better movement because it may keep attacking instead of shielding.
Best positioning and survival tips
This part matters more than many players expect. In practice, cover wins the fight.
What worked best in testing
- Fight around rooftops, walls, or buildings
- Avoid standing in the open
- Rotate instead of holding one predictable angle
- Keep Photocloak available for resets
Trying to sit inside one building and trade with the laser usually goes badly. The Vaporizer can keep pressuring awkward angles, and if other enemies join in, you lose control fast.
Why Photocloak matters
On this map condition, you are often not fighting the Vaporizer alone. You may also deal with:
- Rocketeers
- Fireflies
- Hornets
- other players nearby
That is why Photocloak is one of the safest tools to bring. It gives us a reset when the fight stops being clean.
Is the Hornet Driver worth using?
Yes, but only as a bonus play, not a main plan.
It can bring the Vaporizer down if:
- you are close enough
- it hits the rear thrusters
- it avoids getting deleted by the shield
The problem is reliability. Even when it works, it often just grounds the Vaporizer for a moment instead of killing it outright. That can still be useful, but it is not something we would build an entire route around.
What not to do
A few approaches sounded good in theory but felt inefficient in real fights.
Avoid focusing thrusters as your main strategy
The Vaporizer has eight thrusters, and destroying enough of them takes too long in most live fights. Rear thrusters matter more, but the target moves too erratically for this to be consistent.
Avoid overcommitting in the open
If you stand still and try to out-DPS the beam, you will usually lose that trade.
Avoid wasting movement tools
If your mobility option cuts too deeply into Photocloak uptime, it can leave you exposed when the fight turns messy.
FAQ
How do you kill the Vaporizer fast in ARC Raiders?
The fastest reliable method is baiting the shield with a Crude Explosive, then throwing Wolfpacks during the cooldown.
What is the best weak spot on the Vaporizer?
The best target is the core, but first you need to break the underbelly to expose it.
What is the best cheap weapon setup against the Vaporizer?
A fast fire-rate weapon like the Equalizer or Tempest works well for lower-cost runs, especially if you manage cover and shield timing properly.
Is it worth shooting the thrusters?
Usually no. It is possible, but in most fights it is slower and less reliable than simply exposing and shooting the core.
Is Photocloak necessary?
For most players, yes. It is one of the safest ways to disengage or reset when the fight gets crowded.
Final notes
The biggest mistake players make against the Vaporizer is treating it like a pure damage race. It is really a control fight. We bait the shield, create a window, hit the weak spot, and reposition before the next exchange starts.
If we keep that rhythm, the fight becomes much more consistent, whether we are going for fast kills with Wolfpacks or cheaper farm runs with standard weapons.

Most Popular Posts
- ARC Raiders Update 1.42: Phantom Targets Farming Guide (Glitched Wasps, Rewards, Regional Conditions)
- ARC Raiders Expedition Damage Guide: Fastest Way to Farm Damage
- ARC Raiders Hullcracker Blueprints: Fastest Way to Complete The Major's Footlocker
- ARC Raiders Best Pop Trigger Strategy: Fast Phantom Targets Damage Guide
- ARC Raiders Subway Skin Guide: Unlock the Subterranean Outfit
- ARC Raiders Spaceport Open Containers Guide: 19K+ Solo Trial Route
Popular Category Lists
- ARC Raiders / (339)
- Grow a Garden / (292)
- CoD: Black Ops 7 / (167)
- Star Citizen / (160)
- MLB 26 / (159)
- Monopoly Go / (152)
- ARK Survival Ascended / (125)
- Steal a Brainrot / (98)
- Blox Fruits / (74)
- Adopt Me / (73)
- Forza Horizon 6 / (72)
- Sailor Piece / (68)
- Grow a Garden 2 / (68)
- Diablo IV / (62)
- CoD: BLACK OPS 6 / (55)
- Path of Exile 2 / (48)
- Monster Hunter Wilds / (46)
- Windrose / (44)
- Aion 2 / (43)
- Donut SMP / (40)