



 0
0GGWTB Editorial Team - Tischler
Created: Sep 3,2026 | ARK Survival Ascended

GGWTB Editorial Team - Tischler
Every Astraeos boss can be soloed on alpha except the Sky Kraken, and the difference between a clean clear and a dead army comes down to whistle discipline, not raw stats. We tested every fight below on official-style difficulty with realistic saddle values, and this guide gives you the exact tames, numbers, and command sequences that worked.
One rule governs everything: never let your tames free-fight the arena. You win by controlling targets, spacing, buffs, and damage windows.
Build around the boss mechanic first, stats second. Here is the baseline we used for repeatable solo clears.
| Boss | Recommended Setup | Tested Stats | Key Mechanic | Solo Alpha? |
|---|---|---|---|---|
| Abyssal Kraken | Megalodon pack | 10k HP / 800% melee | Kill tentacles first | Yes |
| Sky Kraken | Brigantine + special cannonballs | Ship skills required | Beat the 25-min timer | No — gamma only |
| Medusa | Rex army + Yutyrannus | 38k HP / 900% melee / 100 armor | Stay out of dismount range | Yes |
| Cyclops | Acros + firearms | 19k HP / 800% melee / 110 armor | Shoot face to enable damage | Yes |
| Manticore | Acros + Yutyrannus | 12k HP / 700% melee | Force landing behavior | Yes |
| Hydra | Acros + Yutyrannus | 30k HP / 1100% melee | Attack from behind vs blindness | Yes — hardest |
Takeaway: Megalodons own the underwater Kraken, Acros carry every land boss, and the Sky Kraken is the one wall where solo alpha is a resource trap.
The Kraken looks like a brute-force check. It is not. If your pack drifts to the center and bites the body early, then every hit lands into heavy damage reduction while tentacles chew your army apart.
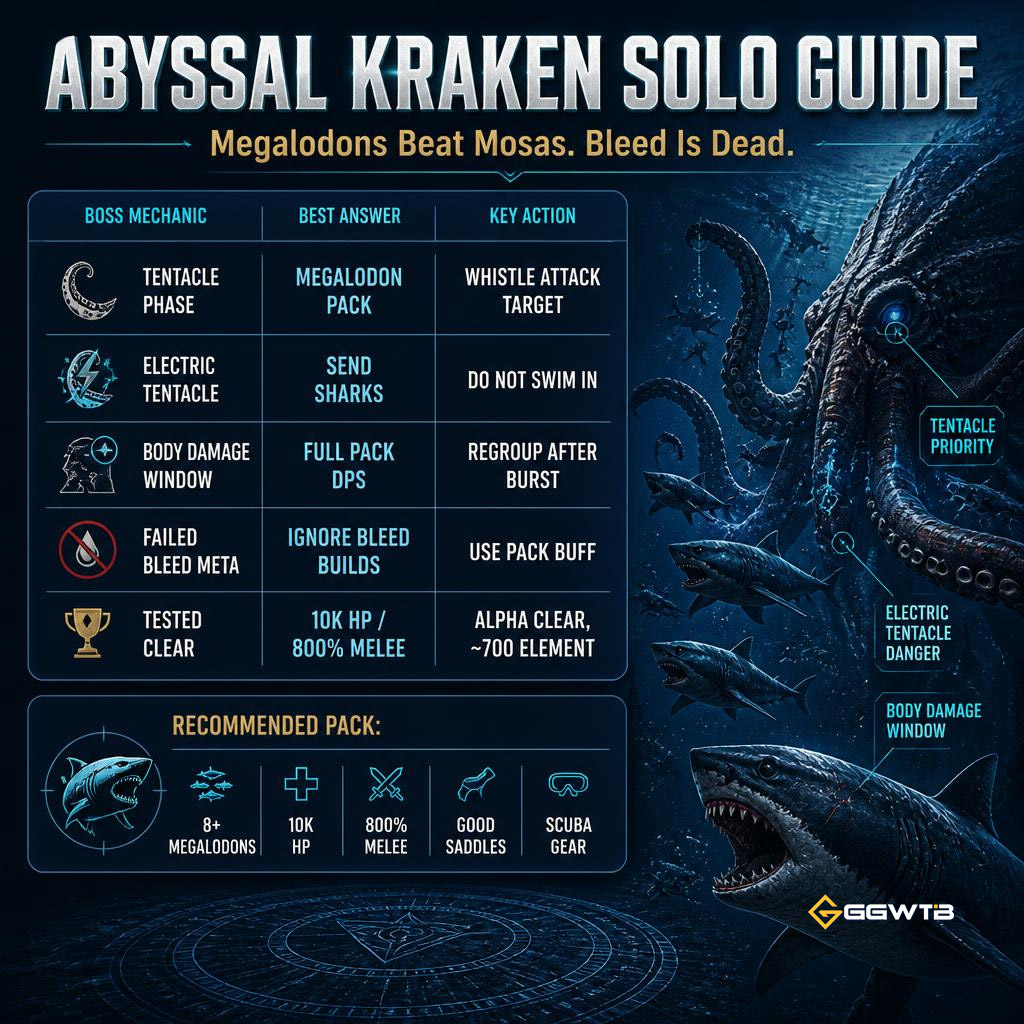
Here is the counterintuitive part most guides miss: Mosas lose to Megalodons in practice despite better paper stats. The fight rewards pack damage uptime, and with 8+ Megalodons the pack buff outpaces anything a clunky Mosa delivers between repositions.
| Option | Strength | Weakness | Verdict |
|---|---|---|---|
| Megalodon | Pack buff, cheap to replace, agile | Needs whistle control | Best solo pick |
| Mosasaur | High individual damage | Slow to breed, clumsy in arena | Overkill on paper, worse in practice |
| Bleed creatures | Old meta appeal | Bleed no longer interacts reliably with this boss | Skip |
| Basilosaurus | Safe rider mount | Weak boss DPS | Support only |
Takeaway: Do not build around bleed. We tested it — the interaction is dead, and pack Megalodons cleared faster every run.
Enter the underwater arena around 94.3 with scuba gear and backup armor.
1. Set all Megalodons to Passive.
2. Position near the first tentacle.
3. Whistle Attack Target on the tentacle.
4. Tentacle dies? Whistle Passive, regroup, move to the next one.
5. Repeat until the Kraken body opens up.
6. Dump damage during the window, then regroup before the pack drifts into the reduced-damage center.
See an electric tentacle? Do not swim in yourself. Send the sharks — they eat a brief stun and shred it anyway.
Your job is not to bite the boss. Your job is target-calling.
At 10k HP / 800% melee we cleared alpha three times with zero meaningful losses outside of hammerhead adds getting greedy hits in. Reward was around 700 Element. You can clear at 500–600% melee with good saddles — higher melee just shortens the fight.
The Sky Kraken is not a boss check. It is a math check, and solo math loses.
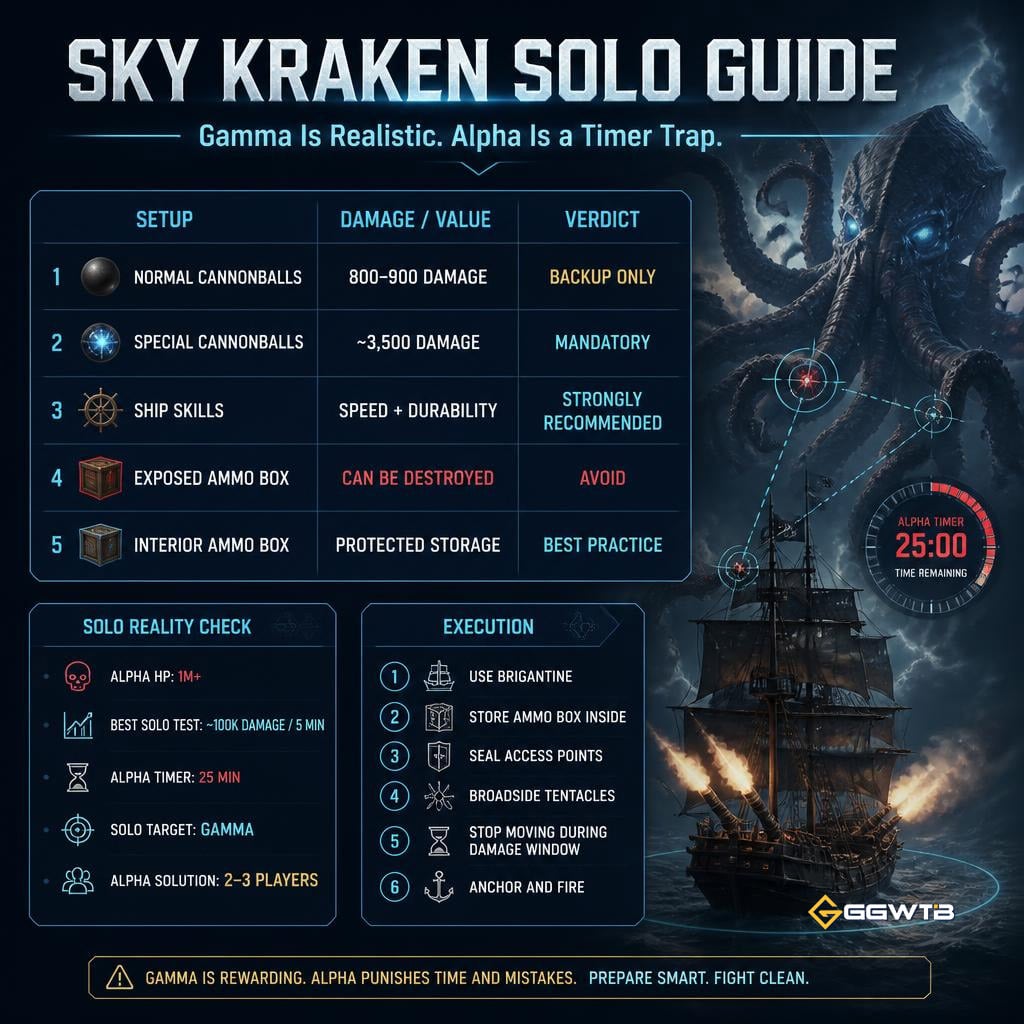
The alpha version carries over 1 million HP. In our best solo execution we pushed roughly 100k damage in 5 minutes — against a 25-minute timer, that leaves you short by a mile. If you are solo on official-style rates, then run gamma or recruit help. Do not gamble the resources.
| Ammo / Setup | Observed Damage | Verdict |
|---|---|---|
| Normal cannonballs | 800–900 | Too weak — backup only |
| Special cannonballs | ~3,500 | Mandatory main ammo |
| Ship skills | Indirect (speed/durability) | Strongly recommended |
| Exposed ammo box | Destroyable mid-fight | Avoid |
| Interior ammo box | Protected | Best practice |
Takeaway: Special cannonballs deal 4x normal damage. Bringing anything else is wasting the attempt before it starts.
Take a Brigantine, store the ammo box inside, and seal access points.
1. Start on your own ship and turn toward the boss early.
2. Angle broadsides at the tentacles.
3. Destroy all tentacles with special cannonballs.
4. When the boss opens — stop moving. Anchor and fire.
5. Ignore chip damage that only costs a few percent hull.
Here is the catch: repositioning during the vulnerability window costs more DPS than it saves in hull. If the boss is open, park and shoot.
With two or three players stacking cannon uptime, alpha becomes realistic. Solo, gamma is the honest ceiling.
Medusa punishes riders, not armies. If she dismounts you, the run can end in seconds — and no Rex stat line fixes a dead rider.
Access the terminal near the Green Obelisk around 35 lat / 16 lon.
| Requirement | Value | Why |
|---|---|---|
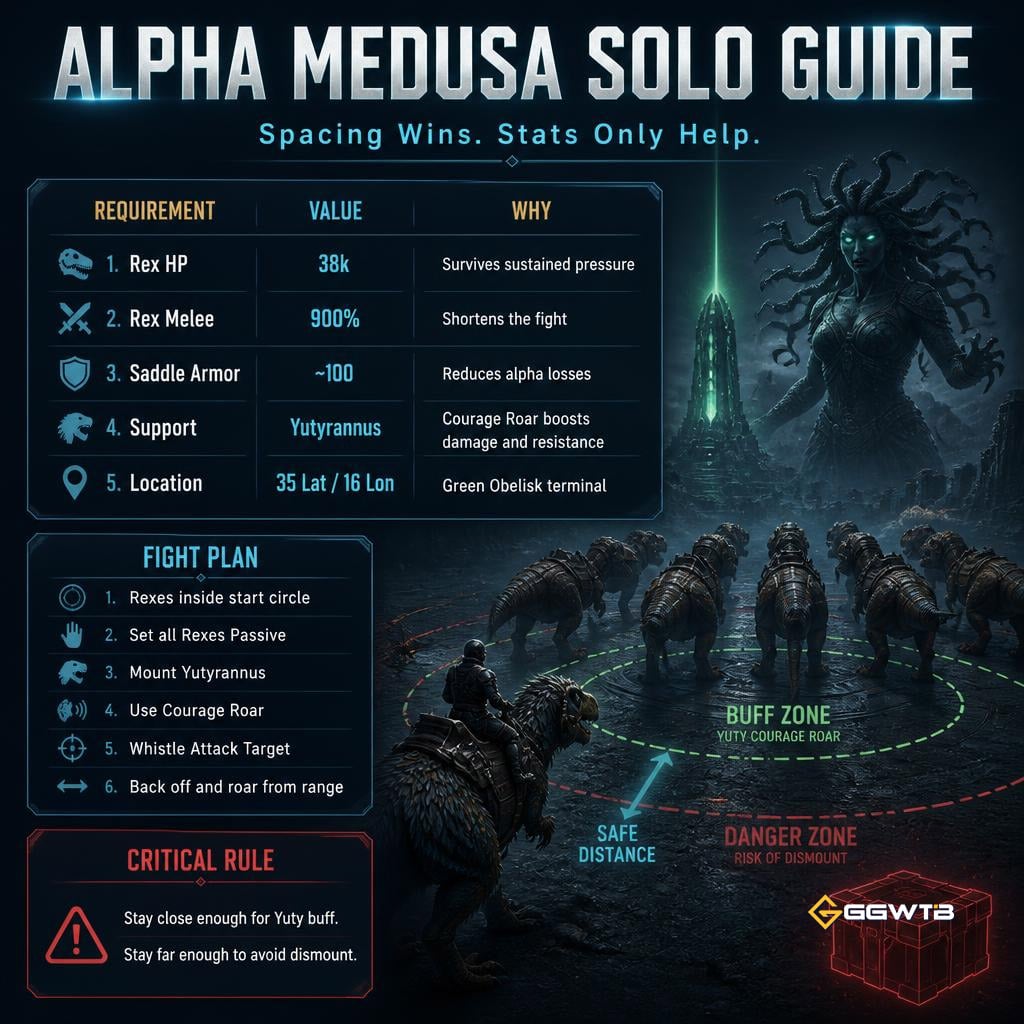
| Rex HP | 38k | Survives sustained boss pressure |
| Rex melee | 900% | Keeps the fight short |
| Saddle armor | ~100 | Cuts alpha losses dramatically |
| Support | Yutyrannus | Courage roar = damage + resistance |
Takeaway: Rexes kill Medusa; the Yuty keeps them alive. Skip the Yuty only if you enjoy replacing 38k Rexes.
1. Get every Rex inside the start circle, set Passive.
2. Mount the Yutyrannus and hit Courage Roar.
3. Whistle Rexes to follow, let Medusa approach.
4. Aim at her and Whistle Attack Target.
5. Back off and keep roaring from range.
Why does this matter? Her dismount threat centers on your position, not your army's. The winning distance is a narrow band: close enough for the Yuty buff radius, far enough to never eat the dismount.
That gap is the entire fight.
At 38k / 900% with 100-armor saddles, our clears were stable but not bloodless — expect wounded Rexes, and a loss if one eats focused damage. Grab the reward from the red crate after.
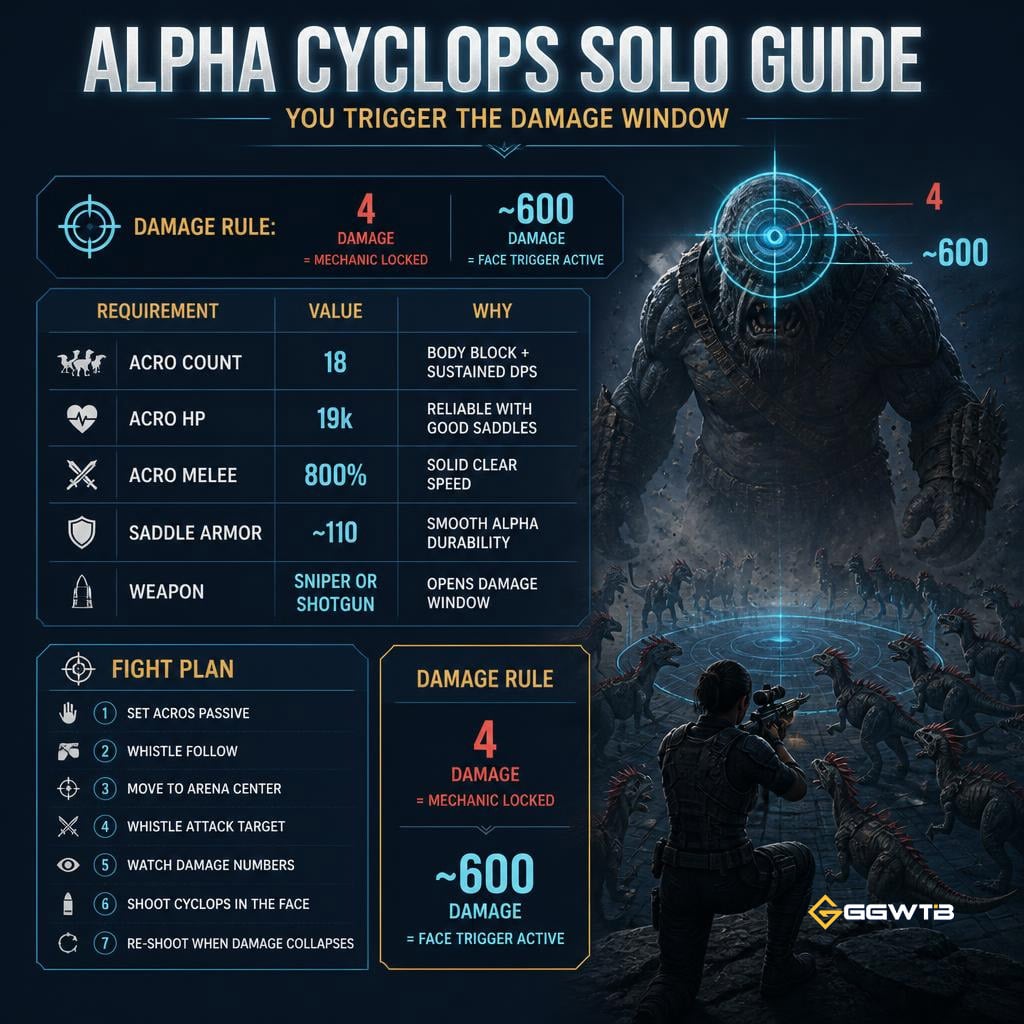
If your Acros are hitting for 4 damage, nothing is wrong with your Acros. Cyclops gates real damage behind a condition, and most failed runs come from players waiting for their army to fix a problem only the rider can fix.
| Requirement | Value | Why |
|---|---|---|
| Acro count | 18 | Body block + sustained DPS; Acro healing shines in long trades |
| Acro HP | 19k | Reliable with good saddles |
| Acro melee | 800% | Solid clear speed |
| Saddle armor | ~110 | Smooth alpha durability |
| Player weapon | Sniper or shotgun | Opens the damage window |
Takeaway: Bring firearms and ammo, or bring nothing at all — the tames cannot solo this mechanic.
1. Spawn with Acros on Passive, whistle Follow.
2. March to the arena center — big tames tangle badly in the entrance.
3. Whistle Attack Target once positioned.
4. Watch damage numbers. Tiny numbers? Shoot Cyclops in the face.
5. When hits jump to real values, maintain pressure and re-shoot whenever damage collapses.
What this actually means: your Acros are the engine, your firearm is the throttle. Sniper wins when he faces you; shotgun wins at awkward angles.
With the face mechanic active, our Acros landed around 600 per hit. The health pool is fat, so bring patience and spare ammo. This fight is annoying, not complicated.
Manticore is the cheapest alpha on the list — if you stop chasing it.
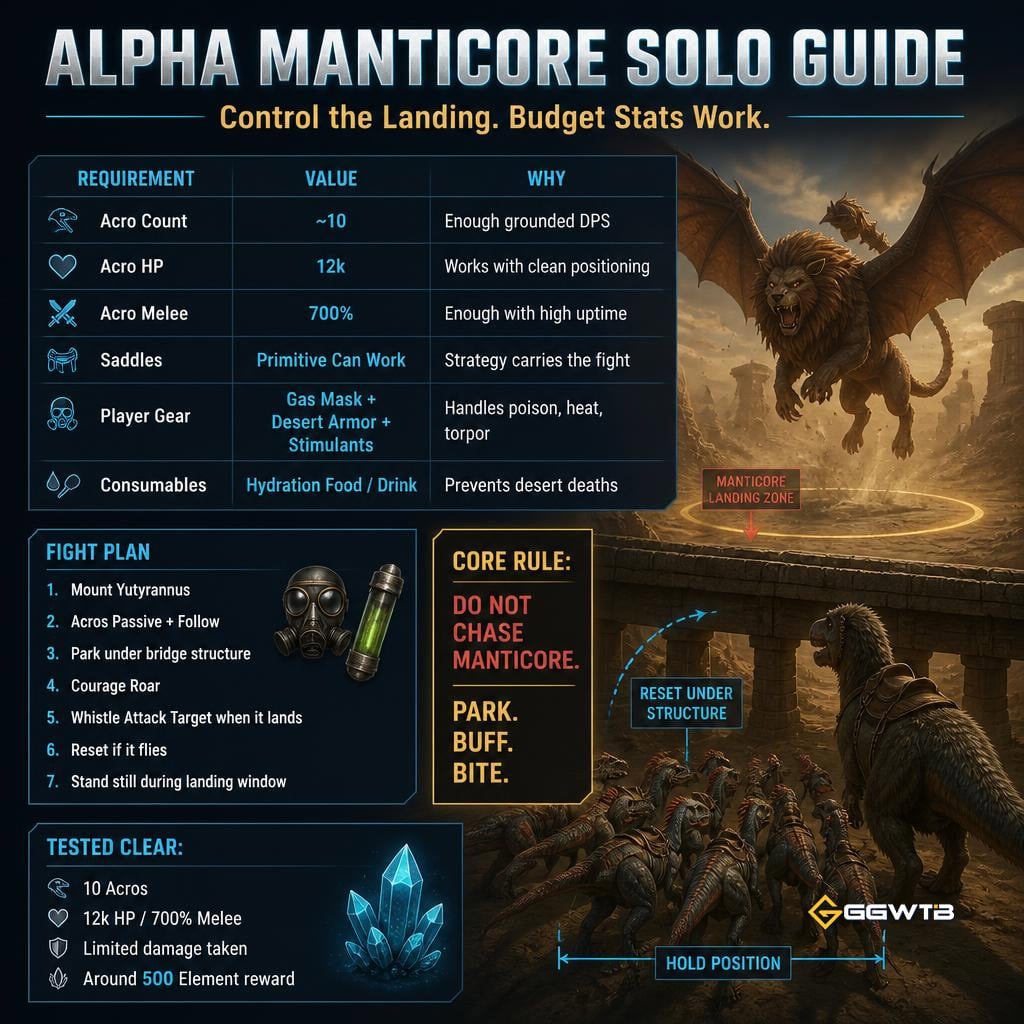
Most failed runs share one habit: sprinting after the boss across the arena. In our testing, excessive movement made the Manticore take off faster. Standing still kept it grounded longer and gave the Acros more uninterrupted bite time. That finding alone let us clear alpha with budget stats.
| Requirement | Value | Why |
|---|---|---|
| Acro count | ~10 | Enough grounded DPS |
| Acro HP | 12k | Works with clean positioning |
| Acro melee | 700% | Enough with good uptime |
| Saddles | Primitive can work | Strategy carries this fight |
| Player gear | Gas mask, desert armor, stimulants | Poison, heat, torpor |
| Consumables | Hydration food/drink | No dumb desert deaths |
Takeaway: This is the boss to farm first when your breeding lines are still mediocre.
1. Mount the Yutyrannus; Acros on Passive + Follow.
2. Park the group under the bridge-like structure.
3. Roar. When Manticore lands, Whistle Attack Target.
4. If it takes off, whistle passive and reset under the structure.
5. When it lands — stand still. Use stimulants if torpor climbs.
Park. Buff. Bite.
10 Acros at 12k / 700% cleared alpha fast with limited damage, paying out around 500 Element. Flight patterns vary run to run, but the structure reset keeps the fight consistent.
Hydra is the hardest land alpha here, and blindness is why. One frontal blind can shut affected creatures down for roughly 30 seconds — if your whole army eats it at once, your DPS falls off a cliff while a 1.2-million-HP boss keeps swinging.
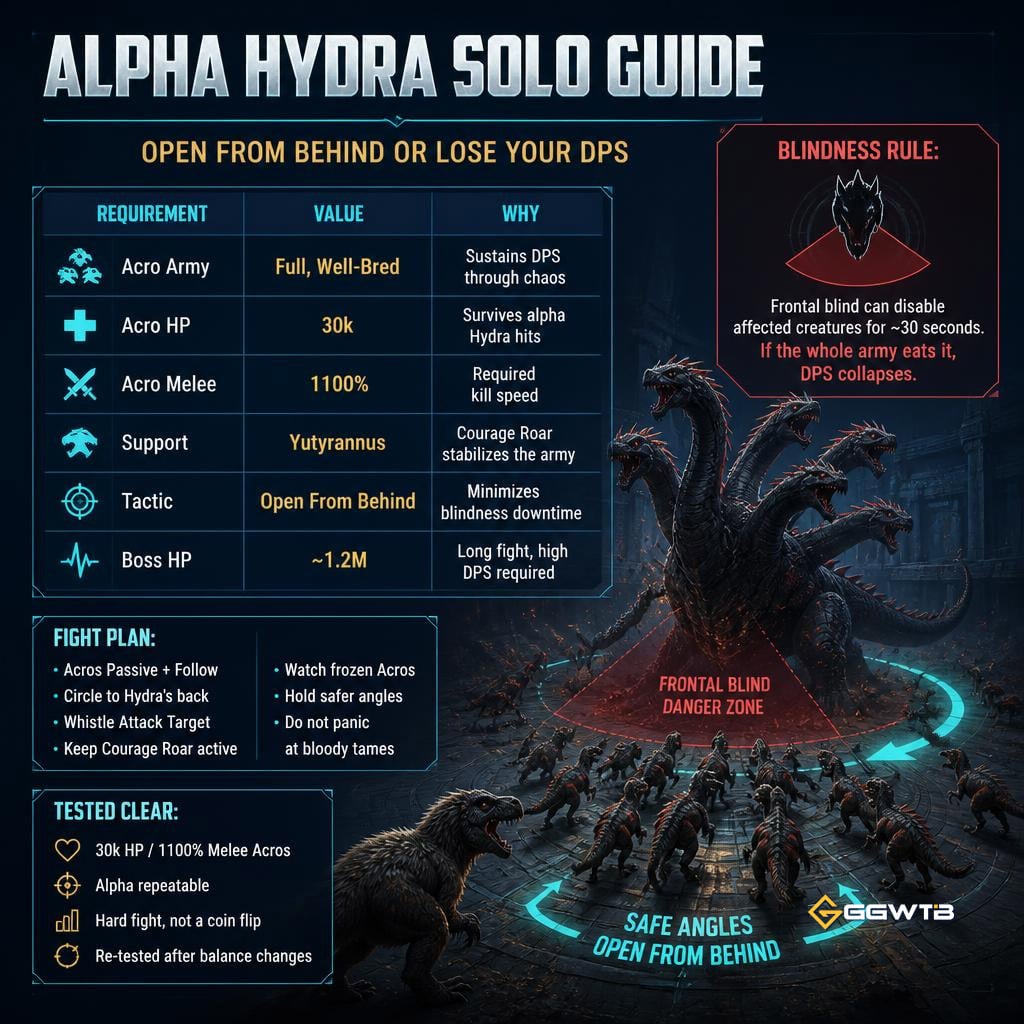
The fix costs nothing: start the fight from behind.
This is where budget stats stop working.
| Requirement | Value | Why |
|---|---|---|
| Acro army | Full, well-bred | Sustains DPS through chaos |
| Acro HP | 30k | Survives alpha Hydra hits |
| Acro melee | 1100% | Required kill speed |
| Support | Yutyrannus | Courage roar stabilizes everything |
| Tactic | Open from behind | Minimizes blindness downtime |
Takeaway: Hydra is both the stat check and the mechanic check — cut corners on either and you feed her an army.
1. Spawn with Acros on Passive, whistle Follow.
2. Circle around to Hydra's back before engaging.
3. Whistle Attack Target from position.
4. Keep Courage Roar rolling from the Yuty.
5. Watch for Acros that freeze — that is blindness, not AI failure.
6. Hold the safer angles and do not panic at bloody Acros.
Some of your army finishing low does not mean the strategy failed. It means Hydra did Hydra things.
Against her ~1.2 million HP, our 30k / 1100% army made alpha repeatable — never casual, but never a coin flip either. After a balance patch mid-testing, we re-verified the stat floor and the numbers above still hold.
Do not open with Hydra. Farm Element from the cheap clears and reinvest into melee and saddles.
| Order | Boss | Reason |
|---|---|---|
| 1 | Manticore | Lowest stat floor with positioning |
| 2 | Abyssal Kraken | Easy once the Megalodon pack exists |
| 3 | Cyclops | Mechanic-gated, firearms carry |
| 4 | Medusa | Real Rex investment + dismount risk |
| 5 | Hydra | Highest stat and mechanic demand |
| 6 | Sky Kraken | Solo alpha timer wall — run gamma |
Takeaway: Every clear funds the next one — Manticore Element buys the Acro lines that make Hydra survivable.
Failed attempts are usually command errors, not weak creatures.
Whistling attack too early. If the army is not positioned, half of it gets stuck, blinded, or redirected. Passive first. Reposition. Then attack.
Ignoring damage numbers. Numbers are your mechanic feedback. Cyclops taking 4 damage means shoot the face. Kraken body taking chip damage means go back to tentacles. Frozen Hydra Acros means blindness hit.
Stacking HP, starving melee. Slow kills mean more incoming damage. Once survival is stable, melee is the clear-speed stat — push it.
Buffing Medusa from inside dismount range. Roar from distance. One dismount ends the run.
Chasing Manticore. Reset under the structure and stand still. Movement makes it fly.
Megalodons — the pack buff at 8+ sharks delivers better sustained boss damage than Mosas, and they maneuver far better around tentacles. Aim for 10k HP / 800% melee and whistle-target tentacles before the body.
Not reliably on official-style settings. The boss carries 1M+ HP against a 25-minute timer, and even strong solo cannon work only managed ~100k damage per 5 minutes in our tests. Run gamma solo, or bring 2–3 players with special cannonballs for alpha.
30k HP and 1100% melee with a Yutyrannus support. Lower stats gamble against Hydra's ~30-second blindness lockout — underbuilt armies lose too much DPS uptime to close the fight.
Because you haven't triggered the damage window — shoot Cyclops in the face with a sniper or shotgun. Damage jumps from single digits to ~600 per Acro hit once the window opens, and you re-trigger it whenever numbers collapse.
Park your army under the bridge-like structure and stand still when it lands. In our testing, running around made it take off faster — stationary positioning kept it grounded longer and let 12k HP / 700% melee Acros clear alpha.

Prepare for the ARK Survival Ascended Enigmasaur launch on November 6, 2026. Master the form-matching taming loop, ability retention rules, and cryo-prep strategy.

Learn the reported Magmasaur cryopod breeding trick, fix common failures, and check compatibility before moving breeders. Start with one eligible pair.
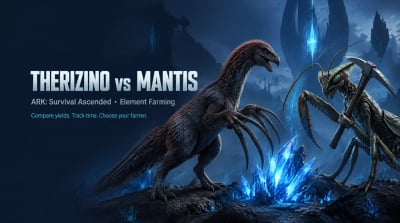
Compare Therizino and Mantis farming setups, avoid misleading yield claims, and measure Element per minute before spending resources on a replacement.

Follow Gargantar's taming cycle, prepare exact feeding sources, and troubleshoot swallowing, gear demands, and keratin rounds before risking valuable equipment.

Separate verified ARK patch mechanics from speculative leaks. Real data on the Therizinosaurus jump, Giga TLC status, and breeding baseline survival prep.

Check which DLC unlocks Cerberax and Gargantar, then follow the taming sequence for each. Includes prep checklists, failure points and a quick-reference table.

We use cookies to ensure website functionality and enhance your experience. Click "Accept All" to consent, or "Customize" to manage your preferences. See our Privacy Policy.