0
0 Created: Sep 9,2026 | ARK Survival Ascended
ARK Survival Ascended Alpha Master Controller Guide: Ossidon & Solo Meta Strategy

Alpha Master Controller wipes well-geared tribes not through combat DPS, but through failed collection logistics. If your team cannot route and deposit Code Keys within the terminal window, massive melee stats will not save your run.
The Ossidon build solves combat friction by preventing dismounts and cleaving arena threats like Gigas and Reapers. It eliminates mob disruption, but it does not remove the deposit mechanic.
Execution speed dictates survival.
- Optimize the Ossidon Squad Around the Arena Bottleneck
- Master the Code Key Loop & Boss Vulnerability
- The Solo Therizino Route: Ranged Execution
- FAQ (Frequently Asked Questions)
- What stats do Ossidons need for Alpha Master Controller?
- Can you solo Alpha Master Controller with Ossidons?
- Do Ossidons eliminate the need for Code Keys?
- How many keys are needed to damage Alpha Master Controller in the final phase?
- What should you do if enemies stop spawning during the key collection phase?
- Summary
Optimize the Ossidon Squad Around the Arena Bottleneck
Combat stops mattering the moment your key collection halts.
In group boss encounters, squads routinely wipe because their high-DPS mounts block the terminal path or drag mobs miles away from the deposit point. The Lost Colony Ossidon bypasses traditional dismount hazards while riders engage elite waves.
Are your mounts clearing space, or are they getting in the runner's way?
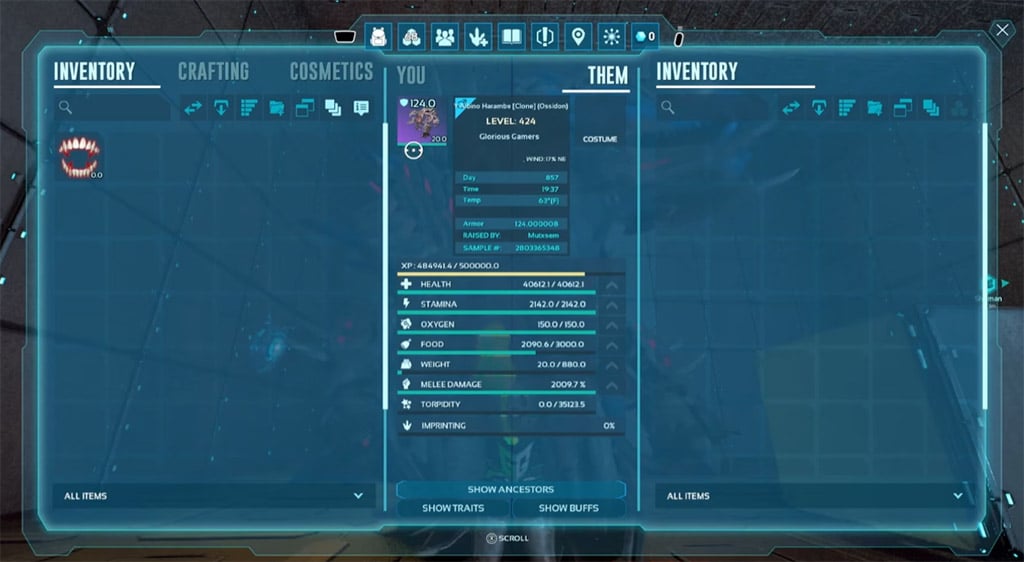
If you bring more than eight large tames, then the terminal approach becomes a physical logjam. The ARK Official Community Wiki's Ossidon data confirms that Ossidons prohibit rider-mounted weaponry. You cannot fire off their backs.
Every survivor on foot requires immediate escort.
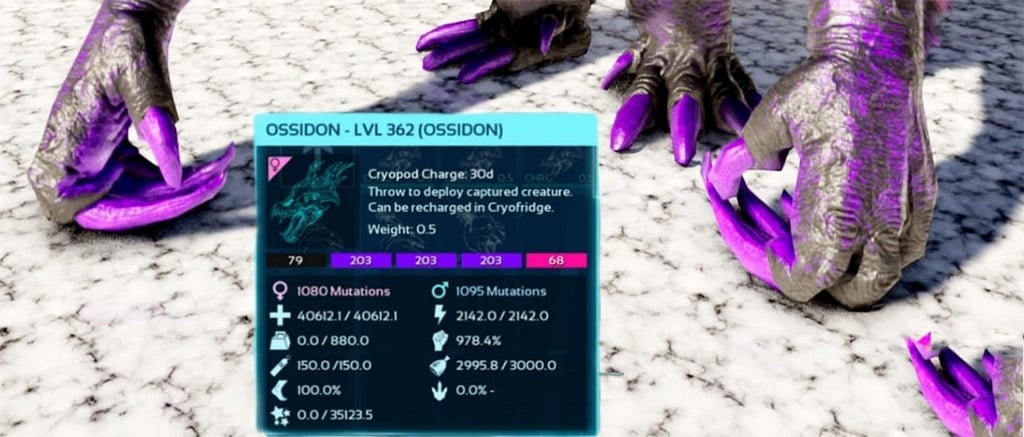
The table below establishes practical stat targets based on high-tier breeding setups:
| Setup Parameter | Target Benchmark | Tactical Function | Hard Boundary |
|---|---|---|---|
| Health Pool | 40,000 HP | Absorbs elite wave bursts | Requires testing on unmutated lines |
| Melee Damage | 2,000%+ Melee | Clears Gigas and Reapers fast | Unobtainable without deep breeding |
| Saddle Armor | 124 Armor | Halves incoming boss add damage | Primitive saddles cause attrition |
| Squad Footprint | 7 to 8 Mounts | Balances DPS with arena mobility | 10 tames risk transfer teleport drops |
| Consumables | Custom Food / Meds | Mitigates arena environmental drain | Raw Flak leaves zero recovery room |
Bring high-tier saddles. Skimping on armor quality forces your mounts to waste time regenerating between key phases.
Assign your squad functions before initiating teleportation. Designate two combat sweepers to hold the perimeter, one primary key runner, and one secondary runner equipped with backup gear.
The primary runner drives the encounter pace.
Pack high-durability armor replacements alongside a capped Pump-Action Shotgun. If an Ossidon rider gets cornered off-mount, they need immediate point-blank stopping power to survive.
Master the Code Key Loop & Boss Vulnerability
Terminal speed beats raw damage output.
Teleport spacing demands strict discipline. Position the pack tightly within the HLN-A bubble, accounting for shoulder pets that consume invisible transfer slots.
Stages 1 through 3 demand 80 deposited Code Keys each. A single survivor holds an inventory ceiling of 20 keys at once.
Run four clean drop rotations per early phase.
[Pull Mobs Near Terminal] ➔ [Execute Cleave Kill] ➔ [Grab 20 Keys] ➔ [Deposit Instantly]
Why does this matter? Because dragging fights across the arena forces your runners to sprint through open fire. Keep the kills within 15 meters of the terminal.
The table below outlines objective thresholds across all four arena phases:
| Encounter Phase | Keys Required | 20-Cap Inventory Runs | Primary Objective |
|---|---|---|---|
| Stage 1 | 80 Keys | 4 Full Runs | Anchor combat zone 15m from terminal |
| Stage 2 | 80 Keys | 4 Full Runs | Re-establish perimeter after knockback |
| Stage 3 | 80 Keys | 4 Full Runs | Swap degraded armor pieces immediately |
| Phase 4 (Boss Burn) | 40 Keys per Burn | 2 Full Runs | Clear terminal lane, then trigger burn |
Commit to the objective instantly. A slow kill right next to the deposit node beats an instant kill on the arena boundary every single time.
Phase 4 requires 40 keys to strip the boss shield. Once HLN-A exposes the Master Controller, unleash all Ossidons directly on the boss hitbox.
Verify the boss health bar drops before withholding ranged weapons. If the physical bite fails to register on the boss hitbox due to terrain elevation, dismount behind your mount's tail and unload with your backup weapon immediately.
Watch the vulnerability timer. When the immunity shield reactivates, pull back to your defensive line and restart key collection immediately.
The Solo Therizino Route: Ranged Execution
Soloing demands an entirely different execution loop.
Without teammates to collect keys, the lone survivor must dodge mob aggression, handle terminal deposits, and dish out ranged boss DPS. In testing across boss encounters, Therizinos equipped with Sweet Vegetable Cakes remain the gold standard for solo survivability.
Sweet Vegetable Cakes sustain Therizino health pools automatically while you run keys.
The comparison below outlines the workload split between both methods:
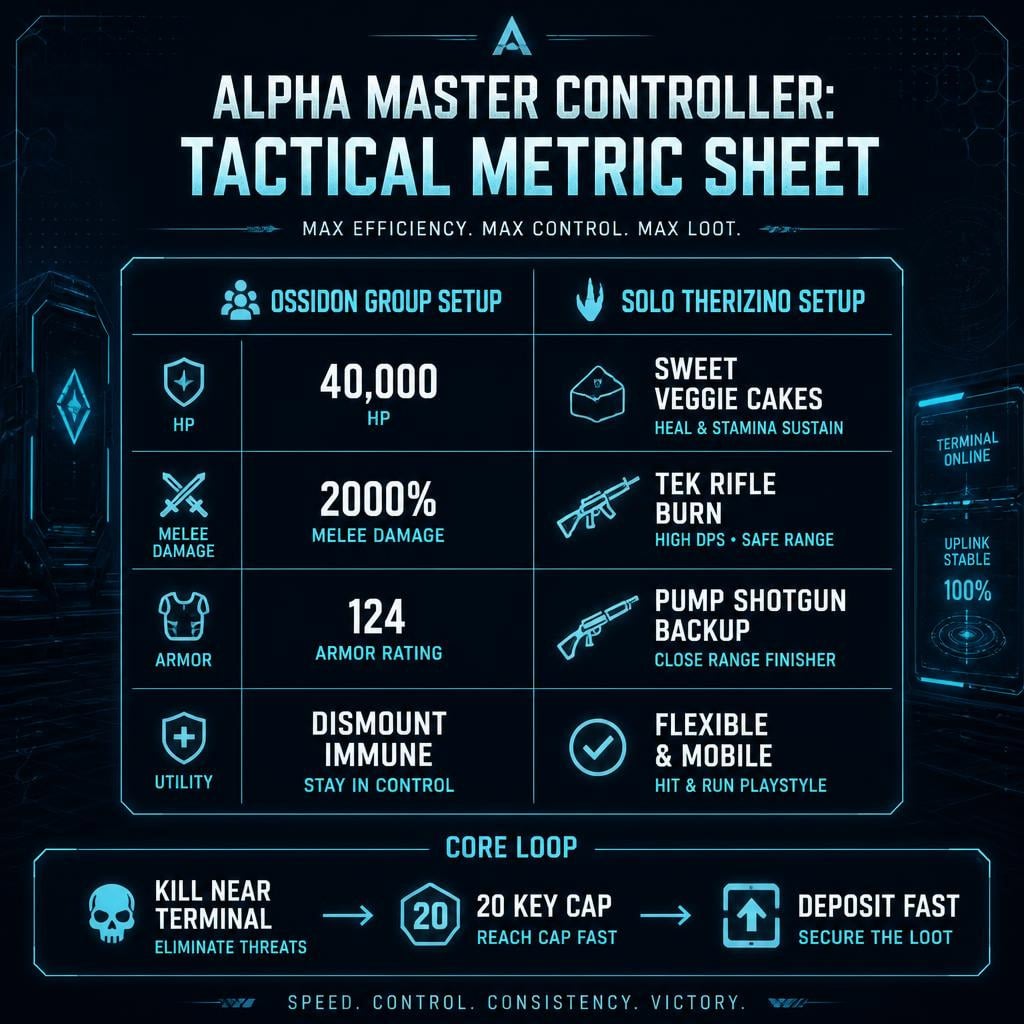
| Strategic Vector | Ossidon Group Meta | Solo Therizino Meta |
|---|---|---|
| Player Workload | Split between runners and sweepers | 1 survivor executes every mechanic |
| Boss Damage Engine | Direct mount DPS | Tek Rifle and 297% Shotgun |
| Mob Management | Sweepers control aggro lanes | Unridden Therizinos hold loose choke points |
| Sustain Method | Raw HP pool and armor saddles | Auto-consuming Sweet Vegetable Cakes (20+ each) |
| Primary Point of Failure | Terminal body-blocking by tames | Runner death during unmounted collection |
Choose the Therizino route if you lack an organized tribe. The execution requires strict mechanical precision, but it avoids multi-player transfer bugs.
Bring a Tek Rifle alongside a high-damage Pump-Action Shotgun. When the boss shield drops, tap-fire your Tek Rifle to maximize DPS without hitting the heat ceiling.
Swap to the shotgun the second your rifle overheats.
Keep your backup weapons hotbared. Waiting out an overheat cooldown wastes up to a third of your total damage phase.
Arena spawn bugs occasionally stall waves. If key-dropping mobs stop spawning mid-phase, sweep the arena perimeter on foot to pull stragglers stuck on world geometry.
Never take irreplaceable breeding stock into the arena.
FAQ (Frequently Asked Questions)
What stats do Ossidons need for Alpha Master Controller?
Target roughly 40,000 HP, 2,000%+ Melee Damage, and 124-armor saddles across seven to eight Ossidons. These stat pools ensure your team cleaves through elite arena waves without pausing to heal.
Can you solo Alpha Master Controller with Ossidons?
No, the Ossidon strategy relies on multi-player role distribution because the mount prohibits rider weaponry. Solo players should utilize Therizinos paired with Sweet Vegetable Cakes, handling key collection and firearm boss damage manually.
Do Ossidons eliminate the need for Code Keys?
No, you must still collect and deposit all required Code Keys at the terminal to progress phases. Ossidons merely stabilize the combat arena so runners can collect keys without suffering dismounts.
How many keys are needed to damage Alpha Master Controller in the final phase?
You must deposit 40 Code Keys to drop the Master Controller's shield for each damage window. The key cap remains 20 per survivor inventory, requiring two full deposit cycles per vulnerability phase.
What should you do if enemies stop spawning during the key collection phase?
Check the arena boundary immediately, as Corrupted Avatars and Dinosaurs often snag on perimeter geometry. Fire a few homing or explosive rounds toward the outer edges to force aggro, but if the counter remains frozen, save your gear by preparing for an arena timeout.
Summary
Clearing Alpha Master Controller comes down to strict division of labor and efficient key logistics rather than raw, unorganized damage. If running as a tribe, deploy seven to eight Ossidons to lock down wave spawns and prevent dismounts, keeping the terminal corridor completely clear for designated runners. For solo attempts, rely on cake-fed Therizinos to soak aggro while you run keys and cycle weapons between a Tek Rifle and Pump-Action Shotgun during shield drops. Secure your breeding lines, keep spare armor on hand, and treat collection speed as your true win condition.

I’m Benjamin Walsh, an Australian Senior Copy Editor at GGWTB focused on survival crafting, open-world exploration, and extraction games. My guides weigh base locations, supply routes, and what deserves the last slot in your backpack. When editing, I look for skipped prerequisites and unclear directions—a useful guide shouldn’t send you across the map without the right tools.

Most Popular Posts
- ARK Survival Ascended Lunar Biome Cave Locations: All 6 Caves From World Teleporter
- ARK: Survival Ascended Bjarnheim Farming Guide: Element, Pearls, Metal & Boss Routes
- ARK: Survival Ascended Lumina Dinos Guide: Spawn Locations, Taming Steps & Umbra Synergy
- Thylacoleo Location on Genesis 1 (ASA): Spawn Coordinates, Force-Spawn Method & Fast Taming Guide
- ARK: Survival Ascended Giant Queen Bees: Find and Tame in Genesis 1
- ARK Survival Ascended Magmasaur Guide: Egg Theft, Raising, and Metal Farming Tips
Popular Category Lists
- ARC Raiders / (354)
- Grow a Garden / (294)
- CoD: Black Ops 7 / (167)
- Star Citizen / (163)
- MLB 26 / (159)
- Monopoly Go / (153)
- ARK Survival Ascended / (128)
- Steal a Brainrot / (99)
- Blox Fruits / (74)
- Adopt Me / (74)
- Forza Horizon 6 / (72)
- Sailor Piece / (68)
- Grow a Garden 2 / (68)
- Diablo IV / (62)
- CoD: BLACK OPS 6 / (55)
- Aion 2 / (52)
- Path of Exile 2 / (48)
- Monster Hunter Wilds / (46)
- Windrose / (44)
- Maplestory Classic / (42)