


 0
0Best Grow a Garden Pets Team Combos for Infinite Eggs, Fast Leveling, and Huge Pets
- Jordan
- Share
- Grow a Garden
- 10/31/25
- 1639
You want a lineup that hatches faster, levels harder, and crafts smarter. The good news? You can. After dozens of live tests—from burning 60 Paradise Eggs to raising giant peacocks—we've nailed down the 10 pet combos that consistently outperform. You'll see why each setup works, what stats you need to hit caps, and how to adjust if your box is missing pieces. If you're chasing huge Grow a Garden pets, low egg spend, or late‑game XP spikes, there's something here that will change your day‑to‑day grind.
- Eight Koi + Eight Seal: Infinite Egg Refund Engine
- Brontosaurus Core for Huge Pets
- Blood Kiwi + Bald Eagle: Fast Hatchers for Long Eggs
- Seven Blood Owls: Early‑Game XP Rocket
- Seven Capybaras + One Tiger: AoE XP Burst (Glitch‑Assisted)
- French Fry Ferrets for Late‑Game Leveling
- Seven Mimic Octopus or Seven Chinchillas: Rare Effect Multipliers
- Orangutan + Patches (Pachycephalosaurus): Double Craft, Lower Cost
- Giant Fruit Farm: Seven Shroomies + One Tiger
- Eight Pack Bees: Endgame Inventory Expansion
- FAQ
- Conclusion
↖ Eight Koi + Eight Seal: Infinite Egg Refund Engine
 | x 8 | + | 8 x |  |
- Why it works: Koi grants egg refunds on hatch; Seal refunds eggs when selling pets. Together, they slash your egg spend on both ends.
- What this means: You can mass hatch—even huge variants—without watching your egg pile evaporate.
- Caps and requirements:
- Both effects cap at 50%.
- Koi: ≥1.18 kg base + Nightmare mutation to hit 50%.
- Seal: either ≥1.70 kg base (no mutation) or ≥1.46 kg + Nightmare mutation.
- Tested result: Hatched a 8.74 kg giant peacock with only 60 Paradise Eggs using this pairing.
- Pro tip: If you have 8 slots, consider 5 Nightmare Koi + 3 Nightmare Seal to balance refunds across hatch and sell cycles.
- Watch out: Refunds don't guarantee rare mutations; it just lets you iterate more cheaply.
↖ Brontosaurus Core for Huge Pets

- Why it works: Bronto boosts base hatch weight up to +30% per egg, raising the entire huge roll floor.
- What this means: Your huge outcomes shift from 4.56–11.44 kg to higher brackets post-level, peaking at ~114.4 kg by level 100.
- Caps and requirements:
- Normal hatch range: 0.88–2.20 kg.
- With Bronto (+30%): 1.14–2.86 kg.
- Huge modifier (0.1% ×4): huge range 4.56–11.44 kg pre-leveling.
- Cap condition: 30% cap reached with five Brontos at ≥1 kg each; fewer if heavier or mutated.
- Optimal 8‑slot build: 5 Brontos + 3 Koi for refund stability.
- Advanced tip: 3 Nightmare Brontos + 5 Nightmare Koi + Medium Toy to harmonize weight and refund—efficient for long hatch sessions.
- Watch out: Don't overstack Brontos past the cap; those slots are better spent on Koi/utility.
↖ Blood Kiwi + Bald Eagle: Fast Hatchers for Long Eggs
- Why it works: Bald Eagle compresses hatch time; Blood Kiwi speeds only the single slowest egg by 20% (non‑stacking).
- What this means: You target pain points like bugged eggs or extreme timers without wasting buffs.
- Recommended sets:
- Long eggs: 5 Bald Eagles + 3 Blood Kiwis.
- Giant Peacock synergy: 2 Giant Peacocks + 6 Bald Eagles for ~10 minutes on a 4‑hour egg.
- Reality check: Blood Kiwi's bonus isn't groupwide and won't stack—don't overinvest in multiples beyond covering the slowest egg.
- If you find your hatchers idling: swap one Kiwi for a Koi to keep eggs flowing longer.
↖ Seven Blood Owls: Early‑Game XP Rocket
- Why it works: Blood Owl drip‑feeds XP per second; scaling with weight and Nightmare mutation.
- Numbers you can trust:
- One 1.3 kg Nightmare Blood Owl ≈ 1.65 XP/s.
- Seven owls + small & medium treats ≈ 18.15 XP/s.
- Time to level 30: a bit over 2 hours.
- Why not Rainbow Dilophosaurus? Faster, yes—but extremely rare. Owls are realistic for most players.
- If you're stuck under level 20: prioritize a clean owl stack before chasing dilophosaurus trades.
↖ Seven Capybaras + One Tiger: AoE XP Burst (Glitch‑Assisted)
 | x 7 | + | 1 x |  |
- Why it works: Capybaras boost AoE XP; Tiger glitch clusters them to maximize overlaps.
- What this means: With tight stacking (pancake or Tiger), you can blast XP onto your target pet.
- Numbers:
- Typical stacked gain: 50+ XP/s.
- With seven giant Capybaras: up to ≈210 XP/s.
- How to run it:
- Step 1: Place 7 Capys + 1 Tiger to gather.
- Step 2: Swap Tiger out for the pet you want to level.
- Caveat: The Tiger gather glitch is not patched at time of testing but could change; have a pancake stack backup plan.
↖ French Fry Ferrets for Late‑Game Leveling
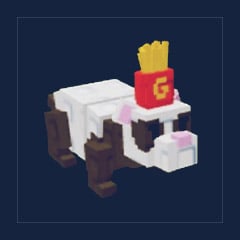
- Why it works: Each Ferret converts minutes into guaranteed levels for your target pet; stacks scale hard.
- Benchmarks:
- One 1 kg Ferret ≈ 60 minutes per level.
- Seven Ferrets ≈ 8 minutes per level.
- With ≥2 kg or Nightmare Ferrets: ≈4 minutes per level.
- With 2 Giant Peacocks + 1 Giant Spider assisting: as low as ~35 seconds per level.
- When to use: Past mid‑game where raw XP/s falls off; Ferrets give predictable throughput.
- Tip: Time your runs with event windows to double dip rewards while leveling.
↖ Seven Mimic Octopus or Seven Chinchillas: Rare Effect Multipliers
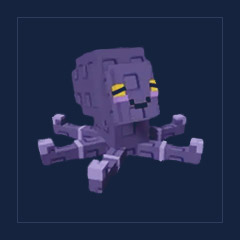 | x 7 | + | 7 x | 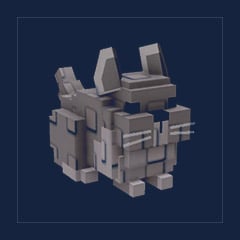 |
- Why it works:
- Mimic Octopus: duplicates the effect of your rare pet, pretending you have eight copies.
- Chinchillas: refresh pet skills three times each, up to 21 triggers in ~40 minutes.
- Use cases:
- Kitsuni, Raccoon, Disco, Butterfly—effects that scale with copies or need repeated procs.
- Limitations:
- Chinchilla cooldowns can't be reduced; plan cycles around fixed timers.
- If you lack Mimics: run Chinchillas for burst refresh windows, then swap to Koi/utility during cooldowns.
↖ Orangutan + Patches (Pachycephalosaurus): Double Craft, Lower Cost
 |  |
- Why it works: Orangutan gives up to 56% chance not to consume materials; Patches guarantees double output (with right stats).
- Requirements:
- Orangutan: 7% per pet, stack to 56%.
- Patches: ≥1.73 kg + Nightmare mutation for 100% double craft.
- What this means: You can produce anti‑bee eggs, pet pouches, and new event items at twice the yield while burning fewer mats.
- Pro tip: Stage crafts in bulk; the savings compound on large queues.
↖ Giant Fruit Farm: Seven Shroomies + One Tiger
 | x 7 | + | 1 x | |
- Why it works: Tiger glitch groups Shroomies; sprinklers accelerate growth; 300 fungus plants unlock giant fruit potential.
- What this means: You can farm giant fruits reliably once you hit fungus diversity—there are eight types available now, so collection is realistic.
- Setup notes:
- Use the Tiger to cluster, then lay sprinklers.
- Monitor plant count; efficiency spikes after the 300 threshold.
- If Tiger gets patched: adopt tight terrain funnels to simulate clustering.
↖ Eight Pack Bees: Endgame Inventory Expansion

- Why it works: Each max‑level Pack Bee adds ~40 backpack slots; eight bring 300+ capacity on top of base.
- Totals:
- Base 200 + 50 ascension + 300+ from bees ≈ ~600 slots.
- What this means: Massive event farming, e.g., Halloween Jack‑o'‑Lantern runs without invasive bank trips.
- Bonus: Craftable at the workbench—making acquisition cheap and scalable.
- Tip: Pair with Orangutan for material savings while crafting Pack Bee components.
↖ FAQ
- Q: Do Koi and Seal refunds stack beyond 50%?
- A: No. Both cap at 50%. Aim for listed weights/mutations to reach caps; extra copies won't push past.
- Q: Is the Tiger gather glitch safe to rely on?
- A: It worked in our latest tests and hasn't been patched, but glitches can change. Keep a pancake stack or terrain funnel as backup.
- Q: Does Blood Kiwi help all eggs in a batch?
- A: No. It only applies to the single slowest egg and does not stack with other Kiwis.
- Q: Can Brontosaurus exceed +30% hatch weight?
- A: The effect caps at +30%. Once reached, swap extra Brontos for Koi or speed pets for efficiency.
- Q: Are Chinchilla skill refreshes affected by speed modifiers?
- A: No. Their cooldowns are fixed; you schedule around them rather than accelerating them.
- Q: How do I get Pack Bees cheaply?
- A: Use the workbench; consider combining Orangutan for material savings and Patches to double output.
↖ Conclusion
If you're chasing huge pets, start with Brontos + Koi. If eggs are your bottleneck, move straight to Koi + Seal. When leveling stalls, swap in Blood Owls or graduate to French Fry Ferrets for late‑game speed. Farming or crafting heavy? Orangutan + Patches and Pack Bees will feel like flipping a switch. If you discover a variant that outperforms—especially around event stations—share it and stress‑test it with 10–20 run samples. And if you're missing key pets, jump onto trade hubs like the Kitsune site to fill gaps fast. Now, pick the combo that matches your bottleneck and run a 30‑minute test—your garden will feel different by tomorrow.

Most Popular Posts
- Grow a Garden 2 Release Date Guide: Why Saturday Is the Likely Launch Window
- Grow a Garden Bizzy Bee Event: Honey Coins, Bee Eggs, Seeds, Upgrades, and Rewards
- Grow a Garden Bee Dungeon Guide: Best Wave 100 Strategy, Bee Shards, and Team Setup
- Grow A Garden Best Pet Mutations 2026: Ranked Guide for Power, Trading, and AFK Farming
- Grow a Garden Bee Stats Guide: Best Bees Ranked by Damage, HP, and DPS
- Grow a Garden Busy Bee Part 2 Guide: Royal Jelly, Best Pets, New Seeds, and Prep Strategy
Popular Category Lists
- Grow a Garden / (286)
- ARC Raiders / (262)
- CoD: Black Ops 7 / (166)
- Monopoly Go / (146)
- MLB 26 / (144)
- Star Citizen / (111)
- Steal a Brainrot / (89)
- Sailor Piece / (68)
- ARK Survival Ascended / (66)
- Diablo IV / (61)
- Forza Horizon 6 / (60)
- Blox Fruits / (60)
- CoD: BLACK OPS 6 / (55)
- Adopt Me / (53)
- Path of Exile 2 / (48)
- Monster Hunter Wilds / (46)
- Windrose / (44)
- Path of Exile / (40)
- Grow a Garden 2 / (38)
- Bee Swarm Simulator / (36)


