0
Created: Oct 27,2026 | Enshrouded
Enshrouded Farming & Animal Taming Guide: Soil, Bait & Setup

To build a self-sustaining farm in Enshrouded, you must unlock the Farmer (Emily Fray), establish a single Seedbed loop, and stockpile livestock feed before capturing a single animal. Most players stall their progression by taming animals early and starving their own crop supply to make feed.
- Unlock the Farmer and Build the Production Chain
- Separate the Three Production Stages
- Produce Seedlings and Choose Soil Carefully
- Read Each Seedbed Recipe
- Use the Soil Recipe Chain
- Diagnose Slow Growth with a Controlled Plot Test
- Choose Animals by Output and Feed Cost
- Compare the Available Farm Animals
- Budget for Feed Before Crafting Bait
- Tame Animals Without Rushing the Approach
- Follow the Taming Loop
- Diagnose Repeated Taming Failures
- Set Up Housing and Confirm Production
- Validate One Enclosure First
- Manage Breeding Space
- Plan Crops and Livestock as One System
- Watch the Shared Materials
- Keep Water-Crop Experiments Contained
- Add Bees and Pets After the Core Farm Works
- Troubleshoot Before Adding More Infrastructure
- FAQ (Frequently Asked Questions)
- Should I start with crops or animal taming in Enshrouded?
- Does every Seedbed recipe produce five seedlings?
- Can I put taming bait inside the animal feeder?
- Why did my tamed animals stop producing Milk, Eggs, or Wool?
- How do I pause animal feed consumption without losing my livestock?
Unlock the Farmer and Build the Production Chain
Starting a farm fails when you clear massive fields before building the stations required to process soil and seedlings. You need a strict crafting sequence that turns raw stone and dirt into repeatable planting stock.
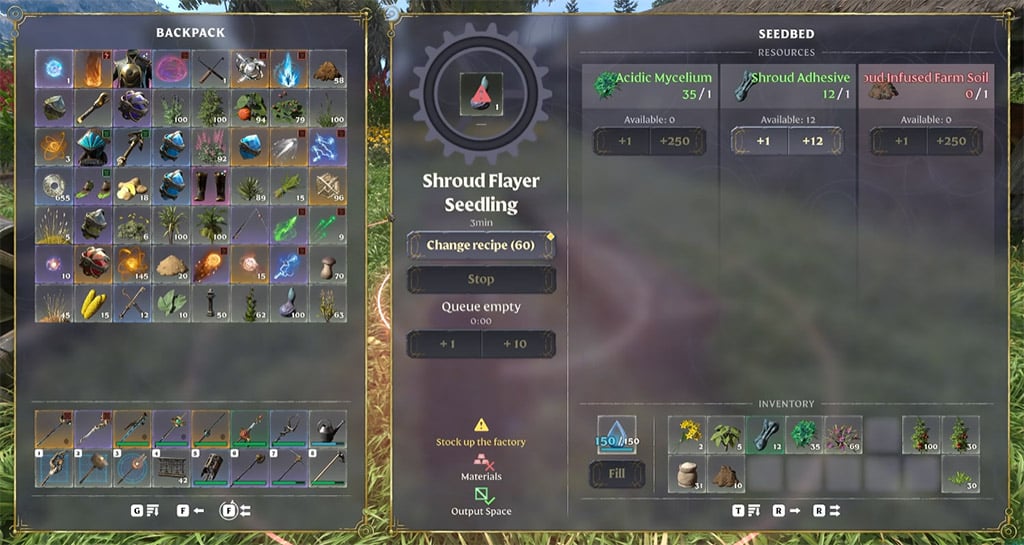
What this actually means is securing the Alchemist's Grinding Stones alongside the Farmer. Without Bonemeal, your entire soil production halts before you plant your first seed.
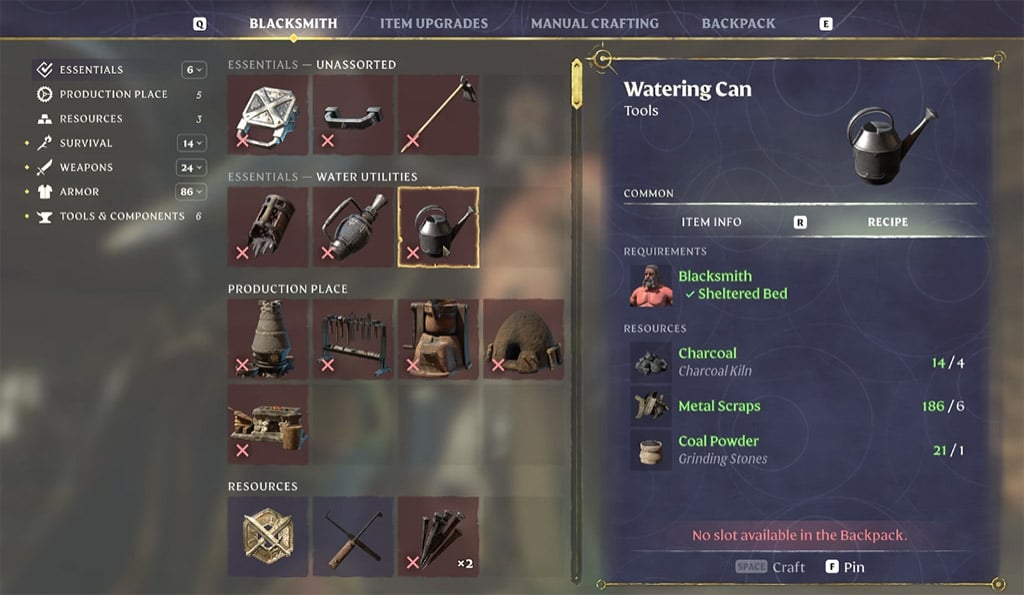
Prepare these exact starting materials to initialize your base loop:
| Item | Required Materials | Primary Function |
|---|---|---|
| Grinding Stones | 10 Flintstone, 15 Stone | Crafted via Alchemist; grinds bones into Bonemeal |
| Farm Soil | 7 Springlands Dirt, 3 Bonemeal | Crafts 10 units; required for Seedbeds and base plots |
| Seedbed | 10 Wood Logs, 2 Metal Scraps, 10 Farm Soil | Multiplies raw crops into plantable seedlings |
| Flower Soil | 10 Farm Soil, 1 Honey | Crafts 10 units; supports flora and decorative plants |
Build exactly one Seedbed first and refuse to expand until seedling craft speeds actually bottleneck your field space.
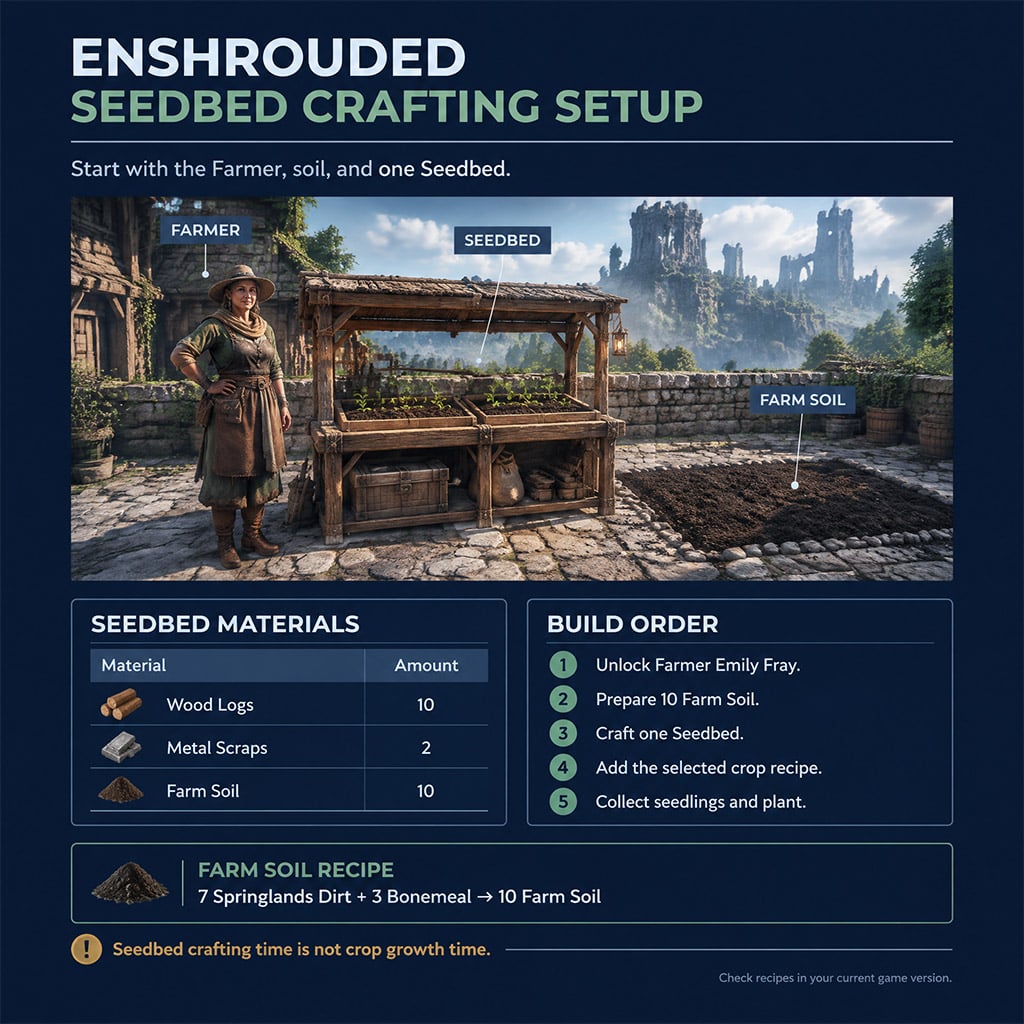
Follow this exact deployment sequence:
1. Rescue the Farmer, Emily Fray, from her vault.
2. Craft Grinding Stones via the Alchemist to process Bonemeal.
3. Batch-craft 20 Farm Soil (10 for the station, 10 for your first test plot).
4. Place one Seedbed and queue a small batch of a single crop.
5. Stockpile ongoing animal feed before crafting any taming bait.
Separate the Three Production Stages
Why does adding more Seedbeds rarely increase your food supply? Players constantly confuse seedling generation with field maturity.
Treat your farm as three isolated bottlenecks:
- Seedling Production: How fast the Seedbed converts 1 raw crop into multiple starts.
- Field Growth: How fast planted starts mature in placed soil blocks.
- Consumption: How fast your kitchen and livestock feeders drain the storage chests.
If your Seedbed chest is already full of unplanted seedlings, building a second station wastes Metal Scraps and Farm Soil. Expand your dirt plots or cut back on animal mouths instead.
Produce Seedlings and Choose Soil Carefully
Relying on a single rule of thumb for seedling yields or soil upgrades will ruin your material math. A soil type used inside a Seedbed recipe is not automatically the fastest surface for field growth.
Read Each Seedbed Recipe
Standard crops typically yield 5 seedlings per 3-minute craft cycle, alongsideExceptions that break your resource planning. Aloe generates 10 seedlings per batch, while Shroud Flayer yields only 1 seedling.
Check the station UI before dumping rare reagents into the queue.
That 3-minute timer only dictates station crafting speed. Once you pull those seedlings out and plant them in the ground, field growth follows a completely separate internal clock.
Use the Soil Recipe Chain
Upgrading every plot to endgame soil drains your Nitrate and Fossilized Bone Dust reserves without guaranteeing faster harvests for basic crops.
Use this material chain to budget your terrain upgrades:
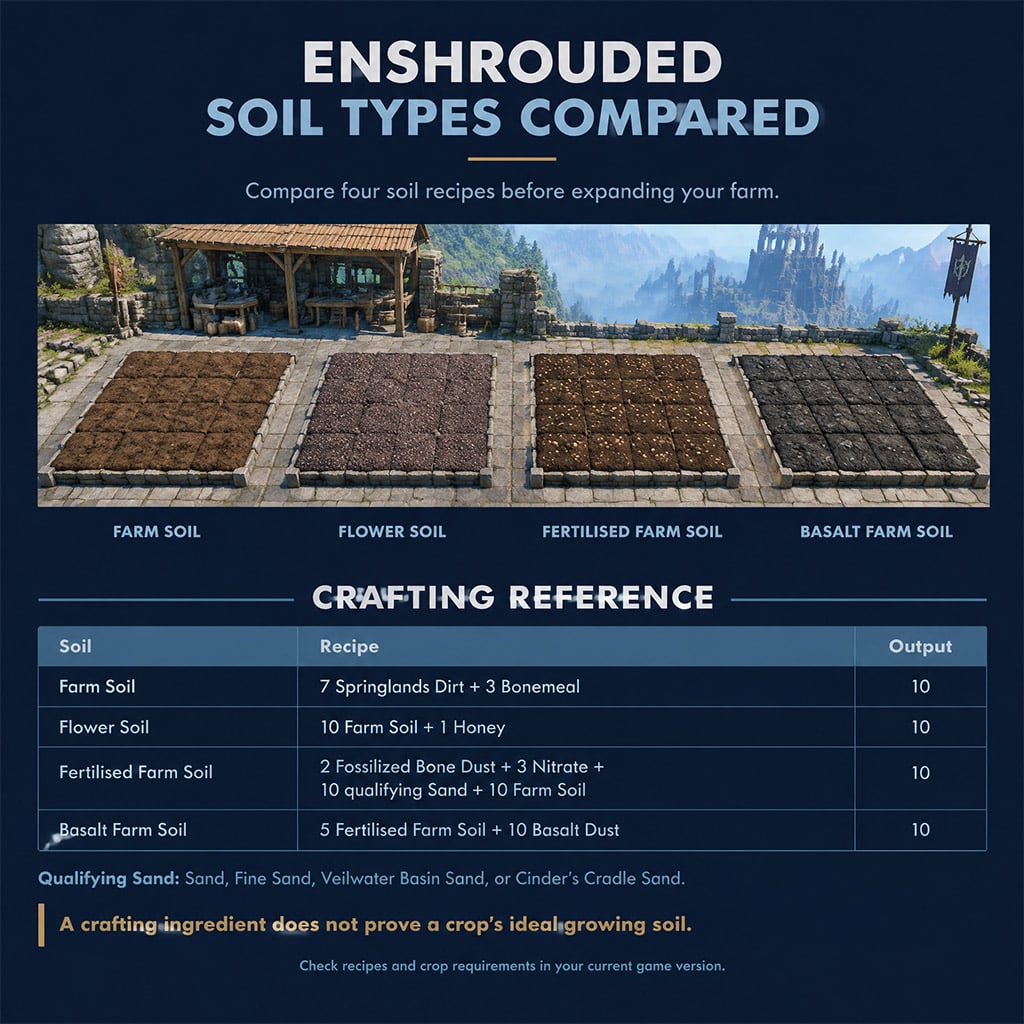
| Soil Type | Required Inputs | Yield |
|---|---|---|
| Farm Soil | 7 Springlands Dirt + 3 Bonemeal | 10 Blocks |
| Flower Soil | 10 Farm Soil + 1 Honey | 10 Blocks |
| Fertilised Farm Soil | 2 Fossilized Bone Dust + 3 Nitrate + 10 Sand + 10 Farm Soil | 10 Blocks |
| Basalt Farm Soil | 5 Fertilised Farm Soil + 10 Basalt Dust | 10 Blocks |
Keep basic Springlands crops on standard Farm Soil and save Fertilised Farm Soil strictly for high-tier biome plants that refuse to grow on starter dirt.
Note that Fertilised Farm Soil accepts standard Sand, Fine Sand, Veilwater Basin Sand, or Cinder's Cradle Sand interchangeably. Furthermore, Basalt Farm Soil consumes Fertilised Farm Soil as an input—meaning you must maintain a steady Nitrate pipeline even in the late game.
Diagnose Slow Growth with a Controlled Plot Test
When a crop seems frozen in its early growth stage, ripping up your entire farm is a mistake. Run a side-by-side soil check first.
In our side-by-side plot tests, planting identical seedlings across two 2x2 grids—one using Farm Soil and the other Fertilised Farm Soil—immediately exposes whether a plant is biome-locked or simply on a long maturity timer.
1. Lay down two 2x2 plots of different soil tiers right next to each other.
2. Plant the exact same seedling in both grids within 5 seconds.
3. Equip your Watering Can and hover over the planted sprouts to inspect their status readout before changing anything else.
4. Track full maturity, not just the first visual sprout transition.
Choose Animals by Output and Feed Cost
Taming every creature you pass in the wild creates a massive upkeep trap. If an animal's daily feed consumes the exact crops you need for stamina food, that pen becomes a net loss for your base.
Compare the Available Farm Animals
Target specific livestock based on the exact crafting reagent blocking your next armor set or consumable tier:
| Animal | Primary Output | Max Held Cap (1 per 10m) | Strategic Priority |
|---|---|---|---|
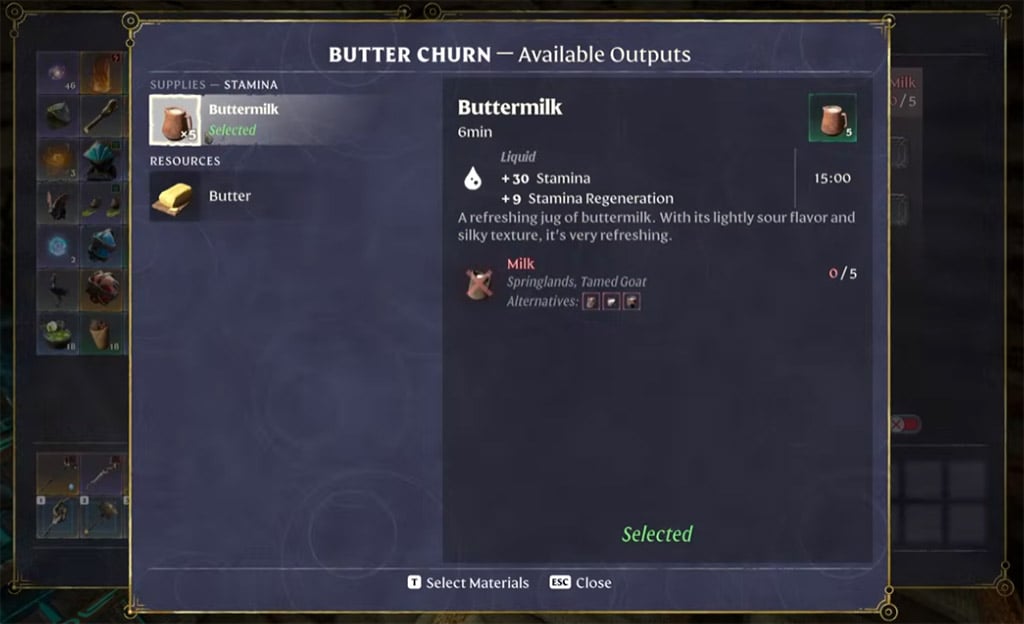
| Common Goat | Milk | 8 | High; required for Fae Deer Bait and early dairy |
| Hophare | None (Cosmetic/Meat) | N/A | Skip unless decorating your base |
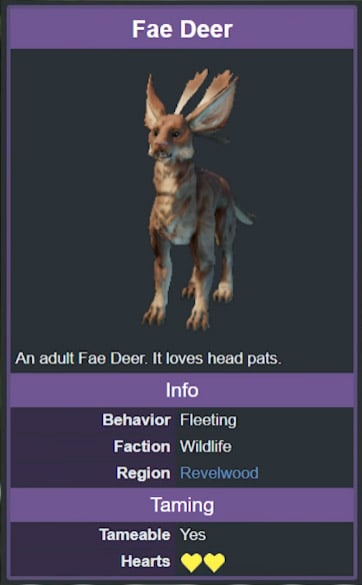
| Fae Deer | Uncooked Fae Deer Milk | 8 | Medium; tame only after securing a Common Goat |
| Flightless Redtail | Eggs | 8 | High; essential for mid-to-late game baking buffs |
| Round-Billed Sailer | Feather | 8 | High; passive arrow production without hunting birds |
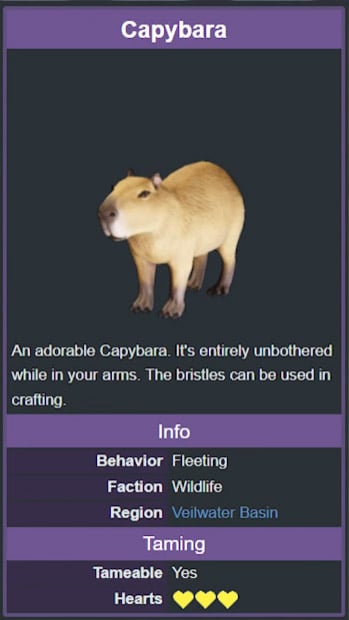
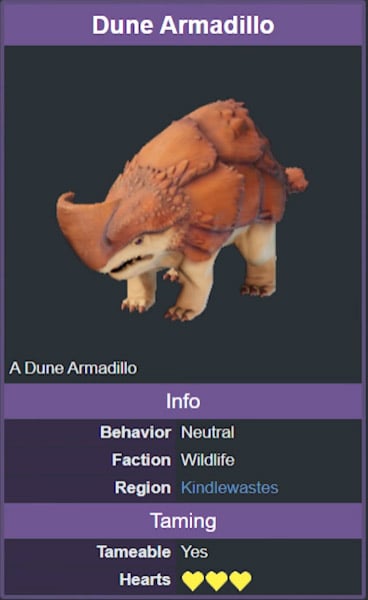
| Dune Armadillo | Scales | 10 | Situational; tame when armor recipes demand scales |
| Frizzy Goat | Frizzy Goat Milk | 8 | High; replaces basic dairy in advanced recipes |
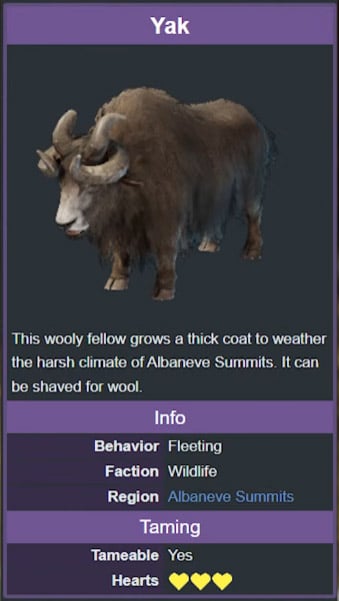
| Yak | Raw Wool | 8 | High; mandatory for cold-weather padding and textiles |
| Capybara | Capybara Bristles | 8 | Situational; target only when bristle gear unlocks |
Skip the Hophare completely unless you want a lawn ornament, and prioritize the Common Goat first since its Milk is a mandatory ingredient for crafting Fae Deer Bait.
Budget for Feed Before Crafting Bait
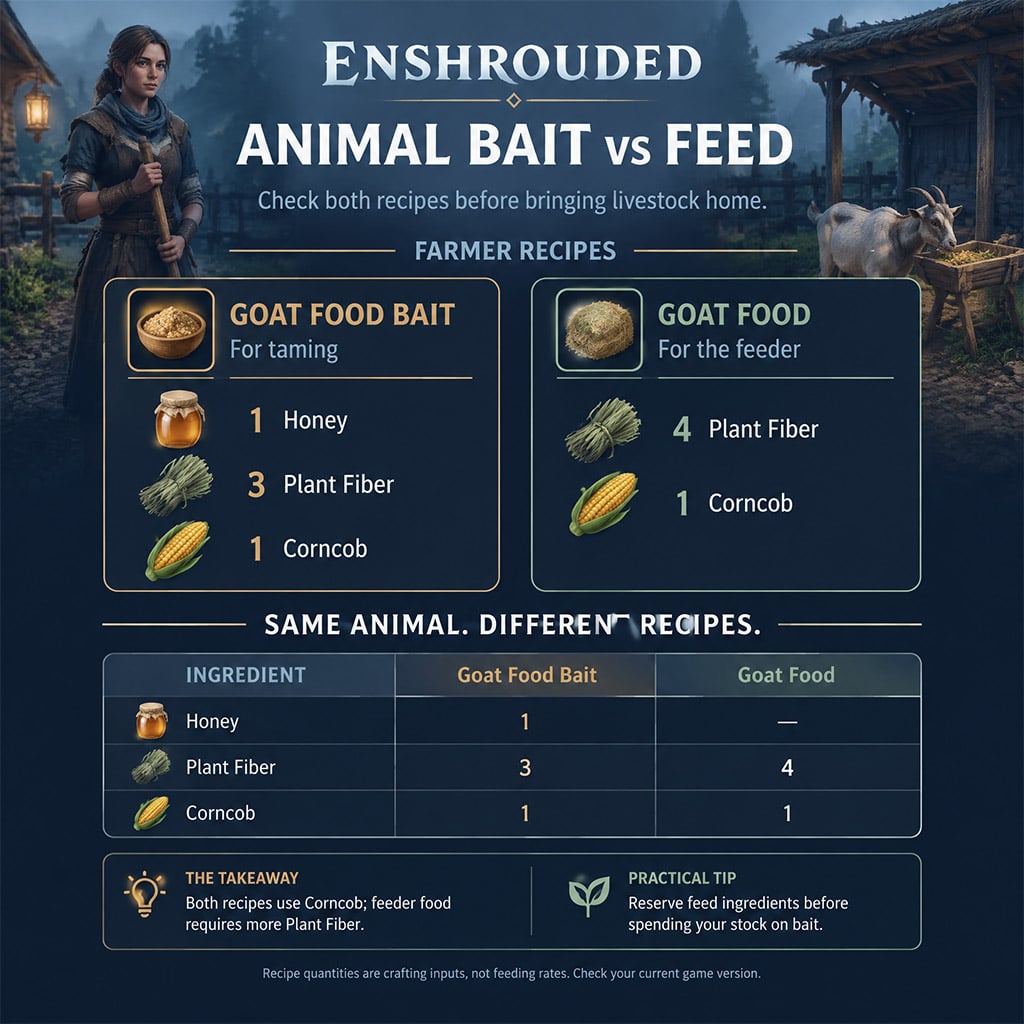
Bait is a one-time capture expense, whereas feed is a permanent tax on your storage chests. Confusing the two leaves you with starving animals that produce zero resources.
Bait is not feed.
Compare the capture cost against the permanent upkeep tax before leaving base:
| Animal | Taming Bait Recipe | Ongoing Feeder Recipe |
|---|---|---|
| Common Goat | 1 Honey, 3 Plant Fiber, 1 Corncob | 4 Plant Fiber, 1 Corncob |
| Hophare | 1 Forest Beet, 1 Hazelnut, 1 Strawberry, 2 Corncob | 1 Hazelnut, 1 Strawberry, 3 Corncob |
| Fae Deer | 1 Plant Fiber, 1 Milk, 1 Corncob, 1 Forest Beet, 1 Penny Bun | 4 Plant Fiber, 1 Forest Beet |
| Flightless Redtail | 1 Bell Pepper, 1 Wheat Grains, 1 Corncob, 1 Dried Purple Berry, 1 Hazelnut | 1 Bell Pepper, 2 Wheat Grains, 2 Grasshopper |
Notice how Fae Deer drops the Milk and Corncob requirement once tamed, shifting entirely to Plant Fiber and Forest Beet for daily upkeep. Conversely, keeping a Flightless Redtail fed requires active Grasshopper farming—making its upkeep far more labor-intensive than a Common Goat.
Tame Animals Without Rushing the Approach
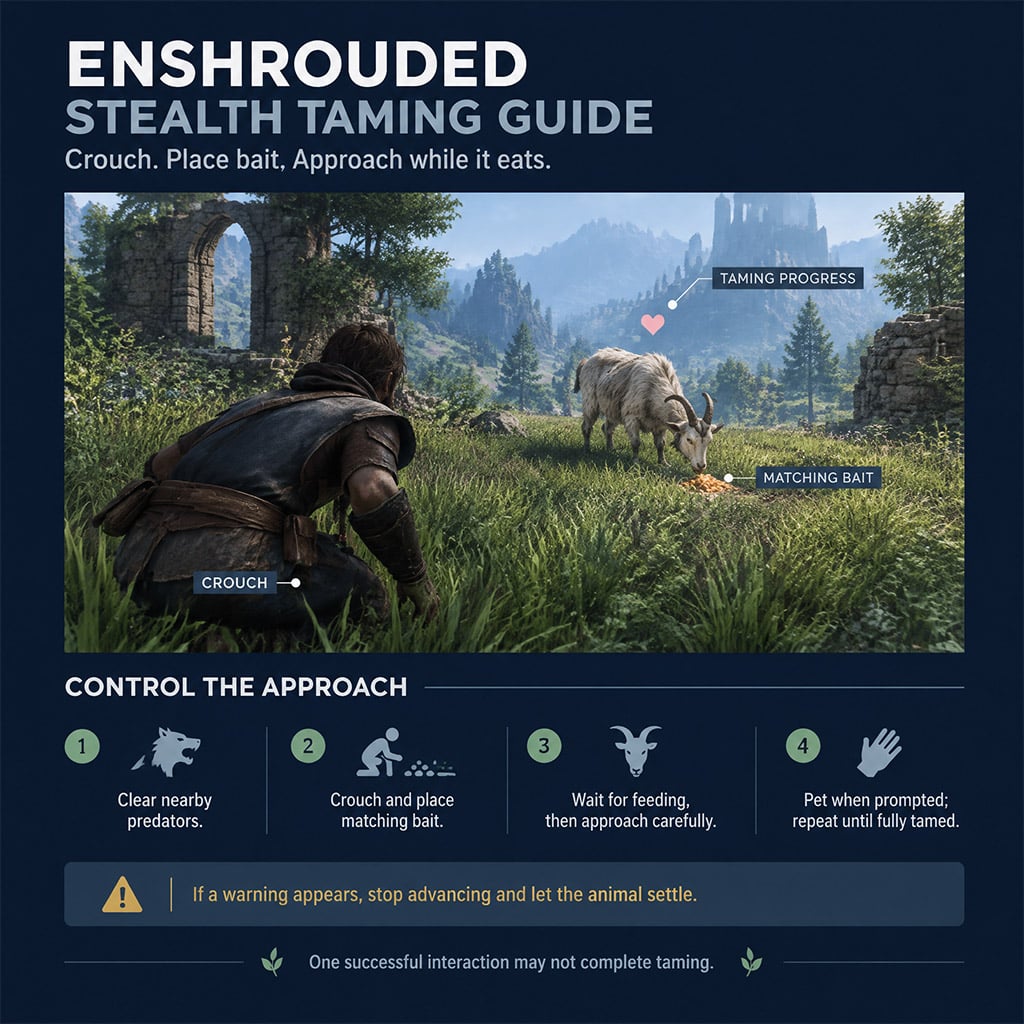
Sprinting toward a wild animal after throwing bait resets its taming meter and wastes rare ingredients like Honey and Penny Bun. Predators roaming nearby will also aggro onto your target mid-tame, killing the animal before you can pick it up.
Follow the Taming Loop
During our taming runs across the Springlands and Revelwood, we found that clearing a 50-meter perimeter of wolves and fell creatures before crouching saves roughly half our bait stack.
1. Craft at least 5 pieces of target bait per animal to cover accidental startles.
2. Kill all predators in the immediate clearing.
3. Crouch (C) outside aggro range and toss the bait toward the animal.
4. Freeze in place until the animal walks over and begins the eating animation.
5. Crouch-walk slowly behind it and press E when the pet prompt appears.
6. Back away immediately after petting and repeat until all taming hearts fill.
7. Pick up the tamed animal directly into your backpack inventory.
Never assume a single pet finishes the job. End-tier animals require multiple heart cycles, and moving while a yellow question mark or red exclamation icon appears over their head instantly penalizes your progress.
Diagnose Repeated Taming Failures
If you burn through three baits without gaining a heart, stop throwing food and check your positioning against this failure table:
| Taming Failure | Root Cause | Immediate Fix |
|---|---|---|
| Animal ignores thrown bait | Wrong bait type or thrown out of line-of-sight | Verify species name (e.g., Frizzy Goat vs Common Goat) and toss closer |
| Yellow/Red alert icon pops up | Moving while the animal isn't actively chewing | Take hands off WASD the moment it stops eating |
| No Pet prompt appears | Approached too late or blocked by uneven terrain | Lure the animal onto flat ground with the next bait toss |
| Taming hearts drop backward | Sprinted, stood up, or took damage nearby | Back out of detection range and wait 10 seconds to reset its state |
Always lure cliff-side animals like Goats or Yaks onto flat ground with your first bait toss before attempting the stealth approach.
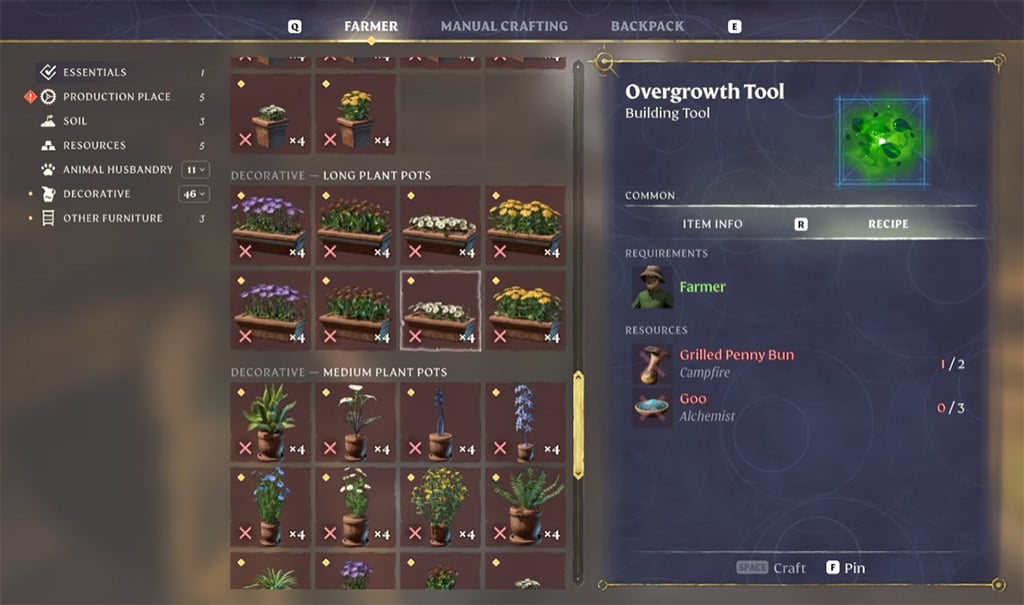
Set Up Housing and Confirm Production
Dropping a tamed animal inside a fenced yard does nothing if the game's pathfinding fails to link the creature to its bed and feeder. An unlinked animal halts production entirely.
Validate One Enclosure First
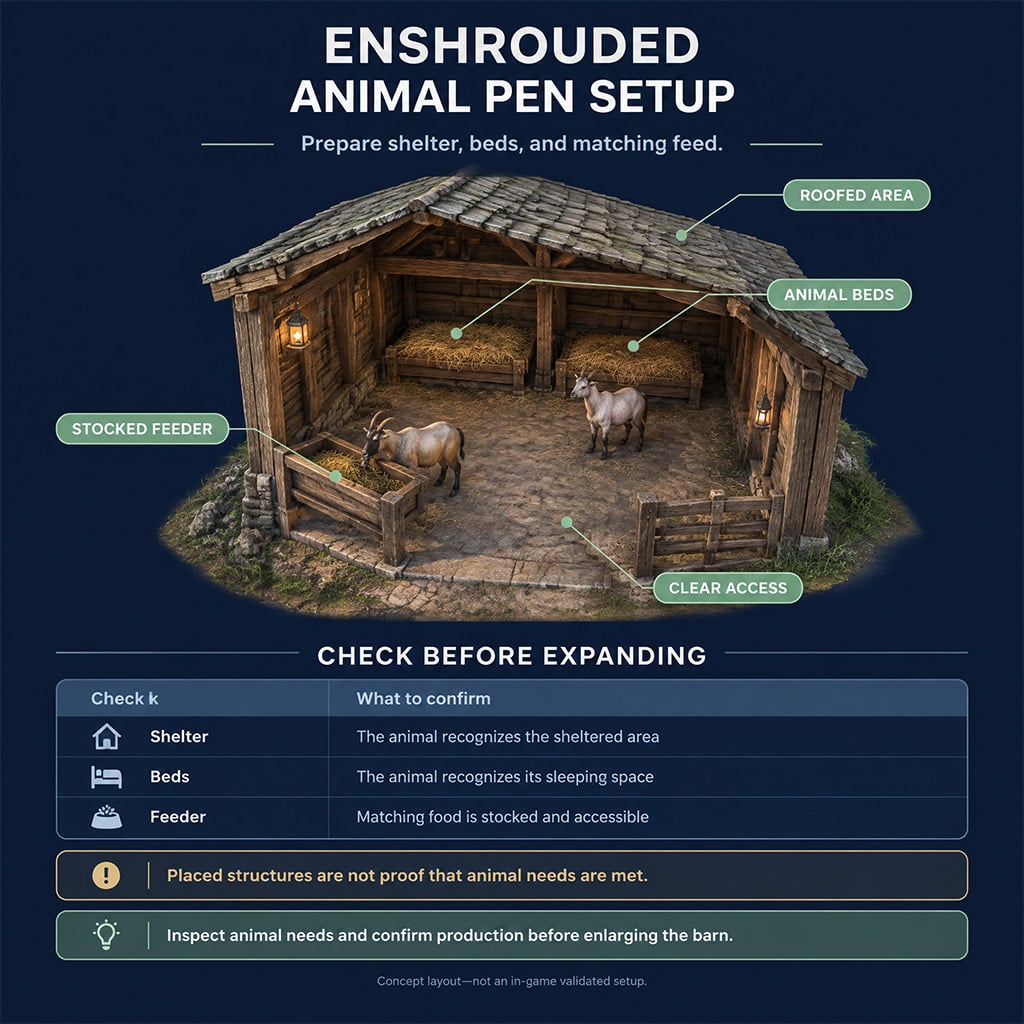
When we tested enclosure layouts at our main Flame Altar, placing animal beds flush against rough stone walls caused livestock to fail their shelter check until we pulled the pillows one block inward.
Run this five-point inspection the moment you place an animal from your inventory:
- Open the animal status inspect window to verify both Bed and Food show green valid states.
- Confirm a roof covers the bed; open-air pillows fail the shelter check.
- Load the matching Feeder with ongoing feed (not taming bait).
- Wait 10 minutes to confirm the first resource item spawns in the enclosure.
- Empty the harvested goods regularly so the animal never hits its internal storage cap.
Why does that last step matter? Most livestock generate 1 resource every 10 minutes, capping out at 8 held items (10 for Dune Armadillo Scales). Once an animal holds 8 Milk or Eggs, its production timer freezes completely until you loot the pen.
Manage Breeding Space
If you want your livestock to breed passively, never build minimum-capacity pens. Breeding requires at least two adult animals of the same species, surplus food in the trough, and an unclaimed spare bed under valid shelter before a baby animal can spawn overnight.
Plan Crops and Livestock as One System
Expanding your barn without expanding your corn and fiber plots will bankrupt your farm in two play sessions. Livestock and crafting stations pull from the exact same ingredient pool.
Watch the Shared Materials
Here is the catch: Corncob and Plant Fiber act as the universal currency of an Enshrouded farm. If you tame three Goats and two Hophares, their combined daily appetite will strip your Corncob chests dry before you can craft a single piece of Flightless Redtail Bait.
Use this dependency matrix to protect your bottleneck crops:
| Shared Crop / Item | Competing Demands | Resource Management Rule |
|---|---|---|
| Corncob | Goat Feed, Hophare Feed, almost all Taming Baits | Dedicate one full 20-plant plot solely to Corn before taming |
| Plant Fiber | Goat Feed, Fae Deer Feed, Twine, Roof blocks | Never burn your last 100 stack on building materials |
| Honey | Common Goat Bait, Flower Soil, Stamina foods | Build a Honey Beehive before crafting Flower Soil in bulk |
| Milk | Fae Deer Bait, Drinking consumables | Reserve your first 5 Goat Milk drops strictly for deer taming |
| Wheat Grains | Bird Bait, Bird Food, Flour/Bread crafting | Double your wheat field size before capturing Flightless Redtails |
Plant a dedicated Corn and Shrub (Plant Fiber) field before building your second animal pen.
Keep Water-Crop Experiments Contained
When transitioning into Veilwater Basin aquatic farming for Rice and Algae, flooding a massive trench leads to unmanageable water physics and dead seedlings.
Build two separate, walled 2x2 stone basins first. Use water emitters and drains to test shallow submersion versus full submersion on single seedlings before committing 50 starts to a flooded pit.
Add Bees and Pets After the Core Farm Works
Do not mix Honey Beehive upkeep or domestic pets (Cats/Dogs) into your primary livestock loop until your basic crop-to-feed pipeline runs at a surplus. A Honey Beehive requires 4 Wood Logs, 20 Straw, and 4 Lump of Clay—plus a placed Beehive Smoker—making it a mid-game expansion rather than a starter station.
Troubleshoot Before Adding More Infrastructure
When your farm output stalls, building more stations or taming more animals only compounds the failure. Isolate the broken link in your chain using this diagnostic table:
| Farm Symptom | First Diagnostic Check | Immediate Fix |
|---|---|---|
| Seedbed refuses to start crafting | Missing water, soil, or raw crop input in station UI | Load the exact soil tier specified by that specific plant |
| Chests overflow with unplanted seedlings | Field plot size vs. Seedbed output speed | Stop queueing seedlings; lay down 20 more Farm Soil blocks |
| Planted crops never reach harvest stage | Soil tier mismatch or water level issue | Hover with the Watering Can and run a 2x2 upgraded soil test |
| Tamed animals produce zero resources | Shelter icon, empty feeder, or full output cap | Move beds 1 block off walls, refill trough, or loot the 8-item cap |
| Crop reserves vanish overnight | Feeder consumption rate vs. harvest intervals | Pick up extra animals into storage chests until crop supply recovers |
If your feed reserves crash to zero, pick up your extra animals and store them inside a standard storage chest—they do not starve or die while packed away as inventory items.
FAQ (Frequently Asked Questions)
Should I start with crops or animal taming in Enshrouded?
Always establish your Seedbed and Farm Soil plots first. Tamed animals require a continuous supply of crafted feed made from Corncobs, Plant Fiber, and Wheat Grains, meaning livestock will quickly starve if you cannot mass-produce those crops at home.
Does every Seedbed recipe produce five seedlings?
No, seedling yields vary by plant species. While most standard crops produce 5 seedlings per 3-minute cycle, recipes like Aloe yield 10 seedlings and specialized flora like Shroud Flayer yield only 1 seedling.
Can I put taming bait inside the animal feeder?
No, taming bait only works when thrown on the ground to capture wild animals. Once you place a tamed creature at your base, you must craft its specific Livestock Food recipe and load it into a matching feeder trough.
Why did my tamed animals stop producing Milk, Eggs, or Wool?
Your animals have either run out of feed, lost valid roof shelter over their beds, or hit their internal storage cap. Most Enshrouded livestock stop generating items once 8 uncollected resources (10 for Dune Armadillo Scales) pile up, so loot their pens regularly.
How do I pause animal feed consumption without losing my livestock?
Walk up to your tamed animal, pick it up into your backpack, and place it inside any storage chest. Stored animals freeze their hunger timers completely and can be redeployed into your pens once you harvest enough crops.

I’m Hiroshi Tanaka, a Japanese Technical Content Writer at GGWTB covering action RPGs, loot farming, and gear builds. My guides connect character progression with stat priorities, gear synergies, and targeted farming routes. A build needs to work before the perfect drop arrives—not just after every slot is filled.

Most Popular Posts
- Enshrouded 1.0 Best Builds: Ice/Shock Mage, Fire Ranger & Paladin
- Enshrouded Base Locations: How to Choose a Site and Build Smarter
- Enshrouded Farming & Animal Taming Guide: Soil, Bait & Setup
Popular Category Lists
- ARC Raiders / (357)
- Grow a Garden / (295)
- CoD: Black Ops 7 / (167)
- Star Citizen / (163)
- MLB 26 / (159)
- Monopoly Go / (153)
- ARK Survival Ascended / (128)
- Steal a Brainrot / (99)
- Blox Fruits / (74)
- Adopt Me / (74)
- Forza Horizon 6 / (72)
- Sailor Piece / (68)
- Grow a Garden 2 / (68)
- Diablo IV / (62)
- CoD: BLACK OPS 6 / (55)
- Aion 2 / (55)
- Path of Exile 2 / (48)
- Monster Hunter Wilds / (46)
- Windrose / (44)
- COD: Modern Warfare 4 / (44)