


 0
0Fastest Grow a Garden Giant Friendship Max: 15‑Minute Cooking Kit & +7 Prismatic Recipe Method
- Cecila
- Share
- Grow a Garden
- 08/25/25
- 1257
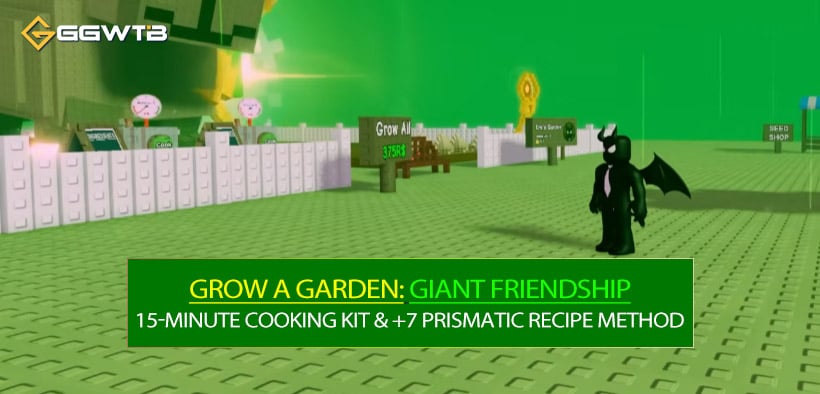
You've climbed the Beantock again, locked eyes with the Giant, and… nothing. you haven't claimed the Cooking Kit, and you're not leveraging Prismatic recipes that give a chunky 7 Friendship Points per dish. It looks grindy from the outside, but a tight route can finish the prerequisite achievements in roughly 15–20 minutes, after which you mass‑cook, hand in batches, and unlock the Friendship Shop (Gnome pet, Giant Mega Pet shard, etc.).
- Core Mechanics at a Glance: Why Cooking First, Prismatic Later
- Required Achievements for the Cooking Kit
- Follow order to avoid backtracking
- Cost & Time Optimization
- Shovel 100 Plants: Subtleties & Pitfalls
- Gifting Achievements: Making Every Gift Count
- Placing & Accessing the Cooking Kit
- Prismatic Recipe Strategy
- Friendship Sprint Loop
- Frequent Errors & Rapid Diagnosis
- Advanced Parallel & Micro Optimizations
- FAQ
↖ Core Mechanics at a Glance: Why Cooking First, Prismatic Later
- 1. Friendship Points only come from giving the Giant cooked dishes (raw crops don't work).
- 2. Regular recipes = low points; Prismatic recipes (need Bone Blossom) = 7 points each (current version; always verify in‑game).
- 3. No Cooking Kit = no point loop. Phase 1 objective is singular: obtain the Cooking Kit via Achievements > Core Plants.
- 4. After that, it becomes an efficiency problem: maximize points per hand‑in trip up the Beantock.
↖ Required Achievements for the Cooking Kit
Common set (verify in your Garden Guide → Achievements → Core Plants):
- 1. Sell 500 Strawberries
- 2. Shovel (fully remove) 100 Plants
- 3. Harvest 200 Carrots
- 4. Gift 5 Strawberries
- 5. Gift 5 Carrots
Note: Some builds bundle gift tasks; treat each listed line as mandatory until the Kit reward lights up.
↖ Follow order to avoid backtracking
Step 1: Prepare Seeds
- - Strawberries ×100 plots (loop harvests to reach 500 sold)
- - Carrots ×200 (or 100 plots harvested twice)
- - Optional extra cheap multi‑harvest crop batch for the Shovel 100 sacrifice if you don't want to touch permanent layouts.
Step 2: Plant 100 Strawberries → wait → harvest → SELL (not just collect) → repeat cycles until Sell 500 progress completes.
Step 3: Interleave two carrot waves: plant 100 → harvest (=100) → replant → harvest (=200).
Step 4: After finishing the Sell 500, designate the 100‑plant batch (often those same strawberries or a cheap batch) and shovel whole plants one by one until 100.
Step 5: Before mass selling, Favor (star) 5 Strawberries + 5 Carrots so they aren't accidentally sold.
Step 6: Join a public server; Gift the 5 Strawberries and 5 Carrots to active players (confirm each acceptance increments the counter).
Step 7: Open Garden Guide → Achievements → claim reward → receive Cooking Kit.
↖ Cost & Time Optimization
Why Strawberries? Fast growth (in most versions), multi‑harvest potential, common seed availability—so 500 sold is achieved with minimal replanting.
Shovel timing: Always extract sale value first (finish selling goal) then shovel; you're turning the expended batch into achievement credit after monetizing it.
Parallel growth: While Strawberries are maturing, start Carrots so their harvest window overlaps; reduce idle.
Inventory pressure: When near capacity, sell immediately; full bags cause accidental selling of reserved gift items.
Time model:
- Let T_s = Strawberry grow time, T_c = Carrot grow time
- Strawberry cycles needed = ceil(500 / (per‑cycle yield × multi‑harvest count))
- Total time ≈ max(Strawberry total, Carrot 2 × T_c) + 2–3 min shoveling + 1–5 min gifting.
↖ Shovel 100 Plants: Subtleties & Pitfalls
Pitfall: Partial tile removal (e.g., a segment of a multi‑tile tree) usually doesn't count—you must confirm full plant deletion.
Cooldown: Rapid spamming can trigger an internal delay; settle into a click → confirmation rhythm.
If counter stuck at 0: You're likely removing non‑qualifying partial components; swap to a uniform grid of simple plants.
Practical tip: Align 10×10 uniform cheap plants; sweep row by row for consistent cursor travel.
↖ Gifting Achievements: Making Every Gift Count
Only accepted gifts count; AFK or full‑inventory recipients waste attempts.
If it stalls at 4/5: Switch recipient or relog; UI delay happens.
Favor/star the 5+5 crops upfront; un‑favor after achievement completes.
If the counter doesn't move, check you're gifting the correct crop variety (Strawberries vs Carrots are tracked separately).
↖ Placing & Accessing the Cooking Kit
Build/Placement mode → locate Cooking Kit (may show as Cosmetic + functional) → place in open space.
Interact: Distinguish standard recipes tab vs Prismatic tab.
Delay normal recipes until you've stockpiled enough materials to batch Prismatic, maximizing points per run.
↖ Prismatic Recipe Strategy
Priority: Prismatic > Standard due to 7 points per dish (current testing).
Key bottleneck material: Bone Blossom—sources can include Bone Blossom seeds, event drops, marketplace (if enabled).
Batch formula: Needed Prismatic dishes = ceil(Target Friendship Points ÷ 7).
If short of Bone Blossom near the end, use high‑yield regular recipes to fill the remaining gap (e.g., if 3–4 points short).
Batch logic: Cook in sets (e.g., 10) → climb Beantock once → hand them all in; reduces traversal overhead.
↖ Friendship Sprint Loop
Loop structure = Batch cook → Grow/ascend Beantock → Hand in → Record total → Repeat.
Downtime absorption: When Beantock is regrowing, plant Bone Blossom seeds or prep next harvest cycles.
Multiplayer synergy: Coordinated Beantock growth (others contributing) means you reallocate more time to cooking rather than waiting.
Tracking sheet: Maintain simple tally: Delivered N ×7 = M points; Remaining = Goal − M.
↖ Frequent Errors & Rapid Diagnosis
Issue: Sold Strawberry progress not advancing → You only harvested; you must press Sell.
Issue: Shovel stuck at low number → You're not removing entire plants.
Issue: Friendship didn't increase → You handed in raw ingredients, not a cooked dish.
Issue: Bone Blossom shortage → Mix in standard recipes temporarily; keep Bone Blossom grow plots active.
Issue: Kit missing after achievements lit → You forgot to manually Claim in Achievements.
Issue: Gift not counting → Recipient AFK/full; swap target or relog.
Issue: Inventory clog leading to misclicks → Set a soft threshold (e.g., when <10 empty slots remain, clear/sell before harvesting more).
↖ Advanced Parallel & Micro Optimizations
Favor Tagging: Reserve gift crops; prevents accidental sell‑all. Remove tag afterward.
Dual Plot Allocation: Plot A = Strawberry loops; Plot B = Carrots / Bone Blossom. Jump between them based on earliest ready timer.
Economic loop: Strawberry revenue offsets Carrot + Bone Blossom seed purchases toward near‑neutral cash flow.
Layered action cycle:
- - Harvest layer: Sweep everything ready.
- - Sell layer: Immediately liquidate all non‑reserved crops.
- - Achievement check layer: Open Garden Guide after each supposed completion; prevent overshooting requirements.
Recovery: If you accidentally shovel a high‑value plant, stop instantly; substitute the remainder with cheap seeds to finish the 100.
↖ FAQ
Q1: I sold 500 Strawberries but didn't get the Cooking Kit. Why?
You must complete every Core Plants achievement in that reward group, then manually click Claim in the Achievements panel.
Q2: Some Prismatic recipes are locked. What now?
Unlock chain prerequisites by crafting base recipes or gathering required material counts; hover each locked item for its specific condition.
Q3: Fastest Bone Blossom source?
Depends on your server economy: direct seed planting vs event drops vs marketplace purchase. If Bone Blossom unit price < (Your value of 7 Friendship Points), consider buying to accelerate.
Q4: Can I ignore Prismatic recipes and spam regular ones?
Yes, but your time cost rises. Compare: Required Dishes = Target Points ÷ Points per Dish. Prismatic cuts total dish count dramatically.
Q5: Gifts not counting even after acceptance?
Try a different player, ensure they have inventory space, or relog. Mild latency can delay counter updates—wait a few seconds, then reopen Achievements.
Q6: Shovel progress stuck at 99/100.
Shovel one or two more; if still frozen, relog—UI sometimes caches. The backend count usually is correct.
Q7: Giant won't take my items.
Confirm you're carrying finished dishes (distinct cooked icon), not raw crops. Also ensure the Beantock climb fully loaded the interaction zone.
Summary:
Your acceleration path is linear: finish the Core Plants achievements using a 100‑Strawberry loop plus two Carrot harvest cycles, then repurpose that batch for the 100 Shovel requirement after extracting sale value. Favor reserve 5 Strawberries + 5 Carrots for gifting, claim the Cooking Kit, place it, and pivot into Prismatic (Bone Blossom) batch cooking—each dish rewarding 7 Friendship Points. Batch deliveries minimize climb time, while parallel planting covers material bottlenecks. If any single achievement isn't lighting up, fix that first; if all are claimed, shift fully into Bone Blossom scaling and Friendship hand‑ins. You're now positioned to unlock the Friendship Shop swiftly and pick up those coveted cosmetics and pets.

Most Popular Posts
- Grow a Garden 2 Release Date Guide: Why Saturday Is the Likely Launch Window
- Grow a Garden Bizzy Bee Event: Honey Coins, Bee Eggs, Seeds, Upgrades, and Rewards
- Grow a Garden Bee Dungeon Guide: Best Wave 100 Strategy, Bee Shards, and Team Setup
- Grow A Garden Best Pet Mutations 2026: Ranked Guide for Power, Trading, and AFK Farming
- Grow a Garden Bee Stats Guide: Best Bees Ranked by Damage, HP, and DPS
- Grow a Garden Busy Bee Part 2 Guide: Royal Jelly, Best Pets, New Seeds, and Prep Strategy
Popular Category Lists
- Grow a Garden / (286)
- ARC Raiders / (262)
- CoD: Black Ops 7 / (166)
- Monopoly Go / (146)
- MLB 26 / (145)
- Star Citizen / (112)
- Steal a Brainrot / (89)
- Sailor Piece / (68)
- ARK Survival Ascended / (67)
- Diablo IV / (61)
- Forza Horizon 6 / (60)
- Blox Fruits / (60)
- CoD: BLACK OPS 6 / (55)
- Adopt Me / (53)
- Path of Exile 2 / (48)
- Monster Hunter Wilds / (46)
- Windrose / (44)
- Path of Exile / (40)
- Grow a Garden 2 / (40)
- Bee Swarm Simulator / (36)


