


 0
0Grow a Garden AFK Farming Infinite Full Macro Guides for Christmas Event
- Jordan
- Share
- Grow a Garden
- 12/15/25
- 1136

The second part of the Christmas event in Grow a Garden looks big on the surface, but once you strip away the fluff, there are really only a couple of rewards that can carry your account long-term. The good news is that the mechanics behind this event are extremely AFK-friendly: a 10-minute timer, point-based plant turn-ins, and a shop you can automate.
- I. Understanding Points & Plant Choice: Why Rarity Is King
- 1. How the point system actually works
- 2. Why high-rarity plants are so much better
- 3. How I prep my inventory in practice
- II. Method 1: The Most Stable 10-Minute Gift AFK Macro
- 1. Concept overview
- 2. Step-by-step setup
- 3. How often do you need to come back?
- III. Method 2: AFK Farming the Shop (Infinite Shopping Loop)
- 1. Key concept
- 2. Important recording tips
- 3. What's worth auto-buying?
- IV. Method 3: Infinite AFK Loop – Harvest, Turn-In, Sell, Repeat
- 1. Concept and trade-offs
- 2. Setting up your garden
- 3. Recording the full loop macro
- 4. Pros and cons of this method
- V. Reward Priority: What's Worth Grinding and What Isn't
- 1. Ice Golem: a budget Headless Horseman if you don't own one
- 2. HyperHunger: the single best long-term farming boost
- 3. Other pets & rewards: mostly nice-to-have
- VI. Practical AFK Combos: How to Use These Methods Together
- 1. While actively playing or nearby
- 2. Long AFK sessions (sleep, school, work)
- 3. Short breaks with lots of points saved
- FAQ
- Let the Macros Work So You Don't Have To
If you've ever felt like you're online a lot but somehow end events with mediocre rewards, tightening up these AFK methods will change that.
↖ I. Understanding Points & Plant Choice: Why Rarity Is King
Before talking about macros, you need to understand how the point system works. Once this clicks, the whole infinite AFK concept makes sense.
↖ 1. How the point system actually works
Event gifts are fueled by points from turning in plants:
- Each plant species and rarity gives a fixed number of points.
- Higher rarity = more points per plant.
- When you press Submit All, the game does something very important:
- It only takes just enough plants to reach the required points for that gift (e.g. 175 points for a rare gift).
- Any extra plants stay in your inventory.
This is the key trick: your backpack can act like a point battery. As long as your total stored points in plants > the cost of one gift, the game will only shave off a small portion each time you submit and leave the rest untouched.
↖ 2. Why high-rarity plants are so much better
Let's compare two of the plants you mentioned:
| Plant | Rarity | Points per plant | Practical comment |
|---|---|---|---|
| Tomato | Rare | 3 points | Looks big, but very low point efficiency |
| Beanstalk | Prismatic | 7 points | One beanstalk > two tomatoes in point value |
If a rare gift costs 175 points, you roughly need:
- Tomatoes: 175 / 3 ≈ 59 plants
- Beanstalks: 175 / 7 ≈ 25 plants
With a fixed backpack size, that difference is huge. In practice this means:
- The higher the rarity, the fewer plants you need to store for the same number of gift submissions.
- With a backpack full of high-rarity plants, you can survive many 10-minute resets before running out of points.
Even if you don't have prismatic or transcendent plants in bulk, the logic is the same:
- Always use the highest rarity plant that you can mass-produce.
- Transcendent > Prismatic > Mythic > Legendary > Epic > Rare, and so on.
↖ 3. How I prep my inventory in practice
Here's the prep routine I use:
1. Plant your highest-rarity plants
- Fill your garden with your best rarity plants that you have multiple copies of (e.g. beanstalks).
2. Wait for mutations
- You want the Snowy / Christmas-related mutations the event accepts.
- Let them sit for a while so a large percentage get the right mutation.
3. Maximize backpack space
- Buy/max backpack upgrades if you can.
- More slots = bigger point battery.
4. Fill your backpack
- Harvest only plants that have the correct mutation.
- Aim to have a total point sum in your inventory that's several times higher than 175.
Once you've done this, the 10-minute timer stops being a hard wall and becomes a simple metronome: every time it dings, you get a gift.
↖ II. Method 1: The Most Stable 10-Minute Gift AFK Macro
This is the method I'd recommend as your default daily AFK setup:
- Extremely stable.
- Very low risk of breaking.
- You only need to come back every ~2–3 hours to refill your point battery.
↖ 1. Concept overview
The idea is simple:
- Pre-load your backpack with thousands of points worth of high-rarity mutated plants.
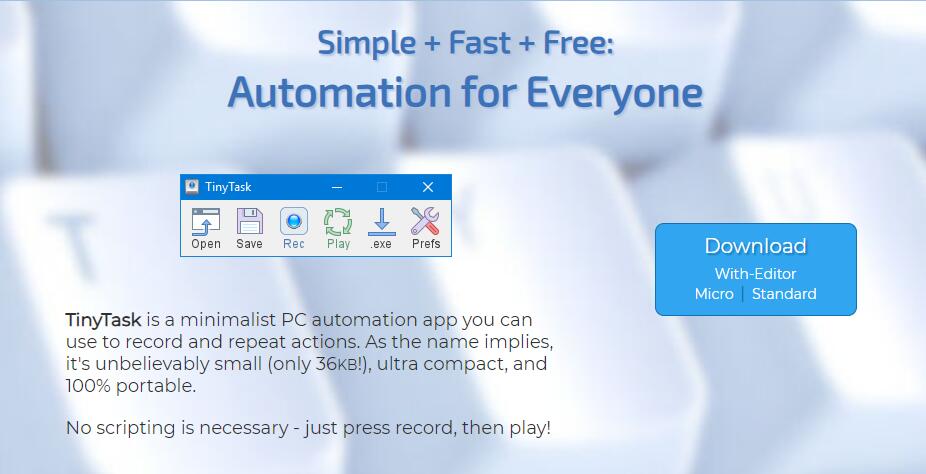
- Use TinyTask (or TinyTask-like tools) to record a short sequence:
- Press E to submit plants.
- Claim gift.
- Close the window.
- Put that sequence on continuous playback.
Every time the 10-minute cooldown ends, the macro will automatically submit just enough plants to get you a gift and leave the rest untouched.
↖ 2. Step-by-step setup
1. Prepare your points stockpile
- Inventory full of high-rarity plants with the correct event mutation (e.g. Snowy beanstalks).
- Confirm your total points are way above 175 (ideally in the hundreds or thousands).
2. Open TinyTask / TinyDash or similar macro tool
- Turn on Continuous Playback (loop forever).
- Optionally set a hotkey to start/stop playback.
3. Position your character
- Stand directly in front of the event gift turn-in area (where you press E to submit).
4. Start recording the macro
- Hit Record in TinyTask.
- Do the following sequence slowly and cleanly:
1. Hold E once or a few times until the submission happens.
2. Wait for the gift UI to appear.
3. Press E again if needed to fully confirm/claim.
4. Click the X in the top-right of the gift window to close it.
- Hit Stop to end recording.
5. Activate the loop
- Make sure Continuous Playback is checked.
- Hit Play (or your hotkey).
From now on:
- Every time the 10-minute timer resets, if the game is in the right state, your macro will:
- Press E → consume enough plants to hit 175 points → grant a gift.
- Close the UI and wait for the next cycle.
- Because your backpack has way more than 175 points, it'll only use a portion each time.
↖ 3. How often do you need to come back?
From my testing:
- With a fully loaded backpack of high rarity plants, you usually last around 2–3 hours before points run out.
- After that, the macro will keep trying to submit, but nothing happens because you lack enough points.
So your routine becomes:
- Every 2–3 hours:
- Pause the macro.
- Go back to your garden, harvest more mutated plants.
- Refill backpack.
- Stand at gift area and restart macro.
This method is extremely safe and hardly ever fails, as long as you don't move the camera or UI layout between recordings.
↖ III. Method 2: AFK Farming the Shop (Infinite Shopping Loop)
You can also AFK the event shop, which is great if you want to passively stack specific consumables and useful items.
The core idea is: record a scroll-through of the shop where you only click buy on items you actually want.
↖ 1. Key concept
Your macro should repeatedly:
- Open the shop (you can start with it open).
- Move through the list by clicking items, not scrolling.
- Buy selected items.
- Skip unwanted items.
- Drag the scroll bar back to the starting position.
- Loop forever.
Because shop layout is static, a clean recording can run for hours without misclicking—assuming you don't change resolution or UI scale.
↖ 2. Important recording tips
Before recording:
- Do not use the mouse wheel to scroll.
- Mouse wheel distance is inconsistent and very sensitive to timing.
- Instead, click each item to naturally drag the view down.
Step-by-step:
1. Open the shop UI
- Make sure your resolution and UI scale are the ones you'll keep using.
2. Start recording
- Hit Record in TinyTask.
- Starting from either the top or bottom of the list (your choice):
3. Traverse the shop
- For each item in the list:
- If you want to buy it:
- Click the item → click Buy (or the purchase button).
- If you don't want it:
- Just click on the item once, let the list snap to it, but don't click Buy.
- If you want to buy it:
- Keep doing this until you reach the end of the list (or wherever you decide to stop).
4. Return to starting position
- Grab the vertical scroll bar on the right.
- Drag it back to the top (or bottom) where you started.
5. Stop recording
- Hit Stop and save this macro as your shop loop.
6. Enable continuous playback
- Check Continuous Playback.
- Hit Play to let it loop forever.
↖ 3. What's worth auto-buying?
From an efficiency standpoint, I'd prioritize:
| Item type | Why it's worth AFKing |
|---|---|
| Fireworks / consumables | Stack up passively, usually cheap and useful |
| Boost / utility items | Anything that increases farming speed/efficiency |
| Key event items | Items tied to strong pets or long-term bonuses |
Instead of mindlessly buying every cosmetic, record a curated shop macro that buys only what fits your build and goals.
↖ IV. Method 3: Infinite AFK Loop – Harvest, Turn-In, Sell, Repeat
Now for the ambitious setup: a full auto loop that harvests plants, turns them in for gifts, sells unwanted fruits, and repeats indefinitely.
This is the closest you get to truly infinite AFK…with one catch: weather events (especially the earthquake) can shake your camera and break the macro.
↖ 1. Concept and trade-offs
For this method:
- You don't rely on a pre-loaded inventory.
- Instead, your macro continuously:
- Walks around your farm harvesting plants.
- Teleports to the central area to submit gifts.
- Visits the vendor to sell non-mutated fruits.
- Teleports back to the garden to restart harvesting.
I recommend using fast-growing plants like tomatoes for this loop:
- Their point value is lower, but they regrow quickly.
- Because you're harvesting constantly, frequency compensates for the lower points.
↖ 2. Setting up your garden
Before recording the macro:
1. Choose your AFK plant
- Tomatoes are a good example: easy to grow, fast to regrow.
- Use any plant with a quick growth cycle if you prefer.
2. Cluster them near your garden spawn
- Plant them in a tight patch close to your Garden teleport spawn point.
- The tighter the patch, the simpler your path and the less likely minor camera shifts will break the route.
↖ 3. Recording the full loop macro
1. Teleport to the garden spawn
- Click the Garden button so you know exactly where the macro will start every time.
- Align your camera at a stable angle and don't touch it afterward.
2. Start recording (harvest phase)
- Hit Record in TinyTask.
- From the spawn point, walk toward your tomato patch.
- Hold E while walking all around the plants:
- Even when you see Backpack full, keep circling them a bit.
- You can jump into the patch or around it to ensure coverage.
- After you've made a complete loop and grabbed enough fruit:
- Click Garden again to teleport back to your garden spawn point.
3. Turn-in + sell phase
- From the garden spawn, walk to the event gift area in the middle of the map.
- Hold E to submit all plants and trigger the gift.
- Hold E again or click as necessary to fully claim the gift.
- Click the X and close the gift window.
- Then walk over to Steven (the vendor NPC).
- Open the Sell window.
- Sell everything in your inventory:
- Ideally you're mostly selling non-mutated fruits so mutated ones can refuel your points next cycle, but the simplest macro is sell all.
- Close the sell window.
- Click Garden again to return to the garden spawn.
4. Stop recording
- Hit Stop in TinyTask.
5. Enable the infinite loop
- Check Continuous Playback.
- Hit Play.
From here, your character will:
- Wake up at garden spawn → harvest tomatoes → teleport → submit → sell → teleport → harvest again…
- As long as the camera and UI stay stable, this loop can run for a very long time.
↖ 4. Pros and cons of this method
| Aspect | Evaluation |
|---|---|
| Pros | Minimal manual refilling; can run for hours with no intervention |
| Points | Lower per plant, but high harvest frequency compensates |
| Stability | Main risk is weather events shaking camera (especially quakes) |
| Ideal use | Long AFK sessions like sleeping, being out, or at work |
If you notice your character stuck, walking into a wall, or no longer submitting gifts, it's usually because:
- An earthquake or similar weather event shook the camera.
- Your recorded path no longer matches your current camera angle.
In that case, reset your camera angle and re-record the macro.
↖ V. Reward Priority: What's Worth Grinding and What Isn't
All this AFK effort only makes sense if you're targeting the right rewards. The event has a bunch of pets and items, but in terms of raw power, two stand out:
- Ice Golem – especially if you don't own Headless Horseman.
- Hyper Hunger – currently one of the strongest passive multipliers.
↖ 1. Ice Golem: a budget Headless Horseman if you don't own one
Ice Golem is essentially an event version of Headless Horseman with a slightly weaker top-end. Its main strength is:
- When your pet mutates, it can transform into one of four exclusive Ice Golem mutations:
- Christmas Rally
- Jolly Decoration
- Merry Nursery
- Giant Golem (rare mutation)
The one that matters most for raw power is Giant Golem:
- Giant Golem:
- Grants a +20% boost to your pet's passive.
- Compare that with Nightmare (Headless Horseman's best mutation):
- Nightmare gives +22% boost.
Here's how that looks side by side:
| Pet / Mutation | Passive boost | Comment |
|---|---|---|
| Nightmare (Horseman) | +22% | One of the current top-tier |
| Giant Golem | +20% | Only slightly weaker than Nightmare |
According to the Grow a Garden Pet Calculator:
- To maximize the chance of getting Giant Golem, you want your pet's weight around 15.7 kg.
- Age itself is not the key; weight is what matters most for the mutation odds.
My recommendation:
- If you don't have Headless Horseman:
- Ice Golem is absolutely worth grinding for – it gives you a very strong pseudo-Horseman-level option.
- If you already have Headless Horseman with Nightmare:
- Ice Golem becomes more of a backup and collection piece rather than a must-have.
↖ 2. HyperHunger: the single best long-term farming boost
HyperHunger is, in my opinion, the single most valuable reward from this event.

Reason:
- HyperHunger's mutation gives a +30% boost to pet passive.
- Compare it to Nightmare's +22% and Giant Golem's +20%:
| Pet / Mutation | Passive boost | Relative to Nightmare |
|---|---|---|
| Nightmare | +22% | Baseline top-tier |
| Giant Golem | +20% | Slightly weaker |
| HyperHunger | +30% | Significantly stronger |
What this means in practice:
- Any strategy that relies on pet passives—money farming, XP farming, drop farming, etc.—
gets a very direct, multiplicative bump when backed by HyperHunger.
- It doesn't require fancy setups; it just scales everything your pet's passive touches.
If you are the kind of player who plans to keep grinding this game for a while:
- HyperHunger is the number one reward to chase.
- Not grabbing it is basically sacrificing a huge chunk of future efficiency.
↖ 3. Other pets & rewards: mostly nice-to-have
From a pure power standpoint:
- Most other Christmas event pets don't surpass existing top-tier options.
- Many are fun, thematic, or situational, but not account-defining.
- The game is reaching a stage where a few broken rewards matter far more than having every mid-tier pet.
So it's totally reasonable to rank your targets like this:
| Priority | Reward | Recommendation |
|---|---|---|
| S | HyperHunger | Top priority, best farming value |
| A | Ice Golem (if no Horseman) | Strong target for players lacking Headless Horseman |
| B | Ice Golem (if you have Horseman) | Good backup/collection, but not mandatory |
| C | Other pets / cosmetics | Optional, grind only if you enjoy collecting |
↖ VI. Practical AFK Combos: How to Use These Methods Together
We've talked about three main AFK methods. The real strength comes when you combine them logically based on your schedule.
↖ 1. While actively playing or nearby
- Use Method 1: 10-minute Gift Macro
- You're online, doing other things (quests, building, etc.).
- TinyTask runs in the background just to press E, claim, close, every 10 minutes.
- You refill your point battery whenever you feel like it.
This gives you free gifts every 10 minutes without thinking about it.
↖ 2. Long AFK sessions (sleep, school, work)
- Use Method 3: Full Auto Harvest → Turn-in → Sell Loop
- More complex macro, higher risk, but you get hours of progress without touching the game.
- Accept that weather events can occasionally break it:
- If you return and see your character stuck, adjust camera and re-record.
This is your set it overnight and hope for the best method.
↖ 3. Short breaks with lots of points saved
- Use Method 2: AFK Shop Macro
- When you're loaded on event currency and only want to shop:
- Record a shop-only macro that buys chosen items and loops.
- Great for short AFKs where you don't want to leave your character exposed elsewhere.
- When you're loaded on event currency and only want to shop:
↖ FAQ
Q1: I don't have any prismatic/transcendent plants. Are these AFK methods still viable?
Yes. Just apply the same logic to whatever you do have:
- Use your highest rarity plant that you can plant in bulk (even if it's just epic or rare).
- Fill your backpack and run the 10-minute gift macro.
You'll need to refill more often, but the method works identically.
Q2: Do resolution and UI changes really matter for TinyTask macros?
Absolutely. Macros like TinyTask are pixel- and position-based:
- If you change resolution or UI scale after recording, click positions will be off.
- Try to:
- Record your macro with your final settings.
- Avoid changing them unless you're ready to re-record.
Q3: Why bother selling non-mutated fruits in the full auto loop?
Because your backpack is finite. Over long AFK sessions:
- Non-mutated fruits clutter your inventory.
- That leaves less room for event-relevant mutated plants.
By auto-selling, you're constantly freeing space so mutation plants—and thus points—keep flowing.
Q4: How exactly do weather events break macros?
Events like earthquakes shake your screen and can:
- Rotate your camera angle.
- Slightly shift your character's position after the animation.
Your macro, however, is still trying to walk and click based on the old camera and position. That mismatch causes:
- Running into walls.
- Missing buttons.
- Failing to reach NPCs or the gift pedestal.
The fix is simple but manual:
- Reset your camera, go back to your standard angle, and re-record the macro.
Q5: I only have time to focus on one major reward. What should I pick?
From a pure efficiency standpoint:
- First choice: HyperHunger – the +30% passive boost is insane for long-term farming.
- Second choice: Ice Golem – especially if you don't own Headless Horseman yet.
If you secure HyperHunger, you've essentially upgraded every future grind you'll ever do.
↖ Let the Macros Work So You Don't Have To
Once you understand how the event's point system works, Grow a Garden's Christmas Event PT.2 turns from a time sink into a background income stream:
- High-rarity plants + point battery let you survive many 10-minute cycles.
- A clean TinyTask gift macro keeps the presents flowing.
- A curated AFK shop macro buys only what's truly useful.
- And for the brave, a full auto harvest → submit → sell loop can grind through entire nights.
Focus your grind on HyperHunger and, if you lack Headless Horseman, Ice Golem. Those two alone justify building out a proper AFK setup and let you convert idle time into permanent account power.

Most Popular Posts
- Grow a Garden 2 Release Date Guide: Why Saturday Is the Likely Launch Window
- Grow a Garden Bizzy Bee Event: Honey Coins, Bee Eggs, Seeds, Upgrades, and Rewards
- Grow a Garden Bee Dungeon Guide: Best Wave 100 Strategy, Bee Shards, and Team Setup
- Grow A Garden Best Pet Mutations 2026: Ranked Guide for Power, Trading, and AFK Farming
- Grow a Garden Bee Stats Guide: Best Bees Ranked by Damage, HP, and DPS
- Grow a Garden Busy Bee Part 2 Guide: Royal Jelly, Best Pets, New Seeds, and Prep Strategy
Popular Category Lists
- Grow a Garden / (286)
- ARC Raiders / (262)
- CoD: Black Ops 7 / (166)
- Monopoly Go / (146)
- MLB 26 / (144)
- Star Citizen / (112)
- Steal a Brainrot / (89)
- Sailor Piece / (68)
- ARK Survival Ascended / (67)
- Diablo IV / (61)
- Forza Horizon 6 / (60)
- Blox Fruits / (60)
- CoD: BLACK OPS 6 / (55)
- Adopt Me / (53)
- Path of Exile 2 / (48)
- Monster Hunter Wilds / (46)
- Windrose / (44)
- Path of Exile / (40)
- Grow a Garden 2 / (40)
- Bee Swarm Simulator / (36)


