


 0
0Grow a Garden Best Ruby Squid Pet Combos with Real Stats, Caps, and Step-by-Step Builds
- Jordan
- Share
- Grow a Garden
- 11/19/25
- 4215
After a full day farming mats, you drop Ruby Squids into your lineup, clone your single best passive, and suddenly you hatch faster, spend fewer materials, double your crafts, and even get eggs back from selling pets. That's the magic of Grow a Garden Ruby Squid—turning one god-tier passive into your team's baseline. Here's how to use it right, why it works, and what to watch for, wrapped into a clean, testable playbook.
- Core Concepts: How Ruby Squid Actually Wins
- TOP 5 Broken Ruby Squid Combos
- - Koi Egg-Return × Ruby Squid (hatch endurance king)
- - Orangutan Material-Save × Ruby Squid (cost cutter for crafting)
- - Pipelosaurus Double-Craft × Ruby Squid (profit engine)
- - Seal Sell-Back Eggs × Ruby Squid (clean-out recycler)
- - Hatch Speed Group × Ruby Squid (fast lanes even without Eagles)
- Deeper Mechanics: Locking, Weight, and Validation
- Ready-Made Lineups
- FAQ
- Conclusion
↖ Core Concepts: How Ruby Squid Actually Wins
Ruby Squid passive: continuously copies a random P-type passive.
It mirrors the passive as-is, which implies:
- The key trick: leave only the pet with your single best passive on the field so Ruby Squid has just one candidate to copy.
- Order matters: clear the field of other P-passive pets → keep only your best passive pet → equip Ruby Squids → after you see the copy in effect, add the rest back.
- Power source: when you lack quantity or levels, copy multiplies quality; many passives stack as independent checks, so multiple copies sharply raise total success rates.
Why it's strong: many passives behave like independent rolls. More copies = more rolls = higher chance that something good fires each attempt. You don't need mutations or special weight on the Squid; it piggybacks your best sample.
↖ TOP 5 Broken Ruby Squid Combos
These five cover hatching, crafting, selling, and raw speed. Each includes the why, the how, and field notes.
↖ - Koi Egg-Return × Ruby Squid (hatch endurance king)
Why it's strong
Koi passive: chance to return the egg when hatching. High-end Koi reach ~6.3%+.
One top Koi can be spread across several slots via Ruby Squids, massively lifting cumulative egg returns during long sessions.
How to run it
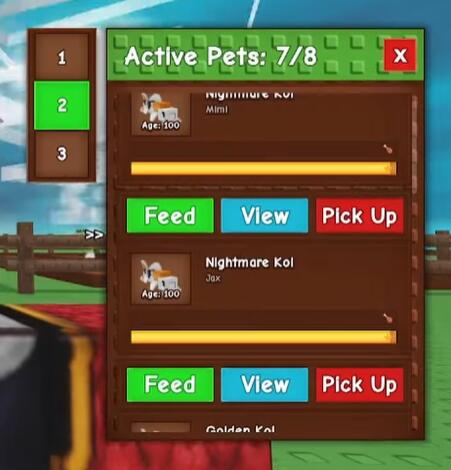
1. Stow all P-passive pets except your single best Koi (e.g., 6.47%).
2. Equip Ruby Squids; let them lock onto that Koi.
3. Add the rest of your team; start batch hatching and track over time.
Field numbers
Example: 1 original 6.47% Koi + 5 Squids copying ≈ multiple independent checks per hatch. Over large samples, total returns climb noticeably.
Pitfalls
Don't let Squid copy a low-level or off-rarity Koi. Always lock to the highest-rate Koi first.
↖ - Orangutan Material-Save × Ruby Squid (cost cutter for crafting)
Why it's strong
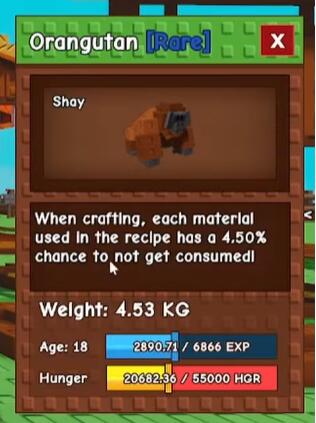
Orangutan passive: each material slot in a recipe has an independent chance not to be consumed. High-end can reach ~7% per material.
For multi-mat recipes, multiple independent checks compound savings, especially on expensive items (e.g., event cores, rare coals).
How to run it
1. Leave your single best Orangutan on the field.
2. Equip multiple Ruby Squids to copy that passive; then craft in batches.
Practical math sense
With 3 Orangutans + 5 Squids all around ~7%, each ingredient slot gets many don't consume rolls; the more slots, the bigger the effect.
Pitfalls
RNG can swing short-term. Evaluate savings across a larger batch to see the true average.
↖ - Pipelosaurus Double-Craft × Ruby Squid (profit engine)
Why it's strong
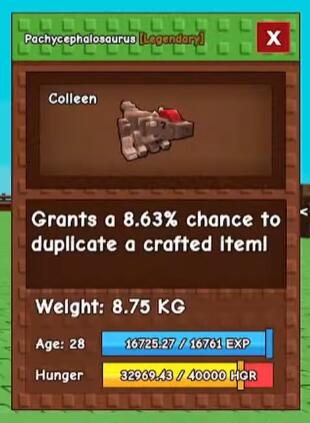
Pipelosaurus passive: chance to duplicate the crafted item (double output).
It's a P-type passive, copyable by Ruby Squid; stacking copies pushes total double odds way up.
How to run it
1. Keep only your highest-duplicate-rate Pipelosaurus out.
2. Fill with Ruby Squids to copy; do a small validation craft set; then scale up on high-value recipes.
Caps and myths
Community claims vary (some suggest a ~25% cap; others report much higher with enough copies). Best approach: test your own baseline with solid samples.
Pitfalls
Always run a small pilot (e.g., N=30 crafts) to confirm the Squids copied the right passive before committing expensive mats.
↖ - Seal Sell-Back Eggs × Ruby Squid (clean-out recycler)
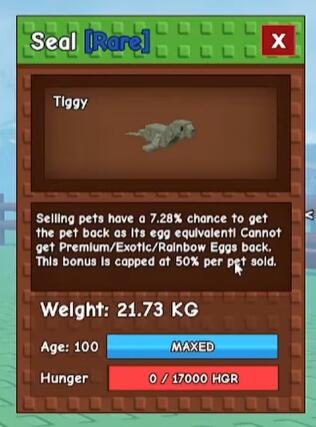
Why it's strong
Seal passive: when selling pets, chance to receive the pet's egg back. Perfect for clearing inventory while refueling egg stock.
High-end examples hover around ~7.28%.
How to run it
1. Keep your best Seal active and copy via Ruby Squids.
2. Head to the shop and bulk-sell low-value pets; watch egg returns accumulate.
Pitfalls
ROI scales with sell volume and the quality of the egg pools you're feeding back into.
↖ - Hatch Speed Group × Ruby Squid (fast lanes even without Eagles)
Why it's strong
Goal: compress hatch cycles to increase attempts per hour.
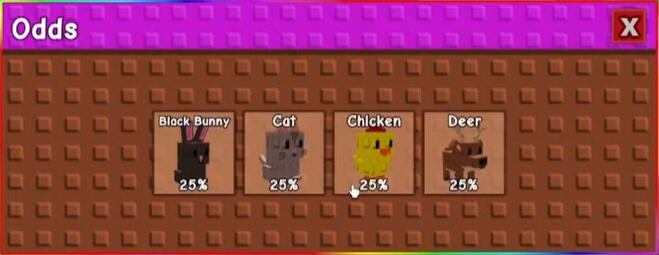
Top-tier is Bald Eagle; if you lack it, use Rooster (+20% hatch speed, rare egg shop) or Chicken (+10%, uncommon egg).
How to run it
1. Keep your single best speed booster out (Eagle > Rooster > Chicken).
2. Copy with Ruby Squids, then run long hatch sessions during event windows.
Pro tip
If you're short on eggs but the event is hot, pair Koi returns × Speed group so you both return eggs and process them faster.
Pitfalls
Start with Rooster for accessibility; upgrade to Eagle later and re-lock Squids to the better passive.
↖ Deeper Mechanics: Locking, Weight, and Validation
Locking the copy target
- Remove all other P-passive pets so Ruby Squid has only one valid target.
- Equip Squids and wait for the copy to take hold; then re-add your other pets.
- Avoid swapping targets mid-run; changing the candidate pool can cause the Squid to shift.
Do Squids need mutations or weight?
Field experience: Squids mirror the passive's effective numbers rather than recalculating via their own weight/mutation.
Translation: you do not need to juice the Squid itself; invest in the original best passive pet instead.
DIY validation protocol (quick and convincing)
Choose a quantifiable passive (e.g., Koi at 6.47%).
Group A: 1 original Koi only. Group B: same Koi + 3 Squids.
Run N ≥ 300 hatches; compare egg return counts and see if B outperforms A in line with independent checks expectations.
↖ Ready-Made Lineups
Hatch Event Sprint (egg-starved)
Keep best Koi → add 3–5 Ruby Squids to copy → add speed boosters (Rooster/Eagle) → run long batches.
Crafting Cost Save (materials expensive)
Keep best Orangutan → add 3–5 Ruby Squids → craft in batches and log average mats consumed.
Crafting Value Push (high-value items)
Keep best Pipelosaurus → fill with Squids → validate small set → scale to big runs.
Inventory Clean and Recycle
Keep best Seal → add 2–4 Squids → bulk sell low-value pets → reuse eggs for fresh rolls.
One godlike Koi/Pipelosaurus beats several mediocre ones. Ruby Squids let a single-core build act like multi-core.
↖ FAQ
Q: After copying, can I swap out the original best passive pet?
A: Not recommended. Ruby Squid continuously copies a random P-passive; changing the pool risks shifting its target and destabilizing numbers.
Q: Is Pipelosaurus duplication hard-capped?
A: Reports conflict. Run your own large-sample logs; even with a soft cap, multiple independent checks still lift average output meaningfully.
Q: My best Koi is only ~4%. Worth copying?
A: Farm until you have at least a ~6% Koi; copying a strong sample gives a far bigger jump.
Q: Event time is tight—what's the fastest ramp?
A: Combine Hatch Speed + Koi returns, then layer Orangutan save or Pipelosaurus double for crafting windows.
↖ Conclusion
Ruby Squid's true edge is leverage: it turns your single best passive into your team template. Once you master the flow—clear candidates, lock the copy, then rebuild your lineup—the five powerhouse combos (Koi egg returns, Orangutan material save, Pipelosaurus double craft, Seal sell-back eggs, and Hatch Speed boosters) will compound gains across hatching, crafting, and clearing. If your results feel off, run the quick A/B validation; once the numbers check out, scale confidently and watch both resources and output curve upward.

Most Popular Posts
- Grow a Garden 2 Release Date Guide: Why Saturday Is the Likely Launch Window
- Grow a Garden Bizzy Bee Event: Honey Coins, Bee Eggs, Seeds, Upgrades, and Rewards
- Grow a Garden Bee Dungeon Guide: Best Wave 100 Strategy, Bee Shards, and Team Setup
- Grow A Garden Best Pet Mutations 2026: Ranked Guide for Power, Trading, and AFK Farming
- Grow a Garden Bee Stats Guide: Best Bees Ranked by Damage, HP, and DPS
- Grow a Garden Busy Bee Part 2 Guide: Royal Jelly, Best Pets, New Seeds, and Prep Strategy
Popular Category Lists
- Grow a Garden / (286)
- ARC Raiders / (262)
- CoD: Black Ops 7 / (166)
- Monopoly Go / (146)
- MLB 26 / (145)
- Star Citizen / (112)
- Steal a Brainrot / (89)
- Sailor Piece / (68)
- ARK Survival Ascended / (67)
- Diablo IV / (61)
- Forza Horizon 6 / (60)
- Blox Fruits / (60)
- CoD: BLACK OPS 6 / (55)
- Adopt Me / (53)
- Path of Exile 2 / (48)
- Monster Hunter Wilds / (46)
- Windrose / (44)
- Path of Exile / (40)
- Grow a Garden 2 / (40)
- Bee Swarm Simulator / (36)


