


 0
0Grow a Garden Must-Have High Values Pets: Exact Weights, Ages, and Caps
- Jordan
- Share
- Grow a Garden
- 10/01/25
- 3853
If your goal in Grow a Garden is to roll in value - more pets, heavier pulls, faster eggs - you don't just need to know which pets are good. You need to know why they're good, how heavy they should be, at what age they break even, and where their caps sit. I've distilled multiple event cycles and grind sessions into a practical, numbers-first list of 10 pets. You'll see how Squirrels let you wipe and re-seed for free, Barn Owls pull heavier shop grow a garden pets, Seals and Koi stretch your egg pool, and Brontos push hatch weights into luxury territory. Use the right weights and caps, and your account graph will look like it's on rails.
- Squirrel — The event reset enabler
- Barn Owl — Heavier shop pets, higher ceilings
- Triceratops or Echo Frog — Your growth fast-forward
- Bald Eagle — The best egg accelerator
- Spinosaurus — Consolidate mutations into one perfect fruit
- Butterfly — The Rainbow variant is the multiplier, not a bonus
- Brontosaurus — Push hatch weights to luxury tiers
- Koi — Turn 100 eggs into 150
- Seal — Sell-to-egg conversion for shop flips
- Raccoon — The controversial duplicator
- Two mini case studies
- FAQ
- Wrap-up

↖ Squirrel — The event reset enabler
- Role: Use lucky reclaimers without consuming charges; hard-reset a garden while keeping seeds. Clutch for new events or fast pivots.
- Key numbers:
- Min effective weight: 0.84 kg (normal variant OK; Rainbow not required)
- Recommended count: 8
- Target per-pet effect: 12.5% each (eight-stack = “always-on” feel)
- Age notes: Heavier Squirrels hit 12.5% around Age 40–50; very light ones finish by Age 100
- Setup: Squirrels commonly roll 1.2–1.6 kg—easy to meet the threshold. Prioritize aging.
- Action tip: When an event drops, free-wipe with Squirrels → replant to match event demands → iterate quickly without reclaimer burn.
- You decouple experimentation from consumables, so you learn the event meta faster than everyone else.

↖ Barn Owl — Heavier shop pets, higher ceilings
- Role: Adds extra weight to shop-bought pets; heavier pets have stronger effects and better trade value.
- Key numbers:
- Single-owl cap: +0.4 kg
- Eight-stack global cap: +3.0 kg (combined)
- Min weight to hit +0.4 at Age 100: 1.08 kg (normal)
- Important quirk: Minimum roll is always +0.1 kg on purchase; the minimum does not stack across Owls
- Setup: Owls are relatively cheap now; buy and age early. Heavier birth weights reach +0.4 faster.
- Action tip: Pair Owls with shop cycles; when the pool includes in-demand pets, you're farming weight directly from the store.
- Any shop pet becomes Barn-Owl-farmable, future-proofing your account for new metas.
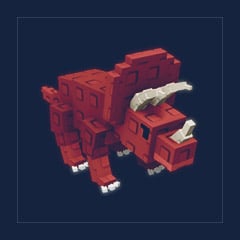
↖ Triceratops or Echo Frog — Your growth fast-forward
- Role: Rapidly advance fruit growth so you can roll more natural-huge attempts per hour.
- Key numbers:
- Triceratops: Every 3 minutes, can trigger up to 3 times, advancing growth ~33 minutes
- Echo Frog: Every 5 minutes, advances the nearest target by 24 hours
- Setup: Choose based on control vs. jump:
- Triceratops = frequent, incremental pushes (great for tight control)
- Echo Frog = big leaps (great for stage skips)
- Action tip: For fruits like Bone Blossom with a natural huge chance (e.g., 2.5%), combine Sprinklers + species-specific boosters + Tri/Echo spam. If it's not huge, pick/delete and reroll immediately.
- You convert rare huge outcomes into a numbers game by massively increasing attempts per hour.

↖ Bald Eagle — The best egg accelerator
- Role: Shortens hatch times with a high chance of multiplying the advance.
- Key numbers (fixed; not weight-scaled):
- Cooldown: 7m 04s
- Base time advance: 70.4s
- Chance to multiply: 74.4%
- Weight-scaled factor: The multiplier itself—around 3.4x at 0.9 kg, up to ~4.0x near 1.23 kg
- Setup: Don't overfixate on weight; getting a squad to Age 100 is the priority for steady cadence.
- Action tip: Eagles act like a metronome; in event weeks, they smooth and accelerate your rare pet pipeline.
- More hatches → more rolls at rare pets → more value velocity.

↖ Spinosaurus — Consolidate mutations into one perfect fruit
- Role: Eats mutations from other fruits and applies them to your favorited trophy fruit.
- Key numbers:
- Age 100, 1.0 kg: every 18 minutes, devours 5 mutations from 5 fruits
- Age 100, 2.0 kg: every 16 minutes, devours 7 mutations from 7 fruits
- Case method:
- During admin mutation windows, carpet-plant mutation carriers (e.g., 100 carrots)
- After the window, pick/keep only carriers with mutations you lack on your main fruit
- Clear the rest, then let Spino om-nom those carriers and feed your favorited giant (e.g., huge Dino Shroom)
- Why this matters: You upcycle scattered RNG into one flagship asset, boosting both value and bragging rights.

↖ Butterfly — The Rainbow variant is the multiplier, not a bonus
- Role: Enables Silver/Gold/Rainbow, with Rainbow applying on the multiplicative side of valuation.
- Reality check:
- Adding many additive mutations can take a Bone Blossom from ~222M base to ~150B
- Flip Rainbow on, and it can jump to ~7.5T—because Rainbow multiplies the sum, not adds to it
- Setup: Even one Butterfly is worth fielding; target your flagship fruits first for Rainbow.
- When additive returns flatten, Rainbow is the switch that turns sums into products.
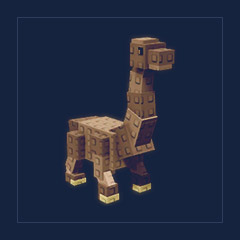
↖ Brontosaurus — Push hatch weights to luxury tiers
- Role: Increases hatched pet final weight. At the 30% global cap, a 2.2 kg hatch moves to ~2.86 kg. The real juice is when you hit Huge/Titanic hatches.
- Key numbers:
- Global cap: 30% combined
- Typical singles: 1.0 kg Bronto ≈ 6.25%; 2.0 kg ≈ 7.25%
- Target average for 4-Bronto setup: 7.5% each to hit 30%
- Viable combos:
- 4 Rainbow Brontos at ≥1.2 kg birth, Age 100 ≈ 7.5% each → 30%
- 3 Huge Brontos at ≥5.0 kg birth (no Rainbow) → ~30%
- 2 Titanic Brontos at ≥8.7 kg each with Rainbow → 15% × 2 = 30%
- Setup call: Most players run 4x Rainbow Brontos to leave room for Koi on hatch teams.
- If you do pop a Huge, Brontos turn it from great to grail.

↖ Koi — Turn 100 eggs into 150
- Role: Egg return on hatch; combined cap 50%.
- Key numbers:
- Goal: 8 × 6.25% = 50% cap
- 1.0 kg normal Koi at Age 100 ≈ 5.2%
- 1.0 kg Rainbow Koi ≈ 5.8%
- Threshold to meet 6.25%: Rainbow + ≥1.21 kg at Age 100 (just over the line)
- Setup: Koi are shop pets with weight ceilings—use Barn Owls to fish for ≥1.21 kg, then add Rainbow.
- Action tip: During heavy hatch periods, always prioritize filling the Koi cap to stretch inventory.
- Extending egg runway by 50% flattens your cost curve and compounds your outcomes.

↖ Seal — Sell-to-egg conversion for shop flips
- Role: While on the field, selling pets to the shop can return eggs—up to 50%.
- Key numbers:
- Combined cap: 50%
- Goal: 8 × 6.25% each
- Min effective weight (normal @ Age 100): 1.71 kg gets you there; Huge/Titanic/Rainbow make it easier
- Case loop (the Egg Return Flywheel):
- Run Seals (50%) + Koi (50%) + Eagles (speed)
- Buy pets → sell to shop for egg returns → hatch with Koi returns → sell again → repeat
- When shop prices and egg outputs align, this loop lets you farm both shekels and eggs with surprisingly long sustain.

↖ Raccoon — The controversial duplicator
- Role: Every 15 minutes, steals a random crop from another plot and delivers it to you.
- Practical use:
- Alt-account method: Park a single high-value fruit or event stage on your alt plot; your main's Raccoon keeps ferrying it back for rewards or sales.
- Risks/Notes:
- This behaves like a de facto duplicator and may be nerfed or redesigned. There are also etiquette and rule considerations—use judgment.
- Prefer to treat Raccoon as an opportunistic booster. Keep your core economy anchored in Koi/Seal/Eagle loops for stability.
- Short-term gains can be explosive, but durability depends on future patches.
↖ Two mini case studies
A) Event Garden Reset (Squirrel-powered)
- Setup: 8 Squirrels, Lucky Reclaimer ready.
- Steps: Wipe plot without consuming charges → re-seed to match event boosters → iterate layouts fast.
- Result: You learn the event's best seeds/placements hours ahead of the curve.
B) Egg Return Flywheel (Seal + Koi + Eagle)
- Setup: 8 Seals (50%), 8 Koi (50%), a squad of Eagles at Age 100.
- Steps: Buy pets → sell to shop (egg returns with Seals) → hatch (egg returns with Koi) → accelerate with Eagles → recycle outcomes.
- Result: Sustained egg volume and steady shot at rare/higher-weight pets.
↖ FAQ
- Q: My Squirrel is 0.9 kg—did I overinvest?
- A: Not at all. The minimum effective weight is 0.84 kg. Heavier just reaches 12.5% earlier in age.
- Q: I already have 8 Barn Owls. Do I need even heavier ones?
- A: Once a single Owl hits +0.4 kg, extra weight doesn't raise its cap—though hitting that cap earlier in age is a nice-to-have.
- Q: Should I chase heavy Bald Eagles?
- A: Don't obsess. The three big values (cooldown/base advance/chance) are fixed. Weight nudges the multiplier; squad Age 100 is more impactful.
- Q: Is 5 Brontos safer than 4?
- A: You can, but you're consuming slots that could go to Koi. For balanced economy, 4 Brontos + room for Koi is a strong baseline.
- Q: My Koi are 1.2 kg and Rainbow but still short—what now?
- A: Use Barn Owls to pull ≥1.21 kg Koi from shop. Temporarily add more Koi to bridge, but aim for 8 × ≥6.25% long-term.
- Q: Do Seals conflict with Koi?
- A: No. Seals cover sell-to-egg; Koi cover hatch returns. They stack across different steps of the loop.
- Q: Will Raccoon get nerfed?
- A: There's a fair chance. Keep your core progress loop independent of it, and treat Raccoon as situational.
↖ Wrap-up
To straighten your wealth curve in Grow a Garden, start by freeing your resets with Squirrels, then pull heavier shop pets with Barn Owls. Use Triceratops/Echo Frog to crank natural-huge attempts, and secure a Butterfly so Rainbow turns additions into multipliers. On the hatch side, let Bald Eagles pace your cycles and Brontos push weight into top brackets. On the sustain side, stack Koi and Seals to extend eggs by 50% at both hatch and sell steps. If you choose to, layer Raccoon as a tactical accelerator—but plan for patch risk. In multiple event runs, this configuration let me re-seed within hours, produce early high-value fruits, and keep the egg machine humming. If you feel a slowdown, revisit the three keys—Weight, Age, Cap—and fix the bottleneck. Your value graph will start climbing again.

Most Popular Posts
- Grow a Garden 2 Release Date Guide: Why Saturday Is the Likely Launch Window
- Grow a Garden Bizzy Bee Event: Honey Coins, Bee Eggs, Seeds, Upgrades, and Rewards
- Grow a Garden Bee Dungeon Guide: Best Wave 100 Strategy, Bee Shards, and Team Setup
- Grow A Garden Best Pet Mutations 2026: Ranked Guide for Power, Trading, and AFK Farming
- Grow a Garden Bee Stats Guide: Best Bees Ranked by Damage, HP, and DPS
- Grow a Garden Busy Bee Part 2 Guide: Royal Jelly, Best Pets, New Seeds, and Prep Strategy
Popular Category Lists
- Grow a Garden / (286)
- ARC Raiders / (262)
- CoD: Black Ops 7 / (166)
- Monopoly Go / (146)
- MLB 26 / (145)
- Star Citizen / (112)
- Steal a Brainrot / (89)
- Sailor Piece / (68)
- ARK Survival Ascended / (67)
- Diablo IV / (61)
- Forza Horizon 6 / (60)
- Blox Fruits / (60)
- CoD: BLACK OPS 6 / (55)
- Adopt Me / (53)
- Path of Exile 2 / (48)
- Monster Hunter Wilds / (46)
- Windrose / (44)
- Path of Exile / (40)
- Grow a Garden 2 / (40)
- Bee Swarm Simulator / (36)


