


 0
0Grow a Garden Wind Wyvern XP Method: Fast Cooldown Loop + Best Pet Combos
- Cecila
- Share
- Grow a Garden
- 01/27/26
- 905
Wind Wyvern isn't just another rare dragon to show off in your inventory—it is a cooldown engine. When we build around its passive ability correctly, we aren't chasing one lucky activation; we are creating a self-sustaining loop where more conversions lead to more cooldown advances, which lead to more ability activations, creating even more conversions.
If you are aiming for easy XP and significantly faster ability cycles, this is one of the cleanest methods we have tested. Below is exactly how we set it up, which Grow a Garden pet combos consistently perform best, and what to tweak if your garden doesn't behave like the high-level farms you see others running.
- 1. Why This Works: The Mechanics Explained Simply
- 2. Our Testing Results: Stability vs. The Cap
- The Best Combo
- Step-by-Step Guide: From Setup to Loop
- Step A: Choose a Dense, Easy Test Crop
- Step B: Create a Clean Layout
- Step C: Apply Wind Struck
- Step D: Spread Aggressively
- Step E: Equip the Insane Loop Loadout
- Why This Beats Standard XP Pets
- Common Failures & Fixes
- FAQ
- Final Thoughts
↖ 1. Why This Works: The Mechanics Explained Simply
To understand why this method dominates, we need to look at the Wind Wyvern's specific effects on farming loops. It does two critical things:
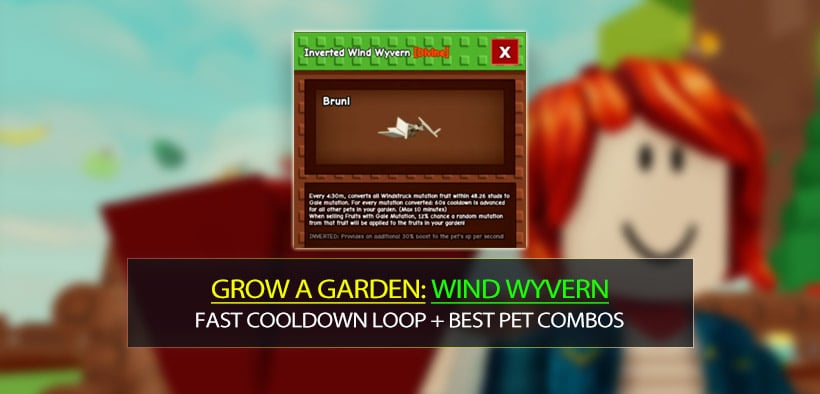
1. Every 30 minutes, it converts Wind Struck mutation fruit within 48 studs into Gale mutation.
2. Crucially, for each mutation converted, it advances the cooldown by 60 seconds for all other pets, up to a maximum of 10 minutes total advance.
There is also a secondary effect: when you sell Gale fruits, there is a 12% chance that a random mutation from that fruit gets applied to other fruits in your garden.
Why does this turn into an XP method?
Because cooldown advance is basically free time. If your French Fry Ferrets, Mimics, or Pterodactyls are on shorter cooldowns, they trigger much more often. Each trigger helps you spread more Wind Struck, which creates more Gale conversions in the next tick.
This means a proper setup doesn't just speed up one pet—it accelerates the tempo of your entire garden.
↖ 2. Our Testing Results: Stability vs. The Cap
We tested the Wind Wyvern as a cooldown accelerator using a simple scorecard: stability, activation frequency, and how often the loop stalls. Here is what we found matters most.
The Cooldown Cap is Real
The Wyvern can push other pets forward by up to 10 minutes. This is a hard cap. If your loop is already extremely fast, you might hit this cap and feel like the method stops scaling. This is normal; it means you are running at maximum efficiency.
Density is King
Consistency depends entirely on Wind Struck density. If you don't maintain enough Wind Struck fruits inside that specific 48-stud radius, the 30-minute conversion tick underperforms, and you won't get the full cooldown reduction.
How to know if you are running it right:
If you see massive cooldown jumps on your other pets immediately after conversion windows, you are on track.
If your garden looks quiet for long stretches with no ability activations, you are likely missing mutation spread or have spacing issues.
↖ The Best Combo
Here is the loadout that produced the most reliable fast cycle results in our runs. We chose these specific pets to maximize the cooldown loop.
| Slot | Pet | Role | Why it is essential |
|---|---|---|---|
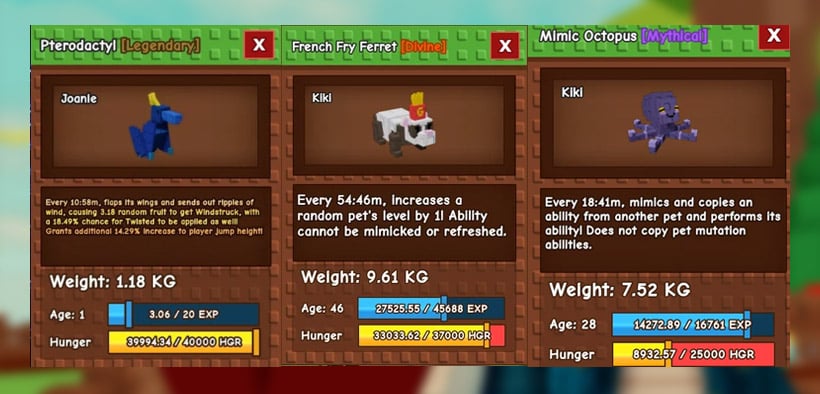
| 1 | Wind Wyvern (x1) | The Engine | Converts Wind Struck to Gale; advances other cooldowns up to 10 mins. |
| 2 | Pterodactyl (x1) | The Applicator | Helps apply Wind Struck quickly when you don't have spray or need to refresh. |
| 3-5 | French Fry Ferret (x3) | The Payload | High-value ability loop. Benefits massively from cooldown advances; more activations = more XP. |
| 6-8 | Mimic Octopus (x3) | The Amplifier | Copies and propagates effects to keep mutation density high enough for the Wyvern to eat. |
Why this specific balance?
This setup isn't random. It is built around one idea: The Wyvern rewards you for having many pets that scale with cooldown reduction. If you remove the Ferrets, you lose the XP benefit. If you remove the Mimics, the loop dies because there aren't enough mutations to convert.
↖ Step-by-Step Guide: From Setup to Loop
We will keep this practical. Follow these steps in order to replicate the results.
↖ Step A: Choose a Dense, Easy Test Crop
Start by planting tomatoes (or any fast, easy-to-stack crop). We prefer tomatoes because they allow you to create high density quickly, which is exactly what the Wyvern conversion mechanic demands.
↖ Step B: Create a Clean Layout
Surround your crop cluster with pancakes. This acts as a barrier to keep your working area tight and manageable.
Critical: Keep the entire cluster within 48 studs of where your Wind Wyvern is effectively covering. If you find conversions feel weak, you are probably letting part of your crop field drift outside the Wyvern's radius.
↖ Step C: Apply Wind Struck
You have two options here:
1. Wind Struck spray (Fastest and most direct).
2. Pterodactyl (To apply Wind Struck through its mutation utility).
We usually start with spray to get the engine running immediately, then rely on the Pterodactyl to maintain coverage.
↖ Step D: Spread Aggressively
Use a T-Rex combined with a 15-second Mimic window (or equivalent fast spread tools) to propagate Wind Struck across the cluster.
Why do we do this? Because the Wyvern only converts what already exists. High density now ensures a much stronger conversion tick later.
↖ Step E: Equip the Insane Loop Loadout
Switch to the full combo: 1 Wind Wyvern, 1 Pterodactyl, 3 French Fry Ferrets, 3 Mimic Octopuses.
Watch the garden tempo change. Your Ferrets will come off cooldown faster, Mimics will keep the mutation field alive, and your Wyvern conversion windows will become meaningful events rather than small blips.
Troubleshooting Tip:
If you notice your Ferret ability isn't coming back fast enough, either you aren't getting enough conversions per tick, or you are already hitting the 10-minute advance cap and need to focus on maintaining the loop rather than speeding it up further.
↖ Why This Beats Standard XP Pets
A lot of players ask us why they should bother with this complex setup instead of just using straightforward XP boosters. Our experience shows that the Wyvern-style acceleration often wins in long farming sessions.
The Real Advantage
Standard XP boosters increase one stream of value (XP per click/harvest). The Wind Wyvern increases the number of times your value streams trigger.
Even if another pet gives more XP per proc, the Wyvern can give you significantly more procs per hour. Once your setup is stable, volume wins.
↖ Common Failures & Fixes
Here are the specific issues that make this method fail, and how we fixed them during testing.
| Problem you see | Likely Cause | The Fix |
|---|---|---|
| Conversions feel tiny | Too few Wind Struck fruits in range. | Increase crop density; re-apply Wind Struck; tighten layout within 48 studs. |
| Loop stalls after a burst | You hit the 10-minute advance cap. | Focus on generating more conversion events to reset the cycle, not more cooldown reduction. |
| Mutation spread is inconsistent | Relying only on the 12% sell effect. | Treat sell-spread as a bonus, not the main engine. Keep Pterodactyl and Mimics active. |
| Garden drifts out of range | Wyvern radius mismanaged. | Re-center the working plot; keep the entire cluster strictly near the Wyvern. |
↖ FAQ
1. Do we absolutely need Wind Struck spray, or is Pterodactyl enough?
If you have the spray, your start-up is much faster. If you don't, Pterodactyl can still work, but you must compensate with more time maintaining coverage and tighter crop density to get the loop started.
2. Why three Ferrets and three Mimics? Can we run fewer?
You can, but the loop becomes less stable. If you run fewer Mimics, mutation density drops, starving the Wyvern. If you run fewer Ferrets, you lose a big chunk of the cooldown advance value because fewer high-impact abilities are being accelerated.
3. What does the 10-minute cap practically mean for my run?
It means the Wyvern cannot keep pushing cooldown forward forever in a single window. If you are already seeing frequent activations, your next improvement should be more conversion frequency (more Wind Struck to convert each tick), rather than trying to stack more cooldown effects.
4. Is Gale selling mandatory for this XP method?
It is not mandatory. It is a strong bonus layer because the 12% spread can re-seed mutations, but the core engine is strictly the Wind Struck to Gale conversion driving the cooldowns.
5. If we don't have Mimic Octopus, what is the closest substitute?
Use any pet or tool whose job is replication and spread rather than a one-time burst. The method lives or dies on keeping mutation density high enough that the Wyvern's periodic conversion actually matters.
↖ Final Thoughts
The Wind Wyvern is valuable because it turns mutation management into a cooldown economy. When we feed it a dense Wind Struck field, it pays us back by accelerating the rest of our pets—especially Ferrets and other high-uptime abilities—so the whole garden runs faster.
If you build the layout tightly with 48-stud awareness, keep Wind Struck coverage high, and run the Wyvern + Pterodactyl + Ferrets + Mimics loop, you will get a method that feels less like gambling and more like a repeatable, high-speed farm routine.

Most Popular Posts
- Grow a Garden 2 Release Date Guide: Why Saturday Is the Likely Launch Window
- Grow a Garden Bizzy Bee Event: Honey Coins, Bee Eggs, Seeds, Upgrades, and Rewards
- Grow a Garden Bee Dungeon Guide: Best Wave 100 Strategy, Bee Shards, and Team Setup
- Grow A Garden Best Pet Mutations 2026: Ranked Guide for Power, Trading, and AFK Farming
- Grow a Garden Bee Stats Guide: Best Bees Ranked by Damage, HP, and DPS
- Grow a Garden Busy Bee Part 2 Guide: Royal Jelly, Best Pets, New Seeds, and Prep Strategy
Popular Category Lists
- Grow a Garden / (286)
- ARC Raiders / (262)
- CoD: Black Ops 7 / (166)
- Monopoly Go / (146)
- MLB 26 / (144)
- Star Citizen / (111)
- Steal a Brainrot / (89)
- Sailor Piece / (68)
- ARK Survival Ascended / (66)
- Diablo IV / (61)
- Forza Horizon 6 / (60)
- Blox Fruits / (60)
- CoD: BLACK OPS 6 / (55)
- Adopt Me / (53)
- Path of Exile 2 / (48)
- Monster Hunter Wilds / (46)
- Windrose / (44)
- Path of Exile / (40)
- Grow a Garden 2 / (38)
- Bee Swarm Simulator / (36)


