


 0
0How to Flip Grow a Garden Pets for Big Tokens in the Market?
- Cecila
- Share
- Grow a Garden
- 12/18/25
- 653
In Grow a Garden, a lot of players assume profit is all about luck: if you happen to meet someone dumping good pets for cheap, you're rich; if not, too bad.
After enough trading, I realized it's almost the opposite: the players who earn consistently are the ones with a clear, repeatable trading system, not the ones rolling the dice.
- Part 1: The Core Profit Logic of Trading in Grow a Garden
- 1.1 Profit Formula: You Earn When You Buy, Not When You Sell
- 1.2 P Values & Average Price: Your Value Anchor
- Part 2: Starting from 0 Tokens – Turning Pets into Your First Capital
- 2.1 Early Stage Mindset: Survive First, Optimize Later
- 2.2 Basic Rule: Claim a Booth First, Then Check Others
- Part 3: After You Have Tokens – Multi-Server Sniping & Flipping
- 3.1 Single-Server Routine: A Fast, Repeatable Scan
- 3.2 Multi-Server Loop: Use Find Sellers as a Teleport Tool
- Part 4: Understanding Weight & Mutations – The Real Advanced Value System
- 4.1 Mutations: Nightmare vs Normal
- 4.2 Weight: Trash, Normal, Huge, Titanic
- 4.3 As a Beginner: You Can Safely Ignore Weight & Mutation
- Part 5: How to Find Those Insanely Cheap Pets and Make Big Profit
- 5.1 Only Do High-Confidence Trades: If You're Not Sure, Don't Buy
- 5.2 Treat Tokens as a Weapon, Not a Decoration
- 5.3 Bargaining: Don't Accept the First Price
- FAQ: Common Questions and Classic Traps
- Q1: Why do my pets sit in my booth forever without selling?
- Q2: Why do I always feel I bought too early or missed a better deal?
- Q3: Should I care about weight and mutations at my current level?
- Q4: Should I stock up on a specific pet if I see it cheap?
- Conclusion: Replace Luck and Impulse with Rules and Patience
You'll often see this contrast:
- One player keeps a booth up for a week and sells almost nothing.
- Another casually scans the market for ten minutes, buys two pets, and quietly makes a few hundred Trade tokens.
The difference comes down to three things:
1. Whether you recognize fair price vs ridiculously cheap at a glance
2. Whether you can spot true value in a sea of random pets
3. Whether you understand that profit is created when you buy, not when you sell
In this guide, I'll break down my own approach step by step—from starting with almost no tokens, to flipping efficiently, to reading weight and mutations like a pro—so you can treat Grow a Garden's farmer's market as a reliable income machine, not a lottery.
↖ Part 1: The Core Profit Logic of Trading in Grow a Garden
Before talking about tricks, we need to fix the way you think about profit.
If you get this part wrong, every good deal you see can still end in a loss.
↖ 1.1 Profit Formula: You Earn When You Buy, Not When You Sell
For most regular players, reality looks like this:
- If you list pets too high, nearly no one buys
- If you list around average price, you're one of many, so sales are slow
- If you list slightly below average, you might sell, but profit margin is small
So real profit comes from this simple formula:
Buy low + resell at fair/normal price = stable profit
What does this mean in practice?
- If your buy price is already high, you'll struggle to profit even if you sell well
- If you only buy when the price is obviously cheap, you can profit even with mediocre selling skills
You're not trying to be a genius seller.
You're trying to be a ruthless buyer.

↖ 1.2 P Values & Average Price: Your Value Anchor
The Index average price is your first value anchor.
Think of it as your reality check:
- Don't buy above the average price (unless you truly understand weight + mutation value)
- As a beginner, only buy when the price is clearly below average
If you're not familiar with average prices yet, your trading is basically gambling.
If you are, every scan through a booth becomes a quick, rational decision instead of a guess.
↖ Part 2: Starting from 0 Tokens – Turning Pets into Your First Capital
Many players start with the same problem:
I'm new, I basically have no tokens. How do I become a trader?
The honest answer: you can't flip without capital.
So step one is simple and brutal: sell pets for cheap to get your first tokens.
↖ 2.1 Early Stage Mindset: Survive First, Optimize Later
If you're just starting out:
- You have some pets
- You have almost no tokens
- You want to start trading quickly
Your top priority isn't maximizing every pet's worth.
Your top priority is: convert inventory into tokens fast.
How to Price Your First Sales
Forget what you feel the pet is worth.
Your first sale prices should be designed to move quickly, not to be perfect.
Here's roughly how I'd price if I urgently needed tokens:
| Pet Type | Fast-Sale Price I'd Use | Why This Price Works |
|---|---|---|
| Peacock | 30 tokens | Obviously cheaper than many casual listings |
| Bald Eagle | 25–30 tokens | Sells much faster than wishful high prices |
| Lion | ~30 tokens | Decent but not greedy for a normal lion |
| Diamond Panther | 50 tokens | Looks valuable, still attractive to buyers |
| Mummy | 100 tokens | Reasonable and not over-ambitious |
Why go this low?
- Because your goal is not to squeeze every coin out of each pet right now
- Your goal is to unlock trading power—a chunk of tokens you can use to buy underpriced pets later
- If you price like those stalls that sit there for a week with no buyers, you delay your entire trading journey
↖ 2.2 Basic Rule: Claim a Booth First, Then Check Others
A subtle but expensive beginner mistake:
Entering a server and immediately running around checking everyone else's booths, leaving your own booth unclaimed.
My routine is the opposite:
1. As soon as I spawn in a server, I claim a booth first
2. I list the pets I'm ready to sell at my fast-sell prices
3. Only then do I start scanning other people's booths
The logic is straightforward:
- While you're browsing their pets, other players are doing the same
- If you have no booth up, you're just a customer
- If you claim a booth early, you have a chance to sell something passively while you hunt for deals
You want to be both buyer and seller at the same time.
↖ Part 3: After You Have Tokens – Multi-Server Sniping & Flipping
Once you have some tokens, things get interesting.
Now your main job shifts from turning pets into tokens to turning tokens into more tokens.
↖ 3.1 Single-Server Routine: A Fast, Repeatable Scan
Here's the standard routine I use whenever I join a new server:
1. Claim a booth immediately
2. List what you want to sell
3. Start checking every booth in the server
4. Use sorting to speed up your scan:
- Sort by price descending to see their best/most expensive pets first
- Sort by price ascending to see their cheapest trash—and possible mispriced gems
When you see a very cheap pet:
- If it's something you personally need: buy it
- If you don't need it but the price is ridiculously low: buy it as a flip candidate
In the example from the prompt:
A Peacock for 6 tokens is a classic you blink, you lose opportunity
These tiny profits—10 here, 20 there—stack up faster than most people expect, especially when you repeat this across many servers.
↖ 3.2 Multi-Server Loop: Use Find Sellers as a Teleport Tool
After you've scanned all booths in one server and found nothing worth buying, it's time to move.
You could randomly hop servers, but a more efficient method is:
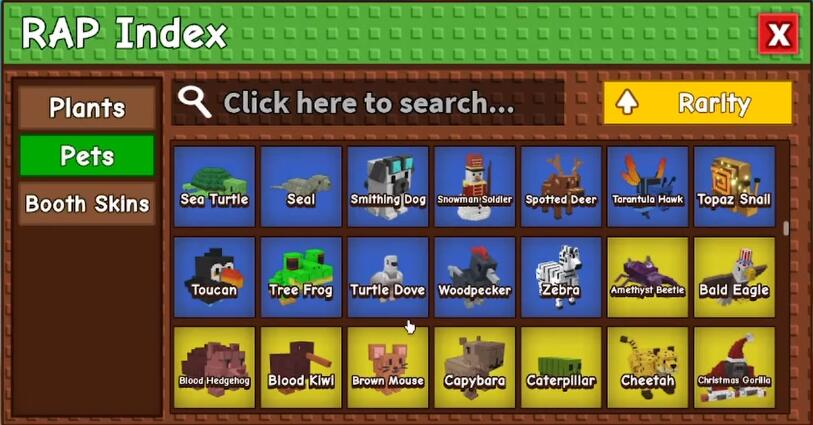
1. Open the Index
2. Select a specific pet you're interested in (e.g., Kitsune, Ruby Wits, Mimic Octopus)
3. Click Find Sellers
4. Use that to teleport into servers where that pet is being sold
This gives you two advantages:
- You land directly in servers where at least one player is selling what you want
- Sellers who list rare or specific pets often list other interesting stuff as well
Sometimes you'll get Server is full messages. That's normal—just try again or switch to another target pet.
This loop is your bread and butter:
Claim booth → scan server → use Index to hop → repeat.
↖ Part 4: Understanding Weight & Mutations – The Real Advanced Value System
Once you're comfortable with average prices, you'll start hitting a deeper question:
Why is this pet 2–3x the usual price even though it's the same species?
That's where weight (base weight / total weight) and mutations come in.
↖ 4.1 Mutations: Nightmare vs Normal
Mutations are one big reason a pet's price jumps.
From the example in the prompt:
Nightmare-mutation pets often have a much higher average price than their normal versions
For instance (illustrative logic, not exact official numbers):
| Pet | Type | Average Price (Approx) | Notes |
|---|---|---|---|
| Dilophosaurus | Normal | ~200 tokens | Baseline price |
| Dilophosaurus | Nightmare mutation | ~371 tokens | Mutation surcharge |
| Dilophosaurus | Nightmare + very heavy | Up to 600 tokens listed | Only worth it if weight is great and market supports it |
But there's a catch:
- Some players use Nightmare as an excuse to overprice
- Mutation deserves a premium, but it has limits
My approach:
1. Check the average price
2. Check the mutation
3. Check the weight
4. Only consider buying if it's at most slightly above average but with really strong stats
You want to pay extra only when those stats give real, resellable value.
↖ 4.2 Weight: Trash, Normal, Huge, Titanic
Weight is like hidden rarity. The heavier, the rarer (usually).
From the prompt, a few key hints:
- 1kg base weight → basically trash in terms of extra value
- 2kg base weight → a bit better, but still not insane
- Huge / Titanic weights → where real premiums show up
Example:
An Ox with Titanic-level weight (7kg+ at H1, meaning base weight is already huge) can be worth 100 tokens even if the species itself isn't top-tier.
Let's bring back the elephant comparison:
| Condition | Cheap Elephant (70 tokens) | Expensive Elephant (175 tokens) |
|---|---|---|
| Level | Lv 1 | Lv 100 |
| Mutation | None | Nightmare |
| Weight | 1.72 kg | 19.42 kg |
| Price | 70 tokens | 175 tokens |
| Value Judgment | Only good as cheap filler | Strong stats but a bit pricey |
For self-use:
The 175-token elephant is clearly much better
For flipping:
You must ask yourself:
Can I realistically sell this for 220–250 tokens or more?
If the answer is no, then it's not a flip; it's just an expensive personal purchase.
↖ 4.3 As a Beginner: You Can Safely Ignore Weight & Mutation
This part is important and saves a lot of mental load.
If you're new or a casual player, I recommend:
- Focus 90% on price vs average
- Treat weight & mutation as bonuses, not mandatory criteria
- As long as you buy well below average price, you can profit even if the pet's stats are mediocre
Only when:
- You have a solid pile of tokens
- You know average prices by heart
- You want to chase higher-profit deals
should you start making weight + mutation a core part of your buy decisions.
↖ Part 5: How to Find Those Insanely Cheap Pets and Make Big Profit
At this point, all roads point to one thing:
How do you consistently find extreme bargains that you can flip for big gains?
↖ 5.1 Only Do High-Confidence Trades: If You're Not Sure, Don't Buy
One of the most common reasons people lose tokens is simple:
I'm not sure if this is cheap or not, but I don't want to miss out, so I'll just buy.
If that sounds like you, set this rule for yourself:
If you're not clearly confident it's cheap, walk away.
It sounds harsh, but here's why:
- In most cases, if you keep scanning servers, you'll find better prices
- Buying maybe kind of okay deals raises your cost base
- Then when you try to resell, you realize there's almost no profit margin without overpricing
You don't have to catch every opportunity.
You just need to avoid buying into weak ones.
↖ 5.2 Treat Tokens as a Weapon, Not a Decoration
There's a mental shift you need to make:
As long as you still have tokens, you still have options.
So I personally stick to these rules:
- I don't spend tokens on decent prices
- I don't spend tokens on slightly below average prices
- I only spend on extremely cheap deals or on fair-priced pets I truly need
Using the Mimic Octopus example:
| Mimic Type | Suggested Mental Price (Approx) | Practical Takeaway |
|---|---|---|
| Normal, 1kg, random stats | 80+ tokens → skip | No real flipping potential |
| Normal, 2kg, okay for self-use | ~50 tokens → acceptable | Fine if you need it, not ideal as a flip |
| Nightmare + very heavy (e.g. 39kg) | ~300 tokens → strong | Good deal if you know the market supports higher |
If you're a user:
Buying a 2kg Mimic at 50 tokens is fine
If you're a flipper:
You should focus mainly on underpriced strong-stat Mimics, not on every mediocre one you see
↖ 5.3 Bargaining: Don't Accept the First Price
A lot of players share the same weakness: they never negotiate.
But Grow a Garden is a player-driven market.
Negotiation isn't rude—it's part of the game.
Here's how I usually approach it:
1. I find a pet I'm interested in (say, a Ruby, a Diamond Panther, or a heavy Mimic)
2. The price is okay but not amazing
3. I do not buy instantly
4. Instead, I write something like:
- 100 is a bit high, can you do 80?
- If you can do 15, I'll buy it right now.
In many cases:
- Sellers list their pets high expecting someone to bargain
- You might land somewhere in the middle: you ask 15, they want 25, you close at 20
If you buy instantly without asking, you're essentially tipping them extra tokens for no reason.
↖ FAQ: Common Questions and Classic Traps
↖ Q1: Why do my pets sit in my booth forever without selling?
Most of the time, it's one (or more) of these:
1. Your pricing is only around average or even slightly above
2. Your pet has no standout features (normal weight, no mutation, low level)
3. You assume someone will need it eventually and ignore market reality
What you can do:
If you urgently need tokens:
- Drop the price until it's obviously below average
If you're not in a hurry:
- Keep the price and accept that it may take days to sell
But don't confuse no one buys with players are blind—
Often the market is telling you: your price just isn't attractive enough.
↖ Q2: Why do I always feel I bought too early or missed a better deal?
That feeling usually comes from a combination of:
- No clear understanding of average prices
- Fear of missing out (FOMO)
To fix this:
1. Spend time first just watching the market:
- What are the typical prices for common pets?
- How often do you see very cheap listings?
2. Make a rule for yourself:
- If a price is only slightly below average → no buy
- Only buy when it's clearly underpriced or exactly what you need at a fair price
Once you have rules, your emotions calm down.
You'll second-guess yourself less, and your trades will get cleaner.
↖ Q3: Should I care about weight and mutations at my current level?
It depends on your phase:
New / low capital phase:
- Focus mainly on price vs average
- Treat weight/mutations as bonus, not as the basis for decisions
Intermediate / high capital phase:
- Weight + Nightmare mutations can produce big trades
- But mistakes are more expensive too
If you still often think I'm not sure whether this is expensive or cheap,
you're better off ignoring weight/mutation for now and just doing simple undervalue flips.
↖ Q4: Should I stock up on a specific pet if I see it cheap?
Tempting, but risky.
Unless you really understand the market, I'd advise:
- Don't heavily stack just one species
- Don't go all-in because of one good-looking price
Why?
If that pet suddenly floods the market or demand drops, you're stuck with a pile of hard-to-sell inventory
Safer approach:
- Diversify across multiple pets
- Use smaller amounts for testing flips
- Scale up only on the ones you've repeatedly proven profitable
↖ Conclusion: Replace Luck and Impulse with Rules and Patience
Grow a Garden's farmer's market looks like a casual place to wander around and click on cute pets.
Under the surface, it's a surprisingly tight little economy with its own rules.
Here are the core principles to keep in your head as you trade:
1. Capital comes first
- With 0 tokens, your job is to sell pets cheaply enough to get a working bankroll
2. Always claim your booth before browsing
- Be visible as a seller while you hunt as a buyer
3. Know the average price, and refuse maybe okay deals
- If you're unsure it's cheap, don't buy
4. Use multi-server scanning and Index Find Sellers to hunt deals
- More servers scanned = more chances to find underpriced pets
5. Treat weight and mutations as advanced layers, not beginner essentials
- Early on, price is king; later, stats decide the big wins
6. Bargain as a habit, not an exception
- Every discount you negotiate is pure extra profit in your pocket
If you follow these rules consistently, Grow a Garden trading stops being random.
You'll start to feel less like a shopper and more like a quiet, efficient market maker—someone who buys smart, sells calmly, and lets the tokens stack up over time.

Most Popular Posts
- Grow a Garden 2 Release Date Guide: Why Saturday Is the Likely Launch Window
- Grow a Garden Bizzy Bee Event: Honey Coins, Bee Eggs, Seeds, Upgrades, and Rewards
- Grow a Garden Bee Dungeon Guide: Best Wave 100 Strategy, Bee Shards, and Team Setup
- Grow A Garden Best Pet Mutations 2026: Ranked Guide for Power, Trading, and AFK Farming
- Grow a Garden Bee Stats Guide: Best Bees Ranked by Damage, HP, and DPS
- Grow a Garden Busy Bee Part 2 Guide: Royal Jelly, Best Pets, New Seeds, and Prep Strategy
Popular Category Lists
- Grow a Garden / (286)
- ARC Raiders / (262)
- CoD: Black Ops 7 / (166)
- Monopoly Go / (146)
- MLB 26 / (144)
- Star Citizen / (112)
- Steal a Brainrot / (89)
- Sailor Piece / (68)
- ARK Survival Ascended / (67)
- Diablo IV / (61)
- Forza Horizon 6 / (60)
- Blox Fruits / (60)
- CoD: BLACK OPS 6 / (55)
- Adopt Me / (53)
- Path of Exile 2 / (48)
- Monster Hunter Wilds / (46)
- Windrose / (44)
- Path of Exile / (40)
- Grow a Garden 2 / (40)
- Bee Swarm Simulator / (36)


