0
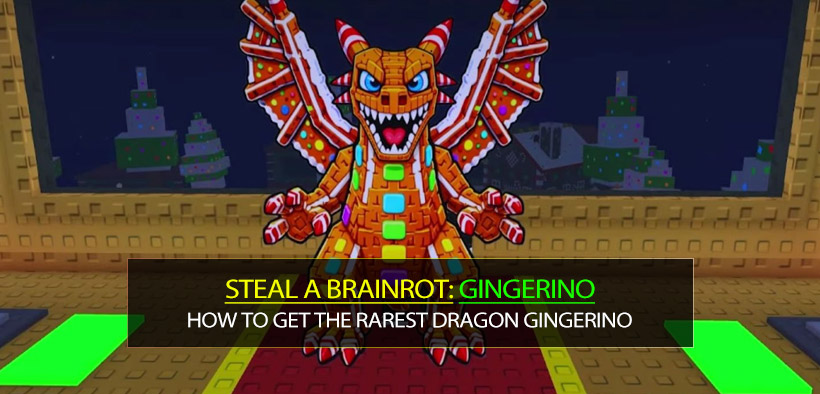
0How to Get the RAREST Dragon Gingerino Brainrots in Steal a Brainrot?
- Jordan
- Share
- Steal a Brainrot
- 01/02/26
- 902
Getting the rarest Dragon Gingerino isn't a single lucky click—it's an operations problem. The runs that look like magic usually come from tight timing, disciplined coordination, and ruthless risk control. In this guide, I'll walk you through the exact structure I use to chase top-tier Dragons (including high-value trait stacks), without relying on shady shortcuts.
- 1) What You're Really Building: A Value Engine, Not One Pet
- 2) Resources, Time Windows, and Why People Fail Here
- 3) Team Roles: I Don't Bring Friends, I Build a Crew
- 4) Execution Flow: The 5-Phase Cycle I Run Every Time
- Phase A — Reset the Field
- Phase B — Align Timing
- Phase C — Claim and Immediately Stabilize
- Phase D — Convert Output Into More Attempts
- Phase E — Stop Conditions (Most Players Ignore This)
- 5) Risk Control: The Difference Between Huge Night and Disaster Clip
- 6) Trait/Value Thinking: How I Judge Whether a Dragon Is Keep, Flip, or Build
- Practical Checklists (Copy/Paste Style)
- Pre-Run Checklist
- In-Run Callouts I Use
- FAQ
- 1) Is it really possible to get rarest Dragons without exploits?
- 2) What's the single most important improvement if I'm solo?
- 3) Why do my runs feel cursed even when I have materials?
- 4) Should I hold rare Dragons to increase value?
- 5) What's the fastest way to lose everything in one night?
- Closing
↖ 1) What You're Really Building: A Value Engine, Not One Pet
Most players think the goal is get the rare Dragon. I treat the goal as:
- Convert limited-time event windows into predictable attempts
- Protect attempts from interruptions (collisions, misclicks, bad spacing)
- Recycle output into more attempts (sell → rebuy → fuse again)
That's why my best sessions don't feel like gambling. They feel like running a factory—just with more screaming.
This means your win condition is not hit the jackpot once, it's maximize high-quality attempts per minute.
↖ 2) Resources, Time Windows, and Why People Fail Here
Before you even start, you need clarity on three things:
1. Attempt cost (how much one full fuse cycle costs you in currency + materials)
2. Attempt rate (how many cycles you can do before the event ends)
3. Failure modes (what usually ruins a cycle: clutter, spacing, desync, panic-buying)
Here's a compact prep sheet I personally use.
| Category | What I Prepare | Why It Matters | Common Failure |
|---|---|---|---|
| Materials | A full set for multiple fuses (not one try) | Keeps momentum; fewer stalls | Running out mid-window |
| Currency buffer | Enough to survive 2–3 dry cycles | Rare pulls cluster when you can keep going | Going broke after one miss |
| Inventory space | Clean slots + fast-sell path | Output must loop back into attempts | Inventory jam = lost timing |
| Comms | Simple callouts (Hold, Claim, Split, Sell) | Cuts mistakes under lag | Everyone talks, nobody acts |
If you find you're pausing to figure out what's next, then you're already leaking attempts.
↖ 3) Team Roles: I Don't Bring Friends, I Build a Crew
High-end sessions work because each person has a single job. No multitasking. No ego.
| Role | What They Do (Only This) | Best Trait | What Breaks If They Fail |
|---|---|---|---|
| Caller (me) | Timers, go/no-go decisions, spacing rules | Calm + decisive | People claim early or late |
| Buyer | Buys key spawns during windows | Fast reactions | High-value items slip away |
| Saver | Positions to prevent losses from hazards | Awareness | You lose a top roll to chaos |
| Juggler/Spacer | Keeps items centered and separated | Discipline | Clumps cause chain losses |
| Runner | Fetches missing materials from bases | Speed | Fuse cycle stalls mid-run |
Why this matters: when the runway gets crowded, everyone helps becomes no one helps. Clear ownership keeps the machine running.
↖ 4) Execution Flow: The 5-Phase Cycle I Run Every Time
I run each cycle like a checklist. It's boring on purpose. Boring scales.
↖ Phase A — Reset the Field
- Clear clutter
- Re-center the active group
- Confirm inventory space
If you notice the runway is getting crowded or visibility is dropping, then reset before claiming anything.
↖ Phase B — Align Timing
- Caller counts down
- Everyone holds until the call
- Claims happen together
This prevents half-claims where one person triggers chaos while others aren't ready.
↖ Phase C — Claim and Immediately Stabilize
- Buy/secure the priority outputs first
- Split high-value units away from the cluster
- Don't chase low-value distractions
This means you protect attempt quality before you chase extra quantity.
↖ Phase D — Convert Output Into More Attempts
- Sell what's meant to be sold
- Store what's meant to be stored
- Rebuy materials for the next fuse
I treat selling as part of the fuse, not a separate activity.
↖ Phase E — Stop Conditions (Most Players Ignore This)
You stop when:
- Event window is too short for another clean cycle
- The runway is too chaotic to stabilize
- You're dipping into your panic funds
If you find you're saying one more, one more, then you're no longer executing a system—you're chasing variance.
↖ 5) Risk Control: The Difference Between Huge Night and Disaster Clip
Rare sessions are fragile. One bad habit can erase an hour.
| Risk | What It Looks Like | My Rule | Why |
|---|---|---|---|
| Panic-buying | Buying everything that moves | Buy priorities only | Low-value buys drain currency + attention |
| Clumping | Items stack in one spot | Always keep a center lane clear | Clumps cause chain hits/losses |
| Desynced claims | People claim at different times | One call, one claim | Prevents confusion under lag |
| Overfusing | Forcing attempts when you're low | Keep a hard stop threshold | Protects future sessions |
↖ 6) Trait/Value Thinking: How I Judge Whether a Dragon Is Keep, Flip, or Build
I don't just look at rarity—I look at liquidity (how tradable it is) and upgrade potential (how well it stacks into future builds).
Here's the rubric I use:
| Tier | Keep/Flip Rule | What I Look For | What You Should Do |
|---|---|---|---|
| S | Keep unless the offer is absurd | Ultra-rare + clean stack | Hold 2–6 weeks if the market is rising |
| A | Flip if you can fund 2+ more cycles | High demand traits | Convert into attempts (compounding wins) |
| B | Flip fast | Medium demand | Sell to stabilize bankroll |
| C | Ignore unless it completes a set | Low demand | Don't waste focus during event windows |
If you find your inventory filling with cool but unsellable rolls, then you're losing the compounding game.
↖ Practical Checklists (Copy/Paste Style)
↖ Pre-Run Checklist
- Currency buffer ready (minimum: enough for multiple cycles)
- Materials staged across bases (no single point of failure)
- Inventory cleared + fast-sell route planned
- Roles assigned + callouts agreed
- One reset plan if the runway becomes chaos
↖ In-Run Callouts I Use
- Hold = nobody claims/buys
- Claim = everyone claims now
- Split = separate the high-value unit immediately
- Sell = convert output into currency now
- Reset = stop everything and clear the field
↖ FAQ
↖ 1) Is it really possible to get rarest Dragons without exploits?
Yes—but the honest answer is: you're not beating RNG, you're increasing high-quality attempts. When you run more clean cycles per event window, rare pulls stop being mythical and start being statistical.
↖ 2) What's the single most important improvement if I'm solo?
Stop multitasking. If you're solo, simulate roles with rules:
- Prioritize securing the best output first
- Reset often
- Hard-stop when your buffer is threatened
↖ 3) Why do my runs feel cursed even when I have materials?
Because materials don't equal attempts. Attempts require:
- timing discipline
- spacing control
- inventory flow
If any one fails, your attempt rate collapses.
↖ 4) Should I hold rare Dragons to increase value?
If the market is active and trading is liquid, holding can work. But I only hold when:
- I can still afford future cycles
- demand is stable (not a one-day hype spike)
Otherwise I flip and compound.
↖ 5) What's the fastest way to lose everything in one night?
Panic-buying + no stop conditions. The moment you start buying just in case, you're paying money to create chaos.
↖ Closing
My best rare-Dragon sessions don't come from hype—they come from a repeatable workflow: prepare for multiple cycles, assign roles, synchronize claims, control spacing, and recycle outputs into more attempts. When you treat the event window like a production line, the rarest Dragon stops being a fairy tale and becomes a result you can chase with discipline.

Most Popular Posts
- Steal A Brainrot Cyber Update Guide: Best Craft Recipes, Rainbow Chances, Traits, and Profit Tips
- How to Get Every Steal a Brainrot Cyber Craft Brainrots?
- How to Unlock DUGGY BROS in Steal a Brainrot: Best Red Carpet and Crafting Strategy
- Steal a Brainrot John Pork Guide: How to Get Him, Stats, Trait, and Best Trading Tips
- Steal A Brainrot ARCADRAGON Trait Farming Guide: Best Traits, Rituals, Admin Abuse Strategy
- Steal a Brainrot Summer Update 2 Base Unlock, Phantom Mutation, Octo Lucky Blocks, and Best Brainrots
Popular Category Lists
- Grow a Garden / (286)
- ARC Raiders / (262)
- CoD: Black Ops 7 / (166)
- Monopoly Go / (146)
- MLB 26 / (145)
- Star Citizen / (112)
- Steal a Brainrot / (89)
- Sailor Piece / (68)
- ARK Survival Ascended / (67)
- Diablo IV / (61)
- Forza Horizon 6 / (60)
- Blox Fruits / (60)
- CoD: BLACK OPS 6 / (55)
- Adopt Me / (53)
- Path of Exile 2 / (48)
- Monster Hunter Wilds / (46)
- Windrose / (44)
- Path of Exile / (40)
- Grow a Garden 2 / (40)
- Bee Swarm Simulator / (36)