



 0
0GGWTB Editorial Team - Lecomte
Created: Aug 9,2026 | SpiritVale

GGWTB Editorial Team - Lecomte
Throw shield. Pack dies. Repeat. That's the dream.

Getting there takes stacking splash + chains + ranged damage + reflect damage so Shield Throw does the work while you hold a button and walk. This is the setup we've tested, refined, and confirmed clears Spiritvale without babysitting your character.
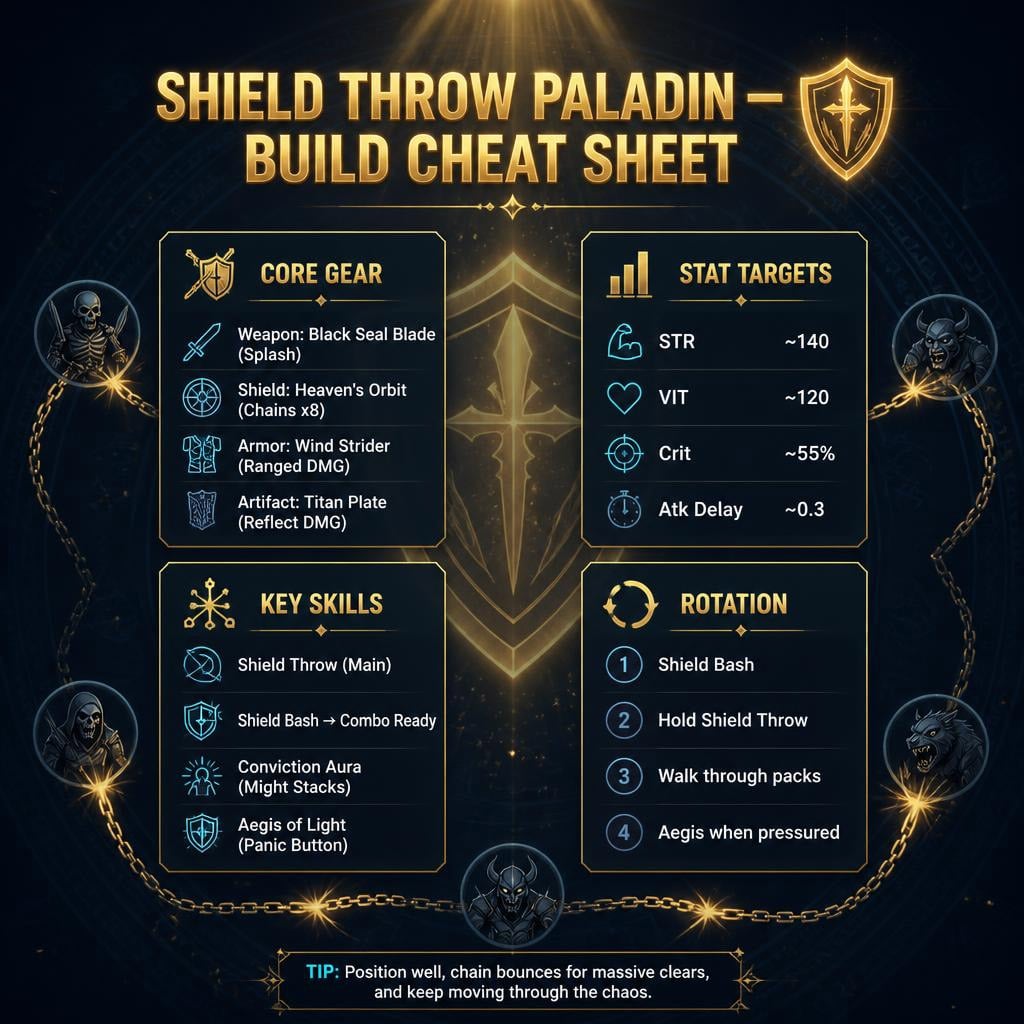
Shield Throw multiplies across separate systems. Dump everything into one stat and you hit a wall. Layer them and damage compounds.
Stack these:
More chains meant more comfort than raw single-hit damage in our testing. A pack-clearing throw beats a bigger single-target number every time.
This is non-negotiable. Here's why:
| Benefit | Effect |
|---|---|
| Atk speed/refine | Smoother throw rhythm |
| Crit/refine | Consistent damage |
| High attack | Direct Shield Throw scaling |
| Lv5 Berserk | +3 skill splash |
| Spear Mastery synergy | Bonus scaling |
Ignore the Berserk-2H flavor text. You're here for splash. Splash turns Shield Throw from single-target tossing into wide-area clearing. This is the single biggest comfort upgrade in the build.
Heaven's Orbit is mandatory. It gives:
Slot Sapphire Merman Card and you're pushing ~8 chains. Combine that with Black Seal Blade splash and one throw clears a corridor. Zero aiming required.
| Slot | Item + Card | Gives |
|---|---|---|
| Helmet | Paladin Crest + Night Lord | STR, VIT, DEF, MDEF |
| Face | Iron Shade Helm + Night Drake | Flat DEF, crit damage |
| Utility | Insect Carapace + Knight | 5% DEF, 15% reflect dmg, crit dmg |
That's why Paladin Crest isn't just a tank piece — it's a damage piece.
Wind Strider trades raw tankiness for ranged damage, and ranged damage is a separate multiplier on Shield Throw. Dead enemies can't hit you back — that's the real survivability play here.
| Piece | Card | Effect |
|---|---|---|
| Chest | Orc Reaver | +30% reflect damage |
| Shoes | Gale | Mana recovery (offsets Night Lord penalty) |
| Pants | Violet Octopus | +20% ranged damage |
Set bonus adds another ~15% ranged damage on top.
Titan Plate set — full set gives 5% DEF / 10% reflect damage. Straightforward defense-into-damage conversion.
Gem priority:
| Gem | Priority | Why |
|---|---|---|
| Shield Throw Gem | Highest | Direct skill scaling — upgrade this first, no debate |
| Razor Gem | High | Big flat damage jump |
| Spike Gem | High, pricey | Late-game min-max |
| Bastion Gem | Medium-High | Feeling squishy? Grab this |
| Stat | Target | Why |
|---|---|---|
| STR | ~140 | Attack + Shield Throw scaling |
| VIT | ~120 | HP, defense, reflect scaling |
| AGI | ~0.3 delay | Smooth throw cadence |
| LUK | ~55% crit | Consistent crit output |
Adjust on the fly:
Max these first:
Skip: Two-Handed Parry. Not relevant here.
Solo Conviction Aura caps around 11-12 Might stacks — still worth maxing even without a group.
1. Buff up
2. Shield Bash first — triggers Combo Ready, skips this and your damage tanks
3. Hold/spam Shield Throw
4. Walk through packs, let chains + splash clean up
5. Aegis of Light when HP drops
Controller strongly recommended — auto-targeting lets you hold Shield Throw and just walk. Field-tested output: 35k-37k per throw with this scaling stack active. Your mileage varies by refine/cards/stats.
Skip the trigger-locking macro tricks — check your platform's rules first. Normal controller input is enough to feel lazy.
| Stage | Priority |
|---|---|
| Early | Heaven's Orbit, Shield Throw Gem, basic defense |
| Mid | Black Seal Blade, Sapphire Merman, Wind Strider |
| Advanced | Orc Reaver, Violet Octopus, Archer Beads |
| Min-Max | Titan Plate refines, Spike Gem, high-refine weapon |
Biggest single power spike: chains + splash combo. Get that first.
| Problem | Fix |
|---|---|
| Damage feels low | Missing Combo Ready — Shield Bash first |
| Clear speed weak | Check Heaven's Orbit / Sapphire Merman / Black Seal Blade |
| Mana dies fast | Gale Card, more mana recovery |
| Feels clunky | AGI, Arcane Gloves, Bomb Card |
| Dying in packs | More VIT, Bastion Gem, Titan Plate |
| Crits inconsistent | More LUK / crit gear |
Yes. It's the only easy source of skill splash via Berserk. Without it the build still works, but clears feel flat.
Ranged damage is a multiplier, not a flat add. Kill faster = take less damage overall. If survival's an issue, add VIT/Bastion Gem before ditching the set.
Very. It's the difference between shield bounces once and shield clears the corridor. Pairs directly with Black Seal Blade splash.
Heaven's Orbit → Shield Throw Gem → Black Seal Blade → Sapphire Merman → Wind Strider. Everything else is multiplier icing.
Reflect damage formula uses both attack and defense. Pure STR or pure VIT leaves half the formula on the table.
Black Seal Blade for splash. Heaven's Orbit for chains. Wind Strider for ranged multiplier. Titan Plate for reflect conversion. Shield Bash before every engage.
When damage feels off, check Combo Ready → chains → splash → ranged damage in that order before you touch your gear. Get the layers stacked right and Spiritvale becomes exactly what this build promises: smooth, safe, and satisfyingly lazy.


Gunslinger Launcher build guide for Spiritvale. Explosive Grenade rotation, Launcher Boost mechanics, stats, gear, and MP sustain for fast AoE farming.

Real-tested Spiritvale Weaver builds. Wind for leveling, Water for cheap swaps, Fire and Holy for endgame. Gear, gems, grimoires — no fluff.

Fast Rogue leveling route, Blade Dance transition, and full Shinobi Flash Step vs Auto Caster builds for Spiritvale. Gear, stats, skills, farming spots — no fluff.

Level Scout to Gunslinger fast in Spiritvale. Stat builds, skill order, farming routes, gear priority, and pistol/shotgun/rifle rotations that actually work.

Complete Spiritvale Priest guide for Acolyte leveling, Job Level 50 progression, best stats, skills, weapons, artifacts, and Priest builds for support, farming, and battle play.

Spiritvale class tier list for 2026 covering the best classes for leveling, farming, solo bossing, support, and endgame. Includes S-tier picks, beginner recommendations, and classes to avoid.

We use cookies to ensure website functionality and enhance your experience. Click "Accept All" to consent, or "Customize" to manage your preferences. See our Privacy Policy.