Reserve the five document types below before selling valuables, then check your current 3D Printer requirements. For Weapon Manuals, we prioritize green military crates, weapon lockers, and safes rather than searching every container indiscriminately.
CoD MW4 DMZ Items to Keep Before Selling
Selling an upgrade ingredient turns a successful extraction into another search job. We use five copies of each document as a provisional buffer—not a verified total for every FOB upgrade tier.
Start with this keep-list.
| Item | Suggested Reserve | Reason to Keep | When to Sell |
|---|
| Nuclear Program Files | 5 | Reported FOB upgrade ingredient | After checking remaining recipe needs |
| Degraded Execution Footage | 5 | Reported MIA Recovery Discount ingredient | When confirmed surplus |
| Regional Combat Notes | 5 | Reported MIA Recovery Discount ingredient | After checking upcoming visible tiers |
| Ballistic Flight Logs | 5 | Reported MIA Recovery Discount ingredient | When the remaining requirement is covered |
| Infantry Invasion Plans | 5 | Additional reported FOB upgrade ingredient | After checking its current recipe use |
Keep the buffer while requirements are unclear, but do not hoard duplicates indefinitely once their remaining uses are accounted for.
We checked the October 21 update from Blaine Smith, which lists all five documents and recommends at least five of each. It does not provide a complete tier-by-tier recipe or establish that all five serve the same upgrade.
Five Is a Buffer, Not a Lifetime Requirement
If your stash is crowded, protect the quantity your remaining recipes require and sell confirmed excess. Do not assume completing one upgrade makes every copy disposable; another visible recipe may use the same material.
The 3D Printer's material-location hints are also useful when one ingredient becomes your bottleneck. We checked the official FOB guide, which specifically recommends using those hints to plan targeted searches.
Search for the missing ingredient—not more random valuables.
Weapon Manual Farming: Search the Right Containers
Opening residential containers wastes time if your only objective is a manual. We target the container types identified in GameRant's October 21 Weapon Manual guide, which describes random drops, not a guaranteed farming result.
Use this priority order when comparing available searches.
| Container or Area | Manual-Farming Value | Our Recommendation |
|---|
| Green military crates | Documented manual source | Search when accessible |
| Weapon lockers | Documented manual source | Prioritize during building sweeps |
| Safes | Documented manual source | Check opening requirements before committing |
| Lower-threat military areas | Manuals are reported here too | Use when high-threat routes exceed your equipment |
| Other containers | Not established as manual sources by this guide | Search for other needed supplies, not manual efficiency |
Choose accessible military containers over a dangerous detour justified only by a high-threat marker.
A Manual and a Weapon Solve Different Problems
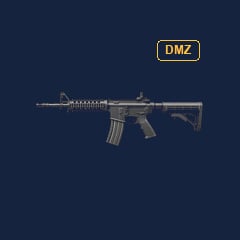
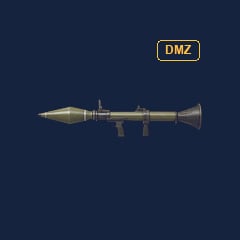
We checked the official Gunsmith description against the manual guide: extracting Weapon Manuals expands the weapons you can build or purchase at the FOB. Extracting a weapon gives you that usable weapon; it is not the same progression result.
If you need a replacement gun, a looted weapon may solve the immediate problem. If you need permanent Gunsmith access, keep pursuing the corresponding manual.
Stop Treating Repeated Attempts as a Guarantee
Found one within three runs does not mean the fourth run must contain one. We have no verified drop rate that supports a fixed attempt limit.
Once you find the target manual, shift from searching to extracting. That protects the progression item instead of exposing it to another optional fight.
Solo Loot Routes: Choose a Route You Can Abandon
A route is unsuitable if its entry method works but its exit depends on surviving a fight you cannot afford. We compare these spots by access, relevant containers, and abandonment conditions, not unsupported loot rankings.
Use the table to choose a nearby opportunity.
| Route | Access Described | Search Focus | When We Would Skip It |
|---|
| Iron Citadel perimeter | Mission deployment and reported wall gap | Military crates, lockers, safes | Approach is occupied or extraction options are poor |
| River Heights compound | Reported vehicle-assisted pole climb | Interior containers, rooftop safes, Apartment B key | Climb or return route is unclear |
| Rice Mill room | Reported pipe, roof ledge, and window entry | Accessible room containers | Window entry or exit cannot be established |
| Train | Board accessible carriages | Military containers and supplies | Boarding requires an exposed chase |
| Trams | Board an accessible tram | Nearby supplies | They divert you from a safer objective |
Take the nearest suitable route; do not cross the map merely because another location has a louder reputation.
Iron Citadel: Separate Looting From Mission Completion
If Operation Iron Citadel is available, the reported farming approach follows the perimeter through a wall gap and searches three nearby buildings.
1. Check available extraction options before entering the area.
2. Locate the reported gap without committing to unnecessary combat.
3. Search relevant containers in accessible buildings.
4. Leave after securing your target if extraction remains viable.
This is a loot attempt, not evidence that the mission objectives are complete. Do not enter with inadequate protection simply to make a possible death cheaper; recovery supplies and armor must suit the approach you actually face.
River Heights and Rice Mill: Confirm Access Before Committing
The River Heights route describes using a vehicle to reach climbing poles, then searching the compound and looking for the Apartment B key. If found, that key extends the route into the neighboring building; accessible rooftop safes deserve a check.
We do not prescribe a vehicle class because no reliable height comparison establishes which models work.
At Rice Mill, the described route climbs an exterior pipe, reaches a roof ledge, and enters through a window. If you cannot establish how to leave, do not drop into the room. General official guidance about alternate entrances does not verify every specific window route.
Train and Trams: Board Opportunistically
If the train is nearby and boarding is practical, inspect accessible carriages. If reaching it requires an exposed chase, change targets.
There is no verified 45-second cutoff, 100-meter rule, or guaranteed empty-crate time. The useful trigger is what you can observe: occupied carriages, stripped containers, hostile attention, or an approach with inadequate cover.
When to Abandon a Farming Run
A found manual changes the value of every subsequent decision. We treat the trip out as the remaining objective rather than adding another building because it is nearby.
The official DMZ overview confirms that successful extraction carries recovered gear into future deployments, while failing to leave can cost those resources.
Use these triggers instead of arbitrary distance limits.
| Trigger | Action | Reason |
|---|
| Target manual secured | Plan a viable extraction | Your main objective is already achieved |
| Needed upgrade ingredient secured | Reassess optional searches | The next recipe may now be funded |
| Entry or exit blocked | Change route before committing | Loot access is not an escape plan |
| Supplies no longer support the route | Shorten the run | A longer sweep adds exposure without fixing readiness |
| Extraction area threatened | Reassess available alternatives | The nearest marker is not automatically the safest choice |
Leave when the objective is secured, but do not rush blindly into a compromised extraction.
GGWTB's proposed DMZ service lets you order specific items and arrange an Activision ID group handoff. If you need a backpack, weapon, key, or supplies, confirm availability, specifications, price, and delivery terms before paying.
Choose Items for Your Next Deployment
Match your purchase to a clear loadout need.
| Category | Purpose | Check Before Buying |
|---|
| Backpacks | Carry more loot | Model and capacity |
| Weapons | Replace your weapon | Weapon, attachments, condition where applicable |
| Keys | Access specific locations | Destination and remaining uses where applicable |
| Plate Carriers, Gear | Improve protection | Variant and included equipment |
| Ingredients | Complete recipes | Exact name and quantity |
| Consumables | Restock supplies | Type and quantity |
| Field Upgrades, Fire Support | Add combat support | Item and restrictions |
| Lethals, Tacticals | Add tactical options | Type and quantity |
Buy one clearly needed item before considering a larger order.
Receiving a weapon does not automatically provide permanent Gunsmith access; Weapon Manuals serve that separate progression purpose.
Why Consider GGWTB?
A targeted order offers an alternative to repeated farming. We judge its value by the exact item, final total, and agreed delivery window—not an unsupported lowest-price claim.
Compare identical variants and quantities. Confirm stock and failed-delivery policies before checkout.
How to Buy
Follow these three steps to keep the order clear.
1. Select: Confirm the item, variant, quantity, stock, and final price.
2. Arrange: Provide your complete Activision ID and agree on platform and delivery timing. Never share passwords or authentication codes.
3. Verify: Inspect the transferred items and complete any agreed extraction or retention step before closing the order.
GGWTB is a third-party seller, not an official Call of Duty storefront. Review applicable game rules; paid item trading is not risk-free.
FAQ (Frequently Asked Questions)
How are the items delivered?
The described method uses an Activision ID group invitation followed by an in-game handoff. Confirm timing and retention requirements before paying.
Do you need to share your password?
No password is required by the described delivery method. Keep authentication and recovery codes private.
Are the items guaranteed cheapest?
No verified lowest-price guarantee is established. Compare matching specifications and final totals.
What happens if delivery fails?
Your options depend on the seller's agreed replacement or refund policy. Confirm those terms before payment and retain your order reference.
What is the best first order?
Start with one precisely specified item. Verify successful receipt and retention before placing a larger order.
Which CoD MW4 DMZ items should we keep instead of selling?
Keep Nuclear Program Files, Degraded Execution Footage, Regional Combat Notes, Ballistic Flight Logs, and Infantry Invasion Plans until you check their recipe uses. Five of each is a community-recommended buffer, not a verified total for every upgrade tier.
Where do Weapon Manuals drop in MW4 DMZ?
Weapon Manuals are documented in green military crates, weapon lockers, and safes. We prioritize those containers; lower-threat military areas are an alternative when your equipment does not support a high-threat sweep.
Is Iron Citadel a guaranteed Weapon Manual farm?
No guaranteed manual drop is established for Iron Citadel. Its reported route offers suitable containers, but random loot means an unsuccessful attempt does not prove the route is broken.
Can we loot Iron Citadel without finishing the mission?
The reported farming method searches nearby buildings and extracts without completing the full mission sequence. Check that the mission and extraction options are available, and do not confuse retained loot with completed objectives.
Should we sell extra documents after finishing MIA Recovery Discount?
Sell only copies that are surplus to your remaining recipe requirements. Check other visible FOB upgrades first, especially for Infantry Invasion Plans, whose precise upgrade role is not established by the five-item reminder.


 0