0
0 Created: Aug 27,2026 | ARC Raiders
ARC Raiders Arpeggio Weapon Guide: Best Attachments, ARC Matchups, and Ammo Tips

The Arpeggio is a top-tier PvE weapon when shots stay on weak points. It deletes flying ARC, strips leg armor quickly, and disables heavy targets with sustained fire.
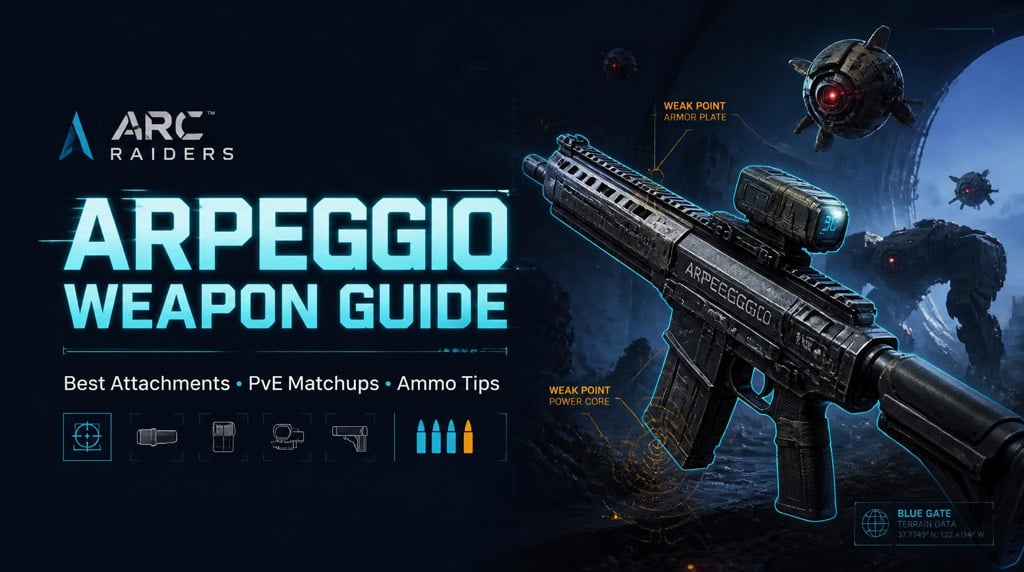
Its weakness is simple: ammo disappears fast. Build for stability, choose one component, and stop firing as soon as it breaks.
- Arpeggio Weapon Overview
- Best Arpeggio Attachments
- Best Arpeggio PvE Build
- Stable Stock vs Lightweight Stock
- Avoid the Kinetic Converter
- Arpeggio PvE Performance and ARC Matchups
- Small Flying ARC: Wasp, Firefly, and Comet
- Wasp
- Firefly
- Comet
- Arpeggio vs Bombardier
- Best Bombardier Strategy
- Arpeggio vs Bastion
- How to Kill a Bastion Efficiently
- Arpeggio vs Rocketeer
- Arpeggio vs Matriarch-Type Targets
- Arpeggio Ammo Management
- Five Rules That Save Ammo
- Arpeggio Durability and Raid Preparation
- Pre-Raid Checklist
- Arpeggio vs Bettina and Renegade
- Best Arpeggio Playstyle
- Ideal Combat Loop
- Do This, Not That
- FAQ
- Is the Arpeggio good in ARC Raiders?
- What are the best attachments for the Arpeggio?
- Should I use Stable Stock or Lightweight Stock?
- How quickly can the Arpeggio break Bastion and Rocketeer components?
- What is the biggest mistake when using the Arpeggio?
- Summary
Arpeggio Weapon Overview
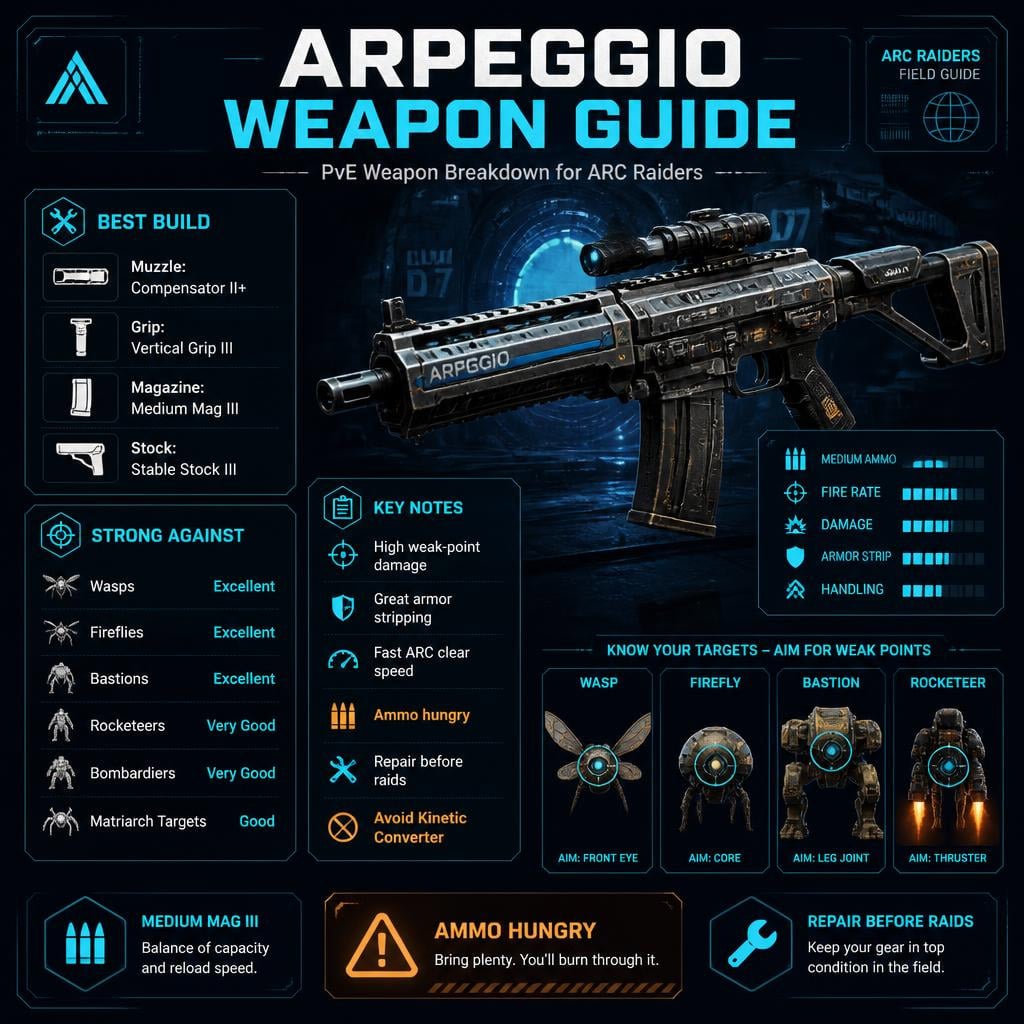
The Arpeggio rewards controlled aggression. It performs best against exposed legs, wings, thrusters, and armor plates.
| Category | Rating | Field Performance |
|---|---|---|
| Small ARC damage | Excellent | Deletes Wasps and Fireflies |
| Armored ARC damage | Very strong | Breaks plates and legs quickly |
| Weak-point damage | Excellent | Strong sustained component pressure |
| Ammo efficiency | Poor–medium | Overfiring drains reserves |
| Recoil control | Build-dependent | Stability attachments matter |
| PvE reliability | High | Effective against most tested ARC |
| PvP performance | Not covered | This guide focuses on PvE |
Bottom line: the Arpeggio has excellent PvE damage, but poor trigger discipline turns it into an expensive paperweight.
Best Arpeggio Attachments
The best Arpeggio build improves recoil control, magazine capacity, and sustained accuracy. Raw handling matters less than keeping every round on one weak point.
Best Arpeggio PvE Build
| Slot | Recommended Attachment | Purpose |
|---|---|---|
| Muzzle | Compensator II or higher | Controls sustained recoil |
| Grip | Vertical Grip III | Improves weak-point tracking |
| Magazine | Medium Magazine III | Helps finish armor breaks |
| Stock | Stable Stock III | Best sustained-fire control |
This is the default build for Bastions, Bombardiers, Rocketeers, and Matriarch-type targets.
Stable Stock vs Lightweight Stock
| Stock | Best Use | Trade-Off |
|---|---|---|
| Stable Stock III | Heavy ARC and component breaks | Slower handling |
| Lightweight Stock | Flying ARC and faster reactions | Less stable under sustained fire |
Use the Stable Stock for serious PvE runs. Heavy ARC fights are won by holding the reticle on one component—not by aiming a fraction faster.
The Lightweight Stock remains usable for mobile play or small flying targets.
Avoid the Kinetic Converter
Do not use the Kinetic Converter on the Arpeggio.
In practical testing, it produced no meaningful performance gain. Use that slot or loadout investment on attachments that directly improve control and consistency.
Arpeggio PvE Performance and ARC Matchups
The Arpeggio is strongest when an enemy has a clear, exposed component. Results vary with distance, angle, attachment tier, and missed shots, so treat magazine counts as practical estimates rather than fixed breakpoints.
| ARC Enemy | Performance | Observed Result | Priority Target |
|---|---|---|---|
| Wasp | Excellent | Very fast kill | Center mass |
| Firefly | Excellent | Very fast kill | Wings |
| Comet | Very good | Fast with proper lead | Core or movement path |
| Bombardier | Very good | Rapid armor stripping | Legs |
| Bastion | Excellent | Leg break near one clean magazine | One leg |
| Rocketeer | Very good | Thruster near 1.5 magazines | Thruster |
| Sentry | Good | Fast with focused fire | Exposed weak point |
| Matriarch-type target | Good–very good | Leg near 2–2.5 magazines | Legs |
The pattern is consistent: clean angle, one weak point, controlled magazine.
Small Flying ARC: Wasp, Firefly, and Comet
The Arpeggio clears aerial pressure quickly. That makes it valuable when flying ARC interrupts looting, positioning, or a larger fight.
Wasp
- Aim at center mass.
- Use a short burst.
- Release the trigger as soon as it starts falling.
Wasps die quickly enough that overfiring often wastes more ammunition than the kill requires.
Firefly
- Prioritize the wings.
- Track smoothly instead of spraying across the body.
- Avoid dumping the rest of the magazine into a disabled target.
Comet
- Lead the target slightly at range.
- Correct your aim before increasing fire.
- Do not panic-spray when shots begin trailing behind it.
The Arpeggio has enough damage to kill Comets quickly. Tracking—not raw fire volume—is the deciding factor.
Arpeggio vs Bombardier
Bombardiers expose the Arpeggio's best and worst traits. It can strip leg armor rapidly, but poor visibility burns ammunition at an ugly rate.
| Target Area | Observed Performance | Practical Result |
|---|---|---|
| Leg armor | Stripped quickly | Strong armor damage |
| Full leg | Around 1.5 magazines | Competitive heavy-ARC damage |
| Partially covered leg | Inefficient | Misses sharply increase ammo use |
Best Bombardier Strategy
1. Reposition until the leg is fully visible.
2. Commit fire to one leg.
3. Stop shooting if terrain blocks the component.
4. Reload behind cover.
5. Repeat only from a clean angle.
Do not force shots through bad terrain. Waiting a few seconds for a better angle can save an entire magazine.
Arpeggio vs Bastion
The Bastion is one of the Arpeggio's strongest matchups. Accurate sustained fire can strip front leg armor in roughly half a magazine and break the full leg in about one clean magazine.
| Target | Approximate Ammo Use | Notes |
|---|---|---|
| Front leg armor | Around half a magazine | Requires steady tracking |
| Full leg break | Around one magazine | Favorable angle and clean hits |
| Multiple legs | Ammo-heavy | Avoid splitting damage |
| Full encounter | Manageable | Cover is mandatory |
How to Kill a Bastion Efficiently
1. Secure cover before firing.
2. Pick one leg.
3. Keep every burst on that leg.
4. Break line of sight during reloads.
5. Stop firing once the break animation starts.
Doors, walls, and hard corners are ideal. If your shield breaks early, reset the fight instead of chasing the final few hits.
The Arpeggio kills Bastions quickly. It does not make greedy positioning safe.
Arpeggio vs Rocketeer
The thruster is the priority target. With steady tracking, the Arpeggio can destroy it in roughly 1.5 magazines.
| Target | Efficiency | Recommended Action |
|---|---|---|
| Thruster | High | Focus whenever exposed |
| General body | Lower | Shoot only when the thruster is unavailable |
| Staggered component | Very high | Continue focused pressure |
Do not spread shots across the chassis. Breaking the thruster reduces the Rocketeer's mobility and makes the rest of the encounter easier to control.
Arpeggio vs Matriarch-Type Targets
The Arpeggio remains effective against Matriarch-type enemies, but this is where its ammo problem becomes serious.
A leg took approximately two to two-and-a-half magazines in testing.
| Attack Sequence | Expected Result |
|---|---|
| First magazine | Significant leg damage |
| Second magazine | Near break with good accuracy |
| Additional half magazine | Likely leg break |
This is solid damage for a durable target. It is not cheap.
Use the Arpeggio to force a component break, create a core opportunity, and reposition. Do not start a long Matriarch encounter with a light ammo reserve.
Arpeggio Ammo Management
Ammo economy is the weapon's main weakness. Its high fire rate encourages overfiring, especially when targets are moving or partially covered.
| Encounter | Ammo Risk | Best Response |
|---|---|---|
| Wasps and Fireflies | Low–medium | Use short bursts |
| Bastions | Medium–high | Commit to one leg |
| Bombardiers | High | Wait for clean visibility |
| Rocketeers | Medium | Focus the thruster |
| Matriarch targets | Very high | Carry extra ammo and a backup |
Five Rules That Save Ammo
- Aim before firing. Do not correct a bad angle with more bullets.
- Focus one component. Split damage wastes the Arpeggio's pressure.
- Release the trigger early. Targets often die before the visual reaction finishes.
- Carry a backup weapon. Use it for low-value enemies.
- Skip unnecessary fights. Save Arpeggio ammunition for heavy ARC and extraction.
If every small enemy costs a reload, the problem is not the magazine size. It is overfiring.
Arpeggio Durability and Raid Preparation
Repair the Arpeggio before a heavy PvE run. A test beginning near 70 durability showed how quickly extended engagements can wear the weapon down.
Pre-Raid Checklist
- Repair the Arpeggio to full durability.
- Check the condition of its attachments.
- Carry extra ammunition.
- Bring a secondary weapon for small targets.
- Set an extraction threshold before durability becomes risky.
Saving a small repair cost is not worth compromising an expensive heavy-ARC run.
Arpeggio vs Bettina and Renegade
The Arpeggio competes closely with the Bettina in practical PvE performance. Both deliver strong ARC damage. Both can destroy an ammo reserve.
| Weapon | Main Strength | Main Weakness | Best Role |
|---|---|---|---|
| Arpeggio | Fast component damage | High ammo use | Weak points and armor breaks |
| Bettina | Reliable heavy PvE damage | High ammo use | General heavy-ARC hunting |
| Renegade | Alternative handling profile | Less explosive in some matchups | Build-dependent mixed use |
Choose the Arpeggio when you value rapid weak-point pressure and can control sustained recoil. Bettina users should find its PvE role familiar, although the handling and attachment priorities differ.
Best Arpeggio Playstyle
The Arpeggio works best with controlled aggression. Take the angle, commit the magazine, then return to cover.
Ideal Combat Loop
1. Identify the most valuable weak point.
2. Move until the entire component is visible.
3. Fire one controlled burst or magazine.
4. Break line of sight to reload.
5. Re-engage only if the component survives.
Do This, Not That
| Do This | Avoid This |
|---|---|
| Focus one weak point | Spread damage across armor plates |
| Reload behind hard cover | Reload in the open |
| Carry extra ammunition | Enter with minimum reserves |
| Repair before heavy hunts | Start with low durability |
| Build for stability | Stack handling at the cost of control |
| Burst small targets | Hold the trigger after the kill |
Accuracy makes the Arpeggio efficient. Missed shots make it difficult to justify.
FAQ
Is the Arpeggio good in ARC Raiders?
Yes. The Arpeggio is a strong PvE weapon against flying ARC, armored targets, and enemies with exposed components. Its main weakness is heavy ammo consumption.
What are the best attachments for the Arpeggio?
Use Compensator II or higher, Vertical Grip III, Medium Magazine III, and Stable Stock III. This setup improves recoil control, magazine consistency, and weak-point tracking.
Should I use Stable Stock or Lightweight Stock?
Use Stable Stock III for Bastions, Bombardiers, Rocketeers, and other heavy ARC. Choose the Lightweight Stock only when faster ADS and mobile handling matter more than sustained control.
How quickly can the Arpeggio break Bastion and Rocketeer components?
Under favorable testing conditions, it can break a Bastion leg in about one controlled magazine and a Rocketeer thruster in roughly 1.5 magazines. Distance, accuracy, angle, and attachment tier affect these estimates.
What is the biggest mistake when using the Arpeggio?
Spraying without a clear weak-point target. Choose one component, wait for a clean angle, and stop firing once it breaks. Careless fire destroys the weapon's ammo efficiency.
Summary
The Arpeggio is one of ARC Raiders' strongest PvE weak-point weapons. It deletes small flying ARC, strips Bombardier armor, breaks Bastion legs quickly, and disables Rocketeer thrusters with focused fire.
Its main limitation is ammo economy. Carry extra rounds, use a secondary weapon for low-value targets, and avoid spraying blocked or low-value body sections.
The best general PvE setup is:
| Slot | Best Attachment |
|---|---|
| Muzzle | Compensator II or higher |
| Grip | Vertical Grip III |
| Magazine | Medium Magazine III |
| Stock | Stable Stock III |
Repair it before deployment. Ignore the Kinetic Converter. Focus one weak point at a time.
Used with discipline, the Arpeggio is not merely viable—it is a reliable heavy-ARC killer.

Most Popular Posts
- ARC Raiders Update 1.42: Phantom Targets Farming Guide (Glitched Wasps, Rewards, Regional Conditions)
- ARC Raiders Hullcracker Blueprints: Fastest Way to Complete The Major's Footlocker
- ARC Raiders Best Pop Trigger Strategy: Fast Phantom Targets Damage Guide
- ARC Raiders Subway Skin Guide: Unlock the Subterranean Outfit
- ARC Raiders Spaceport Open Containers Guide: 19K+ Solo Trial Route
- ARC Raiders Looting Mk. 3 Survivor Blueprint Guide: Best Blue Gate Route and Drop Locations
Popular Category Lists
- ARC Raiders / (342)
- Grow a Garden / (292)
- CoD: Black Ops 7 / (167)
- Star Citizen / (160)
- MLB 26 / (159)
- Monopoly Go / (152)
- ARK Survival Ascended / (125)
- Steal a Brainrot / (98)
- Blox Fruits / (74)
- Adopt Me / (73)
- Forza Horizon 6 / (72)
- Sailor Piece / (68)
- Grow a Garden 2 / (68)
- Diablo IV / (62)
- CoD: BLACK OPS 6 / (55)
- Path of Exile 2 / (48)
- Monster Hunter Wilds / (46)
- Aion 2 / (45)
- Windrose / (44)
- Donut SMP / (41)