0
0 Created: Apr 18,2026 | ARC Raiders
ARC Raiders Best Loot Runs: Stella Montas Guide to Reach 3 Million Coins

If you're trying to hit 3 million Coins fast in ARC Raiders, Stella Montis is one of the best maps to farm right now. The reason is simple: it gives us a strong mix of high-value loot, dense containers, blueprints, and crafting materials without forcing long, inefficient rotations.
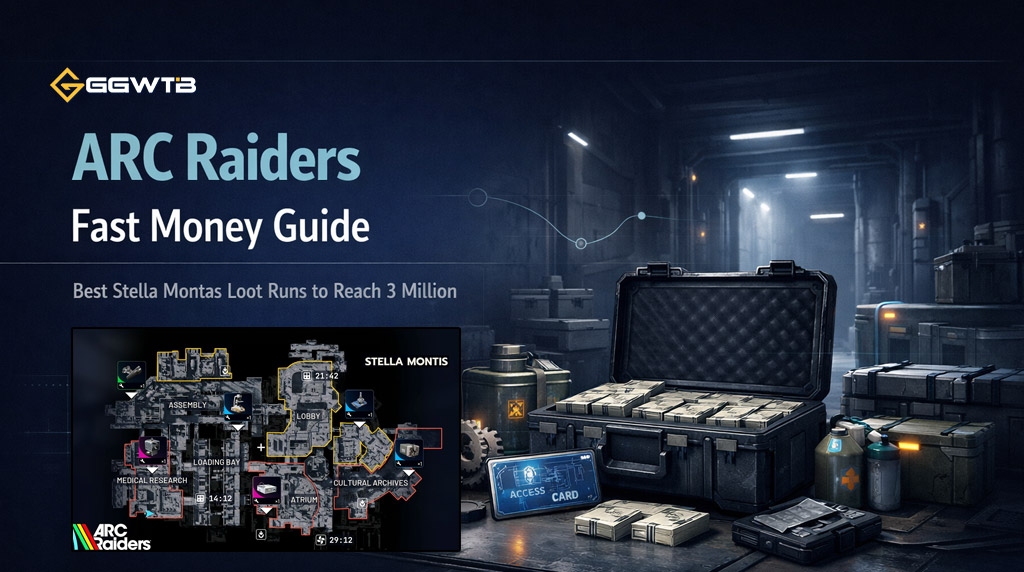
After running this map repeatedly, the pattern is pretty clear. The best results usually come from Assembly into Medical, while Cafeteria and Lobby are strong backup routes when we spawn on the other side. If we play clean, cut weak items from the bag, and avoid wasting time, 500k–750k per hour is a realistic target.
- Why Stella Montis Works So Well
- Best Route: Assembly Into Medical
- Why it's the best
- Example run values
- Best Backup Route: Cafeteria Into Lobby
- What to loot first
- Best Material Farm: Rusted Gears and Chemicals
- What we usually get
- What Actually Increases Your Profit
- Follow this simple rule
- Common Mistakes
- FAQ
- What is the best Coins route in Stella Montis?
- Is Medical still worth checking late in the raid?
- What if I spawn near Cafeteria or Lobby?
- Where should I farm rusted gears?
- Final Notes
Why Stella Montis Works So Well
What makes this map good is not just one jackpot room. It's the fact that almost every good path gives us two things at once:
- Coins
- Progression materials
That matters more than people think. In real runs, we're not only trying to sell loot. We also need:
- Blueprints
- Chemicals
- Rusted gears
- Mechanical parts
- Keys
- Weapon parts
So even a run that looks average on paper can still be highly efficient if it fills important shortages.
| Area | Best For | Loot Quality | Risk |
|---|---|---|---|
| Assembly | Raw credits, weapon loot, keys | High | Medium |
| Medical | Blueprints, high-value items, chemicals | High | Medium |
| Lobby | Suitcases, augment blueprints, breaches | Medium-High | Medium |
| Cafeteria | Fast loot, utility items, blueprints | Medium | Low-Medium |
| Material zones | Rusted gears, chemicals, components | Medium | Low |
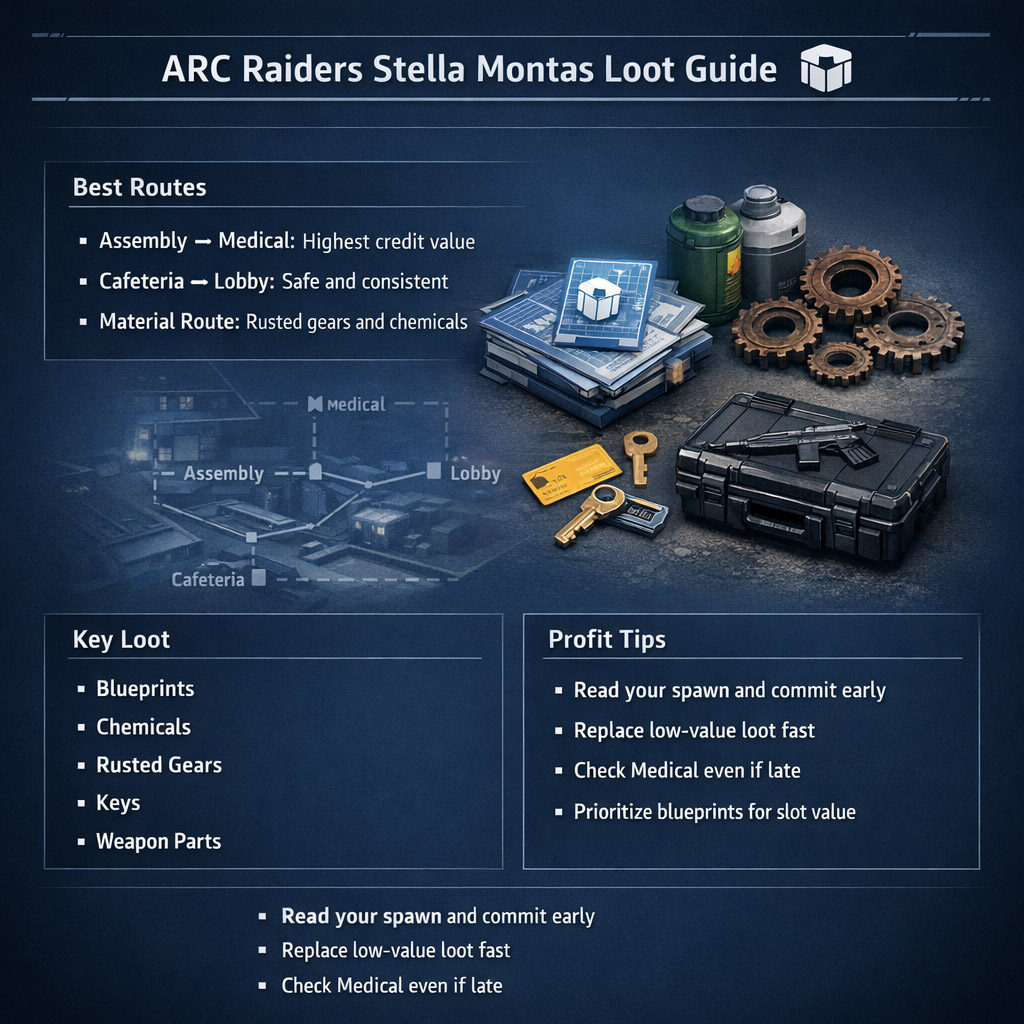
The practical takeaway is simple: read your spawn and commit early.
Best Route: Assembly Into Medical
This is the route that consistently gives the biggest ARC Raiders Coins runs.
If we spawn close to Assembly, we clear it first, then move into Medical as fast as possible. When both sides are available, this is easily the highest-value path on the map.
Why it's the best
Assembly has:
- Good blueprint chances
- Weapon cases
- Key drops
- Security breach access
- Strong small-slot loot
Medical adds:
- More blueprints
- Chemicals
- Reliable high-value replacements
- A surprising amount of missed loot, even in active raids
That last part is important. From experience, Medical often looks contested but still has plenty left. A lot of players skim it rather than clear it properly.
Example run values
| Route | Typical Result |
|---|---|
| Assembly + full Medical | 180k–213k |
| Assembly + partial Medical | 120k–140k |
| Medical checked late but mostly unlooted | Still very profitable |
If you find a strong Assembly spawn and Medical is still open, that's the run where your bag gets heavy very quickly.
Best Backup Route: Cafeteria Into Lobby
If we spawn near Cafeteria or the Lobby side, we switch plans instead of forcing Assembly.
This route is not always as explosive as Assembly + Medical, but it's fast, consistent, and safer to chain repeatedly.
What to loot first
In Cafeteria, prioritize:
- Power Brick room
- Nearby containers
- Weapon box
- Table surfaces
- Medical bags and loose utility loot
Then rotate into Lobby for:
- Suitcases
- Lockers
- Security breaches
- Small carts and side containers
| Route Section | What to Prioritize | Why It Matters |
|---|---|---|
| Cafeteria | Power Brick room, loose loot, containers | Fast early value |
| Lobby | Suitcases, lockers, breaches | Blueprint density and better upgrades |
| Key rooms | Locker clusters if available | Strong augment blueprint farming |
This side of the map is especially good if you care about augment blueprints and want a route that stays efficient even when the premium Coins path is unavailable.
Best Material Farm: Rusted Gears and Chemicals
Some raids should be about progression, not just credits.
If you're low on rusted gears, chemicals, or mechanical components, Stella Montis also has very good utility farming. In my experience, these side material runs are worth doing early in an expedition because they save time later when upgrades start stalling.
What we usually get
From utility-heavy sections and nearby breachables, we can regularly pull:
- 1–2 rusted gears
- Chemicals
- Mechanical components
- Extra filler loot for decent sell value
| Item | Why We Farm It |
|---|---|
| Rusted Gear | Common early bottleneck |
| Chemicals | Used constantly in crafting |
| Mechanical Components | Helpful for upgrades and bench progress |
If you notice your account is blocked by crafting shortages, this route is often more valuable than greed-running for pure credits.
What Actually Increases Your Profit
The biggest difference between an okay run and a strong run is usually not luck. It's inventory discipline.
A lot of players keep weak filler too long. That quietly kills profit.
Follow this simple rule
If you find a better item, replace the worse one immediately.
Prioritize:
- Blueprints
- Flow controllers
- Safekeepers
- High-value compact loot
- Crafting items you actively need
Drop:
- Cheap filler
- Redundant low-value materials
- Weak weapons with poor slot value
| Keep First | Drop First |
|---|---|
| Blueprints | Cheap filler junk |
| High-value single-slot items | Low-return consumables |
| Needed chemicals | Redundant common mats |
| Rare utility loot | Weak holdover items |
This is what turns a 120k raid into a 150k+ raid over time.
Common Mistakes
A few mistakes come up over and over:
- Assuming Medical is always looted
- Ignoring table surfaces and small side containers
- Skipping suitcases in Lobby
- Holding low-value items too long
- Forcing one route no matter where we spawn
If you fix those, your hourly income usually improves without changing much else.
FAQ
What is the best Coins route in Stella Montis?
The best route is usually Assembly into Medical. It has the strongest mix of raw credit value, blueprints, keys, and high-tier replacement loot.
Is Medical still worth checking late in the raid?
Yes. In many runs, Medical still has value left behind. If you see signs it was only partially hit, it's absolutely worth checking.
What if I spawn near Cafeteria or Lobby?
Take the Cafeteria into Lobby route instead. It's a reliable backup path with strong blueprint density and fast container access.
Where should I farm rusted gears?
Focus on utility-heavy side areas and breachables. These spots are consistent for rusted gears, chemicals, and other early expedition materials.
Final Notes
If the goal is to get rich fast in ARC Raiders, Stella Montis is one of the best maps to do it. The strongest pattern is simple:
- Assembly + Medical for max credits
- Cafeteria + Lobby for consistent backup value
- Material routes when crafting becomes the bottleneck
Once we start routing based on spawn instead of habit, the push to 3 million becomes much more manageable. The Coins comes faster, the bags get cleaner, and the runs feel far more consistent.

Most Popular Posts
- ARC Raiders Update 1.42: Phantom Targets Farming Guide (Glitched Wasps, Rewards, Regional Conditions)
- ARC Raiders Best Pop Trigger Strategy: Fast Phantom Targets Damage Guide
- ARC Raiders Subway Skin Guide: Unlock the Subterranean Outfit
- ARC Raiders Medium & Heavy Gun Parts Blueprint Guide: Best Farm Route, Locations, and Refiner Crafting
- ARC Raiders Ascending the Mountain: Fast Loot Routes and Item Guide
- ARC Raiders Frozen Trail Update Guide: Pendola Pass, Frigate & Meta Loadouts
Popular Category Lists
- ARC Raiders / (356)
- Grow a Garden / (295)
- CoD: Black Ops 7 / (167)
- Star Citizen / (163)
- MLB 26 / (159)
- Monopoly Go / (153)
- ARK Survival Ascended / (128)
- Steal a Brainrot / (99)
- Blox Fruits / (74)
- Adopt Me / (74)
- Forza Horizon 6 / (72)
- Sailor Piece / (68)
- Grow a Garden 2 / (68)
- Diablo IV / (62)
- CoD: BLACK OPS 6 / (55)
- Aion 2 / (54)
- Path of Exile 2 / (48)
- Monster Hunter Wilds / (46)
- Windrose / (44)
- COD: Modern Warfare 4 / (44)