0
0 Created: Aug 11,2026 | ARC Raiders
ARC Raiders Best Pop Trigger Strategy: Fast Phantom Targets Damage Guide

Pop Triggers are messy in open space. They bounce wrong, miss targets, and waste your raid.
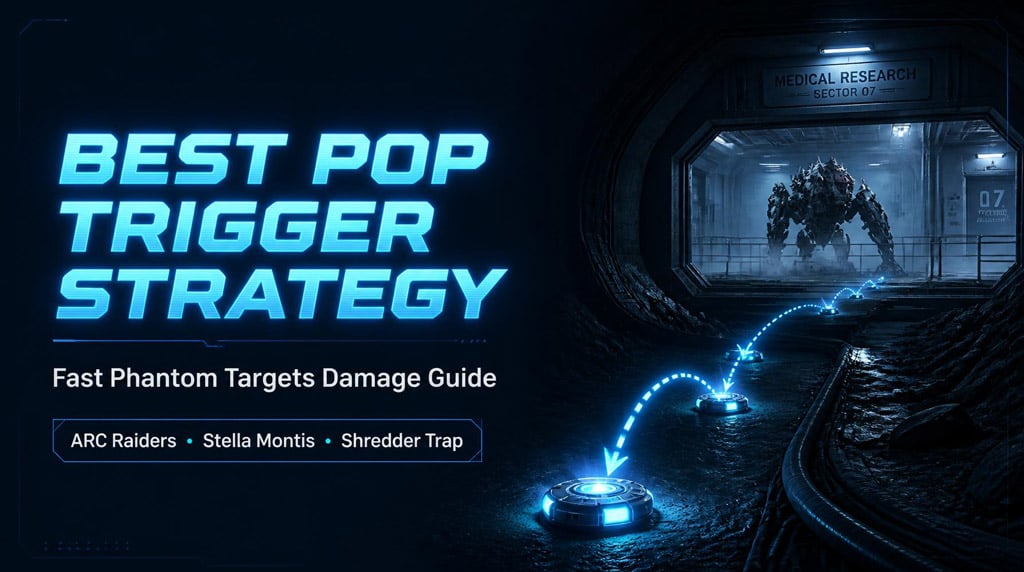
The fix is simple: trap a Shredder in a small Medical Research room on Stella Montis, then throw Pop Triggers through the tunnel. The room does the aiming for you.
- Best Pop Trigger Strategy in ARC Raiders
- Recommended Loadout
- Where to Go: Stella Montis Medical Research
- Step-by-Step Shredder Trap Method
- 1. Find a Shredder
- 2. Bait It Into the Lower Room
- 3. Close the Door
- 4. Move Through the Tunnel
- 5. Throw Pop Triggers Into the Room
- Expected Results
- Why This Beats the Bastion Method
- Common Mistakes
- Throwing Before the Shredder Is Trapped
- Bringing Only Two Pop Triggers
- Fighting in Open Space
- Ignoring Other Players
- Standing Too Close
- FAQ
- What is the best Pop Trigger strategy in ARC Raiders?
- How many Pop Triggers should I bring?
- Can I complete Phantom Targets with two Pop Triggers?
- Why use a Shredder instead of a Bastion?
- What should I do if the Shredder is already dead?
- Summary
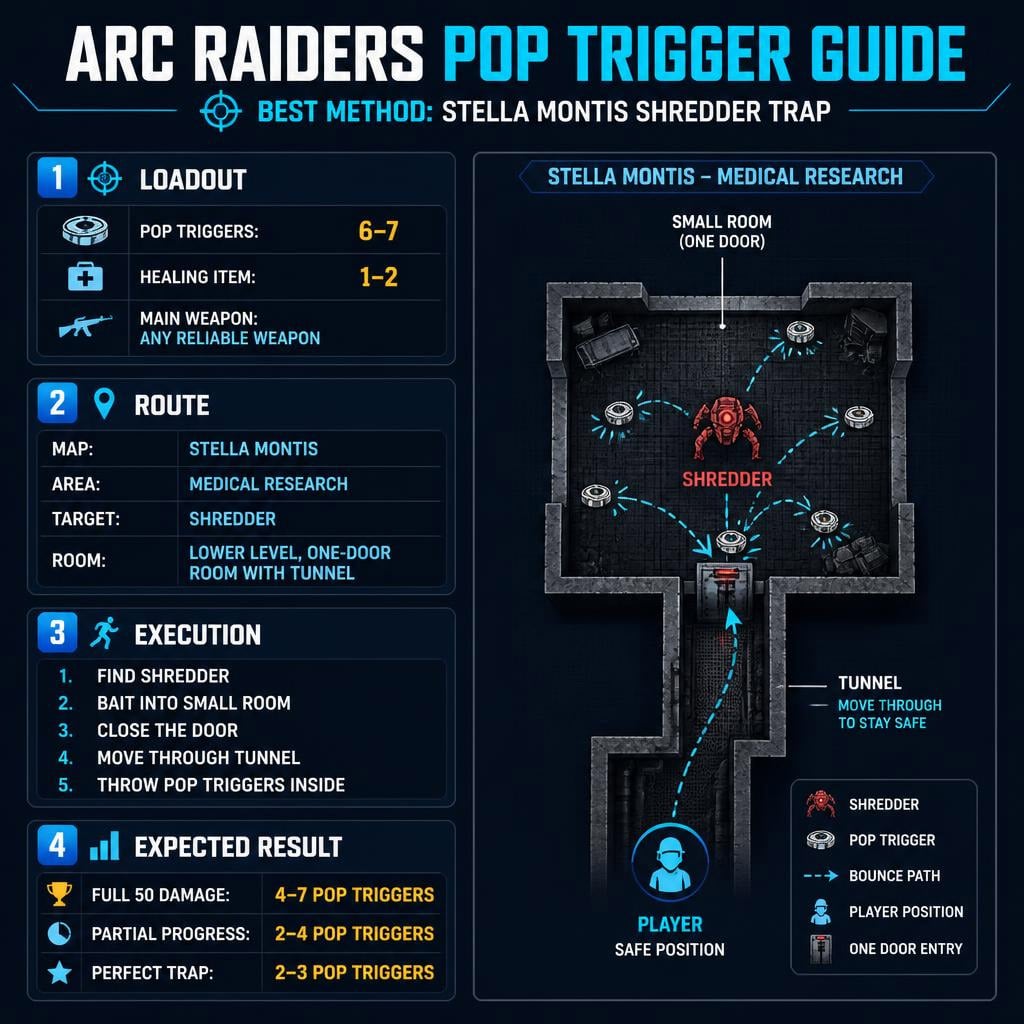
Best Pop Trigger Strategy in ARC Raiders
The best way to deal Pop Trigger damage to ARC enemies is the Stella Montis Medical Research Shredder trap.
You are not trying to land perfect throws. You are forcing the Pop Triggers to bounce inside a tight room until they hit.
| Method | Reliability | Problem | Verdict |
|---|---|---|---|
| Bastion bait | Low-Medium | Pop Triggers fly off in open areas | Usable, not ideal |
| Open-area throws | Low | Too much space, bad bounce control | Avoid |
| Shredder trap | High | Needs setup | Best method |
This method can finish the Phantom Targets Pop Trigger damage task in one raid if the Shredder is alive.
Recommended Loadout
Bring more Pop Triggers than you think you need. Two can work, but only if the hits are clean or you already have progress.
| Item | Amount | Reason |
|---|---|---|
| Pop Triggers | 6–7 | Enough for misses and full damage |
| Main weapon | 1 | Clear threats or finish the Shredder |
| Healing item | 1–2 | Covers bad bait attempts |
| Defensive gear | Optional | Helps if players or ARC pressure you |
If you need the full 50 damage, take 6–7 Pop Triggers. In clean runs, 3–4 hits usually finish it. In strong setups, even 2 hits can be enough.
Where to Go: Stella Montis Medical Research
Load into Stella Montis and move straight to Medical Research.
Do not loot first. Do not take random fights. The Shredder may get killed by another squad if you waste time.
Look for the lower-level room with:
- One main door
- Small interior
- Nearby tunnel/crawl route
- Enough room for a Shredder to enter
- A layout that blocks the Shredder from following you through the tunnel
That room is the whole trick. It turns Pop Triggers from random junk into controlled damage.
Step-by-Step Shredder Trap Method
1. Find a Shredder
Search Medical Research and listen for ARC movement.
If the Shredder is already dead, do not force the objective on random enemies in open space. Rotate or reset. Bad setups waste Pop Triggers.
2. Bait It Into the Lower Room
Aggro the Shredder and pull it toward the target room.
Move slow enough that it follows. If you sprint too far ahead, it may path badly or lose interest.
3. Close the Door
Wait until the Shredder is fully inside.
Then shut the door.
Do not throw early. This is where most players ruin the attempt.
4. Move Through the Tunnel
Use the nearby tunnel/crawl route.
The Shredder should stay trapped while you get a safe throwing angle. This keeps you out of melee pressure and forces the Pop Triggers into the room.
5. Throw Pop Triggers Into the Room
Throw them through the tunnel opening.
Use controlled throws:
- Throw 1–2 Pop Triggers
- Check progress
- Throw more only if needed
Because the room is tight, the Pop Triggers bounce around and are far more likely to hit the Shredder.
Expected Results
| Situation | Pop Triggers Needed | Notes |
|---|---|---|
| Full 50 damage needed | 4–7 | Bring extras for misses |
| Partial progress | 2–4 | Usually quick |
| Perfect trap | 2–3 | Best-case result |
| Bad positioning | 6+ | Still better than open areas |
In my runs, the objective was most consistent when the Shredder stayed near the middle of the room. If it hugs a corner, expect more misses.
Why This Beats the Bastion Method
Bastions are big targets, but the method is inconsistent.
Pop Triggers in open areas love to bounce sideways, overshoot, or launch themselves into nowhere. You cannot control enough variables.
The Shredder trap fixes that.
| Factor | Bastion Method | Shredder Trap |
|---|---|---|
| Setup | Easy | Moderate |
| Reliability | Inconsistent | High |
| Safety | Risky | Safer from tunnel |
| Pop Trigger efficiency | Poor | Strong |
| One-raid completion | Unreliable | Very likely |
Use Bastions only if they are already in a tight corridor. Otherwise, go Stella Montis.
Common Mistakes
Throwing Before the Shredder Is Trapped
If the door is open, the setup is not ready.
Trap first. Throw second.
Bringing Only Two Pop Triggers
Two can work. It is not a plan.
Bring 6–7 if you need full damage.
Fighting in Open Space
Open space kills this strategy.
The tighter the room, the better the Pop Triggers behave.
Ignoring Other Players
Medical Research can get busy.
If you hear footsteps or gunfire, finish the objective fast and reposition. Do not camp the room after progress is done.
Standing Too Close
Pop Triggers are chaotic.
Throw from the tunnel. Let the room do the work.
FAQ
What is the best Pop Trigger strategy in ARC Raiders?
The best strategy is the Stella Montis Medical Research Shredder trap. Bait a Shredder into the lower-level room, close the door, move through the tunnel, and throw Pop Triggers back inside.
How many Pop Triggers should I bring?
Bring 6–7 Pop Triggers if you need the full 50 damage. If you already have partial progress, 2–4 may be enough.
Can I complete Phantom Targets with two Pop Triggers?
Yes, but only in a clean setup or with partial progress already done. For a fresh objective, two is risky. Bring extras.
Why use a Shredder instead of a Bastion?
A Shredder can be trapped in a small room. Bastions are usually fought in open areas, where Pop Triggers miss too often.
What should I do if the Shredder is already dead?
Do not waste Pop Triggers on random ARC enemies outside. Check nearby spawns, rotate, or reset the raid. The method depends on a controlled room setup.
Summary
For the fastest ARC Raiders Pop Trigger damage, run Stella Montis, go straight to Medical Research, and trap a Shredder in the lower-level room.
Bring 6–7 Pop Triggers. Close the door before throwing. Use the tunnel for safety. Let the small room force the bounces.
This is the cleanest way to finish the Phantom Targets Pop Trigger objective in one raid without gambling on Bastion pathing or open-area misses.

Most Popular Posts
- ARC Raiders Update 1.42: Phantom Targets Farming Guide (Glitched Wasps, Rewards, Regional Conditions)
- ARC Raiders Hullcracker Blueprints: Fastest Way to Complete The Major's Footlocker
- ARC Raiders Best Pop Trigger Strategy: Fast Phantom Targets Damage Guide
- ARC Raiders Subway Skin Guide: Unlock the Subterranean Outfit
- ARC Raiders Looting Mk. 3 Survivor Blueprint Guide: Best Blue Gate Route and Drop Locations
- ARC Raiders Medium & Heavy Gun Parts Blueprint Guide: Best Farm Route, Locations, and Refiner Crafting
Popular Category Lists
- ARC Raiders / (345)
- Grow a Garden / (292)
- CoD: Black Ops 7 / (167)
- Star Citizen / (161)
- MLB 26 / (159)
- Monopoly Go / (152)
- ARK Survival Ascended / (126)
- Steal a Brainrot / (98)
- Blox Fruits / (74)
- Adopt Me / (73)
- Forza Horizon 6 / (72)
- Sailor Piece / (68)
- Grow a Garden 2 / (68)
- Diablo IV / (62)
- CoD: BLACK OPS 6 / (55)
- Path of Exile 2 / (48)
- Monster Hunter Wilds / (46)
- Aion 2 / (46)
- Windrose / (44)
- Donut SMP / (41)