



 0
0 Created: Jul 31,2026 | ARC Raiders
ARC Raiders Bombardier Cells Fast: Best Route + Loadout

Bombardier Cells gate your Refiner Level 3 upgrade. No cells, no upgrade — simple as that.
The catch: Bombardiers are loud, explosive, and every squad on the map hears the fight. Killing one is easy. Keeping the loot is the hard part.
Here's the fastest, safest way to farm them.
- What Bombardier Cells Are For
- Best Farm Locations
- How to Spot a Bombardier
- Best Loadout to Kill Them Fast
- Why Trailblazers Win
- Getting Trailblazers
- The Farming Route
- Combat Rules That Matter
- Solo Strategy
- Squad Strategy
- Drop Rates & Timing
- Mistakes That Cost You the Loot
- FAQ
- Where do you get Bombardier Cells?
- What are Bombardier Cells used for?
- What's the best weapon against Bombardiers?
- Can Bombardiers respawn in the same raid?
- Is farming Bombardier Cells solo viable?
- Bottom Line
What Bombardier Cells Are For
Dropped by Bombardiers — rocket-firing ARC mechs. Main use: Refiner Level 2 → 3.
| Item | Rarity | Use | Source |
|---|---|---|---|
| Bombardier Cell | Epic | Refiner Lvl 3 | Loot Bombardier husk |
| Trailblazer | Explosive tool | Fast kills | Craft or buy from Apollo |
| Explosive Compound | Uncommon | Craft Trailblazers | General looting |
Bombardiers usually roll with flying spotters. Kill those first — they track you and turn a clean fight into a mess.
Best Farm Locations
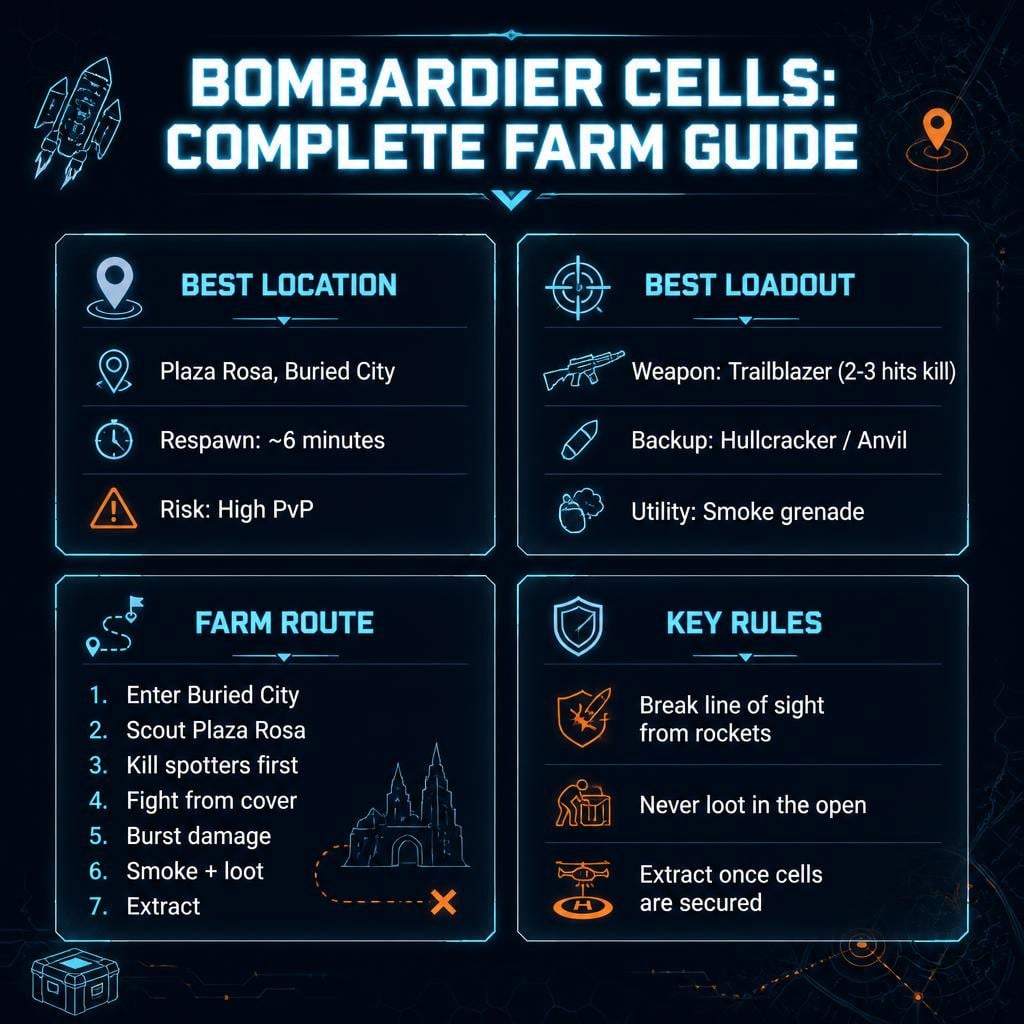
Plaza Rosa (Buried City) is your first stop, full stop.
| Location | Reliability | Risk | Notes |
|---|---|---|---|
| Plaza Rosa | Very High | High PvP | Consistent spawns, good cover |
| Marano Park | High | Medium-High | Solid backup |
| Bluegate | Medium | Medium | Use if Buried City is dry |
| Spaceport | Medium | Medium-High | Bigger, more ARC patrols |
| Stella Montis | Low (for cells) | High | Better for Trailblazer blueprint |
If Plaza Rosa is empty, rotate to Marano Park. No point standing around burning raid time.
Reported respawn window: ~6 minutes. Worth camping if the lobby's quiet.
How to Spot a Bombardier
- Large ARC ground unit with rocket/mortar fire
- Flying spotters nearby = confirm it's a Bombardier
- Explosive impacts = loud, other Raiders will hear it too
See spotters before you see the Bombardier? Slow down. That area's already active.
Best Loadout to Kill Them Fast
Don't bring a weak loadout. Slow kills = free real estate for third parties.
| Option | Strength | Weakness |
|---|---|---|
| Trailblazer | Fast burst kill, 2-3 hits nearly kills one | Needs blueprint or ~4,800cr from Apollo |
| Hullcracker | Strong direct damage | Pricier/harder to get |
| Anvil | Reliable vs armor | Needs good timing |
| Wolfpack grenades | Good finisher | Limited count |
| Rifle-only | Works with cover | Slow, risky |
Recommended kit: ARC-focused primary + Trailblazers + smoke grenade + extra healing. Bring more ammo than feels necessary.
Why Trailblazers Win
- Shorter fight = less rocket exposure
- Less noise time = fewer squads showing up
- Faster kill = faster loot window before it becomes a battlefield
Getting Trailblazers
| Source | Requirement | Notes |
|---|---|---|
| Craft | Blueprint + Explosive Station Lvl 3 | Best long-term |
| Apollo | ~4,800 credits | Fast short-term fix |
| Loot | Random | Not reliable for targeted farming |
Blueprint hunting spot: Stella Montis — Western Tunnel toward Lobby Metro, Assembly Workshops upstairs rooms, small containers. Assembly Workshops is contested — grab and go, don't linger.
The Farming Route
1. Queue Buried City
2. Push to Plaza Rosa
3. Scout before engaging — don't walk into another squad
4. Kill spotters first
5. Fight from hard cover (walls, interiors, not open ground)
6. Burst the Bombardier with Trailblazers
7. Smoke the husk before looting
8. Extract or wait ~6 min for respawn
Because Bombardiers fire explosives, hard cover beats distance every time. Thin cover won't save you from splash.
Combat Rules That Matter
| Situation | Do This |
|---|---|
| Rockets incoming | Break line of sight immediately |
| Spotters hovering | Kill before engaging main target |
| Enemy squad nearby | Let them engage first, or bail |
| Bombardier low HP | Burst it — don't let another team steal the kill |
| Husk exposed | Smoke before looting |
| Already have cells | Extract. Don't push your luck |
Target the torso and legs — better hit results than random spray. A missed Trailblazer isn't just wasted damage, it's wasted materials and wasted time you don't have.
Solo Strategy
Solo farming works, but patience is the whole game.
1. Approach Plaza Rosa, don't rush the open square
2. Let other squads fight and leave
3. Kill spotters
4. Burst damage, smoke, loot
5. Extract immediately after
Late-raid method: hide near Plaza Rosa early, let other teams clear each other out, engage when traffic drops. Slower, but way safer if you only need 1-2 cells.
Squad Strategy
Assign roles before you engage — chaos gets people killed.
| Role | Job | Gear |
|---|---|---|
| Damage | Burst the Bombardier | Trailblazer/Hullcracker |
| Support | Clear drones, watch flanks | Rifle + grenades |
| Security | Watch for enemy Raiders | Mid-range + smoke |
| Looter | Smoke + grab cells | Light loadout |
If a squad approaches mid-fight: finish fast and disengage, or back off entirely. Don't panic-loot.
Drop Rates & Timing
- ~2+ cells per successful kill in most reports
- Respawn: ~6 minutes, same location
- If you've already got what you need — leave. Farming one more is how runs end badly.
Mistakes That Cost You the Loot
| Mistake | Fix |
|---|---|
| Fighting in the open | Use buildings |
| Ignoring spotters | Clear them first |
| Instant looting | Smoke, listen, then loot |
| Weak loadout | Bring burst damage |
| Staying after getting cells | Extract |
| Farming a hot lobby repeatedly | Rotate or reset |
Bombardier Cells are progression loot, not normal loot. Once they're in your bag, the mission changes to survive, not farm more.
FAQ
Where do you get Bombardier Cells?
From defeated Bombardier ARC units. Plaza Rosa, Buried City is the most consistent spawn.
What are Bombardier Cells used for?
Upgrading the Refiner to Level 3 — a key progression bottleneck.
What's the best weapon against Bombardiers?
Trailblazers for fast burst kills. Hullcracker and Anvil are solid alternatives.
Can Bombardiers respawn in the same raid?
Yes — around 6 minutes, especially in reliable zones like Plaza Rosa.
Is farming Bombardier Cells solo viable?
Yes. Use cover, clear spotters first, smoke before looting, and extract right after getting cells. Late-raid timing is safer for solos.
Bottom Line
Buried City, Plaza Rosa, Trailblazers, smoke, extract. That's the loop. Kill spotters first, fight from cover, burst the Bombardier fast, and don't get greedy once the cells are in your bag. One clean extraction beats two greedy fights every time.

Most Popular Posts
- ARC Raiders Update 1.42: Phantom Targets Farming Guide (Glitched Wasps, Rewards, Regional Conditions)
- ARC Raiders Hullcracker Blueprints: Fastest Way to Complete The Major's Footlocker
- ARC Raiders Best Pop Trigger Strategy: Fast Phantom Targets Damage Guide
- ARC Raiders Subway Skin Guide: Unlock the Subterranean Outfit
- ARC Raiders Looting Mk. 3 Survivor Blueprint Guide: Best Blue Gate Route and Drop Locations
- ARC Raiders Medium & Heavy Gun Parts Blueprint Guide: Best Farm Route, Locations, and Refiner Crafting
Popular Category Lists
- ARC Raiders / (354)
- Grow a Garden / (294)
- CoD: Black Ops 7 / (167)
- Star Citizen / (163)
- MLB 26 / (159)
- Monopoly Go / (153)
- ARK Survival Ascended / (128)
- Steal a Brainrot / (99)
- Blox Fruits / (74)
- Adopt Me / (74)
- Forza Horizon 6 / (72)
- Sailor Piece / (68)
- Grow a Garden 2 / (68)
- Diablo IV / (62)
- CoD: BLACK OPS 6 / (55)
- Aion 2 / (52)
- Path of Exile 2 / (48)
- Monster Hunter Wilds / (46)
- Windrose / (44)
- Maplestory Classic / (42)






