0
0 Created: Jul 8,2026 | ARC Raiders
ARC Raiders Expedition Damage Guide: Fastest Way to Farm Damage

You need 100,000 Expedition Damage. Do not waste the grind shooting random small ARC for scraps.
Farm Bastions, Bombardiers, Rocketeers, Vaporizers, and dense ARC routes. Bring enough ammo. Stay in the raid long enough for respawns. That is how we finish 100K in a few hours instead of stretching it across the whole Expedition window.

- Best Loadout for 100K Expedition Damage
- ARC Damage Priority
- Best Events for ARC Raiders Expedition Damage
- Close Scrutiny: Safe 10K–20K Damage
- Route
- Hidden Bunker Spaceport: Best High-Ceiling Farm
- Best Route
- Loop
- Locked Gate Blue Gate: Reliable 20K–27K+
- Route
- Buried City: Best Non-Event Rotation
- Buried City Route
- Rotation
- Riptide: Best Dense ARC Map
- Queen and Matriarch: Only Good With Burst
- Fast 100K Expedition Damage Plan
- Common Mistakes That Kill Your Damage Per Hour
- FAQ
- What is the fastest way to farm 100K Expedition Damage in ARC Raiders?
- What weapons are best for Expedition Damage?
- Which ARC enemies give the most Expedition Damage?
- Is Queen or Matriarch good for 100K damage?
- Can we finish 100K Expedition Damage in one day?
- Summary
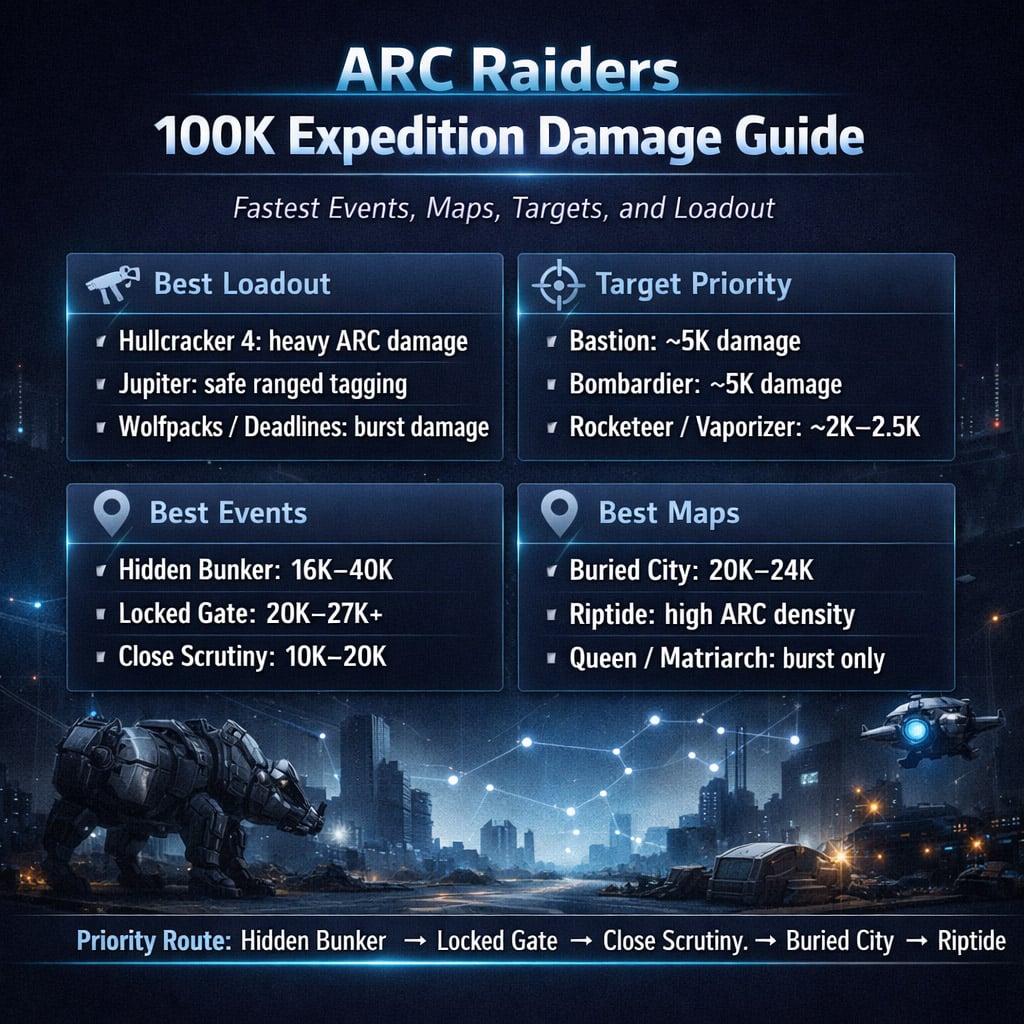
Best Loadout for 100K Expedition Damage
You want two things: heavy ARC damage and safe ranged tagging.
| Gear | Use | Why It Works |
|---|---|---|
| Hullcracker 4 | Heavy ARC killer | Good into Bastions, Bombardiers, big targets |
| Jupiter | Mid-range tagging | Lets us farm from height and hit distant ARC |
| Wolfpacks | Burst damage | Best for fast boss/heavy ARC damage |
| Deadlines | Boss burst | Strong for Queen, Matriarch, and damage races |
If you have Wolfpacks or Deadlines, bring them. Early Expedition lobbies are packed with players racing for damage. If you tag late, you get crumbs.
ARC Damage Priority
Stop wasting time on low-value targets when heavy ARC are alive.
| ARC Target | Value | Priority |
|---|---|---|
| Bastion | Around 5K damage potential | S-tier |
| Bombardier | Around 5K damage potential | S-tier |
| Rocketeer | Around 2K–2.5K | High |
| Vaporizer | Around 2K–2.5K | High |
| Leaper | Medium | Filler |
| Small / Flying ARC | Low | Shoot while rotating |
| Queen / Matriarch | Huge, but contested | Risky |
Rule is simple: Bastion/Bombardier first. Rocketeer/Vaporizer second. Small ARC only while moving.
Best Events for ARC Raiders Expedition Damage
Events carry this grind. Prioritize 40-minute raids when possible.
| Event / Map | Timer | Expected Damage | Reliability |
|---|---|---|---|
| Hidden Bunker / Spaceport | 40 min | 16K–40K | Best ceiling |
| Locked Gate / Blue Gate | 40 min | 20K–27K+ | Most reliable |
| Close Scrutiny / Any Map | 30 min | 10K–20K | Consistent |
| Buried City Standard | 30 min | 20K–24K | Strong non-event |
| Riptide Standard | 30 min | High, spawn-based | Dense ARC |
| Queen / Matriarch | Varies | 5K–Huge | Unstable |
Best rotation: Hidden Bunker → Locked Gate → Close Scrutiny → Buried City → Riptide.
Use Queen/Matriarch only if you have burst tools or the lobby is not melting the boss instantly.
Close Scrutiny: Safe 10K–20K Damage
Close Scrutiny is the easiest consistent farm.
Route
1. Move to the nearest ARC Assessor.
2. Kill ARC around it.
3. Rotate to the next Assessor.
4. Shoot Rocketeers, Vaporizers, and flying ARC on the way.
5. Stay close to the full 30 minutes.
| Lobby Type | Expected Damage |
|---|---|
| Crowded Expedition lobby | 10K–12K |
| Average lobby | 15K |
| Clean rotation | 20K |
Why it works: Assessors keep creating ARC activity. Even in crowded lobbies, we still pulled roughly 11K in one run.
If you need stable progress, run this whenever it appears.
Hidden Bunker Spaceport: Best High-Ceiling Farm
Hidden Bunker on Spaceport is the jackpot route.
Most players chase bunker objectives. We farm the heavy ARC outside.
Best Route
| Area | Target |
|---|---|
| Back of Departure Building | Bastion / Bombardier |
| Fuel Processing | Heavy ARC check |
| Fuel Lines | Respawn rotation |
| Departure Building upper side | Jupiter tagging |
Loop
1. Start at the back of Departure Building.
2. Kill Bastion/Bombardier.
3. Rotate through Fuel Processing and Fuel Lines.
4. Return for respawns.
5. Shoot smaller ARC while waiting.
| Run Quality | Expected Damage |
|---|---|
| Crowded | 16K |
| Good | 20K–30K |
| Perfect heavy spawn run | Close to 40K |
This is the best event if you get the heavy spawns to yourself.
Locked Gate Blue Gate: Reliable 20K–27K+
Locked Gate on Blue Gate is the most stable high-damage route.
The key spot is Checkpoint. Hold high ground. Farm heavy ARC. Watch the gate when it opens.
Route
| Area | Target | Note |
|---|---|---|
| Checkpoint | Bastion / Bombardier | Main farm |
| Hills above Checkpoint | Rocketeer / Vaporizer | Safe range |
| Raider's Refuge | Heavy ARC check | Rotate if Checkpoint is dry |
| Ancient Fort | Leaper | Bonus damage |
| Opened gate interior | Possible Bastion | Push when safe |
A strong Locked Gate run can deliver 26K–27K damage. In one test route, progress jumped from about 35K to 61K+ in a single raid.
That is why this event is priority.
Buried City: Best Non-Event Rotation
No good event up? Go Buried City.
This map has reliable heavy ARC zones close enough to chain.
Buried City Route
| Area | Target |
|---|---|
| Plaza Rosa | Bastion / Bombardier |
| Marano Park | Heavy ARC |
| Parking Garage | Heavy ARC check |
| Library side / outskirts | Rocketeer / Vaporizer / flyers |
| Hospital | Possible Bastion |
| Old Town | Filler ARC route |
Rotation
Plaza Rosa → Library side → Marano Park → Parking Garage → Hospital → Old Town → repeat
Shoot everything while moving, but do not stop too long for small ARC.
Expected result: around 20K–24K in a clean 30-minute run.
Riptide: Best Dense ARC Map
Riptide is pure ARC volume. It has Bastions, Bombardiers, Leapers, Rocketeers, Vaporizers, and nonstop flying ARC.
Best play: take height and farm sightlines.
| Position | Why It Works |
|---|---|
| Hill above extraction | Best overall visibility |
| Elevated ridges | Easy flying ARC tags |
| Cover near slopes | Safer from Bombardiers |
| Mid-range overlook | Great for Jupiter farming |
Target order stays the same:
1. Bastion
2. Bombardier
3. Rocketeer
4. Vaporizer
5. Leaper
6. Flying ARC
7. Small ARC
If you find a safe hill, Riptide prints damage.
Queen and Matriarch: Only Good With Burst
Queen and Matriarch look like the best damage farms. They are not always.
Early Expedition lobbies delete them fast with Wolfpacks and Deadlines. If you arrive underprepared, you might only leave with 5K damage.
| Situation | Result |
|---|---|
| You bring burst tools | Good damage chance |
| Boss gets melted early | Low progress |
| Lobby lacks resources | Huge damage window |
| Later Expedition days | Usually better |
Use boss raids as bonus attempts. Do not build your whole 100K plan around them.
Fast 100K Expedition Damage Plan
Use this route if you want the grind done quickly.
| Run | Activity | Expected Damage | Total |
|---|---|---|---|
| 1 | Close Scrutiny | 11K | 11K |
| 2 | Hidden Bunker Spaceport | 16K | 27K |
| 3 | Locked Gate Blue Gate | 27K | 54K |
| 4 | Buried City | 24K | 78K |
| 5 | Riptide / Event | 22K+ | 100K+ |
Bad lobbies add one extra raid. Good lobbies cut the grind hard.
Common Mistakes That Kill Your Damage Per Hour
| Mistake | Fix |
|---|---|
| Leaving early | Stay for respawns |
| Fighting players too long | Disengage unless needed |
| Ignoring Bastions/Bombardiers | Prioritize heavy ARC |
| Only farming small ARC | Use them as filler |
| Bossing without burst | Bring Wolfpacks/Deadlines |
| Standing in the open | Use height and cover |
| Staying in dead zones | Rotate immediately |
If your damage is low after 10 minutes, move. Dead zones stay dead.
FAQ
What is the fastest way to farm 100K Expedition Damage in ARC Raiders?
Run Hidden Bunker, Locked Gate, and Close Scrutiny whenever they appear. Use Buried City and Riptide between events. Prioritize Bastions and Bombardiers.
What weapons are best for Expedition Damage?
Use Hullcracker 4 for heavy ARC and Jupiter for ranged tagging. Add Wolfpacks and Deadlines if you have them.
Which ARC enemies give the most Expedition Damage?
Bastions and Bombardiers are the best regular targets, each giving around 5K damage potential. Rocketeers and Vaporizers are next.
Is Queen or Matriarch good for 100K damage?
Only if you have burst tools or the lobby is slow. Early Expedition lobbies often melt bosses too fast, leaving you with poor damage.
Can we finish 100K Expedition Damage in one day?
Yes. With good event rotation, 100K can be done in a few hours. A clean chain of Close Scrutiny → Hidden Bunker → Locked Gate → Buried City → Riptide can finish it.
Summary
The fastest 100K Expedition Damage farm is not complicated.
Use this priority:
1. Hidden Bunker Spaceport
2. Locked Gate Blue Gate
3. Close Scrutiny
4. Buried City
5. Riptide
6. Queen/Matriarch only with burst
Bring Hullcracker 4, Jupiter, Wolfpacks, Deadlines, and enough ammo.
Farm Bastions and Bombardiers first. Rotate hard. Stay for respawns. Avoid pointless PvP.
Do that, and 100K Expedition Damage becomes a short, controlled grind instead of a painful wall.

Most Popular Posts
- ARC Raiders Update 1.42: Phantom Targets Farming Guide (Glitched Wasps, Rewards, Regional Conditions)
- ARC Raiders Hullcracker Blueprints: Fastest Way to Complete The Major's Footlocker
- ARC Raiders Best Pop Trigger Strategy: Fast Phantom Targets Damage Guide
- ARC Raiders Subway Skin Guide: Unlock the Subterranean Outfit
- ARC Raiders Looting Mk. 3 Survivor Blueprint Guide: Best Blue Gate Route and Drop Locations
- ARC Raiders Medium & Heavy Gun Parts Blueprint Guide: Best Farm Route, Locations, and Refiner Crafting
Popular Category Lists
- ARC Raiders / (351)
- Grow a Garden / (294)
- CoD: Black Ops 7 / (167)
- Star Citizen / (162)
- MLB 26 / (159)
- Monopoly Go / (152)
- ARK Survival Ascended / (128)
- Steal a Brainrot / (99)
- Blox Fruits / (74)
- Adopt Me / (74)
- Forza Horizon 6 / (72)
- Sailor Piece / (68)
- Grow a Garden 2 / (68)
- Diablo IV / (62)
- CoD: BLACK OPS 6 / (55)
- Aion 2 / (50)
- Path of Exile 2 / (48)
- Monster Hunter Wilds / (46)
- Windrose / (44)
- Donut SMP / (41)