0
Created: Oct 8,2026 | ARC Raiders
ARC Raiders Frozen Trail Skill Tree Guides: Preview Perks and Build Decisions

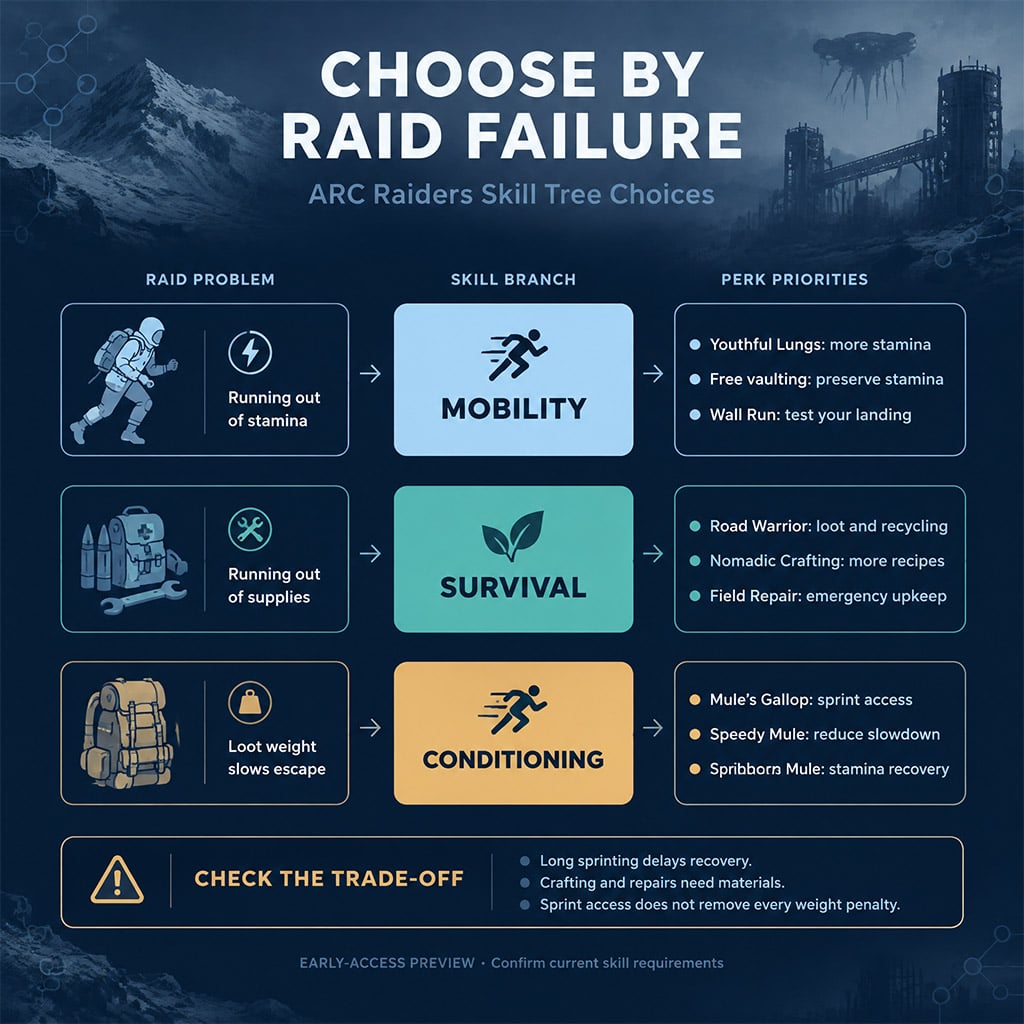
If your raids end because of exhausted stamina, missing supplies, or excess weight, we would prioritize Mobility, Survival, or Conditioning respectively. Choose the skill that fixes that failure before investing in a capstone.
ARC Raiders Frozen Trail Skill Tree: Preview Perks and Build Decisions
Preview status: The skill effects below come from early-access accounts, not independently verified live testing. Embark's official Frozen Trail preview confirms the October 8 update and its new content, but does not establish the detailed skill values used here.
- Skill Choices: Start With Your Raid's Failure Point
- Mobility: Separate Travel From Escape Readiness
- Wall Run Needs a Tested Landing
- Buy the Correct Landing Tool
- Supplies and Weight: Choose a Sustainable Tool
- Repair and Crafting Require Ingredient Planning
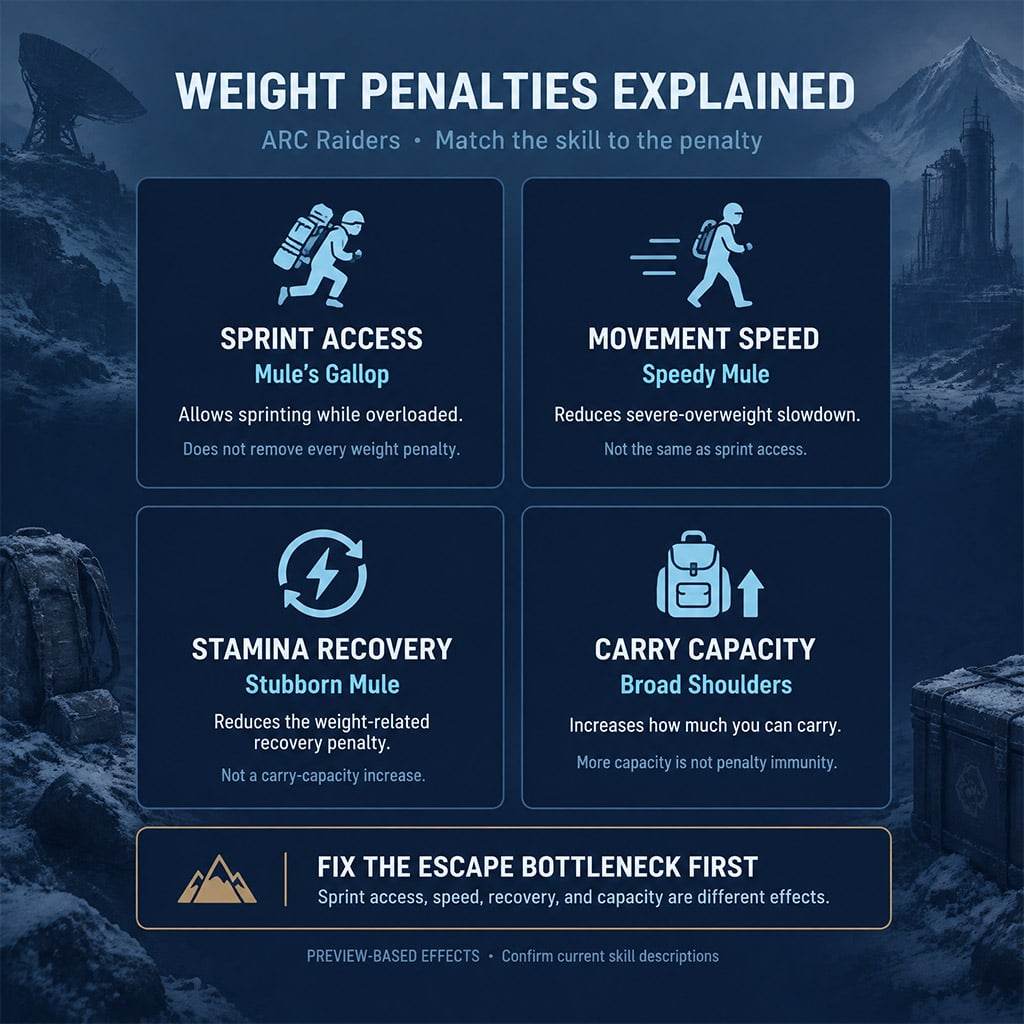
- Conditioning: Diagnose the Weight Penalty
- FAQ (Frequently Asked Questions)
- Which Frozen Trail Skill Tree Should You Choose?
- How Many Points Do Gateway Skills Require?
- Can You Select All Three Capstones?
- Does Sprinting on Fumes Give Unlimited Stamina?
- Does Field Repair Fully Restore Equipment?
Skill Choices: Start With Your Raid's Failure Point
If you copy an older allocation, relocated perks can leave an essential ability out of reach. Inspect the current prerequisites before resetting.
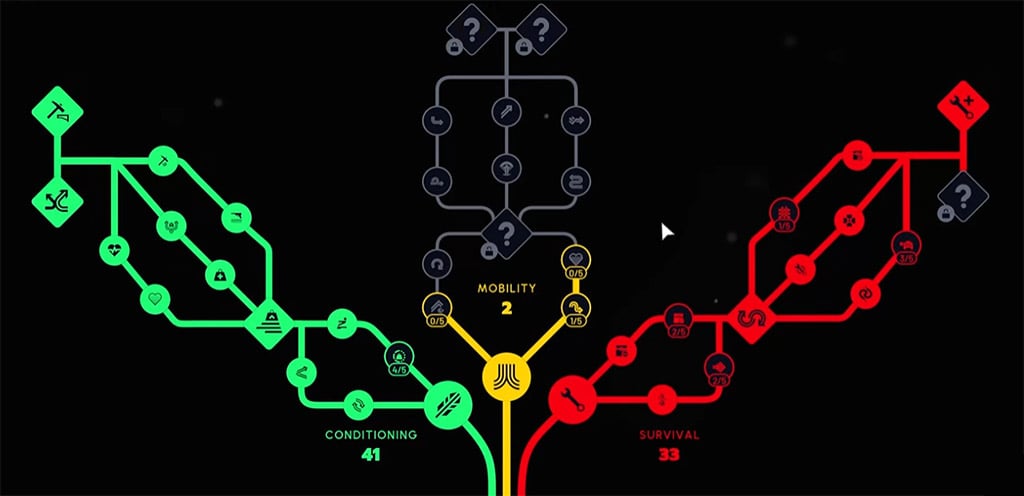
The previews report a 10-point gateway, a 30-point first capstone, and—in one account—a second capstone at 40 points. Accounts disagree on whether all three capstones are selectable, so do not build around that assumption.
We would make the first selection using these conditions:
| Problem | Preview Choice | Trade-Off |
|---|---|---|
| Weight prevents sprinting | Mule's Gallop | Sprint access does not remove every weight penalty |
| Critical health repeatedly ends raids | Back on Your Feet | Regeneration ceiling is unspecified |
| Repeated vaults drain stamina | Vaults On Vaults On Vaults | Competes with post-vault movement utility |
| You need another exit after vaulting | Vault Spring | Does not provide stamina-free vaulting |
| Explosive deployables block routes | Minesweeper | Defusing conditions need confirmation |
| Dodge cost is your bottleneck | Quick Roll | Faster and cheaper, but shorter |
Choose Quick Roll only if its shorter travel clears the attack you need to avoid.
Mobility: Separate Travel From Escape Readiness
Sprinting on Fumes reportedly sustains sprinting, but actions or damage cancel it and longer use increases recovery time. If your route repeatedly exposes you to damage, uninterrupted travel is a poor assumption.
The playtest accounts describe delayed recovery after prolonged running. Stop in cover before your next climb or engagement, rather than arriving at the objective already exhausted.
Wall Run Needs a Tested Landing
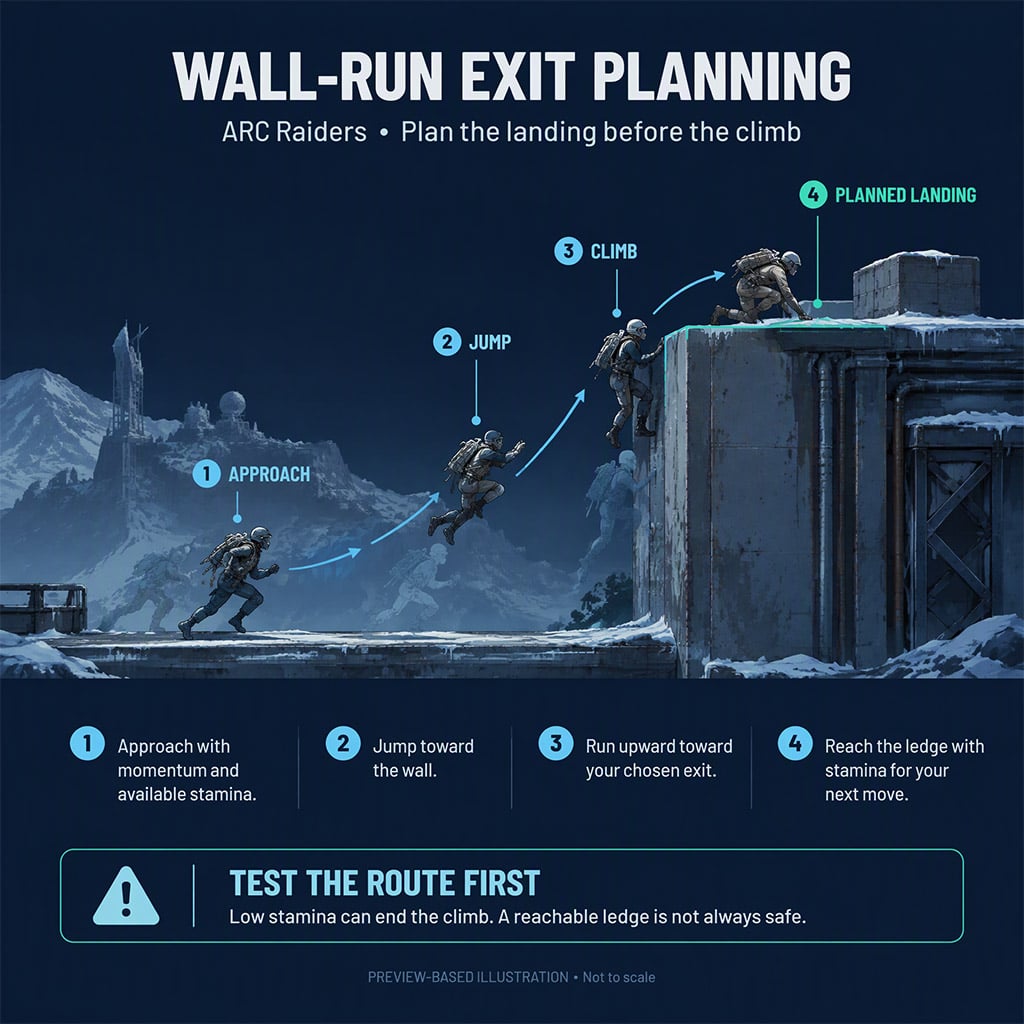
One showcase describes success after adding a jump and run-up, followed by failed climbing when stamina runs out. That suggests a sequence to test, not a universal rule for every surface.
1. Approach with momentum and available stamina.
2. Jump toward the wall.
3. Identify the ledge or push-off destination first.
4. Repeat from your intended raid approach.
The useful benefit may be changing direction—not maximum height. A climb that ends in an exposed landing is a positioning failure.
Buy the Correct Landing Tool
The previews describe Ready to Roll as a wider input window, Stylish Landing as higher recovery-roll eligibility, and Right Back At It as faster recovery after heavy landings. Sturdy Ankles concerns reduced damage from non-lethal falls.
These address different failures. None establishes immunity to lethal drops.
Supplies and Weight: Choose a Sustainable Tool
If ammunition or durability forces early extraction, compare the Survival capstones against the materials your routes actually provide.
| Capstone | Preview Benefit | Do Not Assume |
|---|---|---|
| Road Warrior | More ammunition and ARC Power Cells; full-efficiency recycling | Guaranteed doubled drops |
| Nomadic Crafting | Expanded field recipes | Every displayed recipe is exclusive to this skill |
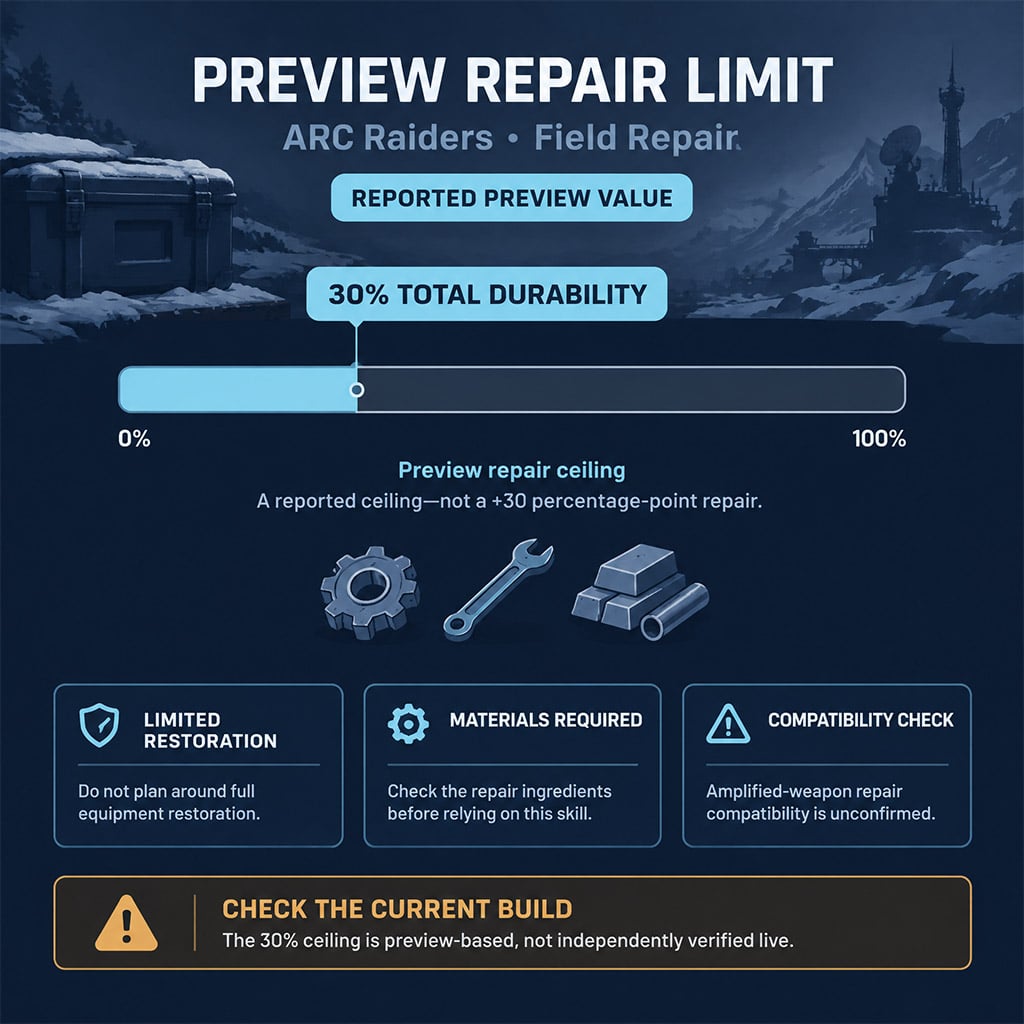
| Field Repair | Equipment repair up to 30% durability | Full restoration or universal repair ingredients |
Choose a materials-dependent skill only after checking the relevant recipe.
A reported turret produced two Power Cells, while two Fireballs each produced one. Without matched baseline drops, that does not establish a multiplier.
For recycling, compare the components you need now with the equipment's extraction value. Full efficiency does not make destroying every carried item worthwhile.
Repair and Crafting Require Ingredient Planning
The crafting accounts mention ammunition, traversal equipment and a hatch key, but do not establish complete costs. Inspect the recipe before recycling components, and retain an alternate route if materials never appear.
Field Repair's reported ceiling is 30% total durability, not a confirmed increase of 30 percentage points. Amplified-weapon compatibility remains unproven.
Conditioning: Diagnose the Weight Penalty
We would separate these effects before allocating points:
- Mule's Gallop: sprint access while overloaded.
- Speedy Mule: reduced severe-overweight speed penalty.
- Stubborn Mule: reduced regeneration penalty.
- Broad Shoulders: increased capacity.
- Loaded Arms: reduced weapon encumbrance.
- Vault and Carry: vaulting with a carryable—not a heavier backpack.
Use the extra capacity to preserve an escape option before filling it with more loot.
Weapon Bash reportedly breaks obstructing ice, but measured combat damage is absent. Bull Rush has conflicting activation accounts; confirm its weapon-stowed condition and visible knockback before relying on it.
FAQ (Frequently Asked Questions)
Which Frozen Trail Skill Tree Should You Choose?
Choose Mobility for traversal, Survival for supplies, or Conditioning for overloaded escapes. The available evidence does not establish a universally best allocation.
How Many Points Do Gateway Skills Require?
The previews report 10 points in the relevant branch. This is branch investment, not character level 10; check the current prerequisites before spending.
Can You Select All Three Capstones?
All-three access is unconfirmed because the accounts disagree. One describes selections at 30 and 40 branch points, leaving a third unavailable.
Does Sprinting on Fumes Give Unlimited Stamina?
No—it sustains sprinting under specific conditions. Actions or damage cancel the effect, and longer use increases recovery rather than supplying unlimited stamina for other actions.
Does Field Repair Fully Restore Equipment?
No—the preview describes a 30% durability ceiling. Check your equipment's ingredients and repair compatibility before planning another engagement around it.

I’m Sofia Bergström, a Swedish Managing Editor covering FPS, competitive shooters, and extraction shooters for GGWTB. My guides focus on loadout trade-offs, positioning, and when to commit—or cut your losses. A weapon’s stats tell only part of the story; I focus on how it fits your role and the fight ahead.
Most Popular Posts
- ARC Raiders Update 1.42: Phantom Targets Farming Guide (Glitched Wasps, Rewards, Regional Conditions)
- ARC Raiders Best Pop Trigger Strategy: Fast Phantom Targets Damage Guide
- ARC Raiders Subway Skin Guide: Unlock the Subterranean Outfit
- ARC Raiders Medium & Heavy Gun Parts Blueprint Guide: Best Farm Route, Locations, and Refiner Crafting
- ARC Raiders Frozen Trail Update Guide: Pendola Pass, Frigate & Meta Loadouts
- ARC Raiders Ascending the Mountain: Fast Loot Routes and Item Guide
Popular Category Lists
- ARC Raiders / (359)
- Grow a Garden / (295)
- CoD: Black Ops 7 / (167)
- Star Citizen / (164)
- MLB 26 / (159)
- Monopoly Go / (153)
- ARK Survival Ascended / (128)
- Steal a Brainrot / (99)
- Blox Fruits / (74)
- Adopt Me / (74)
- Forza Horizon 6 / (72)
- Sailor Piece / (68)
- Grow a Garden 2 / (68)
- Diablo IV / (62)
- Aion 2 / (56)
- CoD: BLACK OPS 6 / (55)
- Path of Exile 2 / (48)
- Monster Hunter Wilds / (46)
- Windrose / (44)
- Maplestory Classic / (44)