



 0
0 Created: Apr 26,2026 | ARC Raiders
Arc Raiders Locked Gate Blueprint Farming Guide: Best Route, Loot Spots

Arc Raiders Locked Gate looks like a simple event at first: grab four Security Codes, open the underground gate, loot what you can, and get out. But after running it as a blueprint farm, it becomes clear that the real value is not only behind the gate. The surrounding houses, village buildings, lockers, ammo boxes, trash cans, and underground rooms can all produce serious loot.
If you are farming Arc Raiders blueprints, Locked Gate on The Blue Gate is worth prioritizing. The raid lasts up to 40 minutes, which gives us more time to route, loot, avoid bad fights, and extract with a stacked bag. The downside is obvious: mines, Rocketeers, ARCs, and other Raiders are all waiting to ruin the payday.
- Arc Raiders Locked Gate Event Overview
- How to Open the Locked Gate
- Should We Open the Gate Every Time?
- Best Loadout for Locked Gate Blueprint Farming
- Best Locked Gate Blueprint Farming Route
- Best Loot to Prioritize
- Mines, Rocketeers, and ARC Pressure
- Underground Looting: What to Grab First
- What a Good Locked Gate Run Can Look Like
- Best Strategy Based on Your Spawn
- Quick Locked Gate Farming Checklist
- Common Mistakes to Avoid
- FAQ
- What is Locked Gate in Arc Raiders?
- Is Locked Gate good for blueprint farming?
- How many Security Codes do you need?
- Do we have to open the gate ourselves?
- Where is the most dangerous Security Code location?
- What should we extract with first?
- When should we leave the raid?
- Summary
Arc Raiders Locked Gate Event Overview
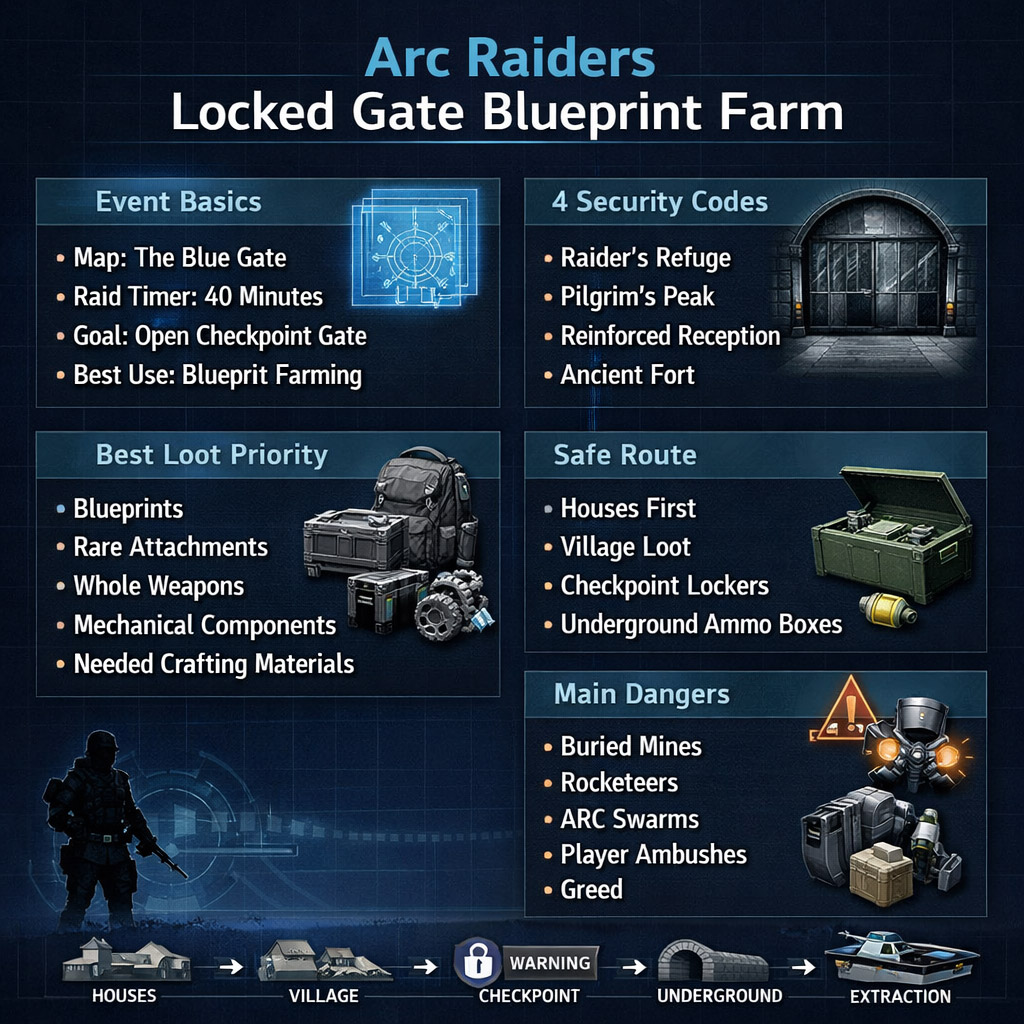
Locked Gate is exclusive to The Blue Gate. The underground tunnel entrance at Checkpoint starts locked, and players need four Security Codes to open it.
| Feature | Details |
|---|---|
| Map | The Blue Gate |
| Event | Locked Gate |
| Raid Timer | 40 minutes |
| Main Objective | Collect 4 Security Codes |
| Gate Location | Checkpoint |
| Best Use | Blueprint and weapon farming |
| Main Risks | Mines, Rocketeers, ARCs, players |
This event is strong because it combines long raid time with dense loot areas. If you route well, you can leave with multiple blueprints, weapons, attachments, and crafting materials in one run.
How to Open the Locked Gate
To open the gate, you need four Security Codes. Each one comes from a Code Printer in a specific location.
| Security Code | Location | Danger Level |
|---|---|---|
| Raider's Refuge Security Code | Raider's Refuge | Medium |
| Pilgrim's Peak Security Code | Pilgrim's Peak | High |
| Reinforced Reception Security Code | Reinforced Reception | Medium |
| Ancient Fort Security Code | Ancient Fort | Medium to High |
Once all four codes are collected, enter them into the console inside the Gate Control Room at Checkpoint. After that, the underground gate opens.
Should We Open the Gate Every Time?
Not always.
If you spawn close to a code location, go for it early. If you spawn late or hear heavy fighting near Checkpoint, farm outside first and let someone else open the gate.
| Situation | Best Play |
|---|---|
| Fresh spawn near code area | Grab a Security Code early |
| Late spawn | Farm village and houses first |
| Heavy PvP at Checkpoint | Avoid forcing the gate |
| Gate opens nearby | Rotate underground quickly |
| Bag already has blueprints | Extract instead of gambling |
The gate is valuable, but dying with two or three blueprints because we got greedy is the classic Locked Gate mistake.
Best Loadout for Locked Gate Blueprint Farming
For this event, we want storage, mobility, and a weapon that can handle both ARCs and surprise PvP.
| Gear Slot | Recommended Pick | Why It Works |
|---|---|---|
| Augment | Looting MK2 or storage augment | More room for blueprints and materials |
| Weapon | Reliable rifle like Ventor-style setup | Handles ARCs and players well |
| Attachments | Grip + medium magazine | Better control and sustained fights |
| Consumables | Stims or adrenaline shots | Faster rotations and safer exits |
| Utility | Shield recharge | Helps recover after messy fights |
We do not need the most expensive kit. A clean, practical farming setup is better. The goal is not to wipe the lobby; the goal is to extract with rare loot.
Best Locked Gate Blueprint Farming Route
The safest route is to loot in layers: start outside, hit the village, then go underground only when it makes sense.
| Priority | Area | What to Check |
|---|---|---|
| 1 | Nearby houses | Cabinets, shelves, bags |
| 2 | Checkpoint | Lockers, utility loot |
| 3 | Village | Cabinets, rooftops, trash cans |
| 4 | Key-room buildings | Upper floors and hidden containers |
| 5 | Underground tunnels | Ammo boxes, lockers, special containers |
| 6 | Extraction path | Only safe extras |
The village is especially good. We have seen strong loot from ordinary-looking containers there, including weapons and blueprint rolls. Do not skip trash cans either. They can look pointless, then casually hand you something valuable like the game is apologizing for all the mines.
Best Loot to Prioritize
Inventory fills fast during Locked Gate, so we need to be picky. Blueprints always come first.
| Keep First | Keep If You Have Space | Drop First |
|---|---|---|
| Blueprints | Sellable trinkets | Low-value junk |
| Rare attachments | Extra materials | Duplicate cheap items |
| Whole weapons | Patrol Car Keys | Heavy low-value loot |
| Mechanical components | Tapes or pottery | Random clutter |
| Needed crafting items | Spare consumables | Items you cannot use |
If you find a blueprint early, your raid changes. From that point on, play safer, avoid unnecessary fights, and start thinking about extraction.
If you pick up several Patrol Car Keys but cannot realistically reach the car, drop them. Keys only matter if they lead to loot before you die.
Mines, Rocketeers, and ARC Pressure
Locked Gate has a lot of hidden danger. Security Code areas are surrounded by buried mines, and Pilgrim's Peak has two Rocketeers, making it one of the riskiest code locations.
| Threat | How to Handle It |
|---|---|
| Buried mines | Slow down near code areas and listen carefully |
| Rocketeers | Avoid open angles and do not rush Pilgrim's Peak |
| Fireflies / Shredders | Clear only what blocks your path |
| Player footsteps | Create distance before looting |
| Underground ARC swarm | Grab priority loot and leave |
If you hear mine cues, stop sprinting. Most mine deaths happen because we rush through a safe-looking path while thinking about loot instead of our feet.
Underground can also get ugly fast. If ARCs start stacking up, do not try to full-clear everything. Loot the best boxes and move.
Underground Looting: What to Grab First
When the gate opens, the underground area can be one of the best parts of the event. It can also become the loudest, messiest, most dangerous part of the raid.
| Underground Priority | Why It Matters |
|---|---|
| Ammo boxes | Strong chance for attachments and blueprints |
| Special containers | Best high-value loot potential |
| Lockers | Good crafting parts and utility items |
| Loose weapons | Can be worth more than common loot |
| ARC parts | Only worth grabbing if safe |
If another team is already fighting underground, wait a moment or rotate around the edge. Let the chaos cool down before stepping into the middle of it.
If your backpack is already stacked, do not overstay. A full bag underground is not almost safe. It is bait.
What a Good Locked Gate Run Can Look Like
A strong Locked Gate run can easily beat a normal loot route if things line up well.
| Loot Type | Possible Result |
|---|---|
| Blueprints | 2–4 in a strong run |
| Weapons | Multiple whole weapon finds |
| Attachments | Mags, grips, suppressors |
| Materials | Wires, duct tape, coolant, converters |
| Sellables | Tapes, pottery, trinkets |
| ARC Parts | Mechanical components if safely looted |
The exact loot will always vary, but the event clearly has enough high-value containers to make repeated farming worthwhile.
Best Strategy Based on Your Spawn
Do not force the same route every raid. Your spawn should decide your opening move.
| Spawn Type | Best First Move |
|---|---|
| Near village | Loot village fast before it gets picked clean |
| Near Checkpoint | Check lockers and watch gate activity |
| Near code location | Consider grabbing the Security Code |
| Late spawn | Farm outside and wait for gate opening |
| Far spawn | Start with safe houses and rotate inward |
If you spawn late, the raid is not ruined. Sometimes late spawns are safer because other players have already opened the gate or moved away from outer loot zones.
Quick Locked Gate Farming Checklist
Use this simple plan during your run:
1. Check your spawn.
2. Loot nearby houses first.
3. Slow down near Security Code areas.
4. Hit village cabinets, rooftops, and trash cans.
5. Watch for the gate opening.
6. Rotate underground only if it is safe.
7. Prioritize ammo boxes and special containers.
8. Extract once your bag has real value.
The best Locked Gate runs are not the ones where we loot everything. They are the ones where we leave with the items that matter.
Common Mistakes to Avoid
| Mistake | Why It Hurts | Better Play |
|---|---|---|
| Sprinting near code areas | Mines can instantly end the run | Slow down and listen |
| Forcing gate every raid | Too risky when contested | Farm outside first |
| Ignoring village loot | Misses strong blueprint chances | Check every good container |
| Keeping too many keys | Wastes inventory space | Keep only usable keys |
| Fighting with blueprints | High-value death risk | Rotate or extract |
| Staying underground too long | ARCs and players collapse fast | Loot priority boxes and leave |
Greed is the real boss in Locked Gate. The event gives great loot, but it also gives plenty of ways to lose it.
FAQ
What is Locked Gate in Arc Raiders?
Locked Gate is a map condition on The Blue Gate where the underground tunnel entrance at Checkpoint is locked until players collect and enter four Security Codes.
Is Locked Gate good for blueprint farming?
Yes. Locked Gate is one of the better blueprint farming opportunities because it has strong village loot, residential containers, lockers, ammo boxes, and underground loot.
How many Security Codes do you need?
You need four Security Codes: Raider's Refuge, Pilgrim's Peak, Reinforced Reception, and Ancient Fort.
Do we have to open the gate ourselves?
No. If another Raider opens the gate, you can still enter the underground area and loot it.
Where is the most dangerous Security Code location?
Pilgrim's Peak is usually the most dangerous because it has mines and two Rocketeers.
What should we extract with first?
Blueprints, rare attachments, whole weapons, mechanical components, and crafting materials you actually need should take priority.
When should we leave the raid?
Leave once you have multiple blueprints, rare loot, or an overweight backpack. If you already have a strong haul, every extra minute is a risk.
Summary
Locked Gate is one of the best blueprint farming events in Arc Raiders when we play it with a clear plan. The trick is not to tunnel vision on opening the gate. The outside houses, village buildings, lockers, rooftops, trash cans, and underground containers all matter.
Our best route is simple: loot safe outside areas first, watch for mines, hit the village early, rotate underground if the gate opens, then extract once the bag is valuable. If you find blueprints early, stop playing like a brawler and start playing like someone carrying rent money in their backpack.

Most Popular Posts
- ARC Raiders Update 1.42: Phantom Targets Farming Guide (Glitched Wasps, Rewards, Regional Conditions)
- ARC Raiders Hullcracker Blueprints: Fastest Way to Complete The Major's Footlocker
- ARC Raiders Best Pop Trigger Strategy: Fast Phantom Targets Damage Guide
- ARC Raiders Subway Skin Guide: Unlock the Subterranean Outfit
- ARC Raiders Looting Mk. 3 Survivor Blueprint Guide: Best Blue Gate Route and Drop Locations
- ARC Raiders Medium & Heavy Gun Parts Blueprint Guide: Best Farm Route, Locations, and Refiner Crafting
Popular Category Lists
- ARC Raiders / (354)
- Grow a Garden / (294)
- CoD: Black Ops 7 / (167)
- Star Citizen / (163)
- MLB 26 / (159)
- Monopoly Go / (153)
- ARK Survival Ascended / (128)
- Steal a Brainrot / (99)
- Blox Fruits / (74)
- Adopt Me / (74)
- Forza Horizon 6 / (72)
- Sailor Piece / (68)
- Grow a Garden 2 / (68)
- Diablo IV / (62)
- CoD: BLACK OPS 6 / (55)
- Aion 2 / (52)
- Path of Exile 2 / (48)
- Monster Hunter Wilds / (46)
- Windrose / (44)
- Maplestory Classic / (42)






