0
0 Created: Aug 17,2026 | ARC Raiders
Arc Raiders Probe Trial Guide: Farm Points Fast Without Dying Like an Idiot

Stop fighting every Wasp you see. That's the #1 reason runs die before hitting 10K.
Probe Trial rewards searching, not killing. Move fast, loot smart, skip fights, extract before greed kills you. That's the whole game. Here's how we actually run it.
- The Core Loop (Memorize This)
- Score Targets (What's Actually Realistic)
- Loadout: Free Kit vs. Better Kit
- Map & Route: Raven Tides Is Your Friend
- Loot Priority: Power Cells First, Always
- ARC Threat Table (Know What to Skip)
- Other Players: Use Them, Don't Chase Them
- When to Extract (Score Checkpoints)
- Mistakes That Kill Runs
- FAQ
- What's the fastest way to farm Probe Trial points?
- Can I run this with a free loadout?
- What score should I aim for?
- Are Power Cells always worth grabbing?
- Should I fight ARC enemies?
- Bottom Line
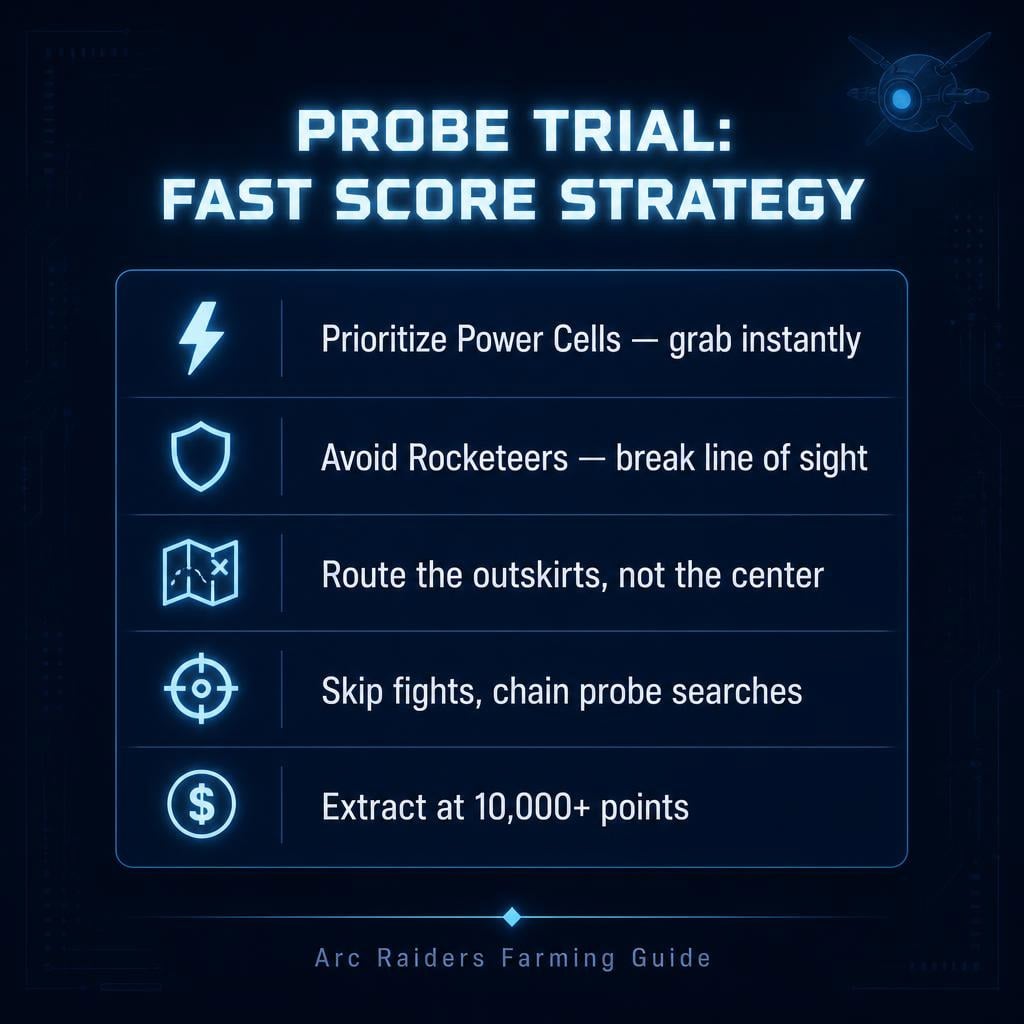
The Core Loop (Memorize This)
1. Find probes — that's your score engine
2. Search fast — grab Power Cells first, skip the junk
3. Avoid ARC unless they're blocking your path
4. Rotate toward extraction while still looting
5. Bank it once the score's good
Every fight you pick costs ammo, time, and attention. Meanwhile someone else is hitting three more probes while you're mid-duel with a Rocketeer for zero score value. Bad trade.
Score Targets (What's Actually Realistic)
| Run Quality | Score | Gear | Risk |
|---|---|---|---|
| Rough/interrupted | 3,000–5,000 | Free kit | Low-Med |
| Clean casual | 7,000–10,000 | Free/light | Medium |
| Solid farm | 10,000–15,000 | Light-mid kit | Medium |
| Optimized run | 15,000+ | Full kit | Med-High |
10K is not a stretch goal. Skip bad fights, keep searching, you'll hit it consistently.
Loadout: Free Kit vs. Better Kit
Free loadout — zero loss on death, forces you to play stealthy. Fine for learning routes. Weakness: you can't trade blows with anything, so ARC avoidance becomes mandatory, not optional.
Better farming kit — worth it once you're pushing past 10K regularly:
| Slot | Bring | Why |
|---|---|---|
| Weapon | Reliable mid-range | Clears small threats fast |
| Ammo | More than default | No panic when spotted |
| Shield | Basic minimum | Room for mistakes |
| Healing | Light kit | Recover chip damage |
| Utility | Smoke/mobility | Escape bad fights |
Don't overinvest. You're not gearing for a boss fight — just enough to survive one bad encounter.
Map & Route: Raven Tides Is Your Friend
Raven Tides works because other squads constantly fight ARC and breach probes for you. You move in after, search faster, less resistance.
Route philosophy — loose circle, not a straight line through the center:
- Start outer edge → search nearby probes
- Move along perimeter, cut inward only when clear
- Check already-breached probes (free time savings)
- Keep extraction direction in mind the whole run
- Loot on the way out, not backward
Center-map pushes = more ARC contact = more dead runs. Outskirts are safer and easier to read.
Loot Priority: Power Cells First, Always
You're not doing a full stash run. You're farming score.
| Loot | Priority | Action |
|---|---|---|
| Power Cells | Very High | Grab instantly |
| Materials/Alloy | Medium | Only if fast |
| Random clutter | Low | Skip |
| Heavy loot | Situational | Only near extraction |
Fast rule: See a Power Cell → take it → move. Don't stand in the menu deciding while a Wasp lines up on your back.
ARC Threat Table (Know What to Skip)
| Enemy | Threat | Response |
|---|---|---|
| Wasp | Medium | Avoid unless blocking path |
| Rocketeer | High | Break LOS immediately |
| Patrol groups | Med-High | Rotate away |
| Distant units | Low | Ignore |
Rocketeer sightline = leave the area. Full stop. This one enemy ends more low-kit runs than anything else in the game.
Fighting only makes sense when: enemy blocks your extraction, or a Wasp is glued to you with no smoke available. Everything else — disengage.
Other Players: Use Them, Don't Chase Them
If you hear gunfire, don't run toward it — approach at an angle and watch.
- Players fighting ARC → probes near them get safer
- Players breaching → search after they clear out
- Players extracting → route temporarily opens up
Don't chase PvP. It burns healing, ammo, and time for zero trial score. You're farming points, not kills.
When to Extract (Score Checkpoints)
| Score | Move |
|---|---|
| 3,000–5,000 | Keep farming |
| 5,000–7,500 | Start planning exit route |
| 7,500–10,000 | Farm toward extraction |
| 10,000–12,500 | Leave if supplies low |
| 12,500+ | Only push if route's clean |
Most failed runs die right here — hit a good number, greed for one more probe, get caught mid-loot. Farm toward extraction, not away from it.
Mistakes That Kill Runs
| Mistake | Fix |
|---|---|
| Fighting every ARC unit | Avoid unless forced |
| Overlooting containers | Grab key items, move |
| Ignoring extraction distance | Route toward exit early |
| Aggressive play on free kit | Play stealthier |
| Looting while enemies close | Cancel, reposition |
| Chasing PvP | Prioritize probes |
The best Probe Trial players aren't the best shooters — they're the ones who know when not to shoot.
FAQ
What's the fastest way to farm Probe Trial points?
Chain probe searches, skip unnecessary fights, grab Power Cells, keep moving toward extraction. Every fight you skip is more search time.
Can I run this with a free loadout?
Yes. Weak combat power means you need to avoid ARC entirely and extract once score is solid. Great for learning routes without risking gear.
What score should I aim for?
7,000–10,000 for a clean casual run. 10,000–15,000+ with better routing and a light kit. Past 10K, start thinking seriously about extraction.
Are Power Cells always worth grabbing?
Yes — top priority every time. Fast to loot, high score value. Grab on sight unless enemies are already closing in.
Should I fight ARC enemies?
Only if they block extraction or won't stop chasing. Otherwise rotate away — fights cost more than they're worth in this mode.
Bottom Line
Probe Trial rewards movement over combat. Search fast, grab Power Cells, dodge ARC, rotate toward extraction, bank the score before greed wrecks it.
Run this loop clean and 10,000 points is routine. Add a light kit and better routing, 15,000+ is well within reach.

Most Popular Posts
- ARC Raiders Update 1.42: Phantom Targets Farming Guide (Glitched Wasps, Rewards, Regional Conditions)
- ARC Raiders Hullcracker Blueprints: Fastest Way to Complete The Major's Footlocker
- ARC Raiders Best Pop Trigger Strategy: Fast Phantom Targets Damage Guide
- ARC Raiders Subway Skin Guide: Unlock the Subterranean Outfit
- ARC Raiders Looting Mk. 3 Survivor Blueprint Guide: Best Blue Gate Route and Drop Locations
- ARC Raiders Medium & Heavy Gun Parts Blueprint Guide: Best Farm Route, Locations, and Refiner Crafting
Popular Category Lists
- ARC Raiders / (350)
- Grow a Garden / (294)
- CoD: Black Ops 7 / (167)
- Star Citizen / (162)
- MLB 26 / (159)
- Monopoly Go / (152)
- ARK Survival Ascended / (127)
- Steal a Brainrot / (99)
- Blox Fruits / (74)
- Adopt Me / (74)
- Forza Horizon 6 / (72)
- Sailor Piece / (68)
- Grow a Garden 2 / (68)
- Diablo IV / (62)
- CoD: BLACK OPS 6 / (55)
- Aion 2 / (50)
- Path of Exile 2 / (48)
- Monster Hunter Wilds / (46)
- Windrose / (44)
- Donut SMP / (41)