



 0
0 Created: Jul 30,2026 | ARC Raiders
Arc Raiders Processors Farming: Best Routes, Locations & Recycling Guide

Processors are the material you ignore until an MK3 kit or pink augment demands a stack you don't have. Stop looting randomly. Hit the right rooms, and 8–15 Processors per run becomes the floor, not the ceiling.

This is the route. No filler.
- Why Processors Actually Matter
- Best Farming Locations Ranked
- The Stella Montis Route (Main Method)
- Route Overview
- Assembly: Your Opening Move
- Medical Research: The Reliable Second Stop
- Control Rooms: Optional Extension
- Cultural Archives: Greedy Route Finisher
- Fast Route vs Full Greed Route
- Items to Save for Recycling
- Vendor Backup: Celeste
- Backup Farm: Spaceport
- Backup Farm: Dam Battlegrounds
- Loadout: Keep It Light
- 8 Rules for Better Yield
- Expected Yield by Run Quality
- Mistakes Killing Your Yield
- FAQ
- What's the fastest way to farm Processors?
- Where's the single best Processor location?
- Can I just buy Processors instead of farming?
- What should I recycle for Processors?
- How many Processors should one run get me?
- Summary
Why Processors Actually Matter
They gate high-grade gear, pink augments, and MK3 kits. If you're not prioritizing them, you're stalling your own progression.
Key point: Processors also come from recycling. Stop chasing a single item. Start farming a whole loot category — servers, cabinets, breach lockers, electronics.
Best Farming Locations Ranked
| Location | Best Area | Why | Rating |
|---|---|---|---|
| Stella Montis | Assembly, Medical Research, Cultural Archives | Highest density of servers/lockers/tech | ???? Best |
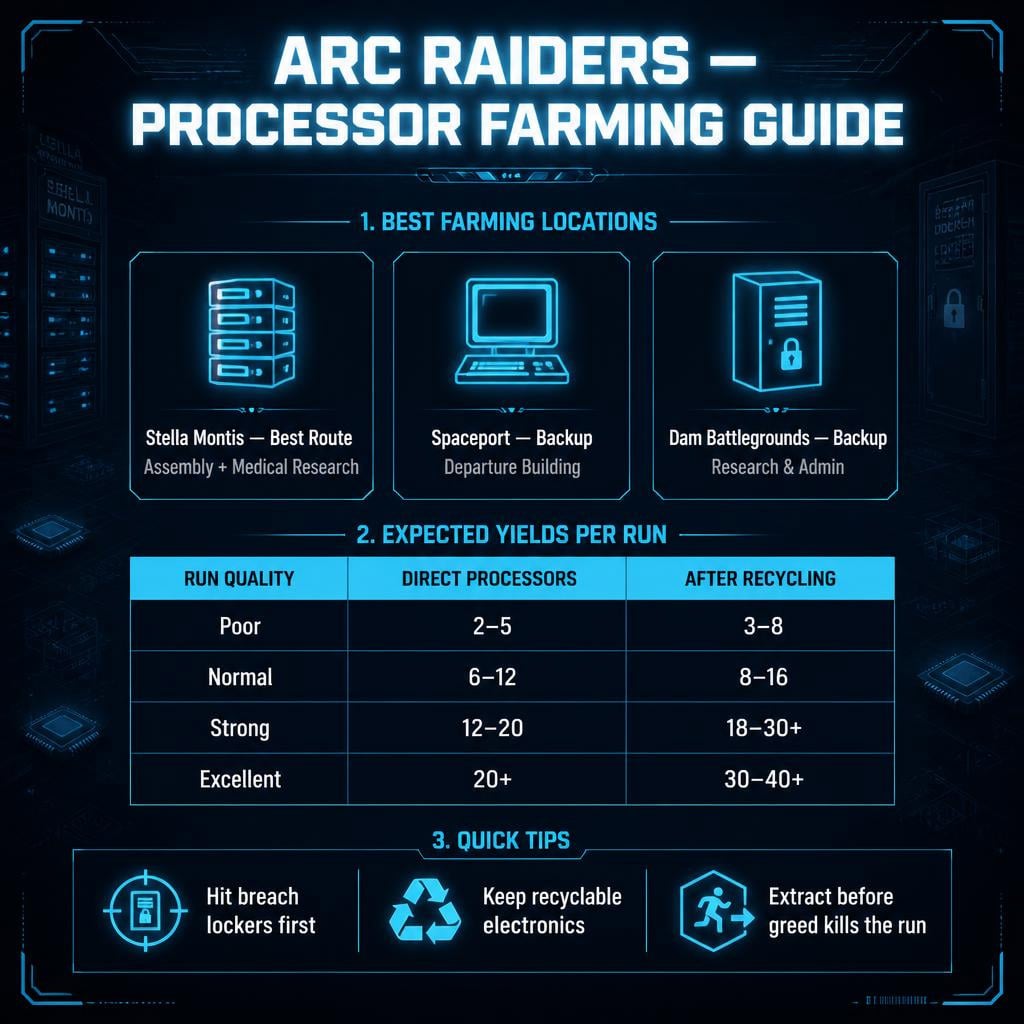
| Spaceport | Departure Building | Solid server/computer concentration | ???? Strong backup |
| Dam Battlegrounds | Research, Admin | Decent tech rooms | ???? Backup |
| Celeste (Vendor) | — | ~5 Processors per reset for seeds | Fills gaps |
| Recycling | Any tech run | Converts junk electronics into Processors | Free bonus |
Bottom line: Stella Montis is the primary farm. Spaceport and Dam are for when Stella's contested.
The Stella Montis Route (Main Method)
Spawn dictates start point:
- Spawn near Assembly? Start there.
- Spawn near Medical Research? Reverse it.
Two minutes of dead running kills your efficiency. Don't force a bad spawn.
Route Overview
| Step | Area | Loot Priority |
|---|---|---|
| 1 | Assembly | Breach lockers, servers, yellow/blue cabinets, carts |
| 2 | Medical Research | Server lockers, computers, cabinets |
| 3 | Control Room A3 | Servers, computer stations |
| 4 | Control Room A1 | Computers, breachable containers |
| 5 | Cultural Archives | Open servers, side-room tech |
| 6 | Extract | Bag's good? Leave. |
Assembly: Your Opening Move
Hit breachable lockers, server racks, cabinets, carts, computers in that order. In a clean lobby, 5 Processors in the first minute is realistic.
Lockers already open? Don't panic — check servers and cabinets anyway. Most players grab the shiny loot and skip the boring tech containers. That's your advantage.
Medical Research: The Reliable Second Stop
Another squad already ran through? Still check everything. Players loot fast and leave recyclables behind.
Assembly + Medical Research alone = 8–12 direct Processors on a clean run.
Control Rooms: Optional Extension
Push into A3 and A1 if your bag isn't full and the lobby's quiet. Lower density than Assembly, but it stabilizes your average.
⚠️ Warning: ARC enemies guarding the area? Decide fast. A dead raider extracts zero Processors. Ten in the bag beats fifteen you never bring home.
Cultural Archives: Greedy Route Finisher
Open server clusters, side-room tech, breachable panels. Check what other players skip — boring containers pay the bills here.
Fast Route vs Full Greed Route
| Route | Time | Yield | Risk |
|---|---|---|---|
| Fast (Assembly → Medical → Extract) | Short | 5–12 direct | Low |
| Standard (+ Control Rooms) | Medium | 8–20+ | Medium |
| Full Greed (+ Cultural Archives) | Long | 20–40+ | High |
| Naked Reset | Very short | Variable | Minimal |
Need a quick top-up? Fast route. Building a stockpile? Go full greed.
Items to Save for Recycling
Don't scrap these. They feed Processor chains.
| Item | Priority |
|---|---|
| Exodus Modules | Very high |
| Broken Guidance Systems | High |
| Telemetry Transceivers | High |
| Ion Splitters | High |
| Geiger Counters | High |
| Spectrum Analyzers | High |
| Oscilloscopes | High |
| Rotary Encoders | High |
| Recording Panels | Medium-high |
| Alarm Clocks / Projectors | Medium |
10 direct Processors on paper can turn into 16+ after you recycle everything else you dragged home.
Vendor Backup: Celeste
Celeste trades seeds for roughly 5 Processors per reset. Not a farming replacement — a gap-filler when you're one craft short.
| Method | Strength | Weakness |
|---|---|---|
| Celeste | Zero combat risk | Capped quantity |
| Stella Montis | Highest volume | Requires extraction |
| Recycling | Free bonus value | Needs item knowledge |
Short a few? Check Celeste first. Need a stack? Go farm.
Backup Farm: Spaceport
Departure Building is the target — first-floor processing rooms, third-floor computer areas, server cases.
Less streamlined than Stella. More spread out, more exposure. Departure already stripped? Pivot immediately. Don't burn five minutes on scraps.
Backup Farm: Dam Battlegrounds
Research and Admin are the zones. Not your first choice for pure Processor farming, but solid if you're already running Dam objectives.
Loadout: Keep It Light
You don't need a full kit to farm tech rooms.
| Setup | Use Case |
|---|---|
| Naked/light kit | Risky lobbies, reset farming |
| Basic weapon only | Standard runs |
| Full kit | Contested/group play only |
| Large bag | Long Stella runs |
Spawned far from the good zones with nothing but a pistol? Sometimes resetting beats forcing it.
8 Rules for Better Yield
1. Hit breach lockers first — best direct Processor source.
2. Never skip servers — most players do. Don't be most players.
3. Open every cabinet — wires and sensors hide here too.
4. Check computers/carts — small containers, real value.
5. Keep recyclable electronics — your final count depends on it.
6. Extract when the bag's good — greed kills more runs than RNG.
7. Reverse route by spawn — don't force a dead-run start.
8. Recheck looted rooms — other players leave more than you'd think.
Expected Yield by Run Quality
| Run Quality | Direct | After Recycling |
|---|---|---|
| Poor (bad spawn/looted) | 2–5 | 3–8 |
| Normal fast run | 6–12 | 8–16 |
| Strong route | 12–20 | 18–30+ |
| Excellent full run | 20+ | 30–40+ |
Clean spawn, untouched containers, full recycling — 40+ Processor value in a single run is achievable. Not guaranteed. But it's the real ceiling.
Mistakes Killing Your Yield
| Mistake | Fix |
|---|---|
| Only looting rare-looking items | Check servers/cabinets/computers |
| Forcing a bad spawn | Reset instead |
| Ignoring recyclables | Keep every listed item |
| Overstaying with a full bag | Extract early |
| Skipping Medical Research | Always hit it |
| Bringing heavy gear to farm | Run light |
FAQ
What's the fastest way to farm Processors?
Stella Montis — Assembly and Medical Research. Loot breach lockers, servers, computers, and cabinets. Extract after those two zones for a fast, reliable run.
Where's the single best Processor location?
Assembly, Stella Montis. Highest container density on the map. Medical Research, Control Rooms A1/A3, and Cultural Archives extend the route if you have time.
Can I just buy Processors instead of farming?
Yes, from Celeste, roughly 5 per reset for seeds. Good for topping off a craft. Won't replace an actual farming run.
What should I recycle for Processors?
Exodus Modules, Broken Guidance Systems, Telemetry Transceivers, Geiger Counters, Spectrum Analyzers, Oscilloscopes, Ion Splitters, Rotary Encoders. Keep all of it.
How many Processors should one run get me?
6–12 direct on a fast Assembly + Medical Research run. 18–30+ with Control Rooms and recycling. 40+ on an excellent full-map run with clean spawns.
Summary
Stop treating Processors as random loot — they're targeted loot. Run Stella Montis: Assembly → Medical Research → Control Rooms → Cultural Archives. Prioritize servers, breach lockers, cabinets, computers. Keep every recyclable electronic. Use Celeste for small gaps. Fall back to Spaceport or Dam when Stella's hot.
Extract before greed turns a good run into nothing.

Most Popular Posts
- ARC Raiders Update 1.42: Phantom Targets Farming Guide (Glitched Wasps, Rewards, Regional Conditions)
- ARC Raiders Hullcracker Blueprints: Fastest Way to Complete The Major's Footlocker
- ARC Raiders Best Pop Trigger Strategy: Fast Phantom Targets Damage Guide
- ARC Raiders Subway Skin Guide: Unlock the Subterranean Outfit
- ARC Raiders Looting Mk. 3 Survivor Blueprint Guide: Best Blue Gate Route and Drop Locations
- ARC Raiders Medium & Heavy Gun Parts Blueprint Guide: Best Farm Route, Locations, and Refiner Crafting
Popular Category Lists
- ARC Raiders / (354)
- Grow a Garden / (294)
- CoD: Black Ops 7 / (167)
- Star Citizen / (163)
- MLB 26 / (159)
- Monopoly Go / (153)
- ARK Survival Ascended / (128)
- Steal a Brainrot / (99)
- Blox Fruits / (74)
- Adopt Me / (74)
- Forza Horizon 6 / (72)
- Sailor Piece / (68)
- Grow a Garden 2 / (68)
- Diablo IV / (62)
- CoD: BLACK OPS 6 / (55)
- Aion 2 / (52)
- Path of Exile 2 / (48)
- Monster Hunter Wilds / (46)
- Windrose / (44)
- Maplestory Classic / (42)






