0
0 Created: Jul 15,2026 | ARC Raiders
ARC Raiders Search Lockers Trial: How to Solo 10k+ Points on Dam Battlegrounds

Dam Battlegrounds is the map for this trial. Spaceport has more locker spawn points on paper, but half of them are empty. That's wasted travel time you don't have.
Each locker = 160 points. You need roughly 63 lockers to clear 10k. Day vs night doesn't change spawn count — pick day for the easier Raider Hatch exit and move on.
- Loadout: Skip the Guesswork
- Key Priority: Don't Waste Slots
- The Route (Sub-20 Minute Loop)
- What We Actually Scored
- Mistakes That Cost You Points
- FAQ
- Does day vs night raid change locker count?
- Is Dam Battlegrounds actually better than Spaceport?
- Do I need the Controlled Access Zone key?
- How do I avoid wasting the Testing Annex key?
- How many lockers do I need for 10k?
- Bottom Line
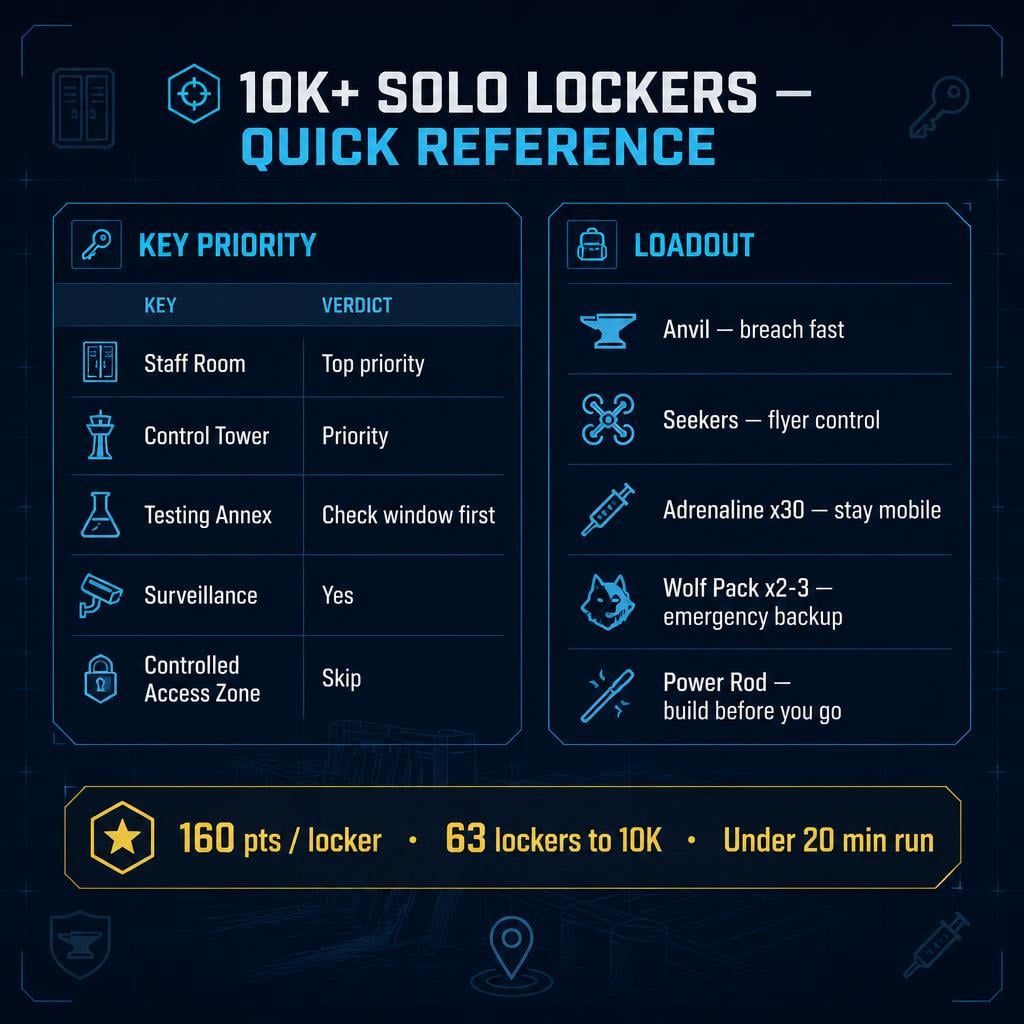
Loadout: Skip the Guesswork
| Bring | Why |
|---|---|
| Anvil | Breaches locked rooms fast |
| Seekers | Flyer control — though they've felt weaker this season, possible stealth nerf |
| Adrenaline Shots x30+ | Keep moving through fire/Tick damage without stopping |
| Wolf Packs x2-3 | Panic button if something aggros |
| Power Rod | No spawns on map — build it before you leave |
Key Priority: Don't Waste Slots
| Key | Lockers? | Verdict |
|---|---|---|
| Staff Room | Yes — biggest single spawn on the map | Priority #1 |
| Control Tower | Yes | Priority #2 |
| Testing Annex | Only 1 of 2 doors | Check mesh window first, always |
| Surveillance | Yes | Water Treatment back room |
| Controlled Access Zone | Unreliable — door was already open both times we ran it | Skip. Save the slot. |
The Route (Sub-20 Minute Loop)
1. Raider Hatch → Hydro Domes. Two lockers per dome. Flyers spawn hard here — don't panic, just move.
2. Power Generation. Use your Power Rod on the side room.
3. Controlled Access Zone. Ground floor + upper office via ladder. No key needed if door's already open.
4. Spillway Lanes. Cross one bridge, not two. Saves real time.
5. Control Tower / Staff Room. If you've got both keys, this is your biggest payout on the map.
6. Testing Annex. Two floors. Window-check both locked doors before using your key — only one has lockers.
7. Extraction-side building. Underrated, often a 4+ locker spawn.
8. Water Treatment. Surveillance room (key-gated) + unlocked front area.
Bonus: Hydro Domes and Water Treatment both count toward the open containers in the Swamp challenge. Two trials, one loop.
What We Actually Scored
Same route, two runs:
- With Staff Room + Control Tower keys: ~11,000 points
- Missing Staff Room key (got lucky, door was already opened by another player): just over 10,000 points
That's a 1,000-point swing from one key. Prioritize accordingly.
Mistakes That Cost You Points
- Testing Annex: Opening blind burns your only key on the empty room. Window-check first.
- Controlled Access Zone: Don't waste inventory space on this key if the door's already unlocked.
- Flyers: Fighting every Hornet/Firefly eats time. Run past, loot after.
FAQ
Does day vs night raid change locker count?
No. Spawn volume is identical. Day just makes extraction via Raider Hatch smoother.
Is Dam Battlegrounds actually better than Spaceport?
Yes. More locker spawns are usable, meaning less dead running for the same or better score.
Do I need the Controlled Access Zone key?
Not based on our runs — the door was already open both times. Skip it, bring more adrenaline shots instead.
How do I avoid wasting the Testing Annex key?
Look through the mesh window on both locked doors before using the key. Only one room has lockers.
How many lockers do I need for 10k?
About 63 lockers at 160 points each. Track it loosely as you go so you know if you need an extra detour.
Bottom Line
Staff Room + Control Tower keys, skip Controlled Access Zone, window-check Testing Annex before you commit. Run the loop above and you'll clear 10k in under 20 minutes — RNG willing, closer to 11k.


The GGWTB Editorial Team features 10 full-time gaming editors and 23 specialist contributors, delivering hands-on tested walkthroughs, easter egg breakdowns, and game updates.
ELSA — who spearheads our in-depth COD: BLACK OPS 7, ARC Raiders guides, and patch notes—every guide is rigorously verified on live servers for accuracy.

Most Popular Posts
- ARC Raiders Update 1.42: Phantom Targets Farming Guide (Glitched Wasps, Rewards, Regional Conditions)
- ARC Raiders Hullcracker Blueprints: Fastest Way to Complete The Major's Footlocker
- ARC Raiders Best Pop Trigger Strategy: Fast Phantom Targets Damage Guide
- ARC Raiders Subway Skin Guide: Unlock the Subterranean Outfit
- ARC Raiders Looting Mk. 3 Survivor Blueprint Guide: Best Blue Gate Route and Drop Locations
- ARC Raiders Medium & Heavy Gun Parts Blueprint Guide: Best Farm Route, Locations, and Refiner Crafting
Popular Category Lists
- ARC Raiders / (356)
- Grow a Garden / (294)
- CoD: Black Ops 7 / (167)
- Star Citizen / (163)
- MLB 26 / (159)
- Monopoly Go / (153)
- ARK Survival Ascended / (128)
- Steal a Brainrot / (99)
- Blox Fruits / (74)
- Adopt Me / (74)
- Forza Horizon 6 / (72)
- Sailor Piece / (68)
- Grow a Garden 2 / (68)
- Diablo IV / (62)
- CoD: BLACK OPS 6 / (55)
- Aion 2 / (53)
- Path of Exile 2 / (48)
- Monster Hunter Wilds / (46)
- Windrose / (44)
- COD: Modern Warfare 4 / (44)