0
Created: Nov 22,2026 | ARC Raiders
ARC Raiders Stella Montis: Best Fossilized Lightning Backpack Route

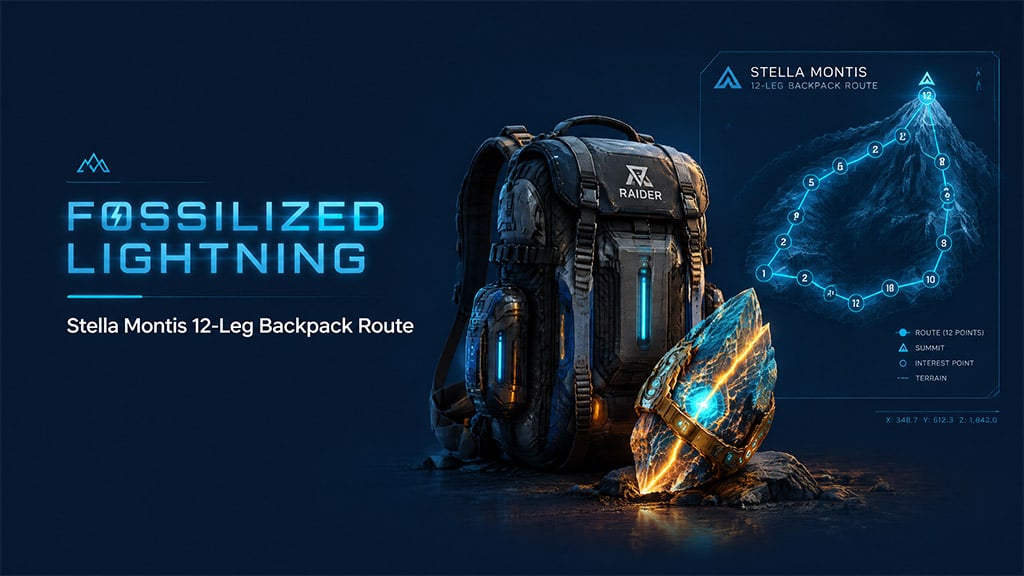
Fossilized Lightning drops from Raider backpacks on Stella Montis during standard day raids—no Electromagnetic Storm required. Run this 12-leg route in order, scan elevated perches from the floor before climbing, and skip any spawn guarded by heavy ARC.
- Stella Montis Route at a Glance
- Legs 1–4: Eastern Tunnel to Cultural Archives
- Legs 5–7: Atrium, Cafeteria, and Robotic Sandbox
- Legs 8–11: Loading Bay, Medical Bay, and Second Tunnel
- Leg 12: Assembly Workshops
- Side Loot and Route Abort Conditions
- FAQ (Frequently Asked Questions)
- Do you need an Electromagnetic Storm to get Fossilized Lightning?
- Do all 52 backpacks spawn every raid?
- Do fuller backpacks have better Fossilized Lightning odds?
- Which legs have the highest Fossilized Lightning priority?
- When should you abort the Stella Montis backpack route?
Stella Montis Route at a Glance
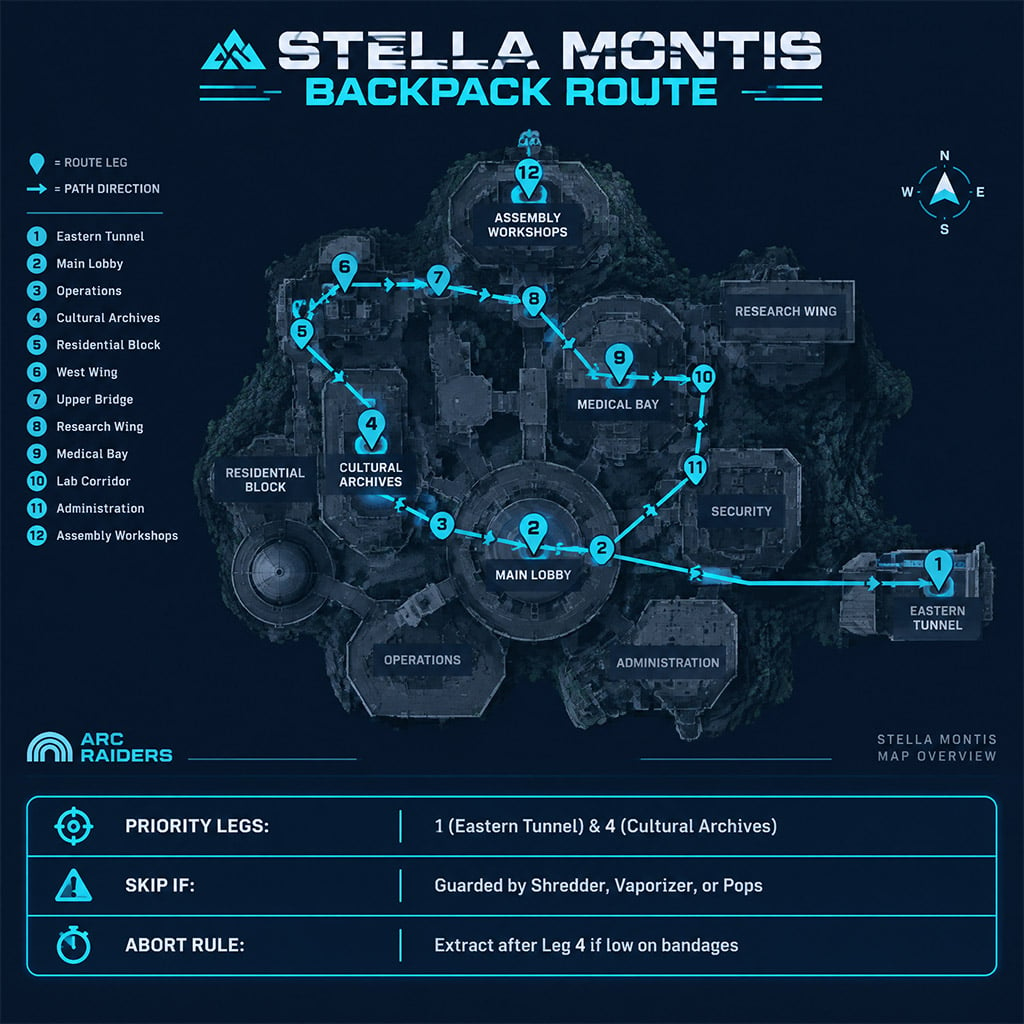
Start from a tunnel-side spawn and clear these 12 legs in sequence.
| Leg | Area | Named Checks | Skip If |
|---|---|---|---|
| 1 | Eastern Tunnel | First tunnel bag, zipline top, crate tops | Never; it sits directly on your path. |
| 2 | Main Lobby | 4–5 computer station spots, second-floor pillar, couch | You do not know the unpinned upper spots. |
| 3 | Business Center | 2 floor positions | You do not have the exact pins memorized. |
| 4 | Cultural Archives | Top shelf, headless statue | Never; both are visible from the floor. |
| 5 | Atrium: Communication Room | Stairwell perch, far corner along the pipe | The pipe sightline shows no bag. |
| 6 | Cafeteria | Fuel-cell room, under the stairs | Pops guard the fuel-cell approach. |
| 7 | Robotic Sandbox B to A | B perch, A main position, A lower opposite side | You are low on bandages or ammo. |
| 8 | Logistics Admin | 1 position inside the room | Never; check immediately on entry. |
| 9 | Medical Bay | Elevated surface, bench, lower room, upper room | You have full supplies and Loading Bay is clear. |
| 10 | Loading Bay | Ledge gaps on both sides, lower checks | A Shredder or Vaporizer holds the middle. |
| 11 | Tunnel before Assembly | Against the wall, side recess | Never; both are directly on your path. |
| 12 | Assembly Workshops | Yellow structure top, keycard-room roof, low corners | Take high checks only if you are short on time. |
Skip Legs 3 and 6 on timed runs, because Cultural Archives and Eastern Tunnel deliver the fastest confirmed Fossilized Lightning checks.
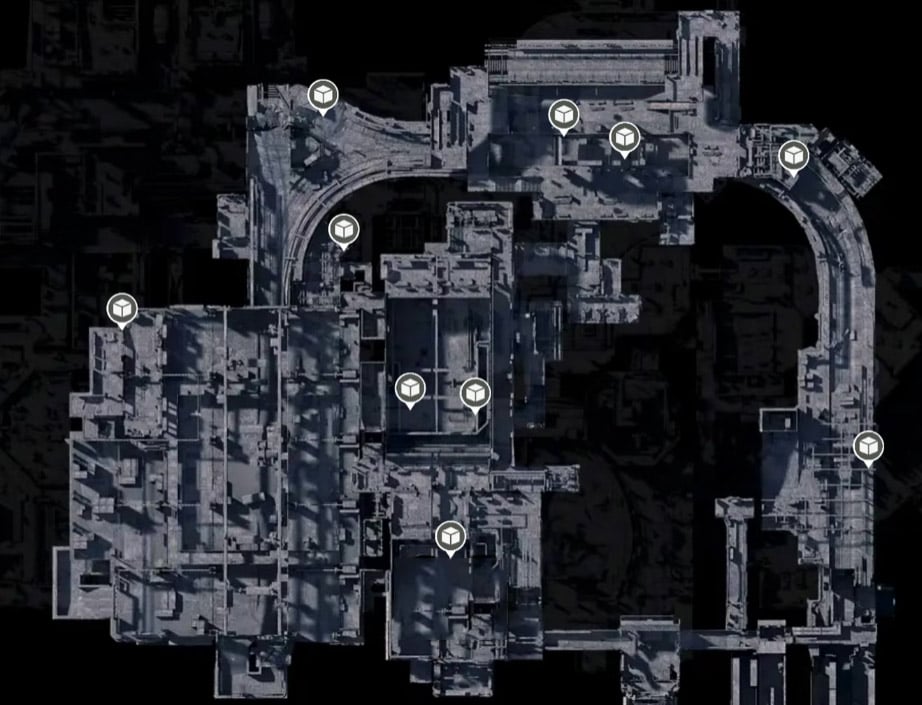
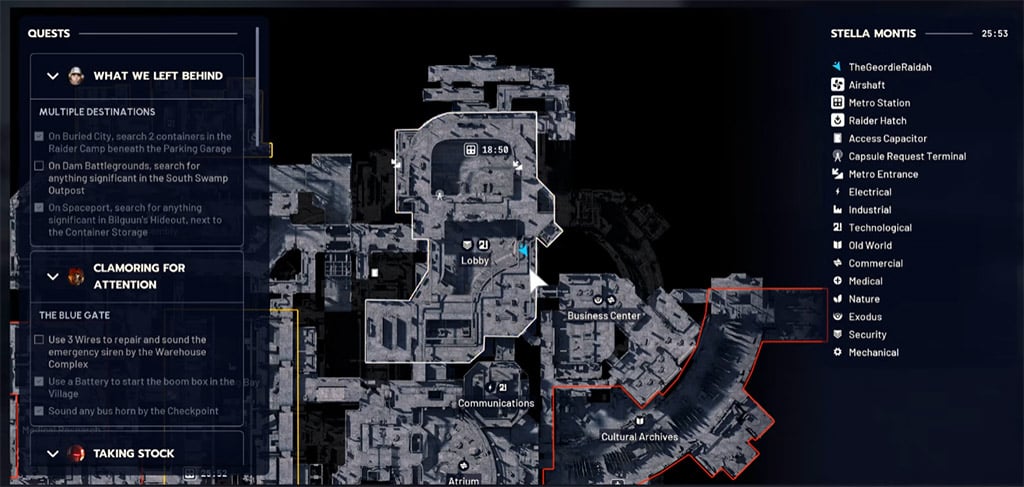
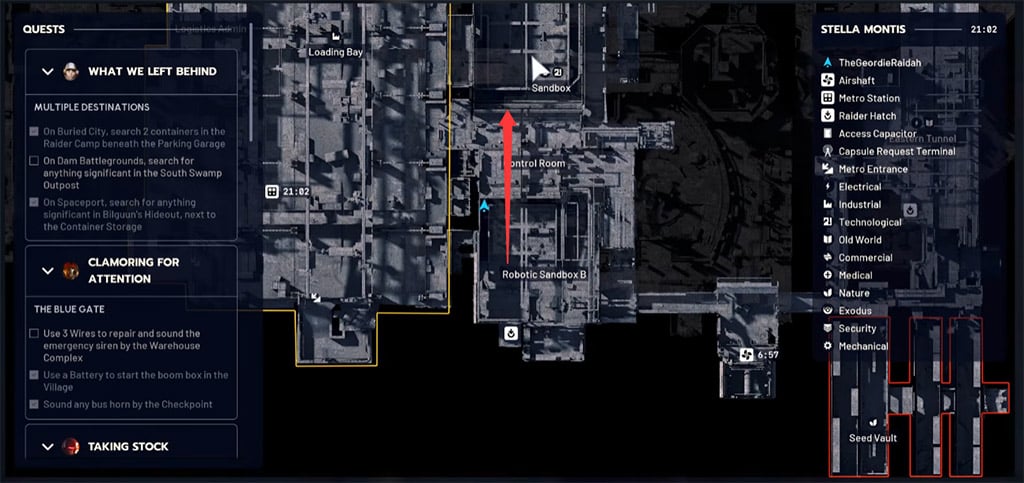
Legs 1–4: Eastern Tunnel to Cultural Archives
This opening stretch delivers the highest Fossilized Lightning density with minimal climbing. In our testing, both Eastern Tunnel and Cultural Archives produced confirmed drops during standard day raids.
- Eastern Tunnel: Loot the first tunnel bag, then visually scan the zipline landing and crate tops from below before climbing.
- Main Lobby (Ground): Sweep desk height and floor level around the computer stations in one pass, checking under the desks.
- Main Lobby (Second Floor): Anchor your search on the pillar and couch to spot nearby surface spawns.
- Business Center: Hit the two floor positions only if you have them memorized, as wandering wastes valuable raid time.
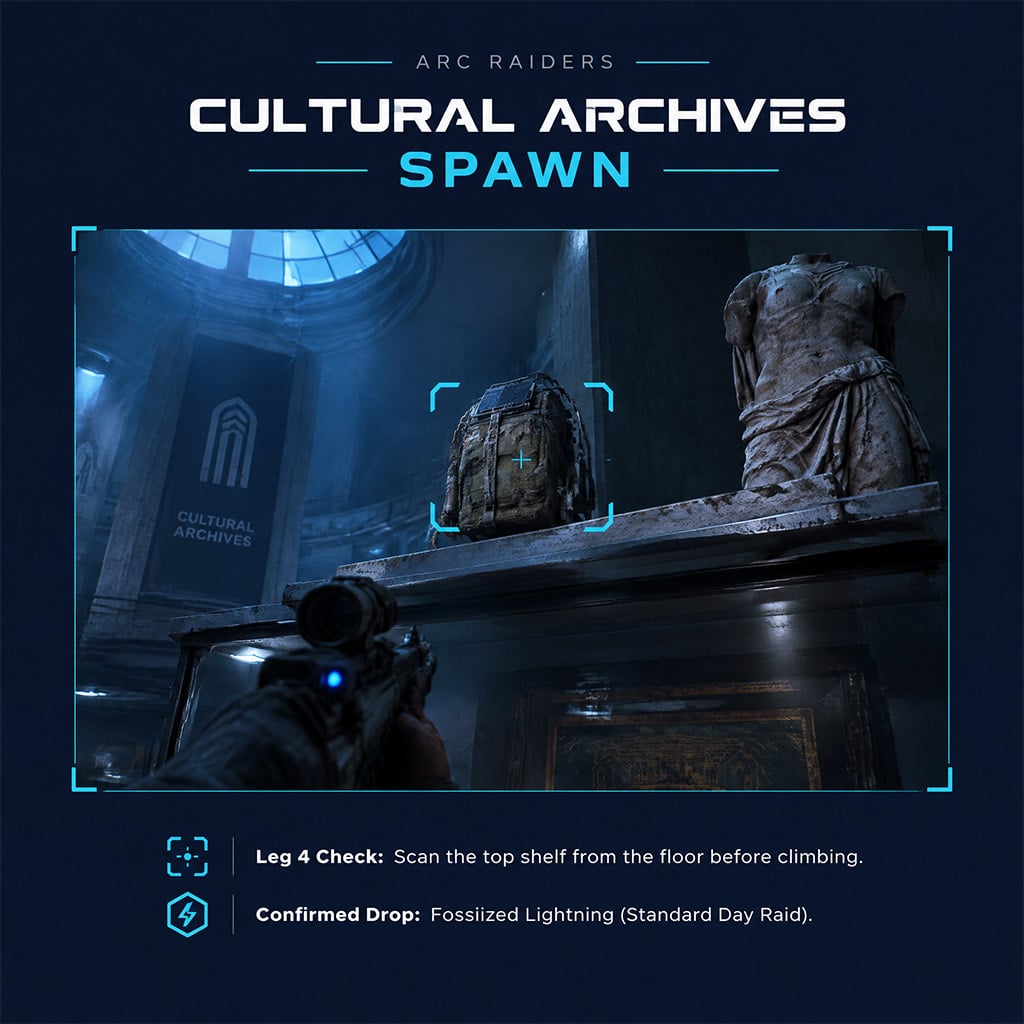
- Cultural Archives: Look up immediately upon entering to check the top shelf and the headless statue from the floor.
Pro Tip: Cut Business Center entirely if you spawn late, because a 3-second visual check on the Cultural Archives shelf beats hunting blind.
Legs 5–7: Atrium, Cafeteria, and Robotic Sandbox
Upper Atrium checks drain your raid timer fastest, so confirm every bag by sight before committing to a climb. We verified that Pops patrolling the Cafeteria fuel-cell room make that single spawn a bad trade when solo.
- Communication Room: Take the Archives zipline, turn left into the Atrium, check the stairwell perch, and scan the far pipe corner before climbing.
- Cafeteria: Check under the stairs first, and only insert the floor fuel cell to open the powered door if the hallway is clear.
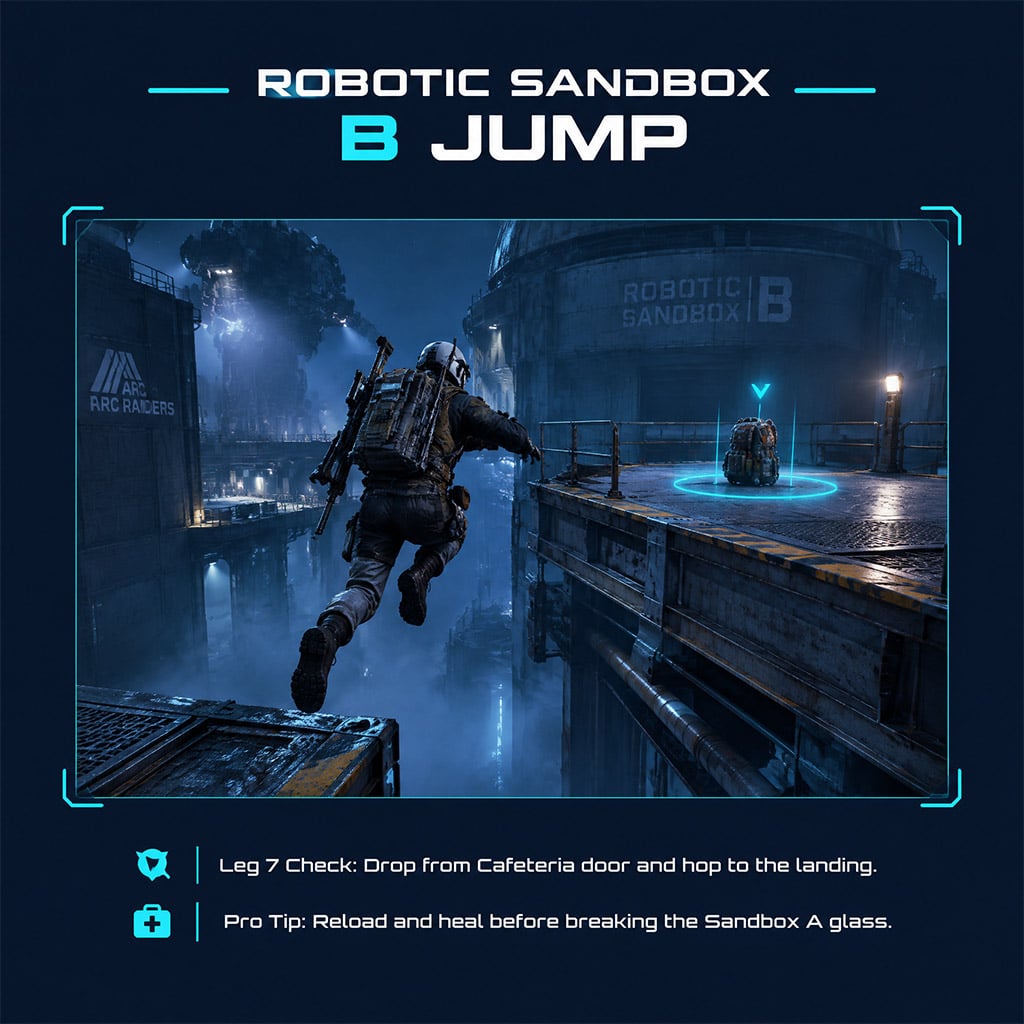
- Sandbox B: Drop from the cafeteria-side door and hop across to the landing to inspect the perch.
- Sandbox A: Push through the glass route, clear the main position, and check the lower spot on the opposite side.
Pro Tip: Reload your Hullcracker and heal to full before breaking the Sandbox A glass, because an ambush by a Pop here will end your run.
Legs 8–11: Loading Bay, Medical Bay, and Second Tunnel
Your path through this sector depends entirely on ARC control in the Loading Bay midsection. Never force a crossing under fire when you can pivot into Medical Bay to restock.
- Logistics Admin: Check the single interior spawn immediately on entry before stepping into the bay.
- Loading Bay Read: Scout the center lane first; if a Shredder or Vaporizer holds it, divert to Medical Bay.
- Medical Bay: Clear the elevated surface, bench, lower room, and upper room via the stairs to grab both backpacks and extra bandages.
- Loading Bay Ledges: Once the lane clears, run both side ledge gaps for backpacks, weapon crates, and grenade tubes.
- Second Tunnel: Loot the wall spawn and the side recess on your way into Assembly.
Pro Tip: Use Medical Bay as a mid-route reset, as our runs consistently pulled three extra bandages from its upper and lower rooms.
Leg 12: Assembly Workshops
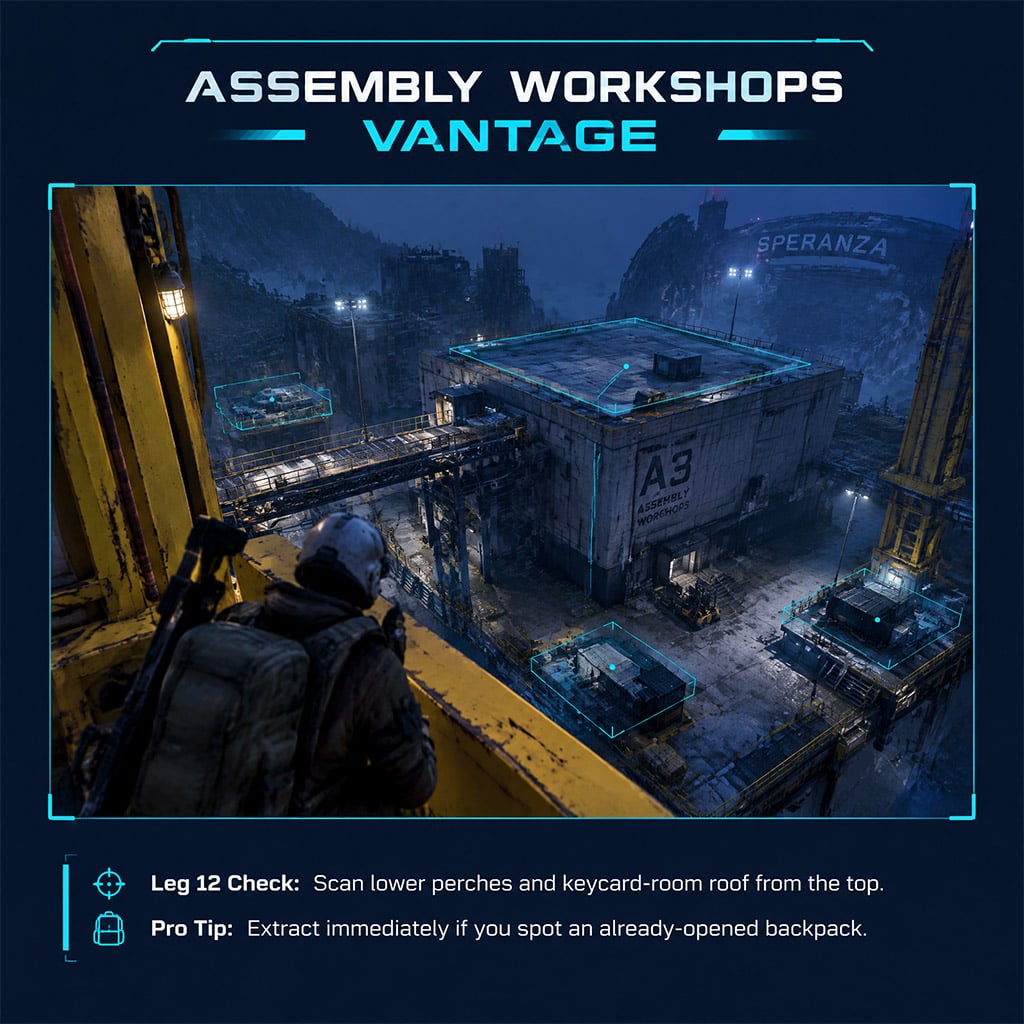
In Assembly Workshops, one high vantage point replaces multiple wasted climbs. Scale the central yellow structure first to map out every active spawn below.
- Yellow Structure: Climb to the top, loot the perch, and scan neighboring structure tops and lower corners before dropping.
- Keycard-Room Roof: Jump or grapple to the keycard-room roof—you do not need the keycard to reach this exterior spawn.
- Low Corners: Sweep the room corner, raised surface, and the spot behind the interior obstruction on your way out.
- Final Perch: Grab the exit-line perch only if it has not been looted by an earlier squad.
Pro Tip: If you spot an already-opened backpack in Assembly, extract immediately rather than checking low corners behind another player.
Side Loot and Route Abort Conditions
Target these secondary containers only if the items are already on your crafting list.
| Target Item | Location | Tactical Note |
|---|---|---|
| Exodus Modules | Communication Room small containers; Assembly breachable containers | Breach only when the room is completely clear. |
| Magnetic Accelerators | Assembly breachable containers | Low drop rate; skip if pressed for time. |
| Augment Blueprints | Upper Medical Bay room (non-backpack loot) | High-traffic PvP zone; expect other players. |
Do not force a full 12-leg clear if you are under-supplied or trailing another squad; extract after Leg 4 if you lack spare bandages or find opened bags ahead of you.
FAQ (Frequently Asked Questions)
Do you need an Electromagnetic Storm to get Fossilized Lightning?
No. Fossilized Lightning drops from Raider backpacks on Stella Montis during standard day raids.
Do all 52 backpacks spawn every raid?
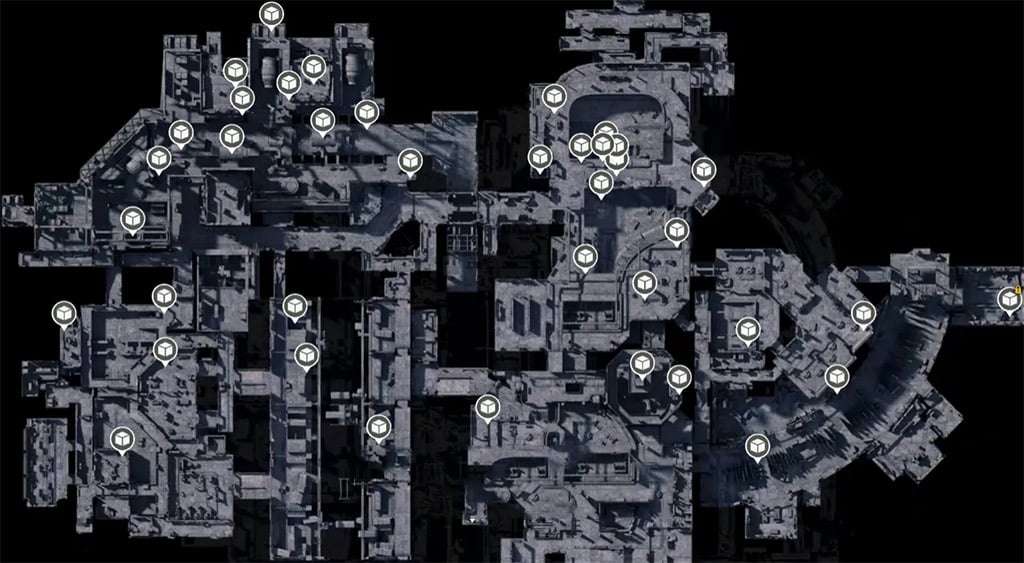
No. That number represents total possible spawn locations, and many perches will be empty or already looted in any given raid.
Do fuller backpacks have better Fossilized Lightning odds?
No. In our testing, a six-item backpack dropped zero Fossilized Lightning, while a single-item tunnel bag dropped one.
Which legs have the highest Fossilized Lightning priority?
Prioritize Leg 1 (Eastern Tunnel) and Leg 4 (Cultural Archives). Both offer fast, ground-visible checks with minimal climbing.
When should you abort the Stella Montis backpack route?
Extract immediately after Leg 4 if you run out of bandages or spot opened backpacks indicating another player is ahead of you.

I’m Sofia Bergström, a Swedish Managing Editor covering FPS, competitive shooters, and extraction shooters for GGWTB. My guides focus on loadout trade-offs, positioning, and when to commit—or cut your losses. A weapon’s stats tell only part of the story; I focus on how it fits your role and the fight ahead.
Most Popular Posts
- ARC Raiders Frozen Trail Update Guide: Pendola Pass, Frigate & Meta Loadouts
- ARC Raiders Broken Guidance System and Dual Anvil Build Guide
- ARC Raiders Ascending the Mountain: Fast Loot Routes and Item Guide
- ARC Raiders Outpost Storage Guide: Furniture Choices and Weapon Racks
- ARC Raiders Frozen Trail Prep Guide: Skills, Weapon Upgrades & Map Shifts
- ARC Raiders Kinetic Converter Guide: Best Weapons, Builds & Stats
Popular Category Lists
- ARC Raiders / (378)
- Grow a Garden / (303)
- Star Citizen / (174)
- CoD: Black Ops 7 / (168)
- MLB 26 / (159)
- Monopoly Go / (153)
- ARK Survival Ascended / (132)
- Steal a Brainrot / (101)
- Adopt Me / (80)
- Blox Fruits / (74)
- Forza Horizon 6 / (72)
- Aion 2 / (69)
- Sailor Piece / (68)
- Grow a Garden 2 / (68)
- COD: Modern Warfare 4 / (66)
- Diablo IV / (62)
- CoD: BLACK OPS 6 / (55)
- Maplestory Classic / (51)
- Path of Exile 2 / (48)
- Monster Hunter Wilds / (46)