



 0
0 Created: Feb 3,2026 | ARC Raiders
ARC Raiders Weekly Trials Guide: Best Maps, Loadouts, and Strategies for High Scores

This week is going to be special for ARC Raiders, as the new rotation is likely to be a low scoring rotation, with the best score being below 200,000 points. It should be noted that this rotation definitely favors Spaceport for combat and Celestis for logistics.
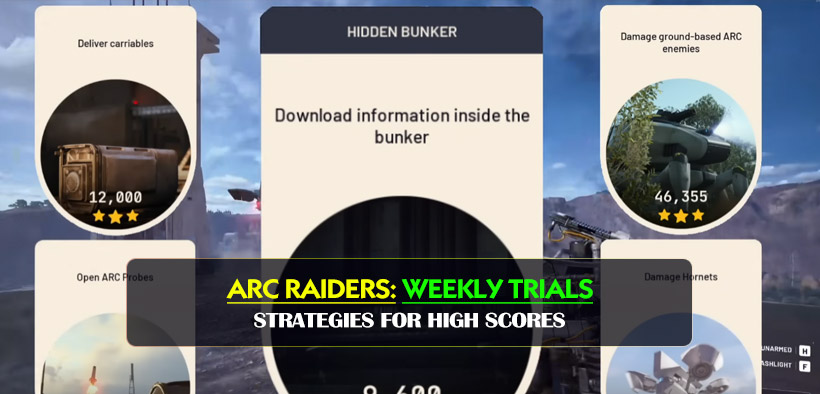
If you are trying to force these trials on the wrong map, you will struggle to hit the three-star thresholds. Below is a structured breakdown of how to tackle each objective efficiently, ensuring you don't waste time on maps with little to no rewards.
Deliver Carryables
Target: Deliver 4 items (during Major Map Condition) for 3 Stars.
While Dam Battlegrounds technically offers the highest possible score, we advise against it due to the difficulty and time it takes to travel. Instead, Celestis is a better option.
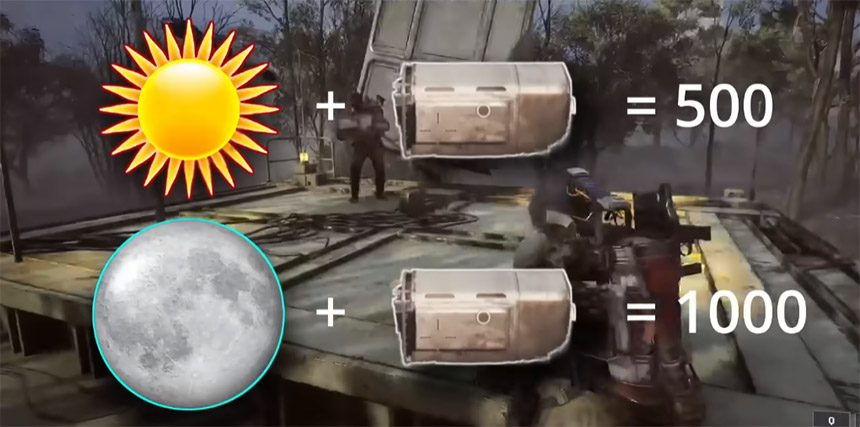
Why Celestis?
Celestis has carryable items that are easier to rout than on Dam. More importantly, it has 12 carryables that you can deliver
The Optimal Route
Prioritize the following doors:
- Medical & Assembly: Check the doors connecting these two zones.
- Assembly & Lobby: Both sides have delivery points.
- Lobby & Atrium: Another reliable transition point.
- Seed Vault Door: A must see.
Tip: If you want to extend your adventure, check the Kitchen in the Atrium and the Battery Door down in the robotic sandbox.
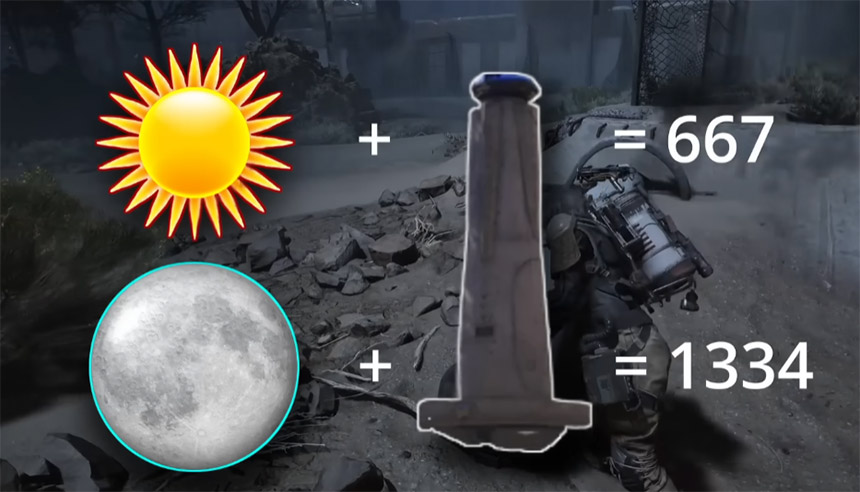
Open Arc Probes
- Target: 3 Probes (during Major Map Condition) for 3 Stars.
- Score: 667 Standard / 1,334 Major Condition.
For this trial, Spaceport: Electromagnetic Storm is your best selection. This map condition has plenty of crashed probes and usually gives you three, which is how many you need to finish this trial.
Finding Probes
- 1.Smoke: There is a visual cue of smoke rising.
- 2.Map: When you get close to a structure, check your map to see if there is a probe icon.
- 3.Rooftops: Probes often get placed on top of buildings.
Loadout Recommendation:
Verticality is very important for this trial, and so you should bring Adjrenaline Shots to increase your speed. A Zipline or Snap Hook will be useful as well so that you do not have to wander around if a probe is on top of a building.
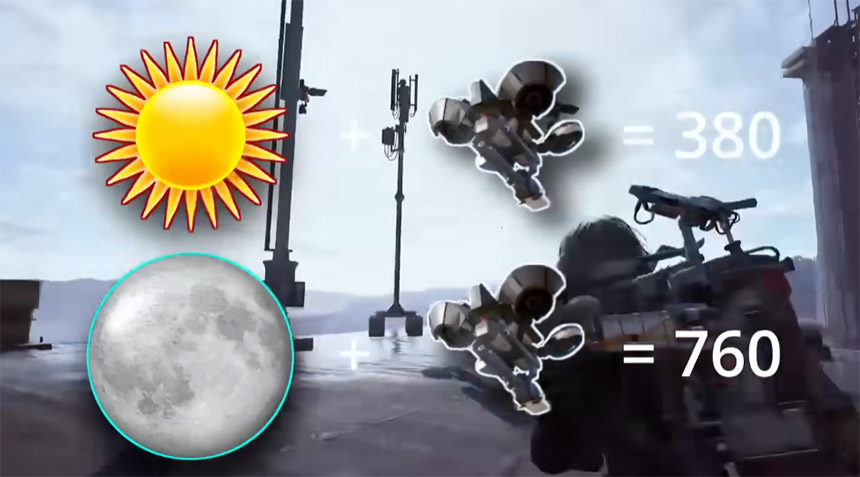
Damage Hornets
- Target: Destroy ~6 Hornets (during Major Map Condition) for 3 Stars.
- Score: 380 points (Standard) / 760 points (Major Condition).
The trial is one of the trickiest due to how damage is calculated. If you shoot out a Hornet's thrusters and it crashes, the impact damage counts as environmental damage, and not yours. That could mean that you may have to shoot down more than 12 Hornets.
The Strategy
We strongly suggest the Spaceport Hidden Bunker event. The event timer adds an extra 10 minutes, and it's important for hunting.
For max score, equip high damage weapons like Jupiter or Hullcracker to score the Defeat before gravity does.
Best Positioning
If you are playing in a squad, splitting up is the best way to cover spawns. Stay in these three positions:
- 1. Top of A6 Control Tower: Great sightlines.
- 2. Southern Trench Tower: Encompasses the lower approach.
- 3. Security Tower: Between the Arrival and Departure buildings.
Be careful: A solo player on a roof attracts a lot of aggressive trios, so be sure you have an escape route.
Download Data (Hidden Bunker)
- Target: 4 Downloads for 3 Stars.
- Score: 1,200 pts per download (Hard Cap: 9,600 pts).
This objective requires you to enter the Hidden Bunker, which is triggered by activating four antennas around the map.
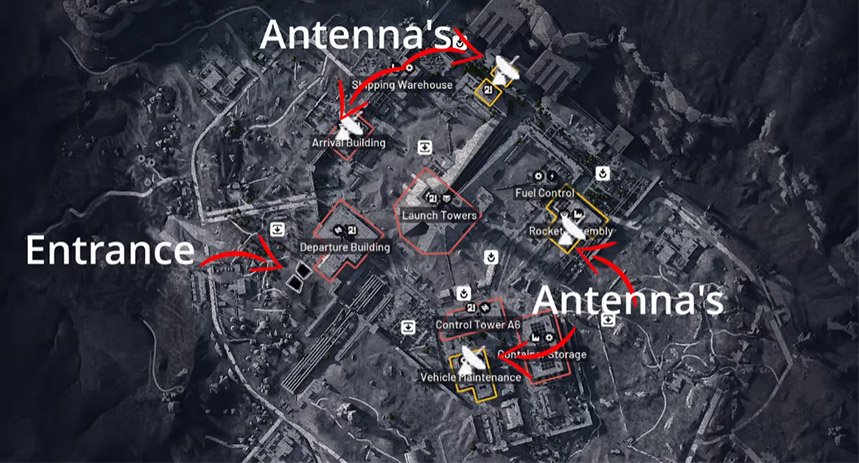
Execution Guide
Once you are inside, there are eight terminals total.
7 Terminals are on the bottom floor.
1 Terminal is located up the stairs in the circular room (often missed by players).
Critical Mechanic:
You must stay within the proximity of the terminal while the data generates. If you walk away, the bar turns red and the download fails.
Efficiency Hack: You don't have to start every download yourself. We like to look for terminals that other players (or enemy squads) have already started working on. You can swoop in, finish the generation, retrieve the data, and move on.
Damage Ground-Based Arc Enemies
Target: Focus on High-Value Targets (HVTs).
Do not waste your time on small ground Arcs; the point values are negligible. You need to hunt Leapers, Bastions, and Bombardiers.
Map Choice: Dam vs. Bunker
| Map / Mode | Pros | Cons |
|---|---|---|
| Hidden Bunker | Extra 10 minutes of raid time. | Spawns can be inconsistent; relies on luck. |
| Dam Battlegrounds (Night) | High density of HVTs (2 Bastions, 1 Bombardier, 4-5 Leapers). | High threat level from players; requires night vision/flares. |
Recommended Loadout & Tactics
If you want the high score, go to Dam Battlegrounds (Night).
Weaponry: Bring Trailblazers and a Jupiter to melt Bastions and Bombardiers quickly. Use a Hullcracker paired with Wolfpack grenades to clean up Leapers.
Split Strategy: Have one team member patrol between the Hydroponic Dome and the Pipeline Tower to hunt Bastions. The other two should hold the rooftops of Research and Administration to pick off Leapers and Bombardiers.
FAQ
Q: Why doesn't my score go up after I Defeat Hornets?
A: You most likely destroyed the thrusters, causing the Hornet to die from fall damage. To get the points, the defeating blow must come from your weapon. Use bigger weapons to finish them while they're still flying.
Q: Can I attempt the Hidden Bunker trial by myself?
A: Yes, but it may be hard to activate the four antennas if they are roof-spawned. Always take a Snap Hook or Zipline so you are able to access every antenna.
Q: Why do you prefer Celestis for carryables instead of Dam?
A: Dam has good potential, but the layout is risky and there is a lot of downtime while moving. Celestis has a more compact cluster of 12 carryables, allowing you to hit the 4-carryable target a lot more easily.
Summary
This week is more about precision than chaos. Given that the overall score ceiling is quite low (sub-200k), you will need to be smart about your map selection. Use Celestis for your delivery contracts and spam Spaceport events for everything else.
Remember to bring vertical mobility tools like Snap Hooks for the Bunker antennas and Probes, and don't let those Hornets crash before you secure the Defeat. Good luck topside, Raiders!

Most Popular Posts
- ARC Raiders Update 1.42: Phantom Targets Farming Guide (Glitched Wasps, Rewards, Regional Conditions)
- ARC Raiders Hullcracker Blueprints: Fastest Way to Complete The Major's Footlocker
- ARC Raiders Best Pop Trigger Strategy: Fast Phantom Targets Damage Guide
- ARC Raiders Subway Skin Guide: Unlock the Subterranean Outfit
- ARC Raiders Looting Mk. 3 Survivor Blueprint Guide: Best Blue Gate Route and Drop Locations
- ARC Raiders Medium & Heavy Gun Parts Blueprint Guide: Best Farm Route, Locations, and Refiner Crafting
Popular Category Lists
- ARC Raiders / (354)
- Grow a Garden / (294)
- CoD: Black Ops 7 / (167)
- Star Citizen / (163)
- MLB 26 / (159)
- Monopoly Go / (153)
- ARK Survival Ascended / (128)
- Steal a Brainrot / (99)
- Blox Fruits / (74)
- Adopt Me / (74)
- Forza Horizon 6 / (72)
- Sailor Piece / (68)
- Grow a Garden 2 / (68)
- Diablo IV / (62)
- CoD: BLACK OPS 6 / (55)
- Aion 2 / (53)
- Path of Exile 2 / (48)
- Monster Hunter Wilds / (46)
- Windrose / (44)
- COD: Modern Warfare 4 / (43)






