0
0 Created: Sep 19,2026 | ARK Survival Ascended
ASA PvP Meta Creatures Guide: Roles, Counters, and Team Comps

Raw stats do not fix a bad matchup. To win consistently in ARK: Survival Ascended PvP, field creatures that can create an opening, control the target, and finish the kill without exposing the entire team.
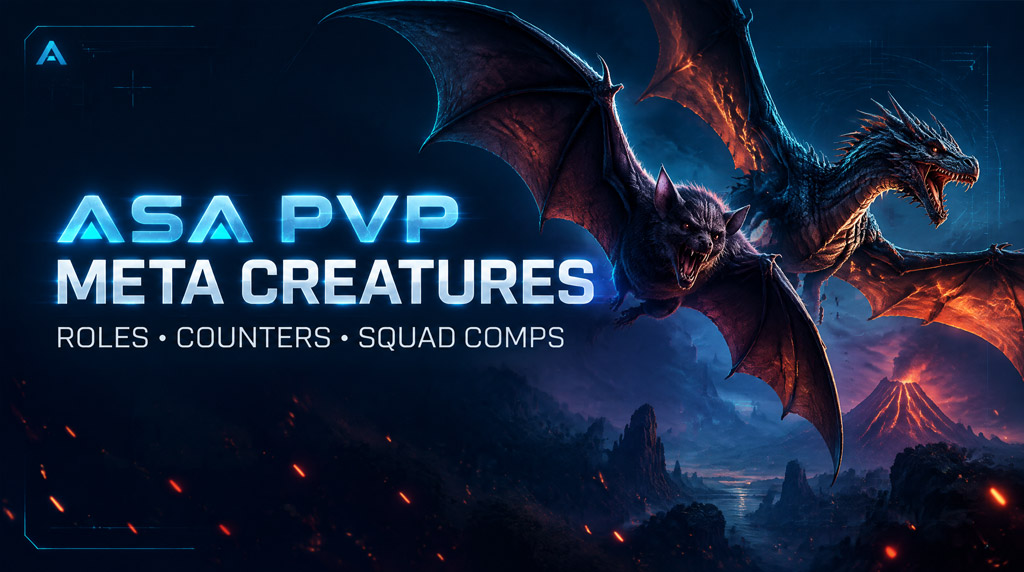
Creature balance, transfer rules, and available species differ across official clusters, modded maps, and private seasons. Treat the roles below as an operational framework, then verify pick weight limits and weapon interactions on your live server before risking a bred mutation line.
- Build the Team Around Roles, Not a Tier List
- The Squad Deployment Matrix
- Desmodus: Mobile Picker and Weapon Platform
- Stat Allocation Priority
- Flight Discipline and Angle of Attack
- Hard Counters and Breakpoints
- Griffin: High-Speed Interceptor
- Master the Dive Mechanics
- Target Selection Rules
- Wyverns: Heavy Burst Following Control
- Match the Element to the Mission
- The Correct Tactical Sequence
- Aureliax: Heavy Transport and Disruption
- Deployment Criteria
- Shoulder Mounts: Gloon vs. Pyromane
- Decision Matrix for Shoulder Mounts
- Managarmr: Interception and Movement Denial
- Role-Specific Stat Focus
- Umbra: Long-Range Burst Projection
- Establishing the Firing Solution
- Proven Squad Compositions
- Two-Player Strike Cell
- Three-Player Air Superiority Unit
- Forward Base Disruption Squad
- FAQ (Frequently Asked Questions)
- What makes the Desmodus the dominant solo PvP mount?
- How do you counter an Umbra without taking heavy losses?
- What is the most common tactical failure when flying a Griffin?
- How does the Aureliax fit into base defense operations?
- When should a tribe prioritize the Gloon over the Pyromane?
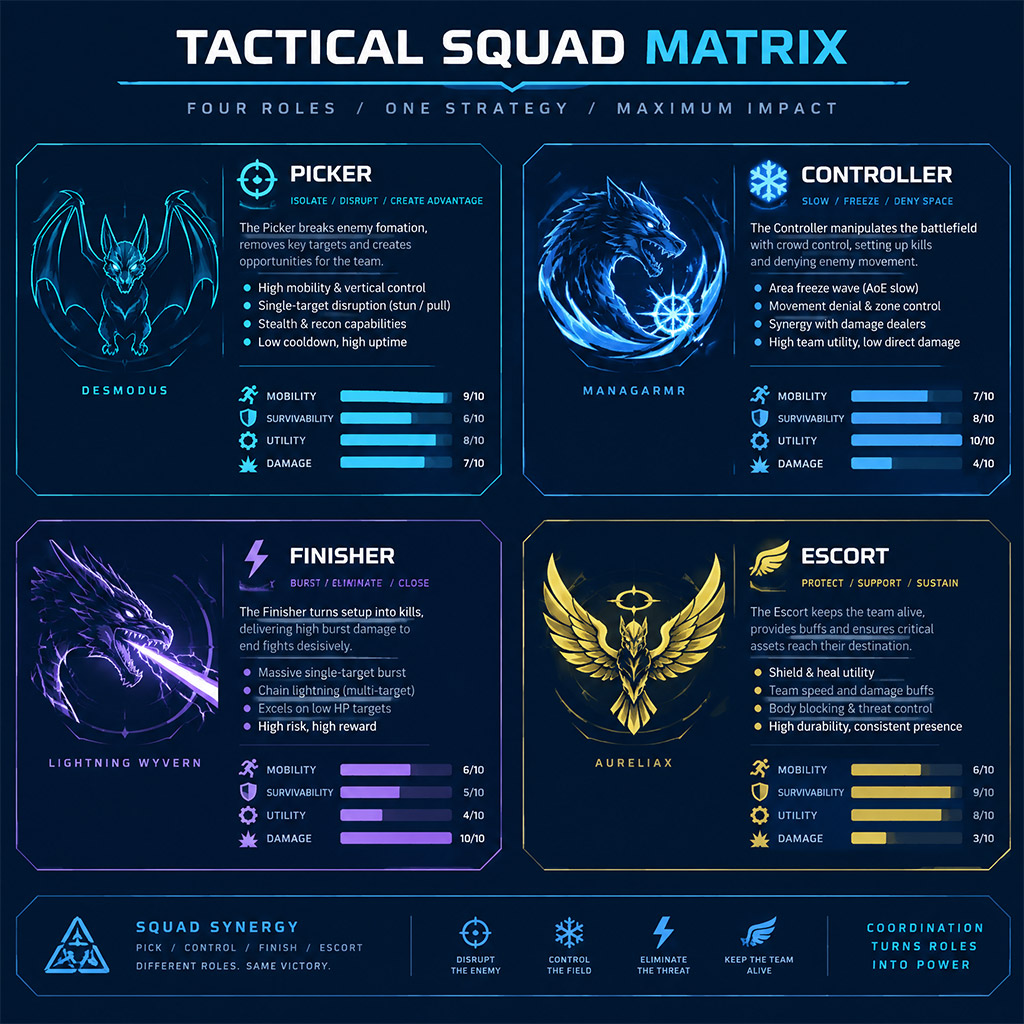
Build the Team Around Roles, Not a Tier List
A creature earns its place in the meta only when it solves a tactical bottleneck better than the alternatives. That bottleneck might be an unarmored sniper roost, a heavily defended soak tame, an agile scout, or a Tek player holding airspace outside melee reach.
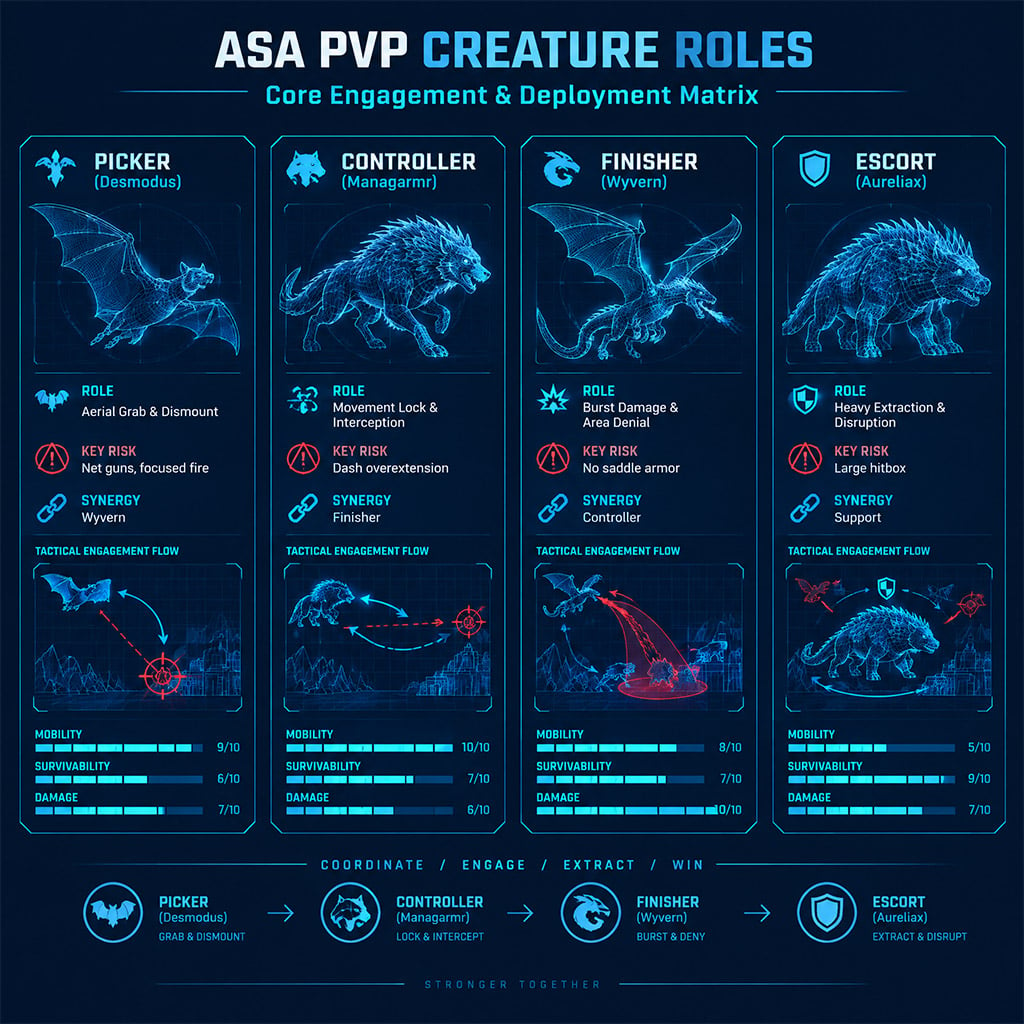
Most combat groups fail because they overload on damage without securing an opening. Run a four-part tactical division:
- Picker: Strips a rider or high-value tame cleanly from the enemy formation.
- Controller: Restricts movement, drains stamina, or pins hitboxes long enough to secure damage.
- Finisher: Converts a grab, stun, or dismount into an immediate, confirmed kill.
- Escort: Intercepts peel attempts, punishes counter-pickers, and shields vulnerable damage dealers during disengagement.
Why does this matter? Three finishers cannot compensate for an inability to lock down a fleeing target. Five grabbers generate visual chaos, but they stall out when facing armored soakers or coordinated ground fire.
The Squad Deployment Matrix
The table below defines core combat responsibilities, structural vulnerabilities, and optimal squad pairings for each meta creature.
| Creature | Primary Combat Role | Critical Liability | High-Value Pairing |
|---|---|---|---|
| Desmodus | Aerial grab, night-vision scouting, mounted weapon platform | Unarmored body; vulnerable to net projectiles and heavy shotgun crossfire | Lightning Wyvern or Griffin |
| Griffin | High-velocity hit-and-run, dive pressure, interception | Rigid pull-up path leaves the rider open to snipers on missed passes | Desmodus |
| Wyvern | Burst element damage, siege disruption, displacement | Zero saddle armor rating and slow turning radiuses | Desmodus or Managarmr |
| Aureliax | Heavy aerial transport, defensive peeling, frontline disruption | Huge hitbox turns uncoordinated turret pushes into rapid squad wipes | Wyvern or Gloon |
| Gloon | Perimeter area denial, tracking, shoulder-mounted disruption | Dependent on narrow lines of sight; easily sniped if left static | Aureliax or Base Defenders |
| Pyromane | Anti-dismount insurance, bail-out combat, close-range burst | Animation locks and cooldown reliance limit extended ground duels | Fast aerial scout |
| Managarmr | High-mobility pursuit, target pinning, lane harassment | Predictable dash trajectories invite heavy crossfire from ground kits | Burst Finisher |
| Umbra | Long-range burst projection, spatial denial, priority harassment | Fragile close-quarters defense; struggles against multi-angle rushes | Fast mobile picker |
The strongest roster is not the one with the highest raw breeding values. It is the one that covers its own failure points.
Desmodus: Mobile Picker and Weapon Platform
The Desmodus dominates aerial combat because it combines raw 360-degree flight control, night camouflage, and the ability to fire weapons directly from the saddle. Use it to dismantle formations, not to slug it out in open DPS trades.
Stat Allocation Priority
Build strictly for your squad assignment:
- Health: Invest here first to ensure survival against burst shotgun fire when a pick attempt misses.
- Weight: Essential when lifting geared players or hauling replacement kits and heavy ammo back to base.
- Stamina: Add levels until you can complete a three-phase loop: approach, attempt two grabs, and boost clear of turret ranges.
- Melee: Keep this secondary unless your tribe runs specific high-stat bleed compositions.
Do not lift stat targets from other clusters without testing. Calculate your base stamina drain by running a test engagement on your live server. If two missed grabs leave you with less than 25% stamina, you are flying a death trap.
Flight Discipline and Angle of Attack
Approach low, utilizing blind spots, tree lines, structures, and shadows. Once you secure a rider grab, make an immediate call:
1. Haul the target directly into friendly crossfire.
2. Drag the target over deep water, hostile wildlife, or unshielded allied turrets.
3. Drop the target into open terrain only if your finishers are pre-positioned with ready line of sight.
4. Abort instantly if you take concentrated fire or enter heavy automatic turret coverage.
Never hover in open airspace while deciding. A stationary Desmodus is an easy target for heavy sniper rifles, compound bows, and netting devices.
Hard Counters and Breakpoints
The Desmodus falls apart against disciplined crossfire and movement denial. If an enemy team sets up dedicated ground shooters or brings aggressive Wyverns to screen your attack lanes, do not force the entry. Keep a parachute or glider equipped at all times; relying purely on Tek chest pieces can backfire when hit by element-draining weapons.
Griffin: High-Speed Interceptor
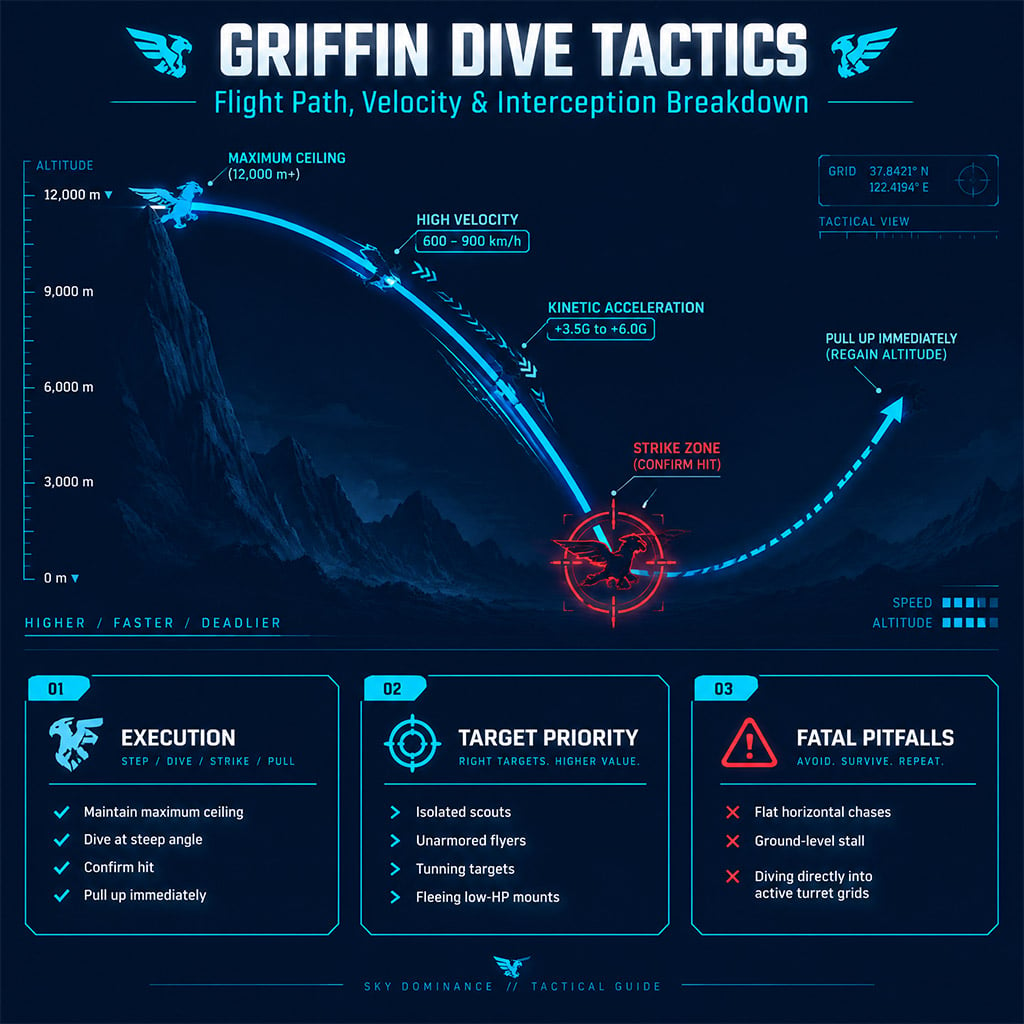
A Griffin ambushes; a Wyvern finishes. The Griffin's dive-bomb mechanic generates exceptional burst damage and unmatched vertical re-positioning, making it lethal against isolated scouts and unarmored targets.
Master the Dive Mechanics
A dive-specialist Griffin lives or dies by its operational ceiling:
- Melee: Maximizes the single-strike damage coefficient at terminal dive speed.
- Health: Provides the buffer needed to absorb return fire as you pull up from a run.
- Stamina: Determines how many consecutive high-altitude climbs you can execute before grounding.
Horizontal ground clawing deals negligible damage compared to a full-speed dive. If you run out of altitude or speed, disengage immediately to regain high ground.
Target Selection Rules
Focus exclusively on high-value, vulnerable targets:
- Saddle-less flyers caught outside friendly base limits.
- Isolated scouts separated from their tribal escorts.
- Large combat tames locked into long turning animations.
- Ground players sprinting across open ground between cover nodes.
Do not dive into organized crossfires. A missed pass locks the Griffin into a predictable glide recovery arc, turning the mount into a broad target for heavy sniper fire.
Wyverns: Heavy Burst Following Control
Wyverns deliver high-volume frontline pressure, but using them for blind initiations is a reliable way to lose high-tier tames. Their massive hitboxes, wide turn radiuses, and complete lack of saddle armor make early-phase overextension lethal.
Match the Element to the Mission
- Lightning: Fires sustained directional beams that incinerate exposed riders and melt raw hitpoints.
- Fire: Imposes percentage-based damage-over-time, making it lethal for stripping forward soaking setups.
- Poison: Fires armor-bypassing projectiles directly into enclosed platforms and stationary targets.
- Ice: Drops movement speed drastically, locking high-velocity targets into friendly kill lanes.
The Correct Tactical Sequence
Control first. Breathe second. Disengage third.
Let a Desmodus or Managarmr secure the target before committing breath attacks. A Wyvern forced to duel high-agility flyers in close-quarters air combat will burn its stamina pool and succumb to ground-based anti-air fire.
Aureliax: Heavy Transport and Disruption
The Aureliax operates as a strategic airborne crane and formation-breaker. Its primary job is moving heavy assets and breaking enemy formations—not trading blows on the frontline.
Deployment Criteria
Deploy the Aureliax specifically to:
- Extract heavily pinned friendly tames out of enemy kill pockets.
- Reposition aggressive enemy soakers away from forward defensive walls.
- Pluck high-priority support mounts directly out of shielded formations.
- Move multiple infantry kits across contested breach lanes simultaneously.
Durability does not mean invulnerability. The Aureliax has a massive hitbox that draws heavy fire from automated turrets. Before crossing into active fire zones, ensure allied ground forces are applying counter-pressure or smoke screening to suppress enemy fire.
Shoulder Mounts: Gloon vs. Pyromane
An unassigned shoulder slot wastes essential survival utility. Choose your companion based on the specific hazard causing your squad the most deaths.
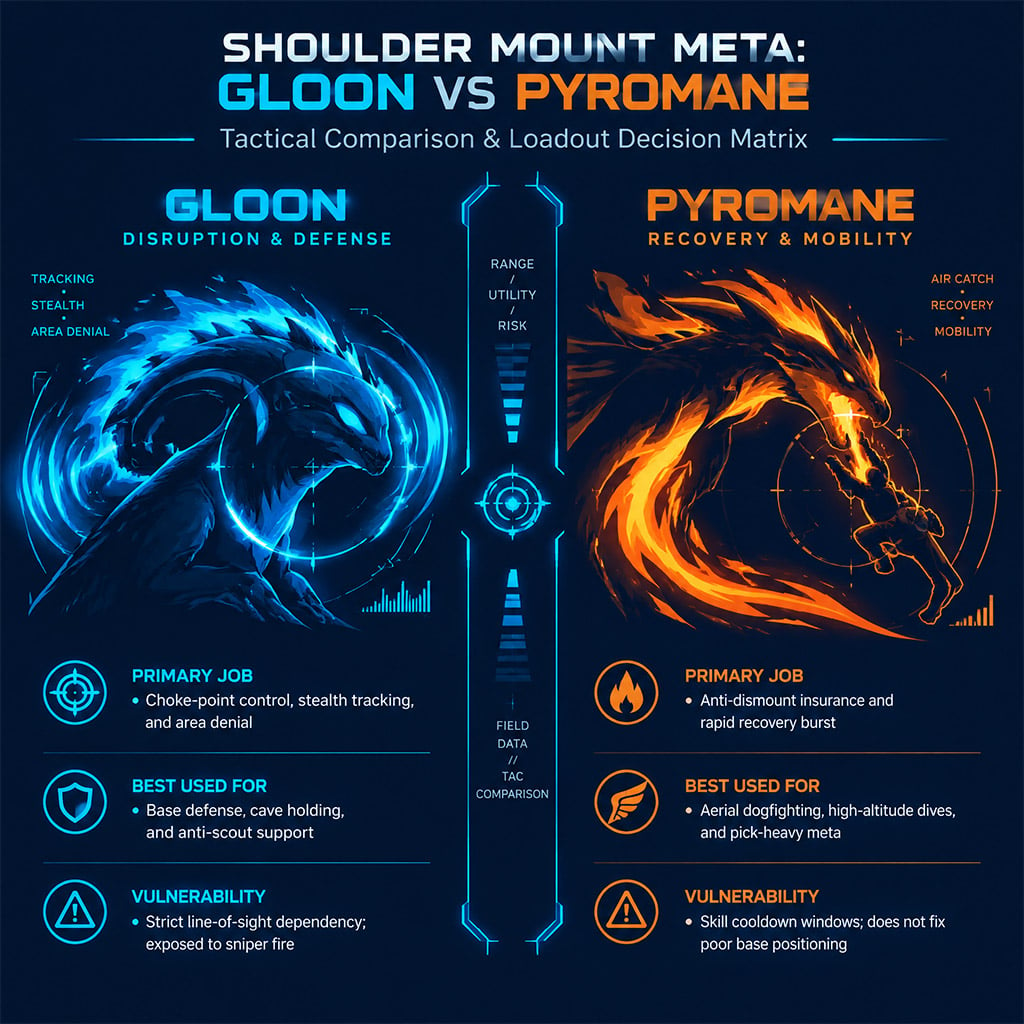
Decision Matrix for Shoulder Mounts
The table below breaks down the operational trade-offs between the Gloon and the Pyromane to guide your pre-fight loadout.
| Tactical Scenario | Recommended Mount | Operational Reason |
|---|---|---|
| Choke-point defense and anti-flanking | Gloon | Locks down narrow corridors and interrupts enemy scouting passes |
| Tracking agile infantry through dense terrain | Gloon | Maintains active line-of-sight markers on hidden targets |
| Aerial dogfighting and pick-heavy combat | Pyromane | Provides an immediate mounted escape option if picked or dismounted |
| Aggressive frontline breaching | Pyromane | Absorbs high burst pressure and allows rapid disengagement |
| Open-field hit-and-run harassment | Mission-Specific | Base your selection strictly on whether your team lacks disruption or escape options |
A shoulder mount will not save a completely out-of-position player. Treat these creatures as tactical fail-safes rather than excuses for reckless aggression.
Managarmr: Interception and Movement Denial
The Managarmr acts as an aggressive interceptor designed to track down retreating targets and deny escape windows.
Role-Specific Stat Focus
Never spread stat points evenly across all attributes:
- Stamina Build: Enables long-distance interception dashes and persistent tracking.
- Health Build: Survives extended harassment passes through enemy base perimeters.
- Melee Build: Punctures lightly armored scouts and punishes retreating foot infantry.
Lead fleeing targets instead of trailing behind them. Dash toward the pass, gateway, or structure they are running toward to cut off their line of retreat, and always reserve enough stamina to dash clear if ambushed.
Umbra: Long-Range Burst Projection
The Umbra exerts heavy spatial pressure, forcing enemy players to abandon predictable approach corridors and scatter their formations.
Establishing the Firing Solution
Hold attacks until targets enter high-probability windows:
- Players locked in recovery animations after a missed dive.
- Slow-turning flyers executing wide banking maneuvers.
- Opponents channeled into narrow canyons or artificial trenches.
- Targets already snared, pinned, or netted by allied controllers.
To beat an Umbra, execute irregular, erratic flight maneuvers, break line of sight using terrain features, and coordinate multi-axis flanking runs to overwhelm its forward focus.
Proven Squad Compositions
Pre-assign responsibilities before staging an assault to avoid hesitation during combat.
Two-Player Strike Cell
- Desmodus (Picker): Pulls the pilot out of position.
- Lightning Wyvern (Finisher): Destroys the unseated target with high-damage breath attacks.
Execution: The Desmodus secures the grab and drags the target into an open firing vector. The Wyvern fires its breath attack, and both mounts immediately pull back to reset their stamina.
Three-Player Air Superiority Unit
- Griffin (Interceptor): Forces targets to take evasive action and burns their stamina.
- Desmodus (Picker): Capitalizes on target evasion paths to execute clean picks.
- Umbra or Wyvern (Finisher): Delivers lethal burst damage to pinned targets.
Execution: The Griffin initiates from high altitude to split the enemy formation. The Desmodus targets isolated players attempting to retreat, feeding them directly to the waiting burst damage platform.
Forward Base Disruption Squad
- Aureliax (Disruption): Pulls key enemy soakers away from structural breach points.
- Managarmr (Control): Traps escorts trying to assist the displaced tame.
- Lightning Wyvern (Finisher): Applies sustained area damage to the target.
- Infantry with Gloon (Peel): Secures the perimeter against counter-picks.
Execution: Clear communication is mandatory. The Aureliax calls the extract target, the Managarmr screens out counter-attacks, and the Wyvern focuses the priority target down before enemy base defenders can stabilize.
FAQ (Frequently Asked Questions)
What makes the Desmodus the dominant solo PvP mount?
The Desmodus combines full omnidirectional flight, stealth capabilities, and the unique ability to fire handheld weapons from the saddle. This allows solo operators to scout, pick targets, and deploy secondary tactical tools without needing dedicated crew support.
How do you counter an Umbra without taking heavy losses?
Engage from multiple angles using high-speed flyers to break the Umbra's line of sight. Force the pilot to turn frequently by coordinating two simultaneous attack paths, allowing a mobile picker to close the distance during its aim adjustments.
What is the most common tactical failure when flying a Griffin?
Pilots often overcommit to horizontal pursuit after a missed dive bomb, burning their remaining stamina at ground level. This leaves the mount moving slowly along predictable paths where it is easily picked by enemy flyers or downed by ground fire.
How does the Aureliax fit into base defense operations?
The Aureliax excels at neutralizing structured pushes by grabbing enemy soak tames and moving them into concentrated allied fire or away from structural weak points. This breaks the attackers' rhythm and exposes their support infantry.
When should a tribe prioritize the Gloon over the Pyromane?
Equip the Gloon when defending choke points, holding cave entrances, or fighting in dense terrain where its disruption abilities disrupt enemy foot movements. Run the Pyromane when conducting high-altitude operations where surviving an unexpected dismount is the primary survival concern.

I’m Benjamin Walsh, an Australian Senior Copy Editor at GGWTB focused on survival crafting, open-world exploration, and extraction games. My guides weigh base locations, supply routes, and what deserves the last slot in your backpack. When editing, I look for skipped prerequisites and unclear directions—a useful guide shouldn’t send you across the map without the right tools.

Most Popular Posts
- ARK Genesis Part 1 Mission Loot Guide: Best Farms for Flak, Tech & Hazard Gear
- ARK Survival Ascended Lunar Biome Cave Locations: All 6 Caves From World Teleporter
- ARK: Survival Ascended Bjarnheim Farming Guide: Element, Pearls, Metal & Boss Routes
- ARK: Survival Ascended Lumina Dinos Guide: Spawn Locations, Taming Steps & Umbra Synergy
- ARK Survival Ascended Best Genesis Missions for Loot and Hexagons
- Thylacoleo Location on Genesis 1 (ASA): Spawn Coordinates, Force-Spawn Method & Fast Taming Guide
Popular Category Lists
- ARC Raiders / (345)
- Grow a Garden / (292)
- CoD: Black Ops 7 / (167)
- Star Citizen / (161)
- MLB 26 / (159)
- Monopoly Go / (152)
- ARK Survival Ascended / (126)
- Steal a Brainrot / (98)
- Blox Fruits / (74)
- Adopt Me / (73)
- Forza Horizon 6 / (72)
- Sailor Piece / (68)
- Grow a Garden 2 / (68)
- Diablo IV / (62)
- CoD: BLACK OPS 6 / (55)
- Path of Exile 2 / (48)
- Monster Hunter Wilds / (46)
- Aion 2 / (46)
- Windrose / (44)
- Donut SMP / (41)