0
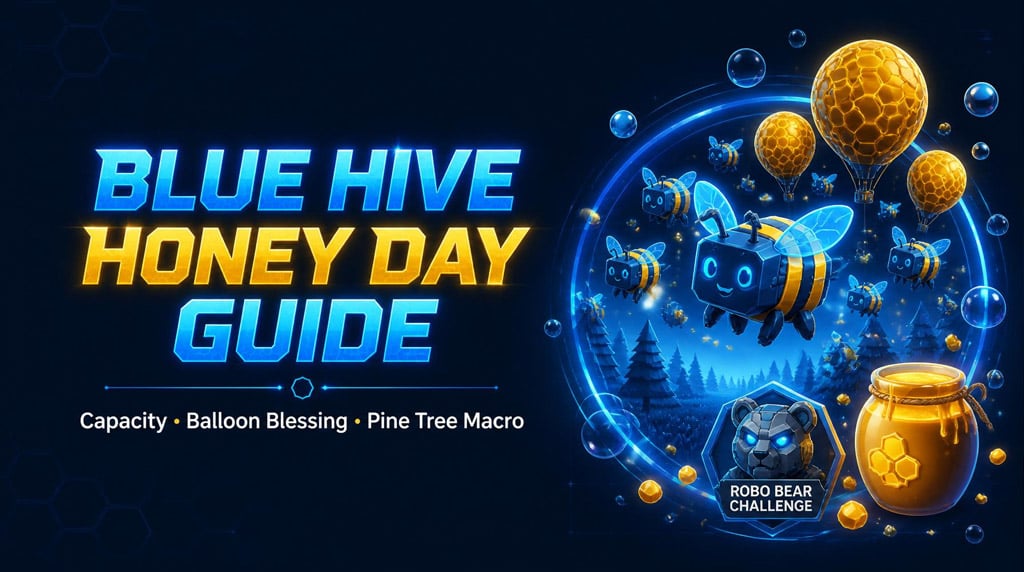
0Bee Swarm Simulator Blue Hive Honey Day Guide: Fast Prep, Bigger Balloon Blessing, More Honey
- WYNN
- Share
- Bee Swarm Simulator
- 06/07/26
- 240
Honey Day rewards preparation, not vibes. If you redeem the code with a messy hive, weak balloon blessing, bad nectars, and random beequips, you waste the best honey window in the game.
- Blue Hive Honey Day Core Plan
- Best Blue Hive Setup for Honey Day
- Bees to Replace First
- Gifted Bees and Mutations
- Best Gifted Priorities
- Best Mutations
- Best Beequips for Blue Hive Honey Day
- Robo Bear Challenge for Bigger Balloon Blessing
- Robo Upgrade Priority
- Best Robo Upgrades
- How to Build High Balloon Blessing
- Fast Balloon Blessing Setup
- Honey Day Buff Checklist
- Nectar Setup for Blue Hive
- Best Blue Hive Macro Settings for Honey Day
- Hotbar Setup
- Active Blue Boosting Tips
- Field Movement
- Expected Honey Day Results
- Resource Cost
- Common Mistakes
- Redeeming Honey Day Too Early
- Ignoring Balloon Blessing
- Keeping Bad Filler Bees
- Random Beequip Placement
- Bad Macro Pathing
- FAQ
- What is the best field for Blue Hive Honey Day?
- How many Buoyant Bees should a Blue Hive use?
- How many Tadpole Bees do we need?
- What is a good Balloon Blessing?
- Why use Robo Bear Challenge before Honey Day?
- Summary
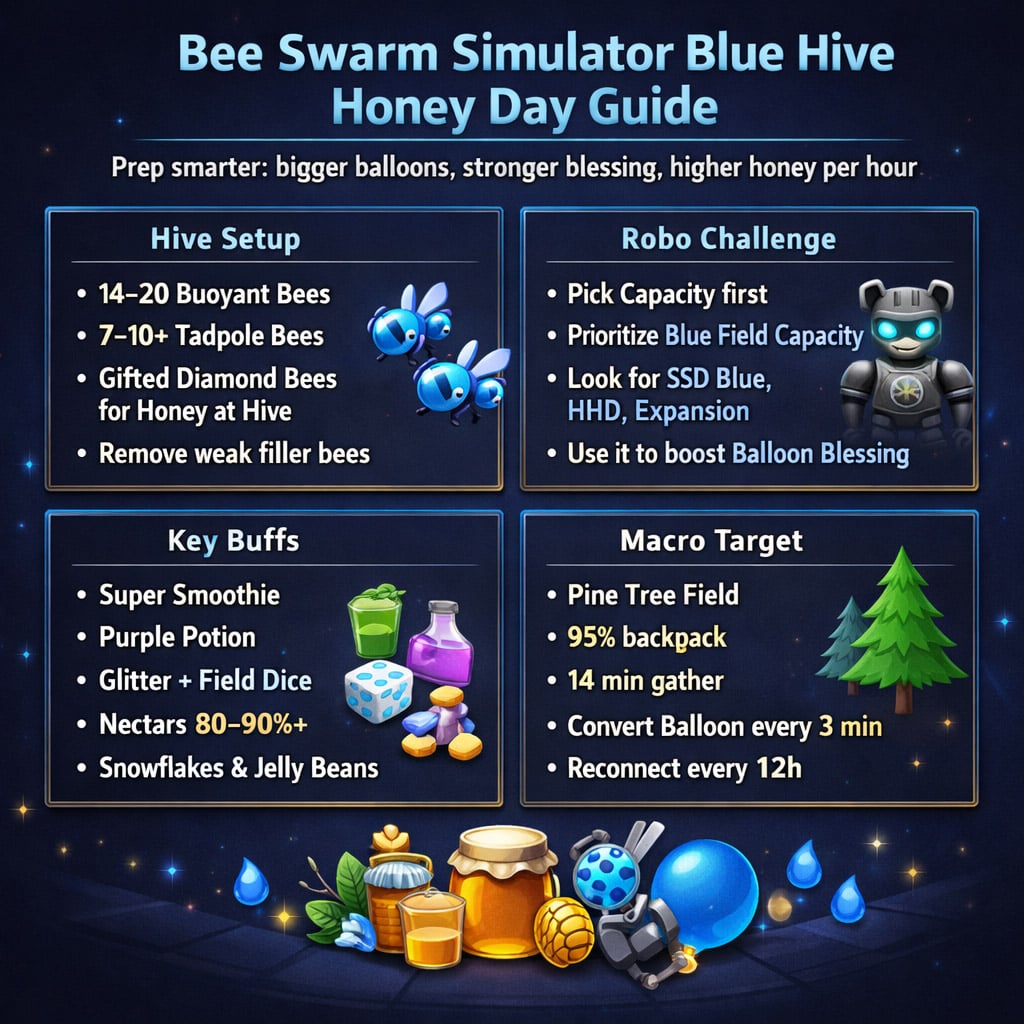
The goal is simple: build a Blue Hive that can hold more pollen, grow bigger balloons, convert harder at hive, and stay stable for long macro or boost sessions.
↖ Blue Hive Honey Day Core Plan
A strong Bee Swarm Simulator Blue Hive runs on four things:
- Capacity
- Balloon Blessing
- Honey at Hive
- Nectar uptime
Blue makes most of its honey through balloons. Bigger capacity means bigger balloons. Bigger balloons mean stronger Balloon Blessing. Higher Honey at Hive makes each balloon conversion hit harder.
That is the whole loop.
Pain point: you overfill, balloon blessing stays low, conversions feel weak.
Strategy: stack capacity first, then convert big balloons with high honey-at-hive stats.
Execution: use Robo Bear Challenge, capacity beequips, nectars, and Blue Hive macro settings.
Result: better hourly honey and fewer wasted boosts.
↖ Best Blue Hive Setup for Honey Day
Do not copy a hive blindly. Your beequip stats, amulets, mutations, and playstyle matter. Still, this is the clean target.
| Bee | Target Count | Reason |
|---|---|---|
| Buoyant Bee | 14–20 | Balloons, capacity, blue scaling |
| Tadpole Bee | 7–10+ | Frogs, bubbles, Pop Star support |
| Gifted Diamond Bee | 10–15 if using Diamond meta | Extra Honey at Hive |
| Bumble Bee | 1 | Capacity |
| Bubble Bee | 1 | Bubble support, overfill control |
| Festive Bee | 1 | Utility, gifted value |
| Gummy Bee | 1 | Honey at hive |
| Bear Bee | 1 | Strong multiplier |
| Tabby Bee | Optional | Long-term conversion value |
| Digital Bee | Optional | Utility and token support |
↖ Bees to Replace First
Cut weak filler bees before Honey Day.
Remove or reduce:
- Brave Bee
- Rage Bee
- Hasty Bee
- Shocked Bee
- extra red bees
- extra white bees
- unnecessary attack bees
If a bee does not help with blue pollen, balloons, bubbles, capacity, honey at hive, or key gifted bonuses, it is probably costing you honey.
↖ Gifted Bees and Mutations
Gifted bonuses matter. Mutations matter more once your hive is already functional.
↖ Best Gifted Priorities
| Bee | Why It Matters |
|---|---|
| Gifted Tadpole Bee | Baby Love uptime |
| Gifted Buoyant Bee | Better balloon value |
| Gifted Diamond Bee | More Honey at Hive |
| Gifted Festive Bee | Strong utility |
| Gifted Gummy Bee | Honey at hive |
| Gifted Bear Bee | Better multiplier value |
| Gifted Tabby Bee | Strong conversion and scaling |
↖ Best Mutations
| Bee Type | Best Mutation |
|---|---|
| Diamond Bee | Convert Amount |
| Buoyant Bee | Convert Amount / Ability Rate |
| Tadpole Bee | Ability Rate / Movement Speed |
| Bear Bee | Ability Rate |
| Festive Bee | Ability Rate |
| Tabby Bee | Convert Amount / Ability Rate |
Do not burn all resources chasing perfect mutations if your hive still lacks Buoyants, Tadpoles, or decent beequips. Fix the big leaks first.
↖ Best Beequips for Blue Hive Honey Day
Beequips are where many Blue Hives quietly lose trillions. For Honey Day, prioritize:
- Capacity
- Honey at Hive
- Honey Per Pollen
- Convert Amount
- Ability Rate
- Blue Pollen
- Bubble stats
| Beequip | Best Use | Why It Matters |
|---|---|---|
| Pine Cone | Capacity bees | Strong capacity |
| Snow Tiara | Blue support | Blue field capacity |
| Reindeer Antlers | Festive/support bee | Seasonal utility |
| Beret | Diamond/support bee | Honey or hive stats |
| Autumn Sun Hat | Diamond/support bee | Useful mixed stats |
| Lip Balm | Bubble/goo support | Niche blue value |
| Toy Drum | Support bee | Movement/utility |
| Candy Ring | Diamond Bee | Good hive stats |
| Elf Cap | Diamond/Festive/Tabby | Flexible value |
| Rose Headband | Diamond/support bee | Depends on stats |
Read the actual stats. A bad recommended beequip is still bad.
If it has Honey at Hive, treat it as a conversion piece.
If it has Capacity, use it for Robo Challenge prep or final macro stability.
↖ Robo Bear Challenge for Bigger Balloon Blessing
Robo Bear Challenge is the fastest way to push a stronger Balloon Blessing before Honey Day grinding.
The goal is not a perfect Robo run. The goal is temporary capacity stacking.
More capacity lets your hive balloon grow larger and deflate slower. That means a better blessing before the long grind starts.
↖ Robo Upgrade Priority
| Priority | Upgrade | Why |
|---|---|---|
| 1 | Capacity | Main target |
| 2 | Blue Field Capacity | Pine Tree scaling |
| 3 | White Field Capacity | Good if bundled with capacity |
| 4 | Convert at Hive / Honey / Goo | Useful secondary stats |
| 5 | Blue Pollen | Only after capacity |
| 6 | Bee Attack | Take only if needed |
↖ Best Robo Upgrades
| Upgrade | Value |
|---|---|
| SSD Blue | One of the best blue capacity picks |
| HHD | Huge capacity boost |
| Expansion | Always useful |
| Cloud capacity upgrades | Strong temporary capacity |
| Bluetooth | Good if you need blue pollen and attack |
If you see Capacity, take it. Skipping it for small pollen boosts usually lowers your final blessing.
↖ How to Build High Balloon Blessing
A usable blessing is 50x–60x.
A strong blessing is 70x+.
An excellent blessing is 90x+.
↖ Fast Balloon Blessing Setup
1. Run Robo Bear Challenge.
2. Stack as much Capacity as possible.
3. Quit or end once capacity is high enough.
4. Quickly equip Honey at Hive and conversion beequips.
5. Use Honey Mask if needed for conversion.
6. Convert the big hive balloon.
7. Lock in a higher Balloon Blessing.
Move fast. After Robo Challenge, your temporary capacity advantage does not last forever. Prepare your beequips before the run so you are not fumbling in menus.
↖ Honey Day Buff Checklist
Do not redeem the Honey Day code until these are ready.
| Item / Buff | Priority |
|---|---|
| Super Smoothie | Very high |
| Purple Potion | Very high |
| Glitter | High |
| Loaded Dice / Field Dice | High |
| Jelly Beans | High |
| Cloud Vials | Medium-high |
| Micro-Converters | High |
| Snowflakes | High during Beesmas |
| Balloons | High |
| Marshmallow Bee | Medium-high |
| Blue Extracts | Backup boost item |
| Oil | High |
| Tropical Drink | High |
Useful blessings:
- Balloon Blessing
- Robo Party Blessing
- Nymph Blessing
- Mondo Blessing
- Guiding Star
- strong Nectars
Optional blessings help. Bad core prep still ruins the run.
↖ Nectar Setup for Blue Hive
Nectar is not optional. Weak nectar means weak honey.
Target these before starting:
| Nectar | Target |
|---|---|
| Comforting | 90%+ |
| Motivating | 90%+ |
| Satisfying | 90%+ |
| Refreshing | 90%+ |
| Invigorating | 80%+ |
Why it matters:
- Honey Per Pollen stacks with your honey economy.
- Honey at Hive improves balloon conversion.
- Better nectar means better hourly honey.
Do not put a planter in Pine Tree Field while macroing Pine. It can mess with collection and pathing. Use other fields to maintain nectar.
↖ Best Blue Hive Macro Settings for Honey Day
Test your macro before redeeming. A broken macro can cost hundreds of trillions over a full Honey Day session.
| Setting | Recommended Value |
|---|---|
| Field | Pine Tree |
| Pattern | Tide Shift / blue pattern |
| Backpack threshold | Around 95% |
| Gather time | Around 14 minutes |
| Distance | Around 2 |
| Convert Balloon | Around 3 minutes |
| Auto Field Boost | Every 12 minutes |
| Boost Target | Blue |
| Reconnect | Every 12 hours |
| Planters | Auto, around hourly |
↖ Hotbar Setup
Use:
- Purple Potion
- Oil
- Tropical Drink
- Field Dice
- Glitter
- Blue Extracts if Purple Potions run out
- Snowflakes if available
- Micro-Converters for emergencies
If your macro cannot walk back to hive cleanly, fix it immediately. Resetting after every gather cycle murders hourly honey.
↖ Active Blue Boosting Tips
Blue boosting is not just running in circles.
You need to manage:
- Pop Star
- Bubble Bloat
- Tidal Blessing
- Blue Field Boost
- Jelly Beans
- Petal buffs
- Coconut Combo
- Baby Love
- Snowflake buff
↖ Field Movement
In Pine Tree Field, move along the edges when needed. Shift left and right so waves and Tidal Surge hit bubbles and balloons properly.
If you overfill too fast, your setup lacks one of three things:
- enough Capacity
- enough Convert
- enough Balloon Blessing
Fix that before wasting more premium buffs.
↖ Expected Honey Day Results
Results depend on hive level, beequips, blessing, nectar, server lag, and execution.
| Hive Strength | Expected Honey Per Hour |
|---|---|
| Early Blue Hive | 1T–10T |
| Mid Blue Hive | 10T–40T |
| Strong Blue Hive | 40T–100T |
| Advanced Blue Hive | 100T+ |
A strong long-session example:
| Metric | Result |
|---|---|
| Total Honey | 3.072Qd |
| Average Hourly | 43.1T/hour |
| Best Hour | 102T |
| Worst Hour | 20T |
The gap between best and worst hours usually comes from macro issues, lag, weak buff uptime, or bad conversion timing.
↖ Resource Cost
Honey Day burns resources fast.
Expect to spend:
- Purple Potions
- Blue Extracts
- Oils
- Tropical Drinks
- Glitter
- Field Dice
- Loaded Dice
- Tickets
- Jelly Beans
- Snowflakes
- Micro-Converters
If your premium items run out, your hourly honey drops. Plan around that instead of pretending one stack of potions will carry the full event.
↖ Common Mistakes
↖ Redeeming Honey Day Too Early
Do all prep first. Hive, beequips, nectars, items, macro, blessings. Then redeem.
↖ Ignoring Balloon Blessing
Low blessing means weak conversions. Push at least 60x+ if possible.
↖ Keeping Bad Filler Bees
Every hive slot matters. Replace bees that do not support Blue Hive economy.
↖ Random Beequip Placement
Stats matter more than names. Place beequips based on Honey at Hive, Capacity, and Convert value.
↖ Bad Macro Pathing
If your macro gets stuck or resets constantly, stop and fix it. Letting it run broken is expensive.
↖ FAQ
↖ What is the best field for Blue Hive Honey Day?
Pine Tree Field. It has the best synergy with blue pollen, bubbles, balloons, and Pop Star.
↖ How many Buoyant Bees should a Blue Hive use?
Most strong Blue Hives use 14–20 Buoyant Bees. Macro-heavy setups usually prefer more Buoyants.
↖ How many Tadpole Bees do we need?
Use around 7–10+ Tadpole Bees. If Pop Star feels slow or inconsistent, add more Tadpoles or improve ability rate.
↖ What is a good Balloon Blessing?
50x–60x is usable. 70x+ is strong. 90x+ is excellent.
↖ Why use Robo Bear Challenge before Honey Day?
Robo Challenge gives temporary Capacity upgrades. More capacity lets you build a bigger hive balloon, which creates a stronger Balloon Blessing.
↖ Summary
Blue Hive Honey Day is won through prep.
Focus on:
- Buoyant Bees
- Tadpole Bees
- Honey at Hive
- Capacity
- Robo Bear Challenge
- Balloon Blessing
- Nectars
- Clean macro settings
Do not redeem early. Do not run a broken macro. Do not ignore beequips.
Get capacity first. Build a bigger balloon. Convert with high honey-at-hive stats. Then let Pine Tree print.

Most Popular Posts
- Bee Swarm Simulator Progression Guide: Best Gear Order from Early Game to Endgame
- Bee Swarm Simulator Bee Bear Quest Guide: Best Fields, Blooms, Stickers & Petal Cub Tips
- Bee Swarm Simulator Planters Guide: Best Fields, Nectar, Growth Times, and Buying Order
- How to Make 20B+ Pollen in Hive Hub as a Blue Hive in Bee Swarm Simulator
- Bee Swarm Simulator Best Mythic Bee: Ranked for Every Hive
- BSS Beesmas Update This Week: BBM Quest, Honeyday, Timer Extension, and Best Prep Guide
Popular Category Lists
- Grow a Garden / (286)
- ARC Raiders / (266)
- CoD: Black Ops 7 / (166)
- Monopoly Go / (146)
- MLB 26 / (145)
- Star Citizen / (116)
- Steal a Brainrot / (89)
- ARK Survival Ascended / (74)
- Sailor Piece / (68)
- Forza Horizon 6 / (63)
- Diablo IV / (61)
- Blox Fruits / (60)
- CoD: BLACK OPS 6 / (55)
- Adopt Me / (53)
- Path of Exile 2 / (48)
- Monster Hunter Wilds / (46)
- Windrose / (44)
- Grow a Garden 2 / (42)
- Path of Exile / (40)
- Bee Swarm Simulator / (36)