


 0
0Bee Swarm Simulator Boost Guide (2026): Everything You Need To Know
- WYNN
- Share
- Bee Swarm Simulator
- 01/22/26
- 5041
Boosting isn't just clicking in circles—it's controlled chaos with a timer in Bee Swarm Simulator. We're trying to compress as much honey as possible into a 15–30 minute window, and the difference between okay and gamebreaking usually comes down to one thing: how cleanly we stack buffs and how little time we waste converting.

Here's the practical approach we use: treat every boost like a short raid. We prep, we execute, we diagnose problems fast (underfilling vs overfilling), and we don't let the timer bleed out while we run back to hive.
- 1. What Boosting Actually Means?
- Why this matters in practice
- 2. he Core Boost Formula: Stack Density + Uptime
- The stack-first rule
- Quick reference: Buff layers
- 3. Pre-Boost Checklist
- A practical checklist
- 4. Early & Mid Game
- 4.1 Underfilling
- 4.2 Overfilling
- 5. End Game
- 5.1 Blue Hive: Balloons, capacity, and consistency
- 5.2 Red Hive: Timing, precision mechanics, and Scorching Star
- 5.3 White Hive: Expensive bursts and perfect timing
- 6. Boost Run Template (15–30 minutes)
- 7. FAQ
- 7.1 How many Micro Converters should we carry for early/mid boosts?
- 7.2 What's the fastest way to tell if we're underfilling or overfilling?
- 7.3 Should we boost with only basic buffs?
- 7.4 For blue hives, why is satisfying nectar such a big deal?
- 7.5 For red hives, what mistake kills boosts most often?
- 7.6 Is it smart to switch to red early?
- Conclusion
↖ 1. What Boosting Actually Means?
Boosting is farming honey at peak efficiency during a limited window, typically 15 minutes because that's how long a standard field boost lasts. If you stack the same field boost multiple times, you can extend the effective window up to 30 minutes.

↖ Why this matters in practice
Because a boost window is short, small mistakes compound:
- 30 seconds spent walking back to hive repeatedly can erase a meaningful chunk of your gain.
- Starting without key consumables can cut your output so hard that the boost feels broken.
So we plan around two constraints:
- Time (the timer is the real enemy)
- Stack density (how many meaningful multipliers run at the same time)
↖ 2. The Core Boost Formula: Stack Density + Uptime
A good boost is less about one magical buff and more about overlap.
↖ The stack-first rule
If you can activate two strong buffs at once, you should usually do it—even if each buff alone feels moderate. Because multipliers compound, overlap is where the suddenly we're printing honey feeling comes from.
↖ Quick reference: Buff layers (from basic to advanced)
Below is a structured stack list we rely on. If you're early/mid game, don't try to force every line—use this as a ladder.
| Layer | What to aim for | Why it matters | When to prioritize |
|---|---|---|---|
| Field boost stack | x4 field boost (up to 30 min total window) | Sets the entire run's baseline | Always |
| Conversion continuity | Micro Converters (≈15) | Keeps you in-field without killing the timer | Early/Mid especially |
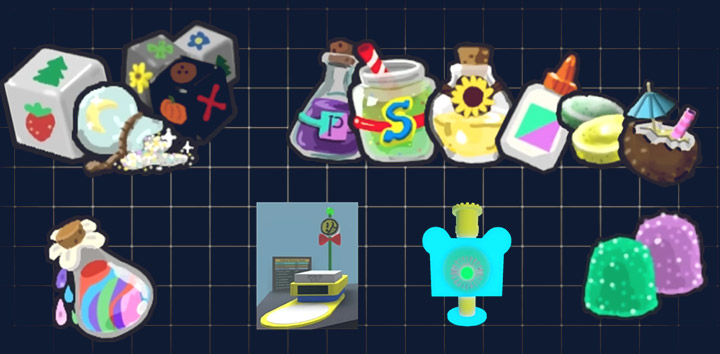
| Core consumables | Super Smoothie / Purple Potion (mid), Gumdrops, Sprinklers | Big multipliers + stable pollen flow | Most boosts |
| Passive always on power | Full nectars, sticker stack | Raises the floor of every second in-field | Mid+ |
| Event/rare blessings | Mondo, Wind Shrine winds, Puff blessing, Wealth Clock, Stick nymph, Robo party | Adds additional multiplicative layers | Mid/End |
| Push it over the edge | Guiding Star stacks, supreme sprinklers, jelly beans/blooms, fuzzy alt support | Turns a strong run into a record | Endgame runs |
What this means: if your runs feel inconsistent, it's usually because you're missing an entire layer (often conversion continuity or nectar uptime), not because you played badly.
↖ 3. Pre-Boost Checklist
We use a simple rule: don't start a timer you can't sustain.
↖ A practical checklist
- Field plan: pick one main field, one backup field (in case of crowding/low token luck).
- Time window: commit to 15 minutes minimum; if stacking to 30, clear distractions.
- Micros:start with ~15 Micro Converters early/mid game.
- Sprinklers + gumdrops: placed and ready.
- Nectars + stickers: active before we press go.
- Conversion plan: know how you will empty bag (micros / instant convert / convert at hive cadence).
If you find yourself saying we'll figure it out mid-boost, that's usually the run where we spend half the timer panicking at a full backpack.
↖ 4. Early & Mid Game
If you don't have a Supreme Star Amulet yet, your boosts are mostly won or lost by managing your backpack and token uptime.

↖ 4.1 Underfilling
If you notice your bag is staying low and your numbers look flat, then you're not generating enough raw pollen per second.
Why it happens
Because your multipliers aren't stacked high enough, or you're missing the pollen engine that early game relies on (bombs, focus, baby love, basic field boosts).
What we do (priority order)
1. Maintain boost tokens at 10x
- Keep Red Boost (Rad Bee) and Blue Boost (Cool Bee) rolling.
- If these drop, pollen output often collapses immediately.
2. Keep Focus and Baby Love active
- Focus raises crit reliability; Baby Love is a huge swing for pollen.
- If you find you're rarely critting, then Focus uptime is your first repair.
3. Lean into bombs
- If you aren't spawning enough bombs, you aren't collecting enough pollen—full stop.
- This means we prioritize bees/gear/play that increases bomb frequency and token collection rate.
A quick field feel test we use
- If the field looks busy (tokens everywhere) but the bag stays empty, then you're missing multipliers.
- If the field looks quiet (few bombs, few tokens), then you're missing token generation or you're not collecting efficiently.
↖ 4.2 Overfilling (bag hits 100% too fast, timer bleeds out)
If you find you're filling to 100% repeatedly and being forced to stop farming, then your bottleneck is conversion or capacity.
Two fixes
Fix A: Increase capacity
- Upgrade backpack/gear.
- Use amulets with capacity stats.
- This is the bigger tank solution.
Fix B: Increase instant conversion
- Pop an Enzyme early if that's your best lever.
- Rely on instant conversion bees (commonly: gifted Photon / gifted Crimson / gifted Cobalt patterns).
- Instant conversion is powerful because pollen never touches your bag—so you stay farming instead of converting.
| Problem | What you see | Best first fix | If you can't do that |
|---|---|---|---|
| Underfilling | Bag low, low honey rate | Stack boosts to 10x, keep Focus/Baby Love | Increase bomb spawn + token collection |
| Overfilling | Bag full every minute | More capacity or instant conversion | Micro Converters to stay in-field |
↖ 5. End Game
At endgame, the same stacking philosophy applies, but the main engine changes by color.
↖ 5.1 Blue Hive: Balloons, capacity, and consistency
Blue generally makes honey by converting balloons. Bigger balloons usually mean bigger payouts.

The blue priorities we don't compromise on
- Capacity first: If your bag is small, balloons tend to be small.
- Convert rate at hive: If conversion is slow, you waste time stuck at hive while the field window is ticking.
- Satisfying nectar uptime: If you're missing it, output can fall off a cliff.
Gear targeting
We prioritize beequips that support capacity and your main farming field stats (commonly Pine-focused pieces such as pine cone / elf cap setups when applicable). If you can place these on the bees that scale your balloon engine (for many builds, buoyant-related slots matter most), do it.

Team/server reality
Blue tends to scale well with other blue players on the same field because extra bubble interactions can increase pop rate and balloon filling. If you notice your solo sessions feel slower, then a coordinated server often raises your baseline without changing your build.
↖ 5.2 Red Hive: Timing, precision mechanics, and Scorching Star
Red is less forgiving. We can't sleepwalk a red boost—our output hinges on timing and correct targeting.
Precise targeting: how we predict the beam
We treat the field like a grid. Precise shots go diagonally across from where you pick up the precise token.
If you collect the token near the top-left, the shot tends to travel toward the bottom-right.
This means positioning is a multiplier: we aren't only stacking buffs; we're stacking hits that actually land where we want.

Scorching Star: build it fast, build it big
- We aim for ~10–12 Spicy Bees (many strong red setups live around 11–12) to speed activation.
- We also maintain key mark uptime (Vector-related tools matter a lot here).
The 6-second flame timing trick
A common mistake is deleting flames too quickly with aggressive swings.
- A spicy flame lasts about 10 seconds.
- If you hit it immediately, you often cut its effective contribution.
- If you wait about 6–7 seconds, then strike, you typically get better star-building behavior.
So if you find your Scorching Star feels inconsistent, then stop spamming and start timing.
Marks and stacking thresholds
- Maintain Precision stacks (often targeted at 10x).
- Maintain Precise Mark (commonly up to 3x, which significantly raises super-crit odds in many builds).
- Vector mark extension mechanics can be huge: higher-level vectors make mark uptime less fragile.

Digital Bee note
A strong Digital Bee setup with well-developed drives can be one of the largest single pieces of red's ceiling. If your red runs feel capped, then the digital setup is a common missing pillar.
↖ 5.3 White Hive: Expensive bursts and perfect timing
White is usually the highest cost and highest precision. The engine revolves around large burst windows (often gummy-star aligned) and punishes sloppy timing.
What we care about most:
- Gifted vectors and mark reliability (to keep the burst window clean)
- Maximum bag space (so we don't choke mid-burst)
- Tight combo timing (because white's value is compressed into fewer, larger spikes)
If you're building white without the budget to sustain it, then the best strategy is often delaying the swap—white punishes half-measures more than the other colors.
↖ 6. Boost Run Template (15–30 minutes)
This is the repeatable routine we use so boosts stop feeling random.
1. Preload: nectars + stickers + sprinklers + gumdrops ready
2. Start: activate x4 field boost, start the timer
3. First 2 minutes: prioritize collecting and stacking (boost tokens, focus, baby love)
4. Mid-window: protect uptime
- If you overfill, micro convert immediately rather than leaving the field
- If you underfill, chase token density and keep bombs rolling
5. Final 2–3 minutes: spend remaining consumables that prevent wasted time (micros, conversion aids)
If you notice you're playing well but numbers are low, then the issue is usually step 1–2 (missing layers), not step 4–5.
↖ 7. FAQ
↖ 7.1 How many Micro Converters should we carry for early/mid boosts?
We've had the most consistent results starting with around 15. If you start with 0, then one overfill loop can force repeated hive trips and quietly delete your entire boost timer.
↖ 7.2 What's the fastest way to tell if we're underfilling or overfilling?
Watch your bag for 60 seconds:
- If it stays low and honey rate is flat, you're underfilling (need multipliers, bombs, token uptime).
- If it hits 100% repeatedly, you're overfilling (need capacity or instant conversion).
↖ 7.3 Should we boost with only basic buffs?
Yes—if you can overlap the basics cleanly. A tidy stack of field boost + sprinklers + gumdrops + stable token uptime often beats a messy advanced run where we spend half the timer traveling or converting.
↖ 7.4 For blue hives, why is satisfying nectar such a big deal?
Because blue's loop often depends on strong honey-at-hive and honey-per-pollen style scaling. If satisfying nectar is missing, then balloon conversion sessions can feel like they pay out nothing, even if the field work looked fine.
↖ 7.5 For red hives, what mistake kills boosts most often?
Two classics:
- Bad precise positioning (beam lands where it doesn't help)
- Over-aggressive flame clearing (you delete value before it compounds)
↖ 7.6 Is it smart to switch to red early?
If you find you're struggling to afford conversion and the supporting pieces, then forcing early red tends to feel painful. Red can pay huge, but it usually asks for expensive infrastructure and tighter execution.
↖ Conclusion
Boosting gets easy when we treat it like a timed stack puzzle:
- We enter the window with layers ready (field boost x4, nectar/stickers, sprinklers/gumdrops, conversion plan).
- If you find the bag is empty, then we raise raw power (10x boosts, Focus, Baby Love, bombs).
- If you find the bag is always full, then we raise capacity or instant conversion (gear/amulets, enzyme, instant convert bees, micros).
- Endgame colors win differently: blue scales through capacity + balloon conversion consistency, red wins through precise mechanics + scorch timing, white wins through expensive burst perfection.
Run the checklist, diagnose within the first minute, and your boosts stop being coin flips—they start being repeatable.

Most Popular Posts
- Bee Swarm Simulator Progression Guide: Best Gear Order from Early Game to Endgame
- Bee Swarm Simulator Bee Bear Quest Guide: Best Fields, Blooms, Stickers & Petal Cub Tips
- Bee Swarm Simulator Planters Guide: Best Fields, Nectar, Growth Times, and Buying Order
- How to Make 20B+ Pollen in Hive Hub as a Blue Hive in Bee Swarm Simulator
- Bee Swarm Simulator Best Mythic Bee: Ranked for Every Hive
- BSS Beesmas Update This Week: BBM Quest, Honeyday, Timer Extension, and Best Prep Guide
Popular Category Lists
- Grow a Garden / (286)
- ARC Raiders / (266)
- CoD: Black Ops 7 / (166)
- Monopoly Go / (146)
- MLB 26 / (145)
- Star Citizen / (116)
- Steal a Brainrot / (89)
- ARK Survival Ascended / (74)
- Sailor Piece / (68)
- Forza Horizon 6 / (63)
- Diablo IV / (61)
- Blox Fruits / (60)
- CoD: BLACK OPS 6 / (55)
- Adopt Me / (53)
- Path of Exile 2 / (48)
- Monster Hunter Wilds / (46)
- Windrose / (44)
- Grow a Garden 2 / (42)
- Path of Exile / (40)
- Bee Swarm Simulator / (36)


